Fluke 1750 Getting Started Manual
Power
Hide thumbs
Also See for 1750:
- Operator's manual (60 pages) ,
- Calibration manual (28 pages) ,
- Technical data manual (8 pages)
Table of Contents
Advertisement
Quick Links
Advertisement
Table of Contents

Related Manuals for Fluke 1750


Summary of Contents for Fluke 1750
- Page 1 1750 Power Recorder Getting Started Guide PN 2386767 October 2006 Rev.3, 6/17 © 2006-2017 Fluke Corporation. All rights reserved. Printed in USA. Specifications are subject to change without notice. All product names are trademarks of their respective companies.
- Page 2 Fluke's warranty obligation is limited, at Fluke's option, to refund of the purchase price, free of charge repair, or replacement of a defective product which is returned to a Fluke authorized service center within the warranty period.
-
Page 3: Table Of Contents
Overview of the Power Analyze Screen ........26 Overview of the Power Analyze Modes........28 Recorded Data Modes............28 Live Data Modes..............28 Recorded Data Screen Overview ..........29 1750 Live View Screen Overview..........32 Snapshot Screen Overview............33 Working with Snapshots............. 35 Main Toolbar ................36... - Page 4 1750 Getting Started Guide Graph Toolbars................37 Zooming In and Out On Graphs..........38 Screen View Tools ..............40 Viewing Data as a Table ............40 Working with Annotations ............42 Using Image or Voice Annotations ......... 44 Inserting Image or Voice Annotations........45 Managing Image and Voice Files..........
- Page 5 List of Tables Table Title Page Symbols ..................4 Standard Accessories ..............5 Input Terminals and Controls ............. 6 Power Analyze Screen Areas and Controls ....... 27 Recorded Data Screen Contents..........31 Live View Screen Contents ............33 Snapshot Screen Contents ............34 Main Toolbar Contents ...............
- Page 6 1750 Getting Started Guide...
- Page 7 List of Figures Figure Title Page Fluke 1750 Power Recorder............6 Connecting the Supplemental Ground Terminal ......8 Power Analyze Screen ............... 26 Recorded Data Screen............... 30 Live View Screen................ 32 Snapshot Screen................ 34 Main Toolbar ................36 Graph Toolbar ................37 Screen View Tools ..............
- Page 8 1750 Getting Started Guide...
-
Page 9: Introduction
1750 Power Recorder Introduction The Fluke 1750 Power Recorder is a comprehensive yet easy to use system for power quality investigations. The 1750 Power Recorder, referred to hereafter as simply “the Recorder”, consists of a power recorder instrument, a wireless handheld Personal Digital Assistant (PDA) for control and setup, and a powerful yet easy to use PC application, Power Analyze. -
Page 10: Contacting Fluke
Power Analyze on a PC. Extensive online help is provided in the Power Analyze software on the product CD shipped with the Recorder. Contacting Fluke To contact Fluke, call one of the following telephone numbers: • Technical Support USA: 1-800-44-FLUKE (1-800-443-5853) •... -
Page 11: Safety Information
Power Recorder Safety Information To register your product, visit http://register.fluke.com. To view, print, or download the latest manual supplement, visit http://us.fluke.com/usen/support/manuals. To contact Technical Support: fpqsupport@fluke.com or 888-257-9897 Safety Information See the Specifications section of the Operators Manual for a full agency compliance list. -
Page 12: Symbols
Do not dispose of this product as unsorted municipal waste. Contact Fluke or a qualified recycler for disposal. -
Page 13: Standard Accessories
Power Recorder Standard Accessories Standard Accessories Table 2 describes the standard accessories that ship with the Recorder. Other optional accessories are also available. See the 1750 Operators Manual for a complete list. Table 2. Standard Accessories Description Part Number Ethernet cable, 3 meters, yellow... -
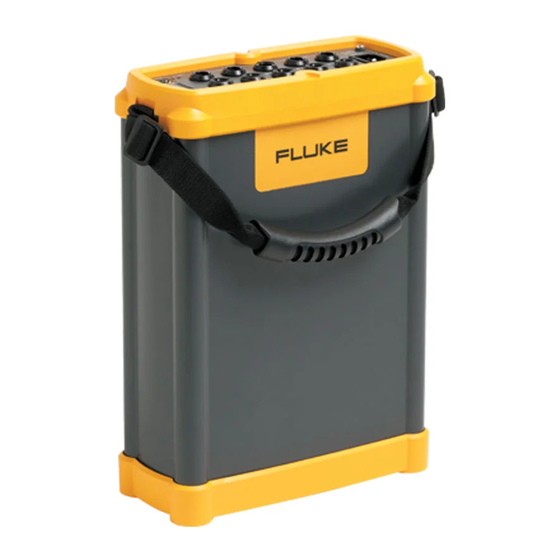
Page 14: Features
POWER ETHERNET 100-240 V 47-63Hz CURRENT LINK BUSY azd09f.eps Figure 1. Fluke 1750 Power Recorder Table 3. Input Terminals and Controls Number Description Standard 120/240 V 50/60 Hz power input for Recorder power Voltage indicator Steady Voltage is present, not overloaded ... - Page 15 Power Recorder Features Table 3. Input Terminals and Controls (cont.) Wireless Controller Status Indicator Blinking Wireless controller communicating Inactive Ethernet port. TCP/IP via Ethernet is used to connect the Recorder to a PC for downloading recorded data, and for configuring the ...
- Page 16 1750 Getting Started Guide Caution Connecting the supplemental ground terminal and the line cord safety ground to different ground potentials creates a ground loop that can damage the Recorder. Caution Above Potential Optional Protective Ground Chassis Ground Loop (See detail below)
-
Page 17: Charging The Pda Battery
This section describes how to install Fluke Power View software on the PDA and Fluke Power Analyze software on your PC. Keep your product CD in case you need to reinstall this software in the future. You should periodically check the Fluke website: www.fluke.com... -
Page 18: Language Selection
Spanish, Chinese, and Italian. When Power View operates for the first time on a new PDA or after a hard reset, it directly opens the language setup window. This window is also accessed by Menu>1750 Setup>Language. The Language window also provides the option to choose between the phase identifiers A, B, C and L1, L2, L3. -
Page 19: Pc System Requirement For Power Analyze
Power Recorder Installing the Software PC System Requirement for Power Analyze • Windows XP, Windows Vista 32/64bit, Windows 7 32/64bit. Administrator privileges are required to install applications. • PC with 500 MHz or faster processor. • 256 MB RAM, 1 GB recommended (100 MB of available disk space, 10 GB recommended). -
Page 20: Installing The Power Recorder At A Facility
1750 Getting Started Guide 5. Start Power Analyze on your PC by choosing Start >All Programs >Fluke >Power Analyze >Power Analyze or double-click the Power Analyze icon on your desktop. 6. After the installation is complete, please take a few minutes to complete your product registration. -
Page 21: Installing The Recorder
Power Recorder Installing the Power Recorder at a Facility • End of recording session You can re-verify if desired, correctness of live data and then download data, power off the Recorder, and pack up for transport. Installing the Recorder 1. Position the Recorder within 2 m (6 ft) of the monitoring location. 2. -
Page 22: Connecting The Recorder To The Wiring
1750 Getting Started Guide If more than one Recorder is within range, these will appear in the drop down menu list. 6. If you have previously established password protection for the Recorder, you must type the correct password in the Password text box and click OK. -
Page 23: Verifying Your Connection
Power Recorder Installing the Power Recorder at a Facility 4. Connect the ground current probe to the distribution system ground and the neutral current probe to neutral, with the arrow on the current probe pointing towards the load (away from the source) in each case. 5. -
Page 24: Finishing Up
The transfer of recorded data to the SD card in the Recorder’s SD slot is automatic when you insert the SD card or you request a download action using the PDA. Downloading to a PC running Fluke Power Analyze Software (included) using the Ethernet cable is recommended and the fastest way to retrieve data from the Recorder. -
Page 25: Downloading Data And Erasing Memory
To stop the automatic download with Power View, select either Menu>Tools>1750 Internal Memory or Menu>Tools>1750 SD Memory. If the download does not start automatically: 1. Verify that neither Power View nor Power Analyze is connected to the device. -
Page 26: Pda Download
1750 Getting Started Guide PDA Download Tap 1750 Internal Memory in the Data menu to view the Download screen. azd116.bmp The Download screen shows a three-phase rms V strip chart with date and timescale shown. This represents the data in the Recorder internal memory. - Page 27 If the SD storage card already contains data files, it may not have room for the new download. Power View alerts you to this condition and asks if you would like to erase the SD card before downloading. azd107s.bmp You can also access the SD card to delete files by selecting Menu>Tools>1750 SD Memory.
- Page 28 1750 Getting Started Guide You can delete files as necessary, and when satisfied that there is room on the card, proceed to write the selected internal Recorder memory data to the SD card. azd108s.bmp When there is room on the card, a message confirming the download will appear.
- Page 29 Power Recorder Downloading Data and Erasing Memory You can also tap the Erase 1750 Memory from the Data menu option which is available under Menu, and tap the Erase All button to erase all power quality data stored in the Recorder. Even then, if you want, you can leave old data in Recorder memory.
-
Page 30: Power Type Diagrams
Note You can also download data by connecting your PC directly to the Recorder with an Ethernet cable and run Power Analyze in the 1750 Live mode. All of the functions (controller, PDA, and Power View) are duplicated in 1750 Live mode. -
Page 31: Using Fluke Power Analyze
Add annotation markers and take manual snapshots that are then stored in the Recorder. Fluke Power Analyze software lets you work on your PC with power quality data monitored by and received from the Recorder. With Fluke Power Analyze, you can download, review, and analyze data. For example, you can: •... -
Page 32: Getting Answers To Questions As You Work
Starting Power Analyze You can start Power Analyze on your PC by choosing Start >All Programs >Fluke >Power Analyze. As you learn to use Power Analyze, you can use the file named SAMPLE.ODN until you have a data file you want to analyze. -
Page 33: Working With Recorded Data Files
Working with Recorded Data Files Working with Recorded Data Files You work in the Fluke Power Analyze works with one file at time. When you download data, it is stored in a file with the extension ".odn". When you download using Power Analyze, these files are stored by default in the directory “\My Documents\Fluke\Power Analyze\”. -
Page 34: Overview Of The Power Analyze Screen
3. On your PC, open the card as a drive. 4. Copy the files from the PDA to the desired location on your computer. You are now ready to open the recorded data files in Fluke Power Analyze. Overview of the Power Analyze Screen... -
Page 35: Power Analyze Screen Areas And Controls
View toolbar. Provides quick access to the different power quality data views for the active mode (Recorded Data, Snapshots, or Live 1750 Data). The active button on the View toolbar indicates the view you see now. View controls. View controls specify what data to display in the ... -
Page 36: Overview Of The Power Analyze Modes
These modes are available when connected to a Power Recorder. • 1750 Setup lets you view and set the instrument settings, including the power configuration, nominal voltage and frequency, voltage and current ratios, and other details about the data that is recorded before... -
Page 37: Recorded Data Screen Overview
You can also create a password in this mode. • 1750 Live lets you monitor data directly, when you are connected to a Recorder. • 1750 Download lets you retrieve data from the Recorder and save it on your computer. - Page 38 1750 Getting Started Guide azd213a.png Figure 4. Recorded Data Screen...
-
Page 39: Recorded Data Screen Contents
Power Recorder Recorded Data Screen Overview Table 5. Recorded Data Screen Contents Number Description Name of open data file. Shows the name of data file that is presently open. Reference graph. Provides an overview of the data for the entire ... -
Page 40: 1750 Live View Screen Overview
View on the PDA. Figure 5 shows a sample Live View Screen and Table 6 describes the contents of the screen. Although the format of the 1750 Live views vary, the overall structure of the live screens is the same. The screenshot below shows the essential elements in the live Scope view. -
Page 41: Snapshot Screen Overview
Snapshot Screen Overview Snapshots are screen captures at a single point in time of the measurements made by the Recorder as displayed in 1750 Live mode. When you download data, you download snapshots (taken manually and at regular intervals), along with the long-term summary data and events. -
Page 42: Snapshot Screen Contents
1750 Getting Started Guide azd201a.png Figure 6. Snapshot Screen Table 7. Snapshot Screen Contents Number Description Data filename. Shows the name of the data file presently open. Main data area. Displays a snapshot of the conditions at the date and time shown in slider bar. In this example, the snapshot is of the Scope for the phases checked in the Phase Selection ... -
Page 43: Working With Snapshots
Snapshots are captured at regular intervals, based on the Snapshot Interval set in 1750 Setup. You can also capture snapshots manually using the Take Snapshot button on the Power Analyze toolbar in 1750 Live Mode, or using the wireless PDA with the Recorder. Snapshot data is saved in the Recorder and downloaded with the rest of recorded data. -
Page 44: Main Toolbar
Main Toolbar The main toolbar in the Power Analyze window includes standard Windows tools and some specialized buttons for working with Fluke Power Analyze graphs. Figure 7 shows the Main Toolbar and Table 8 describes the contents of the toolbar. -
Page 45: Graph Toolbars
Button Description Take Snapshot. Takes a snapshot of the current power measurements. Available only in 1750 Live views. Insert Annotation. Inserts an annotation marker. Available only in 1750 Live views Help. Lets you get information about buttons on the screen and commands in the menus. -
Page 46: Zooming In And Out On Graphs
To zoom in on a section of a graph with the Zoom box: 1. If it is not already active, click 2. Draw over the section of the graph you want to see in more detail. Fluke Power Analyze zooms in on the area you marked and centers it in the window. - Page 47 Power Recorder Zooming In and Out On Graphs The selection cursors on the Reference Graph shift to mark the new selection. 3. If the information you want is not quite centered, you can scroll the graph horizontally or vertically. Note You can zoom in multiple times on an area of a graph.
-
Page 48: Screen View Tools
1750 Getting Started Guide Using the Manual Scale on the time axis allows you to enter either the start and end date or the start date and a time span from a predefined list. 4. Click OK to apply the changes. - Page 49 Power Recorder Viewing Data as a Table When you switch to the table display, the tables generated remain on the screen even as you change recorded data views, until you turn off the table display and switch back to graphs. Note If you click the Tag for Report button when a table is in view, the portion of the table in view will be included in your next report.
-
Page 50: Working With Annotations
1750 Getting Started Guide Working with Annotations Annotations are optional markers that can be inserted by the Recorder operator to flag a particular point in the data when recording. They are usually inserted on using Power View with the wireless PDA. Figure 11 shows a sample Annotation View screen. - Page 51 If the annotation is associated with an audio (.WAV) or image (.jpg) file, the application associated with that file will start and open the file. If the file is not in the default directory \My Documents\Fluke\Power Analyze, a dialog box opens so that you can navigate to the file.
-
Page 52: Using Image Or Voice Annotations
1750 Getting Started Guide • To bring the next annotation to the top, choose Select Next Overlapping Annotation. To then open that annotation, click on it again and choose Open. Note To see overlapping annotations more clearly on the Summary reference graph, move the selection cursors so that they just surround the area that contains the overlapping illustrations. -
Page 53: Inserting Image Or Voice Annotations
1. Set up the Recorder and begin monitoring. 2. Using your PDA-cam or another camera, take a picture of what you want to capture. 3. In Power Analyze, go to 1750 Live mode and click to open the Annotate dialog box. -
Page 54: Auto Report
1750 Getting Started Guide Auto Report The Auto Report function automatically generates a report from the active measurement database. The Auto Report function is started by selecting Auto Report from the file menu. Report Configuration The items for reporting relate to the items that are usually viewed in the main software package: •... -
Page 55: Tagged Screens
Power Recorder Auto Report Tagged Screens You can add tagged data you see on the screen in the View Recorded and Snapshot modes. You can tag as many different views as you want before creating the report. Power Analyze remembers what you have tagged until you exit the application or load a different data file. - Page 56 1750 Getting Started Guide...