Table of Contents
Advertisement
Advertisement
Table of Contents

Related Manuals for Motorola R765


Summary of Contents for Motorola R765
- Page 1 User’s Guide 6802985C35-A, draft, August 27, 2008 @6802985C35@...
- Page 2 For more information on SIM card compatibility, go to www.motorola.com/iden. Defects or damage to your Motorola handset that result from the use of non-Motorola branded or certified Accessories, including but not limited to replacement housings and or other peripheral accessories, are excluded from warranty coverage.
- Page 3 Changes or modifications made in the handheld user is encouraged to try to correct the interference computer, not expressly approved by Motorola, will by one or more of the following measures: void the user's authority to operate the equipment.
-
Page 4: Use And Care
Use and Care Use and Care To care for your Motorola handset, please keep it away from: extreme heat or cold For both handset models avoid temperatures below -10°C/14°F or above 60°C/140°F. microwaves Don’t try to dry your handset in a microwave oven. -
Page 5: Table Of Contents
contents Use and Care ..iii display. When you scroll to answer a private call . . 37 highlight the desired item, store a phone number or introducing your handset 1 press ....17 private ID . - Page 6 . 92 Service & Repairs ..113 customize your handset 93 Limited Warranty Motorola ring tones ..93 Communications Products wallpaper ... 94 (International) .
-
Page 7: Introducing Your Handset
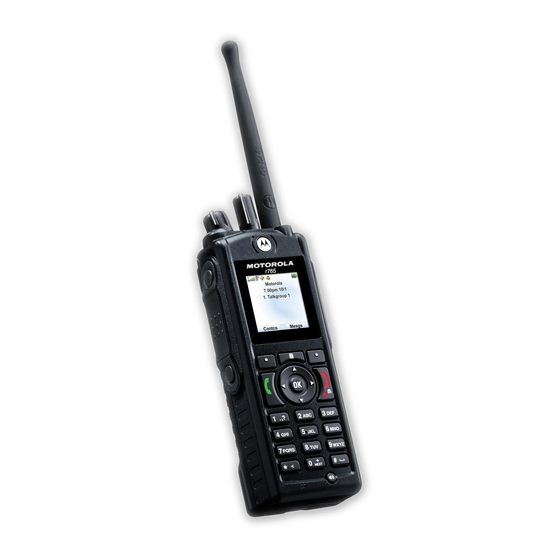
introducing your handset Channel/Talkgroup Knob Emergency Button Volume Knob Earpiece Shortcut 1 Key Right Soft Key Perform function Menu Key Unified Connector in lower right PTT Key From home screen, display. open main menu. Press the Navigation key Shortcut 2 Key Left Soft Key up, down, left, or right to Perform function... -
Page 8: Menu Map
menu map main menu Call Timers My Info • My Name • Last Call • Line 1 Java Apps • Phone Reset • Line 2 • Phone Lifetime • [Buy More] • Private ID • Prvt/Grp Reset • Location Assist •... - Page 9 main menu (cont.) Ring Tones TBD Location Assist • Send Alert • [Buy More] • AlertReceptionListener • Vibrate All • Configuration • Ringer 1-12 • Vibrate Bluetooth • Silent • Hands Free • Link to Devices MOTOtalk • Device History •...
-
Page 10: Settings Menu
settings menu Display/Info 2-Way Radio Security • Wallpaper • Scan • Phone Lock • Text Size • Tkgrp Silent • Keypad Lock • Theme • Tkgrp Area • SIM PIN • Home Icons • One Touch PTT • GPS PIN •... -
Page 11: Handset Basics
handset basics Caution: Before using the handset for the 2 Press the navigation key to scroll to Phone first time, read the Important Safety and Legal Calls, and press the center key information included in the gray-edged pages select it. at the back of this guide. - Page 12 a network for services. Only one SIM card can 1 Turn off your handset and remove your be selected for use at any time (see page 91). battery before you install or remove a SIM card. Warning: To avoid loss or damage, do not remove your SIM card from your handset 2 Carefully slide the SIM card into your unless absolutely necessary.
-
Page 13: Battery And Charger
• Remove the battery and inspect it to • Use only certified power supply, or UL confirm that it bears a Motorola (Underwriters Laboratories Inc.) listed “Original Equipment” hologram; or recognized or specific chargers: • If there is no hologram, the battery Single-Unit Charger PMLN5197 is not a qualified battery;... - Page 14 • Charging precautions: When charging device has been subjected to such your battery, keep it near room damage, take it to a Motorola temperature. Never expose batteries to Authorized Service Center before temperatures below 0°C (32°F) or using. Do not attempt to dry it with an above 45°C (113°F) when charging.
-
Page 15: Battery Installation
battery installation battery removal 1 Release the battery latch by pulling it 1 Place the battery on the back of the upwards as shown. handset as shown. 2 Slide the battery towards the bottom of 2 Slide the battery towards the top of the the handset. -
Page 16: Antenna Installation
2 Turn clockwise until it will no longer turn. ensure full handset functionality while charging. antenna removal Tip: Motorola batteries have circuitry that protects the battery from damage from 1 Grip the antenna firmly and turn it counter- overcharging. clockwise until it is loose. -
Page 17: Sim Card Security
To turn off your handset, press and hold Important: If you enter your PIN incorrectly 3 times, your SIM card is for two seconds. blocked. To unblock your SIM card, you SIM card security must contact your service provider. See “unblock the PIN”... - Page 18 6 At the Re-enter New SIM PIN Code screen, 2 Select On or Off. re-enter the new SIM PIN to confirm. 3 Enter the current SIM PIN. 7 Press - under Ok. 4 Press - under Ok. turn the PIN requirement On and Off unblock the PIN When the SIM PIN requirement is on, you are If you enter your PIN incorrectly 3 times, your...
-
Page 19: Display
Date and Time to give you a PUK code. 3 Select Unblock PIN. Motorola 4 Enter the PUK code. 10:05 am 4/17 5 Enter a new 4 to 8-digit SIM PIN. 6 Re-enter your SIM PIN. - Page 20 Private calls and group calls can be set to come through the earpiece rather than through the speaker. 4 Ringer Vibe/Off: Your handset is set to Motorola 10:05 am 4/17 not ring. 5 Message Indicator: Shows when you receive a text message.
-
Page 21: Main Menu
main menu 2 Select one of the following options: entry method All your handset’s features can be accessed Alpha Press a key several times for through the main menu. You can set the main different characters. menu to appear as List View or Icon View. Word Enter words using a predictive Find it:... - Page 22 The Word English text input method To accept a word completion (such as combines the groups of letters found on each Billion when you entered Bill), press handset key with a fast-access dictionary of right. words, and recognizes what you want to text If you get a word you don’t want, you can as you type.
-
Page 23: Navigation Key
By default, the first letter of an entry is characters capitalized and the following letters are Space lowercased. After a character is entered, the Back cursor automatically advances to the next space after two seconds or when you enter a character on a different key. -
Page 24: Handsfree Speaker
The only exception is during a call: set the Transmitters Off turns off your handset’s volume of the earpiece via up/down or calling features in situations where wireless left/right arrows. handset use is prohibited, but you can use the handset’s other non-calling features when Transmitters is turned Off. - Page 25 Electronics Association 0183 V3.0 (NMEA- device. A virtual USB Comm Port will be 0183) standard. As such it supports the created on your host device upon following sentences: GGA, GLL, GSA, GSV, successful enumeration of the handset as RMC, and VTG. a USB Communications Device Class device.
-
Page 26: Features For The Vision Impaired
5 Set your handset to start sending NMEA- order for it to provide full 500mA charging 0183 formatted location information. current capability to the handset. Find it: > GPS > Interface > NMEA OUT > On. features for the vision Your handset is now actively sending location NMEA-0183 formatted GPS data to your USB impaired... -
Page 27: Calls
calls group calls, A Talkgroup in a Talkgroup knob set can also be part of a Hub. You can differentiate them talkgroups, sets, and by their icons: hubs Talkgroup Talkgroup number Hub number A group call is similar to a Private call, but is made to all members of a Talkgroup at once. - Page 28 A Hub may consist of 1 to 4 Talkgroups*. One With Scan on, all group calls you make are of the four Talkgroups is preset as primary and Hub calls. Group calls you receive are Hub the other three as secondary. calls or Talkgroup calls to Talkgroups in the Hub you have joined.
- Page 29 2 Wait for timeout. The idle network screen option appears. Assign to Talkgroup: Assign the knob position to Note: The set to which the Talkgroup belongs the Talkgroup name and ID. is called the active set. Assign to MOTOtalk: Assign the knob position to the MOTOtalk name, code, and channel.
- Page 30 view Talkgroup knob 3 Press assignments 4 Select Edit. 1 From the main menu, select Settings > 2- 5 Choose an option from the following list Way Radio > Knob Position. and press Note: Only the current Active Set Talkgroups option appear.
-
Page 31: Delete An Entry
6 Press - under Done. 5 Press - under Insert to select the new location. delete an entry 6 Press - under Done to exit the reorder menu. 1 From the main menu, select Settings > 2- Way Radio > Knob Position. add a set 2 Scroll to the knob position to delete and press... - Page 32 delete set change set via main menu 1 From the main menu, select Settings > 2- 1 From the main menu, select Settings > 2- Way Radio > Knob Position. Way Radio > Knob Position. 2 Scroll to Choose Active Set and press 2 Scroll to a knob position and press 3 Select Delete Entry.
- Page 33 2 Press - under Join. 3 Assign the Talkgroup number as the number of the Hub. Note: If you join a Hub by entering a number or via the Contacts list, you will join a view hub details Talkgroup that does not match the knob position.
- Page 34 the selected Talkgroup number and not with an alias. Scroll to the Hub name in Contacts or recent calls list. receive group calls 2 Press and hold the PTT button. Begin When you receive a group call, the following talking after your handset emits a chirping appears on the screen: sound.
-
Page 35: Emergency Group Calls
set talkgroup scan turn off group calls To set your handset to receive group calls 1 From the main menu, select Settings > 2- from all the Talkgroups in a Hub: Way Radio > Tkgrp Silent. 2 Press - under OK. 1 From the main menu, select Settings >... - Page 36 An emergency group call is a call that takes The first destination is a fixed IP address that priority over all other handset activities in the your service provider loaded into the phone handset making the call and sounds a special configuration.
- Page 37 When the handset receives an emergency 3 Select the IP and/or phone numbers for notification, the Location Assist application each Contact per list of options below. goes foreground and presents you the emergency notification information and option associated PTT and phone number of the user who originated this alert.
- Page 38 call the sender via phone call 3 Choose an option from the following list: 1 From the emergency message, select option Phone Call. Ring: Your handset will ring when it receives an alert notification. Press > Phone Call. Vibrate: Your handset will vibrate when it receives an alert notification.
- Page 39 receive alert notification 1 Press and hold the Emergency button for 3 seconds to start the Emergency Group This feature allows you to set up your handset call. to receive and read an alert notification. 2 Exit Emergency Group Call? displays. Either press 1 From the home screen press >...
- Page 40 To answer an emergency call: Caution: You cannot make Emergency Group calls in Isolated Site Operation, even if the • Proceed as if answering a Private call. Hub you last used is the designated emergency Hub. You must have network isolated site operation connectivity to make Emergency Group calls.
-
Page 41: Make A Phone Call
have this capability, the call alert appears Press the PTT button until Alert Successful without the text message. appears on the display. send a call alert status message receive a call alert status message 1 Proceed as you would when sending any When you receive a call alert that includes call alert. -
Page 42: Answer A Phone Call
answer a phone call Your Private ID is the number at which you receive one-to-one Private calls. When your phone rings and/or vibrates, you Talkgroup numbers are numbers through have the following options: which you receive one-to-many group calls. 1 If you want to answer the call on speaker to make a Private call phone, press the speaker key . -
Page 43: Answer A Private Call
answer a private call When you send a call alert, the recipient’s handset displays your name and emits a 1 When your handset emits a chirping series of beeps or vibrations. sound or vibrates to indicate you are The recipient has the following options: receiving a Private call, wait for the caller to finish speaking. -
Page 44: Store A Phone Number Or Private Id
Hub, SDG, IP or Other). To store a Private ID choose Private. 2 Queue the call alert by pressing - under Queue. 4 Enter the number for the entry and press - under Done. Tip: Before saving the entry, you can save 3 Clear the call alert by pressing - under more information. -
Page 45: Your Phone Number And Private Id
Find it: > Private call to that Private ID by pressing and holding the PTT button, even if the Private ID 1 Scroll to the Contacts entry. is not the type of number displayed. Tip: By pressing the first letter of the name of the Contacts you want, you will be your phone number and taken to all the Contact names starting... -
Page 46: Redial
When you send or receive Private calls, the stored to the Contacts list from the Recent recent call list contains the following PTV Calls list. items with those calls: Find it: > Recent Calls. • Contact information received 1 Scroll to or select the item you want to •... -
Page 47: Caller Id
caller ID different numbers depending on the reason you missed the call. You can forward phone Caller ID allows people to identify a caller lines 1 and 2 independently. before answering the phone by displaying the Find it: > Call Forward. number of the incoming call. -
Page 48: Voice Names
voice names emergency calls You can place calls by speaking commands to Your service provider programs one or more your phone if you have previously assigned a emergency phone numbers that you can call voice name to your Contacts. under any circumstances, even when your handset is locked or the SIM card is not assign voice names to contacts inserted. -
Page 49: International Calls
When you make an emergency call, your international access code (indicated by +). handset’s GPS Enabled feature can help Then, press the keypad keys to dial the emergency service personnel find you, if you country code and phone number. are in a location where your handset's GPS You can additionally enable a predefined prefix antenna has established a clear view of the to the dialing number by using Prepend dialing. -
Page 50: Speed Dial
voicemail temporary prepend will be inserted to the number you are dialing. Note: To receive voice mail messages, you must first set up a voice mail account with speed dial your service provider. Each phone number stored in Contacts is receiving a message assigned a Speed Dial number, which you can When you receive a voice mail message, New... -
Page 51: Selective Dynamic Group
selective dynamic You can use Send via PTT to send SDG lists to other handsets that have this group (SDG) calls capability. A SDG call is similar to a Private call, but is create SDG lists in contacts made to all members of a SDG list at once. A Shortcut: From the home screen press - SDG list is a group of Private IDs that you under Contcs. - Page 52 3 Add Private IDs. See “Adding Private Tip: To deselect a selected item, highlight it Numbers” below. and press 4 If you want to create a voice name for the You can also enter Private IDs from the SDG list, select [Options] > Voice Name. As keypad.
- Page 53 3 Press - under Done. remove all members from a SDG list 1 From Contacts, scroll to the SDG list you add members manually from want to delete the member from. the keypad 2 Press - under Edit. 1 While creating a SDG list, select [Add 3 Press >...
- Page 54 From the Contacts list, scroll to an entry containing the Private ID. From the home screen, press the number on your keypad for the shortcut you assigned to the SDG list you want. From recent calls list, scroll to an entry containing the Private ID.
-
Page 55: Using Your Handset As A Modem
• The name of the SDG list O A member of the SDG list who has exited the call. • The name or the Private ID of the U A member of the SDG list who could not person speaking be reached on the SDG call. - Page 56 connect via Bluetooth Use your handset as a modem via Bluetooth. The laptop, handheld device, or desktop computer you want to connect to must have a Bluetooth adapter installed. Check that the adapter is properly installed, and then follow the specific instructions outlined in the device’s user guide to connect the device to your handset.
-
Page 57: Mosms Messages
MOSMS messages text messages The following options become available: option If your service provider offers Text Messaging, Signature: Enter your signature (up to 11 your handset sends text messages using characters long). MOSMS and receives text messages from other handsets that are using MOSMS. Delivery Report: Set it to On if you wish to receive a report once the message has set it up... - Page 58 receive a text message option 1 To view the message press - under Read. Cleanup: Set this option to On if you want your handset to delete sent messages. 2 To dismiss the message notification press - under Back. If you select Cleanup, select Clean Up After to set the number of days after which sent Note: If your handset is powered off when messages are deleted or the number of...
- Page 59 want to read. If the message fills more press > Recent Calls. Select the number than one screen, scroll to read it. you want. Tip: Scrolling through one message lets 3 Select Msg: and enter the text of the message or to use a quick note press - you view the next message.
-
Page 60: Manage Memory
2 Press - under Delete. 1 Select the draft you want to edit. You also have the choice to create new text 3 Press - under Yes to confirm. messages from this menu. delete all unlocked sent messages 2 To edit the fields you want to change, Shortcut: From the home screen press - follow step 2 through step 5 in “create under Msgs >... - Page 61 messages or save drafts until you delete some. To view the amount of memory available in your text inbox: Shortcut: From the home screen press - under Msgs > > Text Msg Setup > Inbox Mem Mtr. MOSMS messages...
-
Page 62: Advanced Features
advanced features PTV features Private ID you are engaged in a Private call with, Private IDs on the Recent Calls list, and With Push To View features, your handset Private IDs stored in Contacts. can send and receive the following items When you make or receive a Private call, your through Private calls with other handsets that handset automatically determines whether... - Page 63 Note: You cannot send PTT feature items Note: The first time you send a message, during Talkgroup calls or SDG calls. Messaging Fees May Apply Continue? appears and you are prompted to respond. Press - under Yes send messages to acknowledge the message. The Push to Send Messages feature begin a message from the Contacts or lets you send short text messages through...
- Page 64 To view the message: Press - under Read. create messages To dismiss the message press - under After you have begun a message and chosen Dismiss. a recipient, a screen appears that lets you create the text of the message you want to reply to a message send.
- Page 65 The first time you send a stored picture after 5 When prompted, press the PTT button to turning the handset on, Picture Fees May Apply resume the Private call. Continue? appears and you are prompted to Note: After you send or receive a picture via respond.
- Page 66 5 Press the PTT button to send the picture. receive a picture 6 When prompted, press the PTT button to When someone sends you a picture, your resume the Private call. handset emits a tone or vibrates and a message appears asking if you want to accept from the PT Manager: the picture.
-
Page 67: Private Call
clear a picture from the display to send a datebook event during a private call If you want to clear a picture from your 1 While in a Private call press > Use PTT handset’s display while still on a call, press Feature >... - Page 68 send my info The information your handset sends always includes My Name and Private. You may also send 1 While in a Private Call press > Send via Line 1, Line 2, and Carrier IP , depending on your PTT, and push the PTT button to send. sending options.
-
Page 69: One Touch Ptt
send contact information turn PTT features on and off 1 While in a Private Call press > Use PTT You can turn your handset’s ability to send Feature. and receive messages, pictures, and Datebook events on and off. 2 Select Send Contact and select the contact information you want to send. - Page 70 One Touch PTT sets your handset to do any of option the following each time you press the PTT Send Message: Go to the first screen to send a button from the home screen: message. See “send messages” on option page 57.
-
Page 71: Pt Manager
PT manager Find it: > Quick PTT. To move between Contacts, Recent Calls, or Memo, The PT Manager lets you quickly access PTT left or right, or press * or #. use the features, and other Private call features, from To make a Private call or SDG call: the main menu. -
Page 72: Mms
To address the message: 1 Select To to bring up a list of address slots. Multimedia Messaging Service (MMS) lets 2 Highlight a slot and press you send and receive messages that may include text, pictures and audio recordings. 3 Enter the phone number or email address using the keypad. - Page 73 1 Select Mesg. option 2 Enter text using the keypad or press - Priority: Set priority Normal or High. under QNotes to select a quick note of your Report: Set receipt confirmation On Delivery. choice (see “quick notes” on page 68) Valid Until: Set a date after which attempts to and press deliver the message end, or press - under...
- Page 74 4 Edit any message fields you want to attach a picture and audio change. recording or a ring tone 5 Press - under Send. You can attach one or more pictures audio recordings or ring tones from your handset quick notes into the body of the message.
- Page 75 their DRM settings do not prevent you from 6 The voice record is attached to the sending. message and saved to the media center and the list of voice records. Forward locked items are usually copyright protected, and you cannot share them with remove an attachment anyone, such as in Private calls or by uploading them from your handset.
- Page 76 send a draft 1 To delete a message in the MMS drafts folder without sending it, scroll to the Shortcut: From the home screen press - message you want to delete and press - under Msgs > Drafts > MMS Drafts. under Delete.
- Page 77 resend delete a message If a message was not sent from your handset, 1 Scroll to the message you want to delete. you can resend it. 2 Press > Delete Multiple. Shortcut: From the home screen press - 3 Select the message or messages you under Msgs >...
- Page 78 3 If the message fills more than one screen, 2 Highlight the attachment you want to scroll down to read it. open. Attachments appear at the end of a message. embedded objects and 3 Press attachments Note: Attachments that are of an unknown Messages may contain pictures or audio type cannot be opened, but they can be recordings as part of the body of the message...
-
Page 79: Send A Call Alert
2 Press - under Delete and - under Yes to 2 Highlight the Private ID or Talkgroup ID confirm. you want to alert. 3 Press > Alert. lock and unlock messages 4 Push the PTT button. Locked messages cannot be deleted until you unlock them. - Page 80 address in the From field, the To field, the Cc go to a website field, the Subject field, or the body of the If a message contains one or more website message, you can store this information to URLs, you can go to that website. Contacts.
- Page 81 3 Press save attachments 4 Select Save Picture or Save Audio. 1 View the message. The item will save in the default storage 2 Highlight the attachment you want to location. save. Note: Some types of pictures and audio 3 Press >...
- Page 82 message transmission The following options become available: After you start to send a message you have option created or start to download a message you Friendly Name: Enter text here to create a have been sent, you can still stop the friendly name.
- Page 83 new quick notes and reply option phrases Cleanup: Controls how long messages remain in the Inbox and Outbox before they are Note: These Quick Notes are not the same as deleted. the quick notes used with MOSMS messages. Each messaging service has its Downloads: Controls whether your handset own quick notes feature.
- Page 84 3 Edit the text and press clean up options The clean up option controls how long delete only quick notes and reply messages remain in the Inbox and Outbox phrases you have created before they are deleted. You set the clean-up 1 From the MMS Setup menu, select Quick Notes option for the Inbox and Outbox separately.
- Page 85 option option 5 Messages: If you have more than 5 Custom: Lets you create a clean-up option of messages, messages are deleted in the up to 99 messages or 99 days. for the inbox order they were received, starting with the 3 Press - under Yes to automatically delete oldest, until 5 are left.
-
Page 86: Bluetooth
4 Press - under Yes to confirm. 3 Select Find Me Time to determine the amount of time in which your handset can be found by other Bluetooth devices. Bluetooth ® Tip: You can turn off Bluetooth if you want to Your handset supports the use of wireless prolong battery life or if you enter an area Bluetooth headsets. - Page 87 Note: If the Handsfree Devices list contains only Note: This handset offers Bluetooth auto pair one device, then your handset will feature with auto pair compatible Motorola automatically try to connect to that device. advanced features...
- Page 88 1 While in a call, press > Use Bluetooth. 1 Select the contact you want to send. 2 Press - under Yes to power On 2 Press > Send Via... > Bluetooth. Bluetooth. 3 Press - under Yes to power On 3 Select the audio device you want to Bluetooth.
-
Page 89: Mototalk
If the event you select repeats, then you Your handset connects with the device will be prompted to choose whether to and sends the datebook event. send the selected instance of the event or all instances of the event. MOTOtalk To send only the selected instance of the MOTOtalk allows direct two-way handset-to- event, select This Event Only. - Page 90 Note: MOTOtalk is not compatible with older Channels are divided into sets of frequencies Family Radio Services products. that allow you to make and receive MOTOtalk calls. Other parties may also be talking on the The following features and main menu items same channel.
- Page 91 MOTOtalk and Talkgroup knob were set appear on the MOTOtalk idle screen. While in MOTOtalk, this icon TBD appears on See “group calls, talkgroups, sets, and hubs” the display, indicating that there is no network on page 21. signal and MOTOtalk is active. enter MOTOtalk via main menu exit MOTOtalk 1 From the main menu, scroll to MOTOtalk...
- Page 92 3 Press - under Edit. speaking after your handset emits the MOTOtalk tone. 4 Select a channel. 2 Release the PTT button to listen. 5 When you are finished, press - under Back to return to the MOTOtalk idle screen. The tone emitted from your handset when using MOTOtalk is 4 beeps and sounds set a code...
- Page 93 set to Receive All 2 Scroll to Code. 3 Press - under Edit. You can set your handset to receive MOTOtalk transmissions from any handset 4 Select Receive All. that is set to the same channel, regardless of 5 When you are finished, press - under the code (1-15), by setting the code to Receive Back to return to the MOTOtalk idle screen.
- Page 94 • The person that you are trying to reach may make a Private MOTOtalk call not be in MOTOtalk. 1 Enter the 10-digit PTN of the person you want to call on your channel. • The person that you are trying to reach is set to a different channel or is out of range.
- Page 95 Note: You can reply within 6 seconds simply setup options by pressing the PTT button. MOTOtalk setup options are available in the MT Options screen in both network and end a private MOTOtalk call MOTOtalk modes. A Private MOTOtalk call will end if there is no To access Setup Options in network: communication for 6 seconds.
- Page 96 use Direct Launch Your handset now displays MT Options when you select MOTOtalk from the main menu. To set your handset to launch MOTOtalk when you select MOTOtalk from the main use State Tone menu: To set your handset to notify you with a tone 1 From the Setup screen, scroll to Direct that you are in MOTOtalk: Launch and press - under Change.
-
Page 97: Use Dual Sim Cards
use dual SIM cards change the active SIM card Find it: > Settings > Advanced > Dual SIM > When changing the active SIM card, the Active SIM following features also change: 1 Press • Ringtones assigned to phone numbers 2 Scroll to the SIM you want to activate. -
Page 98: Select Frequency Band
select frequency band This feature allows you to operate your handset on two frequencies: 800 MHz and 900 MHz. After you select 800 MHz as the primary band, the 900 MHz band will become the secondary band. Find it: > Settings > Advanced > Band Selection 1 Press 2 Choose an option from the following list: option... -
Page 99: Customize Your Handset
customize your handset ring tones making a sound; Silent sets your handset to neither vibrate nor make a sound. To set the ring tone your handset makes Tip: Highlighting a ring tone lets you hear it. when you receive phone calls, call alerts, 3 Select the features you want to assign the message notifications, pictures sent using ring tone to. -
Page 100: Wallpaper
alerts, messages notifications, pictures sent 1 Make sure Vibrate All is set to Off. using Send via PTT, and Datebook reminders. 2 Select Vibrate from the list of ring tones. Find it: > Ring Tones > Vibrate All. 3 Select the features you want to set to Set this option to On or Locked. -
Page 101: Datebook
Note: You can set the wallpapers to change options automatically after a certain period of time by Time Shift: Lets you shift the times of all turning on the Auto Cycle feature located in the Datebook events. This is useful if you are Wallpaper menu. - Page 102 The Location feature allows the network to Select from the following options:: detect your position. Turning Location Off will option hide your location from everyone except 911. Restricted: No Java or similar software Note: Turning Location On will allow the applications may view the location of your network to detect your position using GPS handset.
-
Page 103: Other Special Features
other special features advanced calling feature 3-way call Make or receive a handset feature call and press > 3 Way. call waiting To accept the second call Enter the second handset and put the active call on and - number, press hold press - under Yes. -
Page 104: Contacts
datebook feature any key To answer phone calls by feature answer pressing any key on the create To create a new Datebook keypad press > > datebook event press > Datebook > Phone Calls > Any Key Ans > On. events [New Event]. -
Page 105: Gps
• Remain stationary feature • Avoid touching the antenna with your receive To view the information hands. datebook while still in the Private call events via press The 5 most recent events feature received from a Private ID view To see your approximate are stored with the that approximate location press... -
Page 106: Handsfree
laws and regulations on the use of these feature products. change GPS Note: When you receive your handset, your GPS PIN feature is 0000. speaker To activate the speaker while driving To change your GPS PIN press and hold the press >... -
Page 107: My Info
My Info options Group ID: The number of the Talkgroup you feature have joined. view my To view information about Carrier IP: The IP address assigned to the info your handset and send this carrier. This number appears when you information to other register for packet data services. -
Page 108: Pc Applications
Identity), SIM ID, and Serial Number (SN). other PC For a list of complete PC Please be prepared to supply the applications applications visit: representative with this information when www.motorola.com/support requesting these types of transactions. personalize feature language To set the language of your menu press >... -
Page 109: Security
feature feature menu style To display the main menu as keypad lock To lock the keypad press tabs, graphic icons or a text- > > Security > Keypad based list press > Lock > Lock Now or Auto Lock or >... -
Page 110: Tty
vibrates for incoming calls or messages, but 3 Use your phone to enter phone numbers you need to unlock it to answer. and make calls. Note: When you your handset receives a When you make a TTY call, these icons Private or Talkgroup call, the Keypad Lock will appear on the handset’s display: unlock for the amount of time you selected. - Page 111 feature options choose TTY From the home screen TTY: You type and read text on your TTY mode press > > Phone Calls device. > TTY > Type. VCO: (Voice-Carry-Over) — You speak into your phone and read text replies on your Select from TTY, VCO or HCO.
- Page 112 Important Safety and Legal Information...
-
Page 113: Safety And General Information
Human Exposure to Radio frequency Electromagnetic at which your phone transmits. Fields in the Frequency Range from 3 kHz to 300 GHz, Your Motorola phone is designed to comply with local regulatory 1999. requirements in your country concerning exposure of human beings •... -
Page 114: Approved Accessories
If you do not the relevant standards, always follow these instructions and use a body-worn accessory supplied or approved by Motorola and precautions: are not using the radio product in the intended use positions along... - Page 115 Bluetooth profile. To determine • DO NOT carry the phone in a breast pocket; the profiles supported by other Motorola devices, visit • Use the ear opposite the implantable medical device to www.hellomoto.com/bluetooth. For other devices, contact their minimize the potential for interference.
-
Page 116: Potentially Explosive Atmospheres
While Driving” section at the end of this guide and/or at the a danger of fire, explosion, leakage, or other hazard. For Motorola Web site: www.motorola.com/callsmart. more information, see the “Battery Use and Battery Safety” section in this user’s guide. - Page 117 Glass Parts Symbol Definition Some parts of your phone may be made of glass. This glass could Your battery or phone may break if the product is dropped on a hard surface or receives a 032375o require recycling in substantial impact. If glass breaks, do not touch or attempt to accordance with local laws.
- Page 118 Additionally, for instructions on how to obtain a copy of any source code being made publicly available by Motorola related to software used in this Motorola mobile device, please send your request in writing to: MOTOROLA, Inc. OSS Management...
-
Page 119: Service & Repairs
Service & Repairs If you have questions or need assistance, we’re here to help. Motorola Customer Support Center at 1 (800) 453-0920 (United States). Go to www.motorola.com/support, where you can select from a number of customer care options. You can also contact the Export Law Assurances Service &... -
Page 120: Limited Warranty Motorola Communications Products (International)
MOTOROLA, at its option, will at no charge either repair the Product (with new or reconditioned parts), replace it (with a new or... - Page 121 Product. MAY BE DISCLAIMED BY LAW. MOTOROLA cannot be responsible in any way for any ancillary How to Get Warranty Service: equipment not furnished by MOTOROLA which is attached to or...
- Page 122 Product or parts infringe a patent, and Motorola will • Product which has had the serial number removed or made pay those costs and damages finally awarded against the end user illegible.
- Page 123 MOTOROLA, nor will MOTOROLA have any liability for the use of ancillary equipment or software not furnished by MOTOROLA which is attached to or sued in connection with the Product or any parts thereof. In no event shall...
-
Page 124: Information From The World Health Organization
Motosupport/source/registration.asp Product registration is an important step toward enjoying your new Motorola product. Registering helps us facilitate warranty service, and permits us to contact you should your product require an update or other service. Registration is for U.S. residents only and is not required for warranty coverage. - Page 125 To learn more about CTIA's Recycling Program for Used Wireless its members encourage consumers to recycle their phones and Devices, please visit us at: have taken steps to promote the collection and environmentally http://recycling.motorola.young-america.com/ index.html sound recycling of end-of-life devices. California Perchlorate Label Perchlorate Label...
-
Page 126: Patent And Trademark Information
Motorola, Inc. ® Reg. The Motorola products described in this manual may include U.S. Pat. & Tm. Off. © 2008 Motorola, Inc. All rights reserved. copyrighted Motorola and third party software stored in Microsoft and Microsoft Internet Explorer are registered semiconductor memories or other media. -
Page 127: Privacy And Data Security
• Keep software up to date: If Motorola or a If you have further questions regarding how use of your phone may software/application vendor releases a patch or software impact your privacy or data security, please contact Motorola at fix for your phone which updates the device’s security,... -
Page 128: Smart Practices While
• Dial sensibly and assess the traffic; if possible, • Get to know your Motorola phone and its features place calls when your car is not moving or before such as speed dial and redial. If available, these pulling into traffic. - Page 129 • Use your phone to help others in emergencies. If you see an auto accident, crime in progress, or other serious emergency where lives are in danger, call 911 or other local emergency number, as you would want others to do for you.** •...
-
Page 130: Index
index connect 80 SDG, see SDG calls send information 82 center key 17 accessories 5, 100 setting your phone 80 center select key 5 active phone line 14 turning on or off 80 clock 103 advanced calling 97 contacts 98 3-way calls 97 edit/delete 98 call waiting 97... - Page 131 see also text messages, privacy options 99 drafts GPS enabled international calls 43 emergency calls 43 Isolated Operation 34 GPS, see GPS enabled Group calls 21 Emergency Group calls making 27 making 33 language 102 off 29 receiving 33 low battery message 14 receiving 28 emergency number 42 end a call 35...
- Page 132 view My Info 101 make 36 ring tones, setting 93 view options 101, 105 receive a call alert 37 PT Manager 65 PTV features 51, 56 safety PUK code 12 navigation key 5, 17 radio frequency 107 RF energy interference quick notes safety information 107 one touch PTT 63...
- Page 133 signal strength indicator 14 alpha method 16 SIM card 5 word method 15 wallpaper 94 change SIM PIN 103 text messages 49, 51 WHO information 118 enable SIM PIN 103 creating 53 SIM PIN 11 deleting 54, 55 changing 11 drafts 53 your phone number 39 default 11...
- Page 134 Quick Reference Card use the navigation key answer a private call Press the navigation key up, down, left, or When your handset emits a chirping sound or right to scroll to items in the display. When you vibrates to indicate you are receiving a Private scroll to highlight the desired item, press call, wait for the caller to finish speaking.
- Page 135 If you want to answer the call using the phone, press . To hang up press List of Talkgroups Talkgroup Name If you are using a Bluetooth headset, you can press the answer key on your Bluetooth headset. To hang up press the same key on your Bluetooth.