
Related Manuals for Control Techniques Commander SE


Summary of Contents for Control Techniques Commander SE
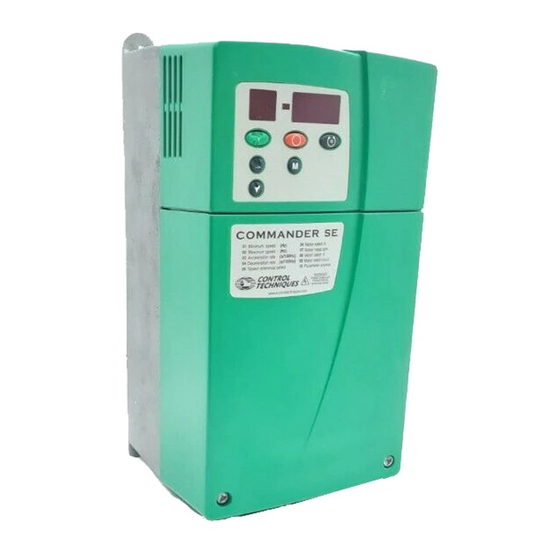
- Page 1 Advanced User Guide Commander SE Variable speed drive for 3 phase induction motors from 0.25kW to 37kW Part Number: 0452-0049-04 Issue Number: 4 www.controltechniques.com...
- Page 2 Drives running in a system, there may be some differences between the existing software and the updated product software, causing varying functionality. This may also apply to Drives returned from Control techniques Service Centre.
-
Page 3: Table Of Contents
3.15 Menu 21: Second motor map ..................... 102 Drive Information ..................107 Power Terminal Connections ..................... 107 Commander SE power circuit layouts ................108 Gland plate holes ....................... 109 Control terminal connections ....................110 Serial communication connections ..................110 Control terminal specifications ................... 111 Calculating the enclosure size .................... - Page 4 Flux Braking ........................185 12.24 Variable Trim ........................186 12.25 Quickey Compatibility ......................187 12.26 Controlling the Commander SE via the Universal Keypad ..........187 12.27 Open loop vector or fixed boost modes ................190 12.28 Ramp Modes ........................193 12.29 Stopping Modes ........................
-
Page 5: Serial Communications
It does not provide connectivity to an EIA485 based network When this converter is used on Commander SE and a true EIA232 host / master such as a PC, then no external power supply is required. This is because the converter sources its power from both the drive and the EIA232 ports. - Page 6 E-mail: sales@westermo.co.uk When using either of the above converters, or any other suitable converter with Commander SE, it is recommended that no terminating resistors be connected on the network. This applies to any of the drives on the network and also any converter used.
- Page 7 Figure 1-3 RJ45 Hand tool, Shielded and Unsheilded Dies All required components to terminate an RJ45 connector can be purchased from RS components. Refer to Table 1-1 on page 9 for RS Components part numbers. Commander SE Advanced User Guide Issue Number: 4...
- Page 8 5. Cut cable to 6mm above cable spacer and fit into RJ45 ensuring all cables are in the correct channels and crimp. 6. Cut back foil shield flush with RJ45 connector and slide up insulation boot over the RJ45 connector. Commander SE Advanced User Guide Issue Number: 4...
-
Page 9: Serial Communications Connections
The TX Enable pin is a 0 to 5V output from the Drive that can be used to externally control and switch the buffers on a serial communications converter from transmit to receive and vice-versa. An example of a converter that can be used with this signal is the Amplicon 485Fi. Commander SE Advanced User Guide Issue Number: 4... -
Page 10: Ansi Protocol Description
00. For example, the address 00 can be used to send a frequency/speed command to all the drives which are mechanically coupled together driving a conveyor. All the drives will then change frequency/speed simultaneously. Commander SE Advanced User Guide Issue Number: 4... - Page 11 An example of a host reading the value of parameter 1.17 on the drive that is addressed as unit 2 of group 1, the host message is: Address Parameter The drive replies with, where [parameter 1.17] = -47.6Hz: The BCC in this example is calculated by the drive as follows: Parameter Data Commander SE Advanced User Guide Issue Number: 4...
- Page 12 If the message is lost following data corruption, it will be necessary to recommence the 'read' communication by starting with a complete message sequence and then reverting to the 're-read' rapid sequence described above. Commander SE Advanced User Guide Issue Number: 4...
- Page 13 The final value is the BCC, provided that its equivalent decimal value exceeds 31 (or 1FH) (ASCII characters from 0 to 31 are used as control codes). When the final XOR result produces a decimal value less than 32, then 32 is added. In this example, 0011 0101 is 53 Commander SE Advanced User Guide Issue Number: 4...
-
Page 14: Modbus Rtu
Type Limitations Level 2 parameter 0.1 ~ 24.7 Used to define the network node address for the Commander SE. All nodes on a Modbus network MUST be configured with a unique node address. 1.4.2 Modbus frame specification 1 start bit... - Page 15 Parameter over range during block read/write 0x17 There will be no indication that there has been a value out of range during the 0x17 access. For detailed information on Modbus RTU protocol specification, refer to the Modicon website. Commander SE Advanced User Guide Issue Number: 4...
-
Page 16: Parameter Types
Parameter value is represented on the display with strings of Text. Requires a 'Drive Reset' before any new value will be implemented Parameter is Protected from being controlled by programmable inputs and functions Parameter saved on power down Commander SE Advanced User Guide Issue Number: 4... -
Page 17: Menus
4.01 Motor current threshold 12.05 Brake release delay time 9.09 * Only becomes active when parameter 29 is set to “br.Eu” or “br.US” and the STOP/RESET button is pressed for 1 second. Commander SE Advanced User Guide Issue Number: 4... -
Page 18: Menu 1: Speed Reference Selection, Limits And Filters
Not used 1.49 Reference selected indicator 1 ~ 5 1.50 Preset selected indicator 1 ~ 8 1.51 Power up keypad reference 0 ~ 2 * The maximum value is 1.06 or 21.01. Commander SE Advanced User Guide Issue Number: 4... - Page 19 Both analog inputs are unipolar and setting this bit does not allow bipolar analog references to be applied to the drive. If an analog bipolar reference is required, use the optional SE51 Bipolar Speed Reference PCB. Commander SE Advanced User Guide Issue Number: 4...
- Page 20 This is because of the easy set-up modes that give the user the flexibility to select between analog reference 1 and 3 preset speeds, or analog reference 2 and 3 presets speed with only 2 digital inputs. Commander SE Advanced User Guide Issue Number: 4...
- Page 21 1.18 defines the reference (either positive or negative) with a resolution of 0.1Hz. Parameter 1.19 defines the fine part of the reference (always positive). The final reference is given by 1.18 + 1.19. Therefore 1.19 increases positive references away from zero, and decreases negative references towards zero. Commander SE Advanced User Guide Issue Number: 4...
- Page 22 Reference in skip frequency band indicator 0 or 1 This parameter indicates that the selected reference is within one of the skip frequency regions such that the motor speed is not as demanded. Commander SE Advanced User Guide Issue Number: 4...
- Page 23 These bits are provided for control by logic input terminals for external reference selection (see parameters 1.14, 21.03 and 1.15). NOTE Although parameters 1.41 to 1.47 are Read only parameters, they can be written to but only via a digital input. Commander SE Advanced User Guide Issue Number: 4...
- Page 24 Selects the value of the keypad reference on power-up. keypad reference is zero LASt keypad reference is the last used value PrS1 keypad reference is copied from preset speed 1 (parameter 1.21) Commander SE Advanced User Guide Issue Number: 4...
- Page 25 Commander SE Advanced User Guide Issue Number: 4...
-
Page 26: Menu 2: Ramps
Acceleration select bit 2 (MSB) 0 or 1 2.35 Deceleration select bit 0 (LSB) 0 or 1 2.36 Deceleration select bit 1 0 or 1 2.37 Deceleration select bit 2 (MSB) 0 or 1 Commander SE Advanced User Guide Issue Number: 4... - Page 27 The default values have been chosen such that for the default ramps and maximum speed, the curved parts of the S will be 25% of the original ramp if S-ramp is enabled. Commander SE Advanced User Guide Issue Number: 4...
- Page 28 2.34. These bits are for control by digital inputs such that ramp rates can be selected by external control. The ramp rate selected depends on the binary code generated by these bits as follows: Commander SE Advanced User Guide Issue Number: 4...
- Page 29 100Hz on the ramp output, therefore with a programmed ramp time of 5 seconds the ramp output will reach 50Hz from 0 in 2.5 seconds. NOTE Although the acceleration rate can be set to 0.0, there is a minimum ramp time within the software of 0.1s/100Hz. Commander SE Advanced User Guide Issue Number: 4...
- Page 30 NOTE Although the deceleration rate can be set to 0.0, there is a minimum ramp time within the software of 0.1s/100Hz. Commander SE Advanced User Guide Issue Number: 4...
- Page 31 2.36 Deceleration select bit 1 2.37 Deceleration select bit 2 (MSB) 0 or 1 These bits are provided for control by logic input terminals for external ramp selection (see 2.10 & 2.20). Commander SE Advanced User Guide Issue Number: 4...
- Page 32 Commander SE Advanced User Guide Issue Number: 4...
-
Page 33: Menu 3: Speed Sensing Thresholds
The 'At speed' window threshold defines the boundary around the set speed point in which the 'At speed' indication (10.06) is set to 1. The 'At speed' window is defined as Set speed ± (3.06/2). Commander SE Advanced User Guide Issue Number: 4... - Page 34 Commander SE Advanced User Guide Issue Number: 4...
-
Page 35: Menu 4: Current Control
± I max A 4.18 Over-riding current limit 0 ~ I max % 4.19 Overload accumulator 0 ~ 100% 4.20 Drive load indicator 0 ~ I max % 4.21 Load indication selector 0 or 1 Commander SE Advanced User Guide Issue Number: 4... - Page 36 If the drive operates in vector mode (see 5.14) the x axis is aligned with the stator flux in the steady state, and so the active Commander SE Advanced User Guide Issue Number: 4...
- Page 37 (4.13 and 4.14) must be high enough to counter the effects of the ramp. For method of setting the gains see 4.13 and 4.14. In torque control mode the current demand is limited by the current limits. For operation of this mode see 4.11. Commander SE Advanced User Guide Issue Number: 4...
- Page 38 The following is a guide to setting the gains for different applications. Commander SE Advanced User Guide Issue Number: 4...
- Page 39 4.16 Motor protection mode select 0 or 1 See 4.15 also. 4.16 = 0: trip when threshold reached 4.16 = 1: reduce current limit when threshold reached Commander SE Advanced User Guide Issue Number: 4...
- Page 40 A positive value in this parameter indicates motoring load and a negative value indicates a regenerating load. 4.21 Load indication selector 0 or 1 This parameter defines whether percentage load or output current is displayed. Ld Value of parameter 4.20 displayed Value of parameter 4.01 displayed Commander SE Advanced User Guide Issue Number: 4...
- Page 41 Commander SE Advanced User Guide Issue Number: 4...
-
Page 42: Menu 5: Machine Control
Not used 5.22 5.23 Voltage offset 0 ~ 25.5V BF, MC 5.24 Motor leakage inductance 000.0 ~ 500.0mH 5.25~ Not used 5.33 5.34 Speed indication selector 0 ~ 2 Uni Txt P 0(Fr) Commander SE Advanced User Guide Issue Number: 4... - Page 43 The motor rated current should be set to the machine nameplate value for rated current. This value is used in the following: Current limit, parameter 4.07 IxT system, parameter 4.15 Slip compensation, parameter 5.08 Dynamic V to F control, parameter 5.13 Commander SE Advanced User Guide Issue Number: 4...
- Page 44 If the full load speed of the motor is above 9999rpm, enter a value of 0 in parameter 07. This will disable slip compensation as values greater than 9999 cannot be entered into this parameter. NOTE Slip compensation should be disabled when using Commander SE on a high inertia load, e.g. fan. 5.09 Motor rated voltage EUR: 50Hz Defaults 400V units >...
- Page 45 There are two levels of autotune that can be performed by the Commander SE. Non-rotating static autotune This autotune measures the motor stator resistance and system voltage offset. The results of the test are stored in the appropriate parameters.
- Page 46 The drive will again trip on ‘rS’ if the stator resistance being measured is greater than the drive’s internal maximum limit. This can happen if a star connected motor is connected to a 200V Commander SE or a motor of a lower kW rating is connected to a larger kW Commander SE.
- Page 47 = Maximum measurable DC Bus voltage (420V or 830V) DC full_scale = Drive rated current x √2 x 2 full_scale When an autotune is carried out by the drive, the calculated stator resistance is automatically saved. Commander SE Advanced User Guide Issue Number: 4...
- Page 48 Intelligent Thermal Management The Commander SE contains a heatsink thermistor that monitors the temperature of the drive’s heatsink. If the switching frequency is set above 3kHz and the heatsink temperature increases above set levels, the drive will reduce the switching frequency in order to prevent the drive from tripping on heatsink over-temperature (Oht2).
- Page 49 This parameter defines whether the speed indication in parameter status mode indicates motor output frequency (0), speed in RPM (1) or customer defined units (2). NOTE When parameter 5.34 is set to 1 (SP), the display will show a maximum of 9999rpm. Commander SE Advanced User Guide Issue Number: 4...
- Page 50 Commander SE Advanced User Guide Issue Number: 4...
-
Page 51: Menu 6: Drive Sequencer
Digital input control bit 5 (Not Stop) 0 or 1 6.40 Enable latching run inputs 0 or 1 6.41 Control word mask 6.42 Control word 6.43 Control word enable 0 or 1 Commander SE Advanced User Guide Issue Number: 4... - Page 52 The drive will decelerate the load accordingly to keep the DC bus above the voltage trip level. The time taken to decelerate the motor will always be equal to or less than the set deceleration ramp, it will never be greater. Commander SE Advanced User Guide Issue Number: 4...
- Page 53 0V or OI.AC trips will be seen. The delay time for the drive to detect the frequency of a spinning motor and act upon it is 500mS. 6.10 ~ Unused parameters 6.11 Commander SE Advanced User Guide Issue Number: 4...
- Page 54 Together with the previous parameter the drive records the amount of time the drive has been running since it left the manufacturing plant. 6.24 Power meter MWh 0 ~ 999.9 Drive power consumption meter. This can be reset to zero by setting parameter 6.17. Commander SE Advanced User Guide Issue Number: 4...
- Page 55 Two of the drives terminals are programmed to control the ‘Run Forward’ and ‘Run Reverse’ bits in the drives default state. For customers who prefer to command the drive with ‘Run’ and ‘Forward/Reverse’ terminals see 6.04. Commander SE Advanced User Guide Issue Number: 4...
- Page 56 When the latching mode is selected, parameter 6.04 = 1, the following latches are used. The STOP input resets all of the latches. The Run Forward and Run Reverse are made to operate independently by resetting the opposing direction latch whenever a single direction is set. Commander SE Advanced User Guide Issue Number: 4...
- Page 57 This value only needs to be set once to the appropriate value. This value is the binary code addition of the functionality required. NOTE This parameter is not saved when the drive is powered off Binary code Function Drive Enable Run Forward Run Reverse Forward / Reverse Not Stop Commander SE Advanced User Guide Issue Number: 4...
- Page 58 To run the drive in the reverse direction, set parameter 6.42 = 113 To stop the drive, set parameter 6.42 = 33 To disable the drive, set parameter 6.42 = 0 To enable the drive, set parameter 6.42 = 1 Commander SE Advanced User Guide Issue Number: 4...
- Page 59 Parameter 6.43 must be set to 1 to allow control of the drive via the control word. If this is not set to 1, then these parameters will not do anything. (6.43 must be set back to 0 for terminal control.) Commander SE Advanced User Guide Issue Number: 4...
- Page 60 Commander SE Advanced User Guide Issue Number: 4...
-
Page 61: Menu 7: Analog Inputs And Outputs
7.20 Analog output scaling 0.00 ~ 2.50 7.21~ Not used 7.27 7.28 Current loop loss indicator 0 or 1 7.29~ Not used 7.32 (0)Fr 7.33 Analog output select (1)Ld (0)Fr (2)Adv Commander SE Advanced User Guide Issue Number: 4... - Page 62 This parameter displays the temperature currently being measured on the drives’ heatsink. If the level reaches 95°C (or 100°C for Commander SE Size 4), the drive will trip (O.ht2 on the display). This is used in the thermal management software (see 10.18 and 5.18).
- Page 63 1.5. The maximum value of 4.20 is the active current limit (4.18) and therefore the analog output will be at 10V when the load is at its maximum. Users wishing to see 10V output at 100% load will need to set a scale factor in 7.20 equal to 4.18 / 100 to achieve this. Commander SE Advanced User Guide Issue Number: 4...
- Page 64 (AdV) This allows another parameter other than 2.01 and 4.02 to be assigned to 7.19. This parameter must first be set to 2 over serial comms to allow 7.19 to be assigned to any other parameter that the user wishes to display on the analog output. Commander SE Advanced User Guide Issue Number: 4...
- Page 65 Commander SE Advanced User Guide Issue Number: 4...
-
Page 66: Menu 8: Digital Inputs And Outputs
Activate digital output 1 0 ~ 1 8.32~ Not used 8.38 Disable digital inputs 5 and 6 auto 8.39 0 ~ 1 selection 8.40 Digital input 6 as thermistor input 0 ~ 1 Commander SE Advanced User Guide Issue Number: 4... - Page 67 Relay state invert 0 or 1 Setting these parameters to a 1 causes the input sense to the destination parameter to be inverted or the output sense from the source parameter to be inverted. Commander SE Advanced User Guide Issue Number: 4...
- Page 68 Activate digital output 1 0 or 1 This parameter is set to 1 for Terminal 8 to be an output and set to a 0 for Terminal 8 to be an input. Commander SE Advanced User Guide Issue Number: 4...
- Page 69 Connect the motor thermistor between 0V and terminal 13. NOTE When terminal 13 is set-up as a motor thermistor, it is not affected by the logic select. (See parameter 34 or 8.29.) Connection diagram Commander SE Advanced User Guide Issue Number: 4...
- Page 70 Commander SE Advanced User Guide Issue Number: 4...
- Page 71 Commander SE Advanced User Guide Issue Number: 4...
- Page 72 Commander SE Advanced User Guide Issue Number: 4...
-
Page 73: Menu 9: Programmable Logic And Motorised Pot
0.00 ~ 2.50 1.00 B, I 0.00 ~ 21.51 9.25 Motorised pot destination 0.00 Menu.parameter 9.26 Motorised pot. up 0 or 1 9.27 Motorised pot.down 0 or 1 9.28 Motorised pot.reset 0 or 1 Commander SE Advanced User Guide Issue Number: 4... - Page 74 0 to a 1 only, such that there is a delay on the output becoming active, but not on the output becoming inactive. The delay parameters are primarily there to ensure that the output condition is a genuine condition (by being present for a period of time) and not just a temporary one. Commander SE Advanced User Guide Issue Number: 4...
- Page 75 Two input terminals must be programmed to control these parameters to implement the motorised pot. 9.28 Motorised pot reset 0 or 1 When this parameter is set to 1 the motorised pot output is reset to zero. Commander SE Advanced User Guide Issue Number: 4...
- Page 76 Commander SE Advanced User Guide Issue Number: 4...
-
Page 77: Menu10: Status And Trips
10.37 Stop drive on non important trips 0 or 1 10.38 User trip 0 ~ 200 10.39 Braking energy overload accumulator 0.0 ~ 100.0% 10.40 Status word 0 ~ 32767 Commander SE Advanced User Guide Issue Number: 4... - Page 78 Set if active current (4.02) is greater or equal to rated active current (see Menu 4: Current control for definition of rated active current). 10.09 Current limit active indicator 0 or 1 This parameter is set if the normal current limit is active. Commander SE Advanced User Guide Issue Number: 4...
- Page 79 IGBT temperature >135°C Reduce switching frequency. If it is 3kHz minimum, trip drive *Commander SE Size 4 >100°C The switching frequency and drive thermal model are updated once per second. Whenever the drive has reduced the switching frequency, this alarm is set. Also, when this alarm has been set, the drive’s display will flash ‘hot’.
- Page 80 Temperature exceeds 95°C (203°F), 100°C (212°C) Oht2† Overheat (heatsink thermistor) for Size 4 Over temperature (Motor thermistor) Excessive motor temperature O.Ld1* +24V or digital output overload Excessive load or short circuit on +24V output Commander SE Advanced User Guide Issue Number: 4...
- Page 81 5.12) * The Enable/Reset terminal will not reset an O.Ld1 trip. Use the Stop/Reset key. ** These trips cannot be reset for 10 seconds. Commander SE Size 4 temperature exceeds † 100°C (212°F) See information under terminal 5 in section 4.2 Control terminal connections.
- Page 82 Stop drive on non important trips 0 or 1 If this parameter is set, the drive will stop before tripping on non important trips. Non important trips are cL, EEF error when saving data, O.Ld, and PH. Commander SE Advanced User Guide Issue Number: 4...
- Page 83 This parameter is for use by a serial comms interface. The value of this parameter is the addition of the drive read only bits with binary weighting as follows: 10.01 10.09 10.02 10.10 10.03 10.11 10.04 10.12 10.05 10.13 10.06 10.14 10.07 10.15 10.08 Commander SE Advanced User Guide Issue Number: 4...
-
Page 84: Menu 11: Miscellaneous
(0) no (1) Eur 11.43 Load default parameters (2) USA (0)no (3) br.Eu (4) br.US (0) L1 11.44 Security status (1) L2 (0)L1 (2) Loc 11.45 Select motor 2 parameters 0 or 1 Commander SE Advanced User Guide Issue Number: 4... - Page 85 Note also that the drive holds its transmit buffers on for up to 1.5ms after it has transmitted the last character and therefore the host must not start transmitting a new message until this period has elapsed. Commander SE Advanced User Guide Issue Number: 4...
- Page 86 Unused parameters 11.40 11.41 Status mode timeout 0 ~ 250 Sets the timeout in seconds for the drive display to revert to status mode from parameter mode following no action on the keypad. Commander SE Advanced User Guide Issue Number: 4...
- Page 87 Motor 2 stator resistance 21.13 Motor 2 voltage offset In the event that the ratings are different the parameters are firstly written to the drive and then the drive will trip with C.rtg. Commander SE Advanced User Guide Issue Number: 4...
- Page 88 Changes will only be implemented when the drive is in a disabled state. When the second motor parameter set is active, the decimal point in the centre of the two digit display will be illuminated and 21.15 will change from logic 0 to 1. Commander SE Advanced User Guide Issue Number: 4...
-
Page 89: Menu 12: Threshold Detector
12.08 Variable selector source 1 0.00 Menu.Parameter 0.00 ~ 21.51 12.09 Variable selector source 2 0.00 Menu.Parameter 12.10 Variable select bit 0 or 1 0.00 ~ 21.51 12.11 Variable selector destination 0.00 Menu.Parameter Commander SE Advanced User Guide Issue Number: 4... - Page 90 Please be aware when programming a reference to a variable source select, if the reference is a percentage, then the variable source treats the percentage as a whole number e.g. 50.0% of reference = 50.0Hz. Commander SE Advanced User Guide Issue Number: 4...
- Page 91 This parameter defines the parameter that the variable selector is to control. Only parameters which are not protected can be setup as a destination. If a non valid parameter is programmed the output is not routed anywhere. Commander SE Advanced User Guide Issue Number: 4...
- Page 92 Commander SE Advanced User Guide Issue Number: 4...
- Page 93 Commander SE Advanced User Guide Issue Number: 4...
-
Page 94: Menu 14: Pid Control
14.17 PID hold integrator enable 0 or 1 14.18 PID symmetrical limits enable 0 or 1 ±100.0% 14.19 PID main reference ±100.0% 14.20 PID reference ±100.0% 14.21 PID feedback ±100.0% 14.22 PID error Commander SE Advanced User Guide Issue Number: 4... - Page 95 1. As with the PID enable above, any optional enable programmed must be at 1 for the PID controller to operate, if it is 0 the PID output will be 0. 14.10 PID proportional gain 0 ~ 2.50 1.00 This is the proportional gain applied to the PID error. See 14.08. Commander SE Advanced User Guide Issue Number: 4...
- Page 96 When this parameter is set to 1, 14.13 is used as a symmetrical limit on the PID output, while if it is set to 0 the positive and negative limits can be set differently with parameters 4.13 and 4.14. 14.19 PID main reference ±100.0 This parameter monitors the Main reference input of the PID controller. Commander SE Advanced User Guide Issue Number: 4...
- Page 97 This parameter monitors the reference input of the PID controller. 14.21 PID feedback ±100.0 This parameter monitors the feedback input of the PID controller. 14.22 PID error ±100.0 This parameter monitors the error of the PID controller. Commander SE Advanced User Guide Issue Number: 4...
- Page 98 Commander SE Advanced User Guide Issue Number: 4...
-
Page 99: Menu 15: Fieldbus Option Parameters
Menu 15: Fieldbus option parameters The Menu 15 parameters contained within the Commander SE are generic for all fieldbus options. If they are viewed through SE Soft, the Universal Keypad or a fieldbus option, then the following parameters will appear as Read Only: 15.01, 15.02, 15.06, 15.50. - Page 100 -9999 ~ 9999 Network Cycles per Second Value Description Fieldbus initialisation failure. Initialisation complete but no network running. Network running but no network cycles per second detected. Network cycles per second detected. Commander SE Advanced User Guide Issue Number: 4...
- Page 101 Load option defaults 0 or 1 Cleared once defaults are loaded. 15.31~ Unused parameters 15.49 15.50 Software version zz (Reserved) 0 ~ 99 Indicates the software sub version of the fieldbus module software. Commander SE Advanced User Guide Issue Number: 4...
-
Page 102: Menu 21: Second Motor Map
21.12 Motor 2 stator resistance 0 ~ 99.99Ω BS, MC 21.13 Motor 2 voltage offset 0 ~ 25.5V BF, MC 21.14 Motor 2 leakage inductance 000.0 ~ 500.0mH 21.15 Motor map 2 active 0 ~ 1 Commander SE Advanced User Guide Issue Number: 4... - Page 103 (indicated by 1.49). If more than 1 bit is set the highest number will have priority. Parameter Parameter Parameter Parameter Frequency reference Parameter 1.41 1.42 1.44 1.44 selected 1.49 Analog reference 1 (A1) Analog reference 2 (A2) Preset reference (Pr) Keypad reference (PAd) Precision reference (Prc) Commander SE Advanced User Guide Issue Number: 4...
- Page 104 Sometimes it will be necessary to adjust this when the drive is commissioned because the nameplate value might be inaccurate. Slip compensation will operate correctly for below base speed and field weakening operation. Slip compensation will not cause a frequency in the opposite direction to the post ramp frequency reference. Commander SE Advanced User Guide Issue Number: 4...
- Page 105 This would cause an incorrect slip compensation to be applied and the rpm speed indication would be incorrect. Therefore, the correct number of motor poles should be programmed manually. Commander SE Advanced User Guide Issue Number: 4...
- Page 106 This parameter can be programmed to a digital output to close a second motor contactor when motor map 2 becomes active. See Chapter 12 Applications for a second motor map set-up example. Commander SE Advanced User Guide Issue Number: 4...
-
Page 107: Drive Information
Mains Supply Ground Supply Ground NOTE When a Commander SE Size 2 200 volt unit is used on single phase, use terminals L1 and L2. Figure 4-3 Commander SE Size 5 power terminal connections Optional RFI Optional filter Braking Optional... -
Page 108: Commander Se Power Circuit Layouts
Motor -DC bus Commander SE sizes 2, 3 and 4 can be powered directly on to its + and - DC terminals from a DC power supply without any external softstart circuitry. Commander SE size 5 requires an external softstart circuit, see Figure 4-7. -
Page 109: Gland Plate Holes
Figure 4-6 Commander SE size 5 power circuit layout +DC bus Motor -DC bus Figure 4-7 Method of powering up the Commander SE size 5 by the DC bus using the drives internal inrush resistor Soft start DC Choke contactor... -
Page 110: Control Terminal Connections
Where full EMC precautions are required, the guidelines in section 4.5.2 of the Commander SE User Guide must also be followed to ensure compliance with radio frequency emission limits. This requires the use of one or more screened cables for all wiring to terminals 1 to 14, with the screen bonded to the gland plate (ground). -
Page 111: Control Terminal Specifications
Control terminal specifications The control terminals of the Commander SE drive are double-insulated from the power electronics and single-insulated from the status relay contacts. Providing that the voltage on the status relay contacts does not exceed 110V, the control terminals meet the requirements for SELV in EN50178. However, in the WARNING event of a serious fault in the drive the safety barriers could be breached. - Page 112 If the Commander SE is being used on an application where the terminal timing is critical, the terminal set-up mode should be changed as to remove this 65ms delay. This can be done by setting Parameter 35 to mode 2 or 3 so that the terminals are set up as Run/Stop terminals and not Run Forward/Run Reverse terminals.
- Page 113 BF, I Reset Motor changed Reset and Level 1 I, L1 Autotune The timing of each parameter can be seen in the single line parameter description at the beginning of each menu. Commander SE Advanced User Guide Issue Number: 4...
-
Page 114: Calculating The Enclosure Size
2. If an RFI filter is to be used with each drive, add the dissipation figures from section 4.8 Commander SE losses on page 116 for each RFI filter that is to be installed in the enclosure. - Page 115 Total dissipation: 2 x (158 + 10.1) = 336.2W Insert the following values: 40°C 30°C 2190W Then: × × 336.2 -------------------------------------- - 131m \hr 504ft \min 40 30 – \hr = 0.59ft \min) Commander SE Advanced User Guide Issue Number: 4...
-
Page 116: Commander Se Losses
SE43401850 SE2D200220 SE53402200 SE23200400 SE53403000 1130 SE23400075 SE53403700 1090 1325 SE23400110 SE23400150 SE23400220 SE23400300 SE23400400 Commander SE RFI Filter Losses Max. Power Losses Max. Power Losses Part Number Part Number 4200-6101 4200-6301 12.4 4200-6102 4200-6302 19.5 4200-6103 4200-6303 10.8 4200-6201 10.1... -
Page 117: Derating Curves
Derating Curves 4.9.1 Commander SE Size 1 NOTE There is no derating on 0.25kW and 0.37kW drives. 0.55kW 3 + 6kHz 12kHz FLC (A) Ambient C 0.75kW 3kHz 6kHz 12kHz FLC (A) Ambient C Commander SE Advanced User Guide Issue Number: 4... - Page 118 4.9.2 Commander SE Size 2 200V 0.75kW (1 & 3 phase) 3 + 6kHz 12kHz FLC (A) Ambient C 200V 1.1kW (1 & 3 phase) 3kHz 6kHz 12kHz FLC (A) Ambient C Commander SE Advanced User Guide Issue Number: 4...
- Page 119 200V 1.5kW (1 & 3 phase) 3, 6 & 12kHz FLC (A) Ambient C 200V 2.2kW (1 & 3 phase) 3 & 6kHz 12kHz FLC (A) Ambient C Commander SE Advanced User Guide Issue Number: 4...
- Page 120 200V 4kW (3 phase) 3kHz 6kHz 12kHz FLC (A) Ambient C 400V 0.75kW (3 phase) 3kHz 12kHz 6kHz FLC (A) Typical no load current of 0.75kW motor Ambient C Commander SE Advanced User Guide Issue Number: 4...
- Page 121 400V 1.1kW (3 phase) 3kHz 6kHz 12kHz FLC (A) Ambient C 400V 1.5kW (3 phase) 3, 6 & 12kHz FLC (A) Ambient C Commander SE Advanced User Guide Issue Number: 4...
- Page 122 400V 2.2kW (3 phase) 3 & 6kHz FLC (A) 12kHz Ambient C 400V 3kW (3 phase) 3 & 6kHz 12kHz FLC (A) Ambient C Commander SE Advanced User Guide Issue Number: 4...
- Page 123 400V 4kW (3 phase) 3kHz 6kHz 12kHz FLC (A) Ambient C Commander SE Advanced User Guide Issue Number: 4...
- Page 124 4.9.3 Commander SE Size 3 200V 5.5kW 3kHz 6kHz 12kHz FLC (A) Ambient C 200V 7.5kW 3kHz 6kHz 12kHz FLC (A) Ambient C Commander SE Advanced User Guide Issue Number: 4...
- Page 125 400V 5.5kW 3 & 6kHz 12kHz FLC (A) Ambient C 400V 7.5kW 3kHz 6kHz 12kHz FLC (A) Ambient C Commander SE Advanced User Guide Issue Number: 4...
- Page 126 4.9.4 Commander SE Size 4 11kW 3kHz 6kHz FLC (A) 12kHz Ambient C 15kW 6kHz 3kHz FLC (A) 12kHz Ambient C Commander SE Advanced User Guide Issue Number: 4...
- Page 127 18.5kW 3kHz 6kHz FLC (A) 12kHz Ambient C 4.9.5 Commander SE Size 5 22kW 3kHz 6kHz FLC (A) Ambient C Commander SE Advanced User Guide Issue Number: 4...
- Page 128 30kW 3kHz 6kHz FLC (A) Ambient C 37kW 3kHz 6kHz FLC (A) Ambient C Commander SE Advanced User Guide Issue Number: 4...
-
Page 129: Dc Bus Information
SE11200075 SE33400750 SE2D200075 SE43401100 1020 SE2D200110 1410 SE43401500 1020 SE2D200150 1410 SE43401850 1020 SE2D200220 1880 SE53402200 4400 0.85 SE23200400 1880 SE53403000 4400 0.91 SE23400075 SE53403700 4400 0.63 SE23400110 SE23400150 SE23400220 SE23400300 SE23400400 Commander SE Advanced User Guide Issue Number: 4... -
Page 130: High-Capacitance Cables
SE23400220 SE23400300 SE23400400 *Commander SE size 5 uses a resistor as its inrush current limiting resistor. Its value remains constant as the temperature increases. NOTE The Commander SE sizes 1 to 4 use surge guards as its inrush current limiting resistors. The ohmic values are given at 25 C. -
Page 131: Storage And Transportation
The drive can be safely stored in its “as delivered” state for up to 2 years provided the drive environment is within the limits specified in the General Data section of the Commander SE User Guide. Following a 2 year storage period the DC Bus electrolytic capacitors will need reforming. This is a simple operation requiring a variable AC source (such as a Variac - single and three phase). -
Page 132: Dynamic Braking
To overcome these trips, a braking resistor may be fitted to the drive to dissipate this returned energy. The internal braking control circuitry constantly monitors the drives’ DC Bus to determine when the braking resistor should be operated. Figure 5-1 Commander SE size 2 to 4 power terminal connections Braking... -
Page 133: Sizing A Braking Resistor
× π × 1450 ------------------------------- - × onds The minimum time for deceleration is 7.8 seconds. The required deceleration time is 10 seconds and is therefore within the specification for the drive. Commander SE Advanced User Guide Issue Number: 4... - Page 134 DC Bus voltage more accurately. This reduction in value does not increase the power dissipation since the average voltage across the resistor is reduced by the braking transistor operating as a chopper. Commander SE Advanced User Guide Issue Number: 4...
- Page 135 This could be critical where inaccurate values are used for inertia etc. This safety factor should be increased where necessary to incorporate any sort of inaccuracy in values used. Commander SE Advanced User Guide Issue Number: 4...
-
Page 136: Commander Se Hf Faults
HF02 - If the drive detects an OI.AC - overcurrent trip on power up, the drive will trip on HF02 and not OI.AC HF03 - If a Commander SE is fitted with a heatsink cooling fan and it stops working, the drive will trip on HF03. -
Page 137: Input Line Reactors
53403000, 53403700 NOTE Commander SE sizes 3, 4 and 5 drives include DC chokes, AC reactors are only required for harmonic reduction. NOTE *These input line reactors are not stocked by Control Techniques. Therefore they should be ordered directly from the manufacturer, Skot Transformers, or sourced locally. - Page 138 1Hz and 30Hz are particularly inclined to cause irritating lighting flicker and are subject to stringent limits under EN61000-3-3. Figure 6-1 Input line reactor 4402-0224 All dimensions in mm Figure 6-2 Input line reactor 4402-0225 All dimensions in mm Commander SE Advanced User Guide Issue Number: 4...
- Page 139 Figure 6-3 Input line reactor 4402-0226 All dimensions in mm Figure 6-4 Input line reactor 4402-0227 All dimensions in mm Commander SE Advanced User Guide Issue Number: 4...
- Page 140 Figure 6-5 Input line reactor 4402-0228 All dimensions in mm Figure 6-6 Input line reactor 4402-0229 All dimensions in mm Commander SE Advanced User Guide Issue Number: 4...
- Page 141 Figure 6-7 Input line reactor 4402-0232 All dimensions in mm Figure 6-8 Input line reactor 4400-0240 All dimensions in mm Commander SE Advanced User Guide Issue Number: 4...
- Page 142 Figure 6-9 Input line reactor 4400-0241 All dimensions in mm. Commander SE Advanced User Guide Issue Number: 4...
-
Page 143: Through-Hole Mounting Plates
Through-hole mounting plates These should be manufactured locally, as per the following drawings, as they are not available through Control Techniques. (Not available for Commander SE size 1 and 5; size 5 can be through-hole mounted as standard.) Figure 7-1 Commander SE Size 2... - Page 144 Figure 7-3 Commander SE Size 4 All dimensions in mm Commander SE Advanced User Guide Issue Number: 4...
-
Page 145: Braking Resistor Brackets
Dynamic braking resistor mounting brackets Dynamic braking resistor mounting brackets are available as an option for Commander SE Sizes 2, 3 and 4. These allow the SRF600 braking resistors to be mounted within the footprint of the drive and thus take up less cubicle space. -
Page 146: Dynamic Braking Resistors
These resistors are only recommended for a very light duty. They will certainly not be suitable for heavy braking, especially on the larger kW ratings of drives. Alternative higher power resistors should be sourced. Commander SE Advanced User Guide Issue Number: 4... - Page 147 If these ON times are exceeded, the resistor will be damaged. Alternative braking resistors Alternative braking resistors can be sourced from the following braking resistor manufacturers: Pentagon Electrical Products Ltd www.pentagonelectric.co.uk Cressall Resistors www.cressall.com www.reo.co.uk Commander SE Advanced User Guide Issue Number: 4...
- Page 148 Table 9-1 Commander SE braking resistor values Minimum Recommended Resistor peak Drive resistance (Ω) resistance (Ω) power rating (W)* SE2D200075 SE2D200110 SE2D200150 SE2D200220 SE23200400 SE23400075 SE23400110 SE23400150 SE23400220 SE23400300 SE23400400 SE33200550 11.8 SE33200750 11.8 SE33400550 13.8 SE33400750 13.8 SE43401100 17.2...
-
Page 149: Emc Cable Screening Bracket And Screening Clamps
SK14 14mm diameter cable SK20 20mm diameter cable If these screen terminal blocks are preferred as an alternative to the cable clips, they can be purchased through Phoenix Contact. Phoenix Contact web site: www.phoenixcon.com Commander SE Advanced User Guide Issue Number: 4... -
Page 150: Rfi Filters
RFI Filters 11.1 RFI Filter Dimensions 11.1.1 Commander SE standard and low earth leakage Footprint/ Side mounting RFI Filter: 4200-6102, 4200-6103, 4200-6201, 4200-6205, 4200-6202, 4200-6207, 4200-6203, 4200-6209, 4200-6302, 4200-6301, 4200-6401, 4200-6403. Figure 11-1 RFI filter dimensions Size 1 and 2... - Page 151 3.366 57.6 2.268 4.291 2.298 4.3 x 7.5 0.17 x 0.3 11.1.4 Commander SE Size 2, 3 and 4 Low cost three phase RFI Filter mounting dimensions, 4200- 6303, 4200-6402 and 4200-6404. Figure 11-4 RFI Filter Dimensions ∅ Cable length 300mm (11.811in)
- Page 152 100 3.94 275 10.83 50 1.97 290 11.42 0.28 4200-6117 377 14.84 11.81 150 103 4.05 315 12.4 4.13 330 12.99 0.28 4200-6106 380 14.96 11.57 150 107 4.21 310 12.2 4.13 325 12.79 0.28 Commander SE Advanced User Guide Issue Number: 4...
-
Page 153: Rfi Filter Data
Low cost Footprint Side 4200-6201 SE2D200075 to 4200-6204 SE2D200220 4200-6205 Table 11-3 Commander SE Size 2 - 200 / 400V, 16A, 3 phase Filter Type Mounting Max motor cable length Filter Part Used with Standard Low leakage Low cost Footprint... - Page 154 Further data for the filters is given in the following tables: Table 11-10 Commander SE Size 1 Maximum Operational Worst Case Filter Filter Terminal Power IP Rating Weight Leakage Leakage current Part Tightening Torque Losses Current Current rating Number lb ft 4200-6101 0.49...
-
Page 155: Multiple Motor Applications
To avoid premature operation of the thermal overloads because of the cable capacitance charging currents, they should be connected at the motor end of the cables, and as close to the motor as possible. Commander SE Advanced User Guide Issue Number: 4... - Page 156 It should be the ratio of the expected maximum short-term torque to the (theoretical) rated torque capability of the drive. The factor 2.1 in the expression is the ratio of drive instant trip current to nominal output current, for Commander SE. Step 3 Decide the maximum DC link voltage where the drive is required to produce full torque.
- Page 157 100W per phase are not uncommon. Example A Commander SE 7.5kW with 8 motors of 0.75kW each connected by 140m of multi-core cable. 380VAC supply, maximum output frequency 50Hz, switching frequency 6kHz. Thermal relays in all motor circuits. Step 1 Cable capacitance 130 x 140 x 8 = 0.146uF = 0.154uF...
- Page 158 Drive set-up The Commander SE should be set up into fixed boost mode when operated in a multi-motor application. Set parameter 5.14 = 2 and perform a save routine. The boost level parameter 5.15 may need adjusting depending on the size of the motors.
-
Page 159: Applications
12.1 Connecting digital inputs in parallel Make the following connections when the digital inputs of a number of Commander SE drives are to be controlled from the same source: • Connect the relevant digital input (e.g. terminal 10) on all the drives in parallel. -
Page 160: How To Re-Assign Drive Terminal Input/Output Functions
Preset speeds Preset speeds Preset speeds Preset speeds The Commander SE also has the flexibility to allow the user to change the function of the drives digital input terminals to the functionality that is required. Terminals 9, 10 and 11 Example... -
Page 161: Commander Se User Trips
If the user sends a value via serial communications to parameter 10.38 which already has a trip code associated with it, then the drive will trip on this trip code i.e. if the user sends 1 to 10.38, the drive will trip on tr UU See information after parameter 10.29 for trip codes. Commander SE Advanced User Guide Issue Number: 4... -
Page 162: Analog Input 2
3mA, the drive will trip on cL. Terminal 13 can then be closed so that variable selector out will select 4-20mA without cL trip on parameter 7.11 (4-.20). Then terminal 12 can be opened and the drive reset so that it can run from a 0 to 10V input on terminal 2. Commander SE Advanced User Guide Issue Number: 4... -
Page 163: Drive Overload Alarm Signal Connection
There is not a parameter to display the motor temperature. The motor thermistor can also be enabled through the advanced menus by setting parameter 8.40 = 1 and performing a save by setting xx.00 to 1000 and pressing the Stop/Reset button. Commander SE Advanced User Guide Issue Number: 4... -
Page 164: Drive Set-Up For 8 Preset Speeds
Utilising dual motor set-up The Commander SE has the ability to control 2 different motors of different ratings, so long as they are both within the specification of the drive. Only one motor can be controlled at any one time. The motor 2 parameters should be entered in Menu 21. - Page 165 When the second motor map is implemented with parameter 11.45, the display will show the programmed second motor map parameters. There is a delay of approximately 1 second for the digital output to change state when changing from one motor map to the other. Commander SE Advanced User Guide Issue Number: 4...
-
Page 166: Commander Se Analog Output Offset Scaler
Example 1 The Commander SE does not have an offset trim parameter, so in order to achieve this function the drive’s internal PID loop can be used. For this example the analog output on terminal 6 is required to give 0-10V (0-50Hz) when the analog input goes from 5.5V-10V. - Page 167 Example 2 Because the Commander SE does not have an offset trim parameter, in order to achieve this function the drive’s internal PID loop must be used. In this example the analog output must read 5.5V on terminal 6 when the drive is reading 0Hz and then proceed linearly to give 10V out on terminal 6 when the drive is at maximum speed.
-
Page 168: Brake Set-Up Parameters
This set-up is appropriate for forward or reverse applications but can cause an issue if you go from forward to reverse as the brake can pulse on when the motor speed falls below the set zero speed threshold. If this is the case, the next example using external circuitry must be implemented. Commander SE Advanced User Guide Issue Number: 4... - Page 169 Brake Control IMPORTANT INFORMATION! • Connect a +24V interface relay to the Commander SE according to the connection diagram on the following page. • Control the brake contactor according to the diagram on the following page. • The programming of the Drive Healthy relay should not be changed, it should remain as a Drive Healthy relay.
- Page 170 Analog output (motor speed) +24V output Digital output Digital enable / reset Run forward Run reverse Local (A1) / Remote (A2) speed reference +24V output Status relay (Drive healthy) Status relay (Drive healthy) Commander SE Advanced User Guide Issue Number: 4...
- Page 171 Control circuit diagram Commander SE Down line MCB K1 K2 Brake Brake resistor relay Limit Limit temperature switch switch contact switch Commander SE line contactor 0~3sec Down Motor brake Speed Profile Stop Motor brake Commander SE Advanced User Guide Issue Number: 4...
-
Page 172: Motorised Potentiometer Set-Up
Motorised potentiometer set-up The Commander SE has the possibility to emulate a motorised potentiometer by simply supplying two logic input signals to increase or decrease the potentiometer. The output of the potentiometer may be routed to control any of the drives non-bit parameters such as speed, torque or current limit. -
Page 173: Setting Up Commander Se In Torque Mode
Setting up Commander SE in torque mode As well as the ability to control the drive in standard speed mode, the Commander SE can be programmed to accept a torque reference and hence operate in torque control. Below is an example of how to set up the drive:... -
Page 174: Torque Limiting
Example 1 When the Commander SE is in torque control and is told to stop by opening the run forward or run reverse terminals, sometimes the motor will carry on turning at low frequency. This is due to inaccuracies in the current measurement circuitry on the drive. -
Page 175: Keypad / Terminal Control
The set-up below allows the drive to be started and stopped from the drives terminals and for the speed of the motor to be controlled by the keypads up and down buttons. NOTE This set-up will only function with V01.08.00 (and later) Commander SE User Interface software. Parameter set-up Set 1.22 = 0.4 Preset speed reference 2 to 0.4... -
Page 176: Timed Digital Output
5.15. The level of boost applied can be adjusted by changing the values of parameters 1.21 and 1.22. Commander SE Advanced User Guide Issue Number: 4... -
Page 177: Analog Input Trim
1, the drive will run at maximum trim speed and not go to zero speed. If the motor is required to go to zero speed with zero reference, the following set-up should be used. Commander SE Advanced User Guide Issue Number: 4... - Page 178 PID loop so that the trim is ignored and analog reference 1 will be fed directly into the drives speed loop. Therefore if analog reference 1 is at zero speed, the drives output will be zero. Commander SE Advanced User Guide Issue Number: 4...
-
Page 179: Programmable Threshold Set-Up
12.19 Programmable threshold set-up The Commander SE drive software supports a software controllable numerical comparator. This comparator can be used to detect when an internal or external signal exceeds a user set point threshold. The threshold comparator also provides a hysteresis band to prevent erratic operation at or near the threshold point. -
Page 180: Pid Loop
PID loop The Commander SE drive software has a dedicated PID control loop. This can be configured to control the speed of a motor with reference to a feedback signal. In PID control, the error resulting from differences between the PID feedback and the PID reference source is passed through a limiter, a scaling stage and finally the error is added or taken away from the main reference source. - Page 181 For level control and temperature control, as the feedback signal increases the speed of the motor should increase. To achieve this, set 14.06 = 1 and 14.05 = 1 to invert the feedback signal. Commander SE Advanced User Guide Issue Number: 4...
-
Page 182: 2 X Latching Run Forward Inputs
When the Run Forward 1 terminal is closed momentarily the drive will run forward at the speed requested by analog input 1 When the Run Forward 2 terminal is closed momentarily the drive will run forward at the speed requested by analog input 2 Commander SE Advanced User Guide Issue Number: 4... -
Page 183: Jog Command
When the jog switch is opened, the drive will ramp down and return to the 'rd' condition. Terminal Diagram Local speed ref. input +10V +24V Not Stop Run Forward Run Reverse Relay 1 Latches Enable N/O x 2 +24V Relay 1 +24V coil Commander SE Advanced User Guide Issue Number: 4... - Page 184 If the switch is closed, the drive will run and jog in the reverse direction. Terminal Diagram Local speed ref. input +10V +24V Not Stop Forward / Reverse Relay 1 Latches Enable N/O x 2 +24V Relay 1 +24V coil Commander SE Advanced User Guide Issue Number: 4...
-
Page 185: Flux Braking
The following set-up can be used to dissipate more energy in a motor while decelerating and therefore it has the possibility of eliminating the need for a braking resistor. This may be especially useful on Commander SE size 1 which does not have the capability of dynamic braking. -
Page 186: Variable Trim
If the main speed reference is 10Hz, the trim will be 10Hz +/-10%. Therefore the trim will be from 9Hz to 11Hz. If the main speed reference is 40Hz, the trim will be 40Hz +/-10%. Therefore the trim will be from 36Hz to 44Hz. Commander SE Advanced User Guide Issue Number: 4... -
Page 187: Quickey Compatibility
The Quickey cannot clone between these two versions of drive software YES: The Quickey can clone between these two versions of drive software *V02.00.04 is only used on Commander SE Size 5. 12.26 Controlling the Commander SE via the Universal Keypad... - Page 188 50,000 99.43 HMI 2 lower limit Keypad bottom line display set up Parameter Description Value 99.09 HMI 1 source address 99.10 HMI 1 source parameter 4.01 99.13 HMI 1 text Motor I Commander SE Advanced User Guide Issue Number: 4...
- Page 189 Perform a drive save routine: xx.00 = 1000 and press the Stop / Reset button on the drive. Perform a Universal Keypad save routine: 99.00 = 1000 and press the red Stop / Reset button on the keypad. Commander SE Advanced User Guide Issue Number: 4...
-
Page 190: Open Loop Vector Or Fixed Boost Modes
Commander SE is a voltage source inverter in which the motor voltage is controlled to correctly flux the motor. The Commander SE can be set-up in one of two modes to control the voltage to frequency profile to be applied to the motor: Open loop vector mode or fixed boost mode. - Page 191 Various parameters and values are calculated from these parameters so that if these values are incorrect, these parameters will be incorrect. The power factor is the angle between the active current and the current magnitude at 100% full load motor rated current. Commander SE Advanced User Guide Issue Number: 4...
- Page 192 For an accurate indication of load in parameter 4.20 and also for the motor overload and current limit to be correct, again the correct power factor must be entered. MotorActiveCurrent ------------------------------------------------------------------------ - × PercentageMotorLoad × MotorRatedCurrent PowerFactor Commander SE Advanced User Guide Issue Number: 4...
-
Page 193: Ramp Modes
12.28 Ramp Modes For Commander SE, the are 3 ramp modes - parameter 2.04: • Fast ramp • Standard ramp with normal motor voltage • Standard ramp with high motor voltage Depending on the setting of parameter 6.01, the drive will enter one of the above ramp modes when the run forward, run reverse, run or not stop terminals are opened. -
Page 194: Stopping Modes
Ramp time frequency extended Time 5 seconds Stop command 12.29 Stopping Modes On Commander SE, there are 5 stopping modes - parameter 6.01: • Coast to stop • Ramp to stop • Ramp to stop + timed DC injection braking •... - Page 195 Once Mode 3 - Injection braking stop with detection of zero speed or Mode 4 - Time DC injection braking stop modes have begun, the drive must go through the 'ready' state before being restarted either by stopping, tripping or being disabled. Commander SE Advanced User Guide Issue Number: 4...