Table of Contents
Advertisement
Philips Speech Processing
Safety regulations require that the set be restored to its original
condition and that parts which are identical with those specified
be used.
Published by BK 2007 PSP Service Department
Copyright Philips Austria GmbH, Speech Processing. All rights reserved.
Subject to technical modifications.
- 1 / 26-
SpeechMike II
LFH5260,5262
LFH5270,5272
LFH5274,5276
LFH5282,5284
GB 5122 991 73611
Advertisement
Table of Contents

Related Manuals for Philips SpeechMike II LFH5260


Summary of Contents for Philips SpeechMike II LFH5260
- Page 1 Published by BK 2007 PSP Service Department GB 5122 991 73611 Subject to technical modifications. Copyright Philips Austria GmbH, Speech Processing. All rights reserved. - 1 / 26-...
-
Page 2: Table Of Contents
Table of content Introduction ..................3 General improvements ..................3 Hardware improvements ................3 Product Features................4 Repair Kit ..................5 Disassembly..................6 Exploded view ...................7 SpeechMike installation..............8 System requirements ..................8 Hardware installation Windows 2000 and Windows XP: .......8 Handling the SpeechMike Classic and SpeechMike ClassicPLUS....10 Handling the SpeechMike Pro and SpeechMike ProPLUS ......11 Software ..................12 Control Application ..................12... -
Page 3: Introduction
1 Introduction The SpeechMike II is an evolution of the well-received SpeechMike I. The SpeechMike II is available in a Philips execution and international execution as well as in 2 different Barcode versions. Type no. SpeechMike Classic – Philips style 4-position switch LFH 5260 SpeechMike Classic –... -
Page 4: Product Features
Improved acoustic specification • Improved microphone suspension • Increased frequency range • Increased microphone sensitivity range 2 Product Features Classic Classic Classic PLUS Classic Classic Pro Pro Classic BC Speech Mike Plus Plus Plus BC Type LFH 5260 5262 5270 5272 5274 5276 5282 5284... -
Page 5: Repair Kit
PHI … Philips style 4-position switch INT … International (US) style 4-position switch 3 Repair Kit For after warranty repairs three repair kits are provided to repair a defective SpeechMike. The content is: SpeechMike Kit Position PH-S INT-S PH/INT-T Upper housing 5260... -
Page 6: Disassembly
4 Disassembly - 6 / 26-... -
Page 7: Exploded View
5 Exploded view - 7 / 26-... -
Page 8: Speechmike Installation
Description Ring plastic Track ball Slider knob Upper housing Speaker Upper key set Light conductor Microphone grill Scroll wheel Microphone Carrier unit Ring magnetic Cushion Slide switch Prism P.C.B 1 P.C.B 2 Lower key set Lower housing USB cable 6 SpeechMike installation 6.1 System requirements •IBM-compatible PC with Pentium II, 233MHz processor (Pentium III, 500MHz recommended) - Page 9 Windows 98 SE and Windows ME:Note: The Windows 98 Second Edition CD contains the USB drivers for the microphone and loudspeaker only. The drivers for the LED display and dictation buttons must be installed from the Driver & Utility CD before connecting the hardware.
-
Page 10: Handling The Speechmike Classic And Speechmike Classicplus
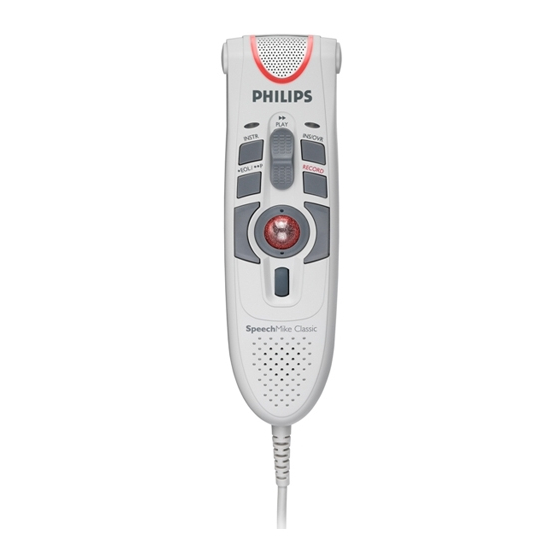
6.3 Handling the SpeechMike Classic and SpeechMike ClassicPLUS Place the SpeechMike in the palm of your hand with the thumb on the 4-position switch and your index finger across the trigger underneath. Alternatively, you can use your SpeechMike on your desktop like a conventional trackball. - 10 / 26-... -
Page 11: Handling The Speechmike Pro And Speechmike Proplus
SpeechMike Classic and SpeechMike ClassicPLUS button functions When the SpeechMike Classic is installed correctly, the Record, Play/Stop, Fast Rewind and Fast Forward functions and the trigger button are available and ready for use. However, the functionality of each button depends on the application and whether the buttons are used in a programmed mode. -
Page 12: Software
Display states of the feedback LEDsRecord LED. The multicolor recording indicator LED is positioned around the microphone inlet. Its colors and display mode (blinking or static lit) give you information about the recording status of the SpeechMike device as follows: Red - staticThe device is in Record (overwrite) mode. -
Page 13: Changes For Speechmike Ii Barcode
Functions can be enabled, disabled or even re-assigned. It can be set up by running the Setup.exe in the folder >Tools\Device Configuration Tool< on the CD. 7.3 Changes for SpeechMike II Barcode Title Description 1 Add barcode column When a SpeechMike II Barcode is connected the “Map Barcode”... -
Page 14: Other Improvements
Detailed description can be found in the SDK section under Barcode keyboard mode vs. barcode event mode 7.4 Other improvements Title Description 1 Add simple mode view To make life easier for the user the most common settings can be done in a simple mode view. The simple mode view looks as follows: 7.5 Bug fixes Solution... -
Page 15: Latest Driver & Utility Software Download
8 Latest Driver & Utility Software download • Go to: http://www.dictation.philips.com/ • Go to: Support Center > Software Downloads • Click the drop down list “Desktop Dictation” and select SpeechMike Classic SpeechMike Pro • Click the icon • After that a list with available software downloads will be displayed. -
Page 16: How To Do A Firmware Upgrade
8.3 How to do a firmware upgrade 1. Start the “FirmwareUpgradeWizard.exe” 2. The welcome screen appears, a. Click next 3. Device Connection Page a. Follow the instructions on the screen and connect the SpeechMike to the PC. b. Click Next 4. - Page 17 5. Firmware download page: a. This page will automatically present the appropriate firmware for your device. b. Click Next and the firmware will be uploaded automatically. 6. Finish page - 17 / 26-...
-
Page 18: Windows Driver Installation
a. Click Finish 8.4 Windows Driver installation A Windows driver installation page will appear if the SpeechMike is connected to that USB port in firmware upgrade mode the first time. Windows will aks you to install the “TI DFU class drivers” If a Firmware Upgrade has already been done on that USB port once continue this steps do not have to be done. - Page 19 b. Click next 3. Found new hardware wizard page 3 b. Select “Include this location in the search” c. Click on “Browse” and browse to the directory of the Firmware upgrade wizard 4. Browse for folder dialog appears a. Browse for the folder which contains the Firmware Upgrade Wizard b.
- Page 20 5. Found new hardware wizard page 3 c. The appropriate directory will be displayed in the dialog. d. Click next 6. The drivers will be installed 7. During driver installation on Windows XP PCs a warning message can appear: - 20 / 26-...
- Page 21 8. Click continue anyway 9. The Driver installation will be completed 10. Click Finish - 21 / 26-...
-
Page 22: Schematic Diagram
9 Schematic diagram 9.1 SpeechMike II part 1 - 22 / 26-... -
Page 23: Speechmike Ii Part 2
9.2 SpeechMike II Part 2 - 23 / 26-... -
Page 24: Circuit Description
10 Circuit Description The SpeechMike II consists of 5 main function groups, which are: • Analogue processing • Digital processing • Microprocessor • I/O expander • Optical trackball sensor • Buttons and LED’s 10.1 Analogue processing IC 301 The sound is taken up by the microphone of the SpeechMike and taken up by IC301. -
Page 25: Micro Controller Ic101
Analogue output The analogue output is on Pin 17 and 18 where the speaker is connected Power The 3V is supplied on Pin 19 and Ground on pin 20 Barcode scanner (optional) Whenever the barcode scanner has a valid information a BEEP information will be generated by the scanner and send via pin4 of CN501 and forwarded to pin 24 of IC 302 this BEEP will be transferred to the speaker in the SpeechMike Where the customer will here this information... -
Page 26: In/Out Expander
Besides managing the audio information the micro Controller is communicating via a proprietary communication channel with the 10.4 In/Out expander IC401 is an 8-bit µP used as In/out expander and ADC for the buttons and indication leds of the SpeechMike II. The communication between µ Controller IC101 and IC 401 is handled via a proprietary communication system using pin 5 PER Clock and pin 6 PER Data.