Axis P5635-E User Manual
Mk ii ptz dome network camera
Hide thumbs
Also See for P5635-E:
- User manual (70 pages) ,
- Installation manual (34 pages) ,
- Repainting instructions (5 pages)
Table of Contents
Advertisement
Advertisement
Table of Contents

Related Manuals for Axis P5635-E


Summary of Contents for Axis P5635-E
-
Page 1: User Manual
AXIS P5635-E Mk II PTZ Dome Network Camera User Manual... -
Page 2: Table Of Contents
Connectors ........... . AXIS Multicable C I/O Audio Power ....... . . -
Page 3: Product Overview
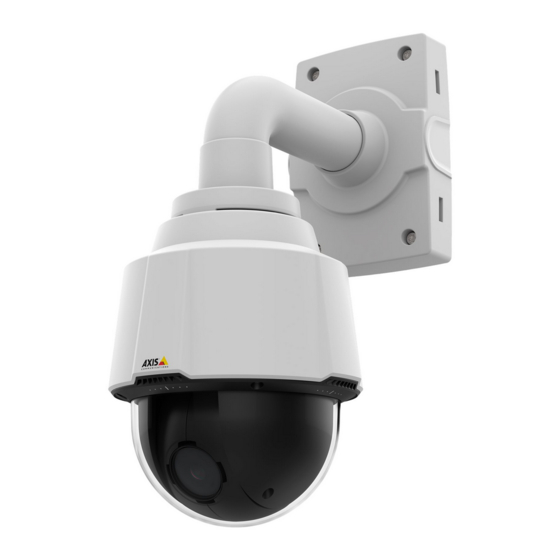
AXIS P5635-E Mk II PTZ Dome Network Camera Product overview Product overview NOTICE TICE TICE Make sure the dome is attached in operation mode, otherwise focus may be affected. Ground screw Mounting screws (3) Network connector (PoE+) Multi-connector with cover (Do not remove the cover unless an I/O-cable is connected) -
Page 4: How To Access The Product
If you do not know the IP address, use AXIS IP Utility to locate the product on the network. For information about how to discover and assign an IP address, see the document Assign an IP Address and Access the Video Stream on Axis Support web at axis.com/support... - Page 5 AXIS P5635-E Mk II PTZ Dome Network Camera How to access the product The default root account has full privileges and should be reserved for administrative tasks. Always create a user account with limited privileges for daily use. This reduces the exposure of the administrative account.
-
Page 6: Setup
AXIS P5635-E Mk II PTZ Dome Network Camera Setup Setup About the product's built-in help You can access the built-in help through your product’s web page. The help provides more detailed information on the product’s features and their settings. Image quality How to focus faster using focus recall areas To save the focus settings at a specific pan/tilt range, add a focus recall area. - Page 7 Note If you use WDR, you may experience some WDR artifacts in the image. Find out more about WDR and how to use it at axis.com/web-articles/wdr How to hide parts of the image with privacy masks If you want to hide parts of the image due to privacy reasons, use one or several privacy masks.
-
Page 8: Streaming And Storage
H.264 or MPEG-4 Part 10/AVC Note H.264 is a licensed technology. The Axis product includes one H.264 viewing client license. Installing additional unlicensed copies of the client is prohibited. To purchase additional licenses, contact your Axis reseller. H.264 can, without compromising image quality, reduce the size of a digital video file by more than 80% compared to the Motion JPEG format and by as much as 50% compared to the MPEG-4 standard. -
Page 9: Overlays
AXIS P5635-E Mk II PTZ Dome Network Camera Setup 4. Click Ok. Overlays About overlays Overlays are superimposed over the video stream. They are used to provide extra information during recordings, such as a timestamp, or during product installation and configuration. -
Page 10: Events
5. Go to Settings > System > Events > Action rules and add an action rule. 6. Type a name for the action rule. 7. From the list of triggers, select Applications and then select AXIS Video Motion Detection (VMD). 8. From the list of actions, select PTZ Control and then select Preset Position. - Page 11 1. Remove the plug from the camera’s multi-connector and connect the multicable. 2. Connect the wires from the PIR sensor to the input pin, see AXIS Multicable C I/O Audio Power. 3. Connect the wires from the switch to the output pin, see AXIS Multicable C I/O Audio Power.
- Page 12 AXIS P5635-E Mk II PTZ Dome Network Camera Setup 2. Create the preset position that covers the entrance of the gate and name it, for example, “Gate entrance”. Create action rules For the camera to open the gate when the PIR sensor detects someone nearby, you need to create an action rule in the camera: 1.
- Page 13 3. Create the zoomed-in preset position so that it covers the area in the image where you assume that the license plate will appear. Create a motion detection profile: 4. Go to Settings > Apps and open AXIS Video Motion Detection. 5. Create a profile that covers the entrance of the gate and then save the profile. Create an action rule: 6.
-
Page 14: Applications
Applications About applications AXIS Camera Application Platform (ACAP) is an open platform that enables third parties to develop analytics and other applications for Axis products. To find out more about available applications, downloads, trials and licenses, go to axis.com/applications To find the user manuals for Axis applications, go to axis.com Note •... -
Page 15: Troubleshooting
To find the latest firmware and the release notes, go to axis.com/support/firmware 1. Download the latest firmware file to your computer, available free of charge at axis.com/support/firmware 2. Log in to the product as an administrator. -
Page 16: Technical Issues, Clues And Solutions
Axis product. Check all cabling and reinstall the product. Possible IP address conflict The static IP address in the Axis product is used before the DHCP server sets a dynamic address. with another device on the... -
Page 17: Performance Considerations
Heavy network utilization due to poor infrastructure affects the bandwidth. • Viewing on poorly performing client computers lowers perceived performance and affects frame rate. • Running multiple AXIS Camera Application Platform (ACAP) applications simultaneously may affect the frame rate and the general performance. -
Page 18: Specifications
Resetting the product to factory default settings. See How to reset to factory default settings on page 15. • Connecting to an AXIS Video Hosting System service. To connect, press and hold the button for about 3 seconds until the status LED flashes green. -
Page 19: Axis Multicable C I/O Audio Power
TICE AXIS Multicable C I/O Audio Power When connecting external equipment to the product, a separetely sold AXIS Multicable C I/O Audio Power 1 m/ 5 m is required in order to maintain the product’s IP rating. Connect the multicable to the product’s multi-connector. To locate the multi-connector, see Product overview. -
Page 20: Axis 10-Pin Push-Pull System Connector (Sold Separately)
I/O configured as output Axis 10-pin push-pull system connector (sold separately) When connecting external equipment to the Axis product, an Axis 10-pin Push-Pull System Connector (sold separately) is required in order to maintain the product’s IP rating. Mounting the wires requires a crimp tool. To get detailed mounting instructions of the wires, go to axis.com/support Connect the 10-pin push-pull system connector to the product’s multi-connector. - Page 21 AXIS P5635-E Mk II PTZ Dome Network Camera Specifications Function Notes Specifications 9, 10 The input is polarity independent. Use a Safety Extra Low AC/DC Power 24 V AC/DC Voltage (SELV) compliant limited power source (LPS) with input either a rated output power limited to ≤100 W or a rated output current limited to ≤5 A.
- Page 22 User Manual Ver. M8.10 AXIS P5635-E Mk II PTZ Dome Network Camera Date: July 2017 © Axis Communications AB, 2016 - 2017 Part No. 1497744...