
Related Manuals for Zhone zNID-GPON-2403


Summary of Contents for Zhone zNID-GPON-2403
- Page 1 Zhone zNID 24xx Series Hardware Installation Guide For software version 2.4 August 2011 Document Part Number: 830-03747-01...
- Page 2 Further, Zhone Technologies reserves the right to revise this publication and to make changes from time to time in the contents hereof without obligation of Zhone Technologies to notify any person of such revision or changes.
-
Page 3: Table Of Contents
ABLE OF ONTENTS Style and notation conventions................5 Typographical conventions..................6 Related documentation.....................6 Acronyms........................7 Contacting Global Service and Support...............9 FCC Statement ......................10 CE..........................10 Important Safety Instructions................12 Laser Safety Instructions..................12 General Instructions ....................13 Chapter 1 zNID 24xx Series ....................15 Overview ........................15 zNID 24xx series components ................17 zNID 24xx series features..................19 zNID 24xx models ....................20 GPON models....................21... - Page 4 Table of Contents Chapter 2 zNID 24xx Installation ..................31 Install the zNID ......................31 Installation precautions ...................33 Mount the zNID ......................33 Wall mount with fiber tray ................34 Wall mount without fiber tray ................36 Desktop with fiber tray..................37 Manage the optical cable ..................38 Fiber handling....................38 Testing optical power ..................38 Optical fiber cable placement in the zNID fiber tray..........39...
-
Page 5: Style And Notation Conventions
BOUT UIDE This guide is intended for use by installation technicians, system administrators, or network administrators. It explains how to install the zNID 24xx series enclosure, electronics and cabling. Style and notation conventions This document uses the following conventions to alert users to information that is instructional, warns of potential damage to system equipment or data, and warns of potential injury or death. -
Page 6: Typographical Conventions
• zNID Quick Installation Instructions for the zNID you are installing. These instructions are shipped with the zNID, but are also available on the Zhone website. • zNID 24xx Configuration Guide — explains how to use the zNID web interface and describes the system commands and parameters. -
Page 7: Acronyms
Acronyms Acronyms The following acronyms are related to Zhone products and may appear throughout this manual: Table 1: Acronyms and their descriptions Acronym Description Active E Active Ethernet, also known as Gigabit Ethernet Angled physical contact (for fiber connector) Coax... - Page 8 North American T1 and the European E1. Ultra physical contact (for fiber connector) Wi-Fi Wireless local area network (trademark of Wi-Fi alliance) Voice Activity Detection VOIP Voice over IP zNID Zhone Network Interface Device Zhone Management System zNID Hardware Installation Guide...
-
Page 9: Contacting Global Service And Support
Contacting Global Service and Support Contacting Global Service and Support Support for this product is provided by your Internet service provider zNID Hardware Installation Guide... -
Page 10: Fcc Statement
(1) This device may not cause harmful interference, and (2) this device must accept any interference received, including interference that may cause undesired operation. For the following equipment: • ZNID-GPON-2402-XXX • ZNID-GPON-2403-XXX • ZNID-GPON-2424-XXX • ZNID-GPON-2425-XXX • ZNID-GPON-2426-XXX •... - Page 11 95/EC) and R&TTE (1999/5/EC).The equipment has passed The test was performed according to thefollowing European standards: • ETSI EN 301 489-17 V2.1.1: 2009 • ETSI EN 301 489-1 V1.8.1: 2008 • ETSI EN 300 328 V1.7.1: 2006 • EN 62311: 2008 •...
-
Page 12: Important Safety Instructions
Laser Safety Instructions Zhone equipment and associated optical test sets use laser sources that emit light energy into fiber cables. This energy is within the red (visible) and infrared (invisible) regions of the electromagnetic spectrum. -
Page 13: General Instructions
Important Safety Instructions • Prevent direct exposure to optical fiber ends or optical connector ends where laser signals are directly accessed. Do not handle pieces of optical fiber with fingers. Use tweezers or adhesive tape to lift and discard any loose optical fiber ends. - Page 14 About This Guide zNID Hardware Installation Guide...
-
Page 15: Chapter 1 Znid 24Xx Series
GPON ONTs which are standards based Consumer Premises Equipment (CPE) designed for advanced triple-play deployments. The indoor models in Zhone's zNID product line of ONT's provide a lower cost alternative to outdoor ONT solutions. The small package contains many features including QoS, VoIP, and multicast video support. - Page 16 Zhone's Voice Gateway to traditional Class 5 TDM switches, while both MGCP and SIP are supported for direct connection to a VoIP Softswitch. This flexibility allows Zhone's 42xx, 9xxx and 24xx Series ONTs to work in nearly all Telco networks, with interoperability support for a broad array of Softswitches.
-
Page 17: Znid 24Xx Series Components
Overview zNID 24xx series components The zNID 24xx series indoor ONTs provide a variety of interfaces for triple play deployments. These indoor units may be mounted to a wall or placed on a desktop. Figure 1: The interfaces, displays and buttons for the zNID 24xx Depending upon the zNID model selected, the interfaces on the zNID can include: •... - Page 18 zNID 24xx Series Figure 2: The zNID 24xx series attaches to a fiber tray base Figure 3: The unit may also be wall mounted, with or without a fiber tray zNID Hardware Installation Guide...
-
Page 19: Znid 24Xx Series Features
The 24xx series of zNIDs share a common SW architecture with the 42xx and 9xxx series of zNIDs, including the same intuitive Web interface and command line interface. The zNID is also managed by the Zhone Network Management System (ZMS),using SNMP. Software upgrades and configuration backups can be handled automatically by the ZMS using the EZ Touch management feature. -
Page 20: Znid 24Xx Models
zNID 24xx Series zNID 24xx models Figure 4: zNID 24xx models Caution: To ensure adequate ventilation, nothing should be placed on the top of the zNID 24xx. zNID 24xx units should not be stacked. zNID Hardware Installation Guide... -
Page 21: Gpon Models
GPON models The zNID series GPON models have the following interfaces: Model Description zNID-GPON-2402 GPON Uplink, 2 GigE zNID-GPON-2403 GPON Uplink, 2 GigE, RFV zNID-GPON-2424 GPON Uplink, 2 POTS, 4 GigE zNID-GPON-2425 GPON Uplink, 2 POTS, 4 GigE, RFV zNID-GPON-2426... -
Page 22: Znid 24Xx Series Specifications
zNID 24xx Series zNID 24xx series specifications The possible interfaces and number of interfaces depend on the specific model, see zNID 24xx models on page 20 for a list of models and their interfaces. Table 2: zNID 24xx common specifications Specifications Values Dimensions:... - Page 23 zNID 24xx models Table 2: zNID 24xx common specifications (Continued) Specifications Values Protocol Support • GPON uplink – ITU-T G.984 (GPON) – Multiple T-CONTS per device – Multiple GEM Ports per device – 1:1 mapping of GEM ports into T-CONTS with priority queue based scheduling –...
- Page 24 64 bit and 128 bit WEP support • MAC address filtering • DDNS IPTV • IGMP multicast • IGMP snooping Management • Zhone Management System – EZ Touch – CPE Manager • OMCI • Web UI • Command Line Interface •...
-
Page 25: Interface Comparison Of Znid 24Xx Models
Interface comparison of zNID 24xx models Table 3: Feature comparison of GPON model Model Upstream Interface POTS 10/100/1000 RF Video WiFi zNID-GPON-2402 GPON zNID-GE-2402 Gigabit Ethernet zNID-GPON-2403 GPON zNID-GPON-2424 GPON zNID-GE-2424 Gigabit Ethernet zNID-GPON-2425 GPON zNID-GPON-2426 GPON zNID-GE-2426 Gigabit Ethernet... -
Page 26: Znid 24Xx Series Dimensions
zNID 24xx Series zNID 24xx series dimensions Figure 5: zNID 24xx dimensions Figure 6: zNID fiber tray dimensions zNID Hardware Installation Guide... -
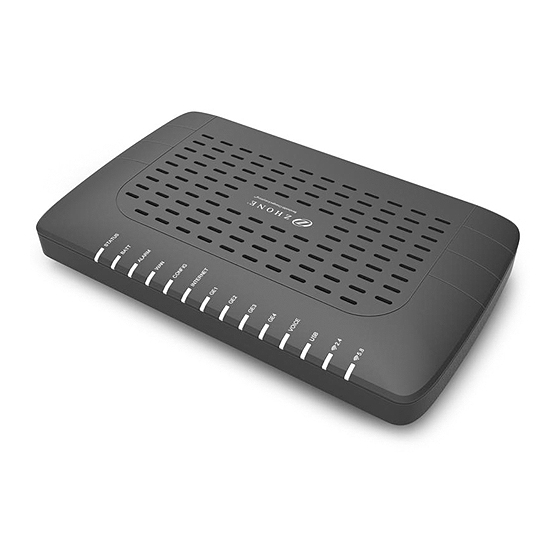
Page 27: Znid 24Xx Series Leds
zNID 24xx series LEDs zNID 24xx series LEDs The LEDs vary depending on the model of zNID. See zNID 24xx models on page 20 for a complete list of zNID models. GPON Figure 7: zNID-GPON-24xx LEDS Table 4: zNID-GPON-24xx LEDs LED Name Color Indicates... - Page 28 zNID 24xx Series Table 4: zNID-GPON-24xx LEDs LED Name Color Indicates Green: On Ranged successfully Green: Slow blink Ranging in progress (1/sec) Not ready for ranging or not provisioned CONFIG Green: On OMCI provisioning is complete Green: Rapid blink OMCI provisioning is written to (10/sec) FLASH Green: Slow blink...
-
Page 29: Logging In To The 24Xx Series Znid
Connect an Ethernet cable from your computer to GE1 on the zNID. Launch a browser and point it to 192.168.1.1. Enter the username and password. The default username/password is admin/zhone. To login with a telnet session: Connect an Ethernet cable from your computer to GE1 on the zNID Launch a telnet session and point it to 192.168.1.1. - Page 30 zNID 24xx Series zNID Hardware Installation Guide...
-
Page 31: Chapter 2 Znid 24Xx Installation
NID 24 NSTALLATION This chapter can be used as separate installation instructions. This chapter explains how to unpack the zNID 24xx and install the zNID 24xx hardware. It includes the following sections: • Install the zNID, page 31 • Overview of zNID 24xx series installation, page 32 Install the zNID This section describes the procedures for installing the zNID. - Page 32 zNID 24xx Installation Overview of zNID 24xx series installation Select the location Ensure that the environment is free of dust and excessive moisture and has sufficient ventilation. The zNID may be installed in a vertical or horizontal orientation (wall or desktop.
-
Page 33: Installation Precautions
Installation precautions Installation precautions Maximum operating temperature should not exceed the range of 0° C to 40° C (32° F to 104° F). Ensure that proper cable grades are used for all system and network connections. For best results, use the cables and connectors recommended in this document. -
Page 34: Wall Mount With Fiber Tray
zNID 24xx Installation Wall mount with fiber tray The zNID fiber tray can be mounted on a wall using four screws. Caution: To prevent damage to the enclosure, use screws appropriate to the mounting surface. Caution: Install the zNID fiber tray a proper height from the floor. Mounting the zNID fiber tray on a wall To mount the zNID fiber tray on a wall: Figure 9: Installing the fiber tray on a wall... - Page 35 Installation precautions Prepare the surface for mounting. Hold the bracket level in the desired location and mark the hole positions. The holes for the fiber tray are 8 cm apart (about 3.15 inches or a little less than 3 and 3/16 inches) on the horizontal axis and 4 cm apart (about 1.57 inches or about 1 and 9/16 inches) on the vertical axis.
-
Page 36: Wall Mount Without Fiber Tray
zNID 24xx Installation Wall mount without fiber tray Caution: To prevent damage to the enclosure, use screws appropriate to the mounting surface. Caution: Install the zNID fiber tray a proper height from the floor. Caution: The zNID should always be mounted in a vertical orientation. -
Page 37: Desktop With Fiber Tray
Installation precautions To mount the zNID directly on a wall: Prepare the surface for mounting. Mark the hole positions. The holes for the fiber tray are 13 cm apart (about 5.12 inches or a little less than 5 and 1/8 inches) on the horizontal axis. Drill the holes. -
Page 38: Manage The Optical Cable
zNID 24xx Installation Manage the optical cable When making a fiber optic connection, avoid touching the fiber cable ends to the outside of the mating connector. Touching can contaminate the connectors. Fiber handling Before making any connections, be sure that the optical cable fiber tips and components are clean and free of dust and debris. -
Page 39: Optical Fiber Cable Placement In The Znid Fiber Tray
Installation precautions Optical fiber cable placement in the zNID fiber tray Using a fiber tray involves routing the optical fiber around the spools, then physically to the SC connector in the zNID. Note: Sharp bends in fiber cables create undesirable optical attenuation or loss. -
Page 40: Connect To Network
Although Zhone optical products have a Class I certification, hazardous exposure to laser radiation can occur when fibers are connected, disconnected or broken. Handling of optical fibers without dust caps increases the risk of exposure. -
Page 41: Connect Power
Connect to network Connect power The zNID is powered by AC power using the adapter which is shipped with the unit. An optional uninterruptable power supply may also be used. Figure 11: The zNID 24xx has both AC input and UPS input for power zNID Hardware Installation Guide... -
Page 42: Connecting Phone Terminals
zNID 24xx Installation Connecting phone terminals The zNID 24xx models have the ability to connect POTS via RJ-11. Connecting POTS The zNID 24xx models have the ability to connect POTS via RJ-11 connector. The terminal connections are shown in Figure Locate the subscriber’s telephone wire pair. -
Page 43: Connecting Ethernet Ports
Connect to network Connecting Ethernet ports The zNID-24xx series models have up to 4 Gigabit Ethernet ports. Connect Ethernet ports The zNID provides RJ 45s for Ethernet connections. Ethernet connections can be used to deliver any packet services including IPTV, data, and VoIP. For Ethernet services, connect a Category 5 or a Category 6 cable to an RJ45 interface as shown in Figure... -
Page 44: Connecting Coaxial Port
zNID 24xx Installation Connecting coaxial port The zNID-24xx series models have a coaxial port for RF video. Connect coaxial port The zNID provides a coaxial port for RF Video. Locate the premises’ coaxial cable. Screw the coaxial connector into the coaxial connector Figure 14: The coaxial port. -
Page 45: Connecting Usb Port
Connect to network Connecting USB port The zNID-24xx series models have a USB 2.0 port for USB storage server. Figure 15: The USB port. Complete the zNID installation After making the physical connections, complete the installation by checking the LEDs, the grounding for the full enclosure, closing the outer cover, sealing the entry holes, and screwing in the final screw to secure the unit. - Page 46 zNID 24xx Installation zNID Hardware Installation Guide...
-
Page 47: Index
NDEX Ethernet connection 43 interfaces supported 22 LEDs 45 model numbers 21 power 41 voice support 24 wall mount 34 zNID Ethernet connection 43 interfaces 22 LEDs 45 model numbers 21 power 41 voice support 24 wall mount 34 zNID Hardware Installation Guide... - Page 48 Index zNID Hardware Installation Guide...