Table of Contents
Advertisement
www.electronicsrepair.net
SERVICE MANUAL
CONTENTS
SPECIFICATIONS .................................................................... 3
PANEL LAYOUT ........................................................................ 4
DISASSEMBLY PROCEDURE ................................................. 5
LSI PIN DESCRIPTION .......................................................... 17
IC BLOCK DIAGRAM .............................................................. 20
CIRCUIT BOARDS ................................................................. 21
INSPECTIONS ........................................................................ 38
BLOCK DIAGRAM
CIRCUIT BOARD LAYOUT & WIRING
OVERALL CIRCUIT DIAGRAM
CL
001772
HAMAMATSU, JAPAN
Advertisement
Chapters
Table of Contents

Related Manuals for Yamaha Clavinova CLP-265GP


Summary of Contents for Yamaha Clavinova CLP-265GP
-
Page 1: Table Of Contents
www.electronicsrepair.net SERVICE MANUAL CONTENTS SPECIFICATIONS ..............3 PANEL LAYOUT ................ 4 DISASSEMBLY PROCEDURE ..........5 LSI PIN DESCRIPTION ............17 IC BLOCK DIAGRAM .............. 20 CIRCUIT BOARDS ..............21 INSPECTIONS ................ 38 DATA BACKUP ................ 43 MIDI IMPLEMENTATION CHART ........... 47 MIDI DATA FORMAT ............... - Page 2 IMPORTANT NOTICE This manual has been provided for the use of authorized Yamaha Retailers and their service personnel. It has been assumed that basic service procedures inherent to the industry, and more specifically Yamaha Products, are already known and understood by the users, and have therefore not been restated.
-
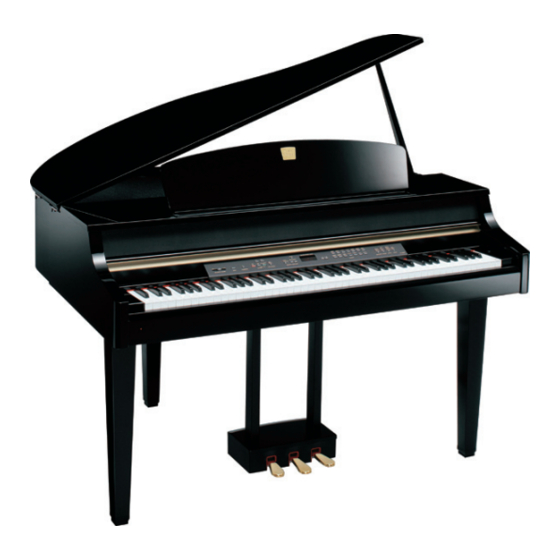
Page 3: Specifications
CLP-265GP ■ SPECIFICATIONS Keyboard GH3 keyboard 88 keys (A-1 - C7) Sound Source AWM Stereo Sampling Polyphony (Max.) Voice Selection Effect Reverb, Effect, Brilliance Volume Master Volume Controls Dual, Metronome, Transpose, Touch (Hard/Medium/Soft/Fixed), Functions Recording/Playback 2-part recording/playback (three user songs), Tempo Adjustment, Sync Start Pedal Damper (with half-pedal effect), Sostenute, Soft Demo Songs... -
Page 4: Panel Layout
CLP-265GP ■ PANEL LAYOUT TEMPO / OTHER VALUE LEFT RIGHT ON/OFF USER TEMPO METRONOME STOP PLAY/PAUSE PRESET FUNCTION SYNC START MASTER VOLUME DEMO TRANSPOSE SONG SONG SELECT TEMPO / FUNCTION GRAND GRAND E.PIANO E.PIANO HARPSI- HARPSI- VIBRA- PIANO 1 PIANO 2 CHORD 1 CHORD 2 PHONE... -
Page 5: Disassembly Procedure
CLP-265GP ■ DISASSEMBLY PROCEDURE Music Rest Assembly Top Board Assembly (L) (Time required: About 1 minute) (Time required: About 3 minutes) Remove the four (4) screws marked [S13]. The music Remove the two (2) hinge shafts. The top board rest assembly can then be removed. (Fig.1) assembly (L) can then be removed. - Page 6 CLP-265GP U model only MA Cover Assembly FU Cover [107B] MA80S FU60 [107A] DJACK NET1 FU60 Jack Assembly MA80S Assembly AJACK PK Connector Power Transformer FU60 Assembly MA80S [S01C] [S01A] [S03] [S02A] [S02B] [S01B] [S01D] [S08] [71] [71] [S21] : U model only [S01A-D]: Bind Head Tapping Screw-1 3.5X12 MFZN2W3 (WE970900) [S02A,B]: Bind Head Tapping Screw-1 3.5X20 MFZN2W3 (WE971500) [S03]:...
-
Page 7: Remove The Top Board Assembly (L) . (See Procedure
CLP-265GP AJACK & DJACK Circuit Boards Circuit Boards & Assemblies (Main Unit) (Time required: About 7 minutes) (Time required: About 6 minutes each) Remove the top board assembly (L) . (See procedure 2.) Remove the top board assembly (L) . (See procedure 2.) Remove the top board assembly (S). - Page 8 CLP-265GP <Bottom view> MA80S [1]: Bind Head Tapping Screw-B 4.0X8 MFZN2W3 (WE974600) [2]: Bind Head Tapping Screw-B 3.0X10 MFZN2W3 (WE774200) PK-LF Cable [3]: Bind Head Tapping Screw-B 3.0X16 MFZN2W3 (WE973400) (Fig.8) (Fig.10) FU60 Circuit Board (Time required: About 7 minutes) <Bottom view>...
- Page 9 CLP-265GP 11-7 MV Circuit Board Power Switch Assembly 11-7-1 Remove the slide knob (MASTER VOLUME). (Fig.12) (Time required: About 10 minutes) 11-7-2 Remove the two (2) screws marked [50A]. The panel 13-1 Remove the top board assembly (L) . (See procedure 2.) holder assembly can then be removed.
- Page 10 CLP-265GP PL Circuit Board Keyboard Assembly (Time required: About 12 minutes) (Time required: About 11 minutes) 16-1 Remove the top board assembly (L) . (See procedure 2.) 15-1 Remove the top board assembly (L) . (See procedure 2.) 16-2 Remove the top board assembly (S). (See procedure 3.) 15-2 Remove the top board assembly (S).
- Page 11 CLP-265GP [S05] [S04] [S05] Keyboard Assembly [7]: Bind Head Tapping Screw-1 3.5X10 MFZN2W3 (WE970800) [S04]: Pan Head Screw 5.0X30 MFZN2W3 (WF786700) [S05]: Bind Head Tapping Screw-1 4.0X14 MFZN2W3 (WE971900) (Fig.15) Keyboard Assembly Keyboard Assembly (Fig.16)
- Page 12 CLP-265GP Speaker (Woofer) Speaker Grille Assembly, Partition Assembly C (Time required: About 8 minutes each) (Time required: About 7 minutes) 19-1 Remove the top board assembly (L). (See procedure 2.) Before disassembling the speaker grille assembly and the 19-2 Remove the support bar assembly. (See procedure 17.) partition assembly C, surely remove the top board 19-3 Remove the speaker grille assembly.
-
Page 13: Remove The Top Board Assembly (S). (See Procedure
CLP-265GP Speaker (Tweeter) Rack Assembly (L, R) (Time required: About 6 minutes each) (Time required: About 7 minutes each) 20-1 Remove the top board assembly (L) . (See procedure 2.) 21-1 Remove the top board assembly (L) . (See procedure 2.) 20-2 Remove the top board assembly (S). -
Page 14: Remove The Key Cover Assembly. (See Procedure
CLP-265GP 22-9 Arm Assembly L Pedal Box Unit, Pedal Assembly (Time required: About 5 minutes) 22-9-1 Remove the three (3) screws marked [S09A], the six (6) screws marked [S06A] and the two (2) screws marked 25-1 Rotate the adjuster until it comes off the floor surface. [6A]. - Page 15 CLP-265GP Leg Assembly Keys can be removed without removing the circuit (Time required: About 10 minutes) boards. For safety, this work should be done by two persons. The rubber contact can be removed after the GH3_EBUS circuit boards L, M and H are removed. 26-1 Lay the unit on the floor.
- Page 16 CLP-265GP 27-6 Hammer, White (Black) Key Hammer, White Key Stopper L88_W After a key has been removed, push the key spring down once to take it out of the hook. (Fig.29) Place the keyboard assembly upside down and peel away the stopper L88-W.
-
Page 17: Lsi Pin Description
CLP-265GP ■ LSI PIN DESCRIPTION CONTENTS ● HD6433690B70FYV (X6008200) CPU (E-HOSTs) ............17 AK4385ET (X6040A00) DAC (Digital to Analog Converter) ......... 17 ● ● YMW767-VTZ (X6055A00) CPU .................. 18 ● ISP1161A1BD (X5879A00) USB CONTROLLER ............19 µ ● PD780031AYGK-NO6 (X2599200) E-TKS ..............19 ●... - Page 18 CLP-265GP ● YMW767-VTZ (X6055A00) CPU DM: IC004, IC007 NAME FUNCTION NAME FUNCTION TESTN Input for TEST IOVDD IOVDD +3.3V PLLBPN PLL bypass select LBN/LWRN/PF6 External memory lower-byte enable PLLVDD PLLVDD +2.5V UBN/UWRN/PF7 External memory upper-byte enable Capacitor terminal for PLL RDN/PF4 External memory read enable PLLVSS...
- Page 19 CLP-265GP ● ISP1161A1BD (X5879A00) USB CONTROLLER DM: IC27 NAME FUNCTION NAME FUNCTION DGND Digital ground NDP_SEL Indicates to the HC EOT input DGND Digital ground D_SUSPEND DC 'suspend' state output DATA bus D_WAKEUP DC wake-up input GoodLink LED output D_VBUS DC USB input DGND Digital ground...
-
Page 20: Ic Block Diagram
CLP-265GP ■ IC BLOCK DIAGRAM SN74LV32APWR (X5647A00) SN74AHC1G08DCKR (X3833A00) SN74LV126APWR (X3865A00) Quad 3-State Bus Buffer TC7S08F (XP116A00) Quad 2 Input OR Single 2-Input Positive-AND Gate DM: IC029 DM:IC018 DM:IC002,IC023 FUNCTION TABLE INPUTS OUTPUT 7 GND NJM2068MD-TE2 (X3505A00) SN74AHCT245PWR (X2709A00) µPC4574G2 (X7391A00) TC74VHC245AFT (XT744B00) µPC4570G2-E1-A (X7351A00) -
Page 21: Circuit Boards
CLP-265GP ■ CIRCUIT BOARDS CONTENTS ● DM Circuit Board (X5830E0) ..................22 ● DJACK Circuit Board (X4470D0) .................. 23 GH3_EBUS L Circuit Board (X2177C0) ................ 24 ● ● GH3_EBUS M Circuit Board (X2178D0) ..............26 ● GH3_EBUS H Circuit Board (X2179C0) ............... 28 ●... - Page 22 CLP-265GP DM Circuit Board ● Not connected to PNL-CN301 to GH3_EBUS M-CN2 to DJACK-CN201 to PNR-CN302 to DJACK-CN102 to PNL-CN101 to PNR-CN102 to PNL-CN201 to MA80S-CN3 to PNR-CN202 Component Side Pattern Side 2NA-WD97020...
-
Page 23: Djack Circuit Board (X4470D0)
CLP-265GP DJACK Circuit Board ● to DM-CN9 Not connected Not connected Not connected to DM-CN2 Not connected THRU TO HOST MIDI Component Side Pattern Side 2NA-WB55590 5... -
Page 24: Gh3_Ebus L Circuit Board (X2177C0)
CLP-265GP GH3_EBUS L Circuit Board ●... - Page 25 CLP-265GP 2NAK8-V890460 1...
-
Page 26: Gh3_Ebus M Circuit Board (X2178D0)
CLP-265GP GH3_EBUS M Circuit Board ●... - Page 27 CLP-265GP 2NAK8-V890470 1...
-
Page 28: Gh3_Ebus H Circuit Board (X2179C0)
CLP-265GP GH3_EBUS H Circuit Board ●... - Page 29 CLP-265GP 2NAK8-V890480 1...
-
Page 30: Pnl Circuit Board (X5955C0)
CLP-265GP PNL Circuit Board ● to DM-CN4 to DM-CN5 to PNR-CN302 to PNR-CN202 Not installed USER LEFT RIGHT PRESET SONG Not installed SELECT DEMO TRANSPOSE STOP PLAY/ PAUSE to DM-CN6 to PNR-CN102 TEMPO METRONOME FUNCTION# TEMPO/ FUNCTION# +/YES -/NO TEMPO/ TEMPO/ DOWN TEMPO/FUNCTION#... -
Page 31: Pnr Circuit Board (X5956C0)
CLP-265GP PNR Circuit Board ● to DM-CN4 to DM-CN5 to PNL-CN301 to PNL-CN201 HARPSI- CHORD2 HARPSI- GRAND GRAND E. PIANO E. PIANO VIBRA- CHORD1 PIANO2 PIANO1 PHONE CHURCH CHURCH JAZZ STRINGS STRINGS CHOIR GUITAR ORGAN1 ORGAN2 ORGAN to DM-CN6 to PNL-CN101 CHORAS ROOM BRIGHT... -
Page 32: Ajack Circuit Board (X6217B0)
CLP-265GP AJACK Circuit Board ● to HP-CN1 to EQ-CN1 to MV-CN401 to DM-CN7 to MA80S-CN8 Not connected Not connected L/L+R AUX IN AUX OUT (LEVEL FIXED) Component Side Pattern Side 2NA-WE49040 2... -
Page 33: Fu60 Circuit Board (Xq395B0)
CLP-265GP FU60 Circuit Board ● to Power transformer to Power switch Voltage Selector AC Inlet (N only) * XQ395B0 and XQ779B0 are equal circuit boards. It is distinguished by the destination. Component Side NET1 Circuit Board ● to Woofers CN002 XT123 to MA80S-CN5 CN003... -
Page 34: Ma80S Circuit Board (X4384E0)
CLP-265GP MA80S Circuit Board ● to Power Transformer The float of IC7,8(DC/DC Converter) and inclination carry out to less than the following figure. The lead of IC7,8 Circuit board The float from a substrate is measured at the both ends of IC7,8, and it is less than 0.5mm both. - Page 35 CLP-265GP 2NA-WB55420 3 Pattern Side...
-
Page 36: Eq Circuit Board (X4413A0)
CLP-265GP EQ Circuit Board ● Component Side Pattern Side MV Circuit Board ● to AJACK-CN3 2NA-WB55450 6 MASTER VOLUME 2NA-WE02160 Component Side... -
Page 37: Pedal Circuit Board (Xr780C0)
CLP-265GP PL Circuit Board ● PEDAL Circuit Board ● * XR898A0 and XL151B0 are equal circuit boards. It is distinguished by the destination. POWER to HP-CN2 indicator Component Side ● PEDAL VR Circuit Board Damper (Right) Pedal HP Circuit Board ●... - Page 38 3) PC(Personal Computer): DOS/V type NOTE: In advance, install a MIDI-USB driver in the PC. Set to the Thru On position on the PC side. Check Download the MIDI-USB driver from the Yamaha official website. (URL >> http://www.yamahapkclub.com) Set each control as follows.
- Page 39 CLP-265GP Test Item List 7 segment. LED Test Function and Judgement criteria (01: Version Checks ROM version. 'Axx' 'bx.x' Make sure that the 7 seg. LED alternately indicates 'Ax.x'(the version of master ROM) and 'bx.x'(the version of slave ROM). Display for NG: 'AnG','bnG' (02: Master ROM Check 1 Master ROM Check If the result is OK, the 7segment LED indicates 'PAS'.
- Page 40 CLP-265GP 7 segment. LED Test Function and Judgement criteria (18: All LED ON All LED ON Check 8. 8 . 8 . Confirm that all LEDs on the panel light up. (19: All Red LED ON All Red LED ON Check 8.
- Page 41 CLP-265GP EQ Check (EQ Low, EQ Mid, EQ High) Lch/Rch If necessary, execute these tests. Terminal to be measured : EQ CN2 (Pin No.1: Lch, Pin No.3: Rch, Pin No.2,4,6 or 7: GND) Confirm that the output level at each terminal is as follows. EQ Low : -13.5dBu (Lch/Rch) EQ Mid : -12.5dBu (Lch/Rch) EQ High : -12.0dBu (Lch/Rch)
- Page 42 CLP-265GP • Table 2 SW No. SWITCH NOTE DEMO k RED TRANSPOSE k RED k YELLOW(RED+GREEN) LEFT k YELLOW(RED+GREEN) RIGHT STOP k RED PLAY/PAUSE k RED(USER/PRESET) SONG SELECT k RED(TEMPO/FUNCTION#) TEMPO/FUNCTION# METRONOME TEMPO/FUNCTION# t TEMPO/FUNCTION# s -/NO +/YES k RED GRAND PIANO 1 k RED GRAND PIANO 2...
-
Page 43: Data Backup
PC (Personal Computer) USB Cable (A-B Type) MIDI-USB Driver *1 Musicsoft Downloader (MSD) *1 *1: Obtain these programs from CD-ROM(X6010A00) of the attachment for CLP-265GP or Yamaha official website. (URL>> http://www.yamahapkclub.com) Install these software in PC beforehand. CLP-265GP TO HOST... - Page 44 CLP-265GP Start up Musicsoft Downloader. Display the following when click "Electronic Musical Instruments" (The music data is stored) (The panel setting and recorded user songs are stored) * Refer to Page 46 <TROUBLE SHOOTING> when the following display appears. When is clicked, data file "CLP230.BUP"...
- Page 45 CLP-265GP If "CLP230.BUP" is clicked, becomes active. When you click the , the screen in the figure below is displayed, and then click Specify the place where the backup data is preserved. (Preserve it in "My document" for example.) If "CLP230.BUP" is clicked, becomes active.
- Page 46 CLP-265GP < TROUBLESHOOTING > * Setting the "MIDI IN/OUT" Click Click Choose "YAMAHA USB OUT 0-1" and click Click , (Because the judgment is O , it is correctry connected.)
-
Page 47: Midi Implementation Chart
CLP-265GP ■ MIDI IMPLEMENTATION CHART YAMAHA [ Clavinova ] Date :16-DEC-2004 Model CLP-265GP MIDI Implementation Chart Version : 1.0 Function... Transmitted Recognized Remarks Basic Default 1 - 16 1 - 16 Channel Changed 1 - 16 Mode Default Messages Altered... -
Page 48: Midi Data Format
CLP-265GP ■ MIDI DATA FORMAT 1. NOTE ON/OFF 3. MODE MESSAGES Data format: [9nH] -> [kk] -> [vv] Data format: [BnH] -> [cc] -> [vv] 9nH = Note ON/OFF event (n = channel number) BnH = Control event (n = channel number) kk = Note number (Transmit: 09H ~ 78H = A-2 ~ C8 / cc =... - Page 49 CLP-265GP 6. SYSTEM EXCLUSIVE MESSAGES 4. PROGRAM CHANGE (Yamaha MIDI Format) Data format: [CnH] -> [ppH] Panel Data Transmit CnH = Program event (n = channel number) ppH = Program change number Data format: [F0H] -> [43H] -> [0nH] -> [7CH] -> ... -> [F7H] P.C.#=Program Change number...
- Page 50 Data format: [F0H] -> [43H] -> [73H] -> [01H] -> [nnH] -> [F7H] F0H = Exclusive status F0H = Exclusive status 7EH = Universal Non-Realtime 43H = Yamaha ID XnH = When received, n=0~F. 73H = Clavinova ID X = don’t care...
- Page 51 CLP-265GP <Table 1> MIDI Parameter Change table (SYSTEM) Address (H) Size (H) Data (H) Parameter Description Default value (H) 00 00 00 020C - 05F4* MASTER TUNE -50 - +50[cent] 00 04 00 00 1st bit 3 - 0 bit 15 - 12 2nd bit 3 - 0 bit 11 - 8 3rd bit 3 - 0...
-
Page 52: Parts List
PARTS LIST CONTENTS OVERALL ASSEMBLY ......2 KEY COVER ASSEMBLY ..... 21 MAIN UNIT ..........4 FRONT RAIL ASSEMBLY ..... 22 KEY BED ASSEMBLY ......10 HP JACK ASSEMBLY ......23 BACK TOP BOARD ASSEMBLY ..11 JACK ASSEMBLY ......... 24 PANEL ASSEMBLY ....... - Page 53 CLP-265GP I OVERALL ASSEMBLY Screw Set Headphone Hanger Set...
-
Page 54: Overall Assembly
CLP-265GP PART NO. DESCRIPTION 部 品 名 REMARKS REF NO. QTY RANK OVERALL ASSEMBLY 総 組 立 CLP-265GP Main Unit CL U メ イ ン ユ ニ ッ ト U (WH34950) Main Unit CL E メ イ ン ユ ニ ッ ト E (WH34960) Main Unit CL N... - Page 55 31 31a 30 30a...
- Page 56 U model only 21c 21b U model only 105 105a 105b U model only...
- Page 57 20b 20c 20b 20c S21 : U model only S02 S01 19c 19a 19b 19c 19a 19b 19c 19 19d 19e...
- Page 58 CLP-265GP G BottomView G Speaker Grille Assembly...
-
Page 59: Main Unit
CLP-265GP PART NO. DESCRIPTION 部 品 名 REMARKS REF NO. QTY RANK MAIN UNIT メ イ ン ユ ニ ッ ト CLP-265GP Main Unit メ イ ン ユ ニ ッ ト U CL U (WH34950) Main Unit メ イ ン ユ ニ ッ ト E CL E (WH34960) Main Unit... - Page 60 CLP-265GP PART NO. DESCRIPTION 部 品 名 REMARKS REF NO. QTY RANK WF831100 Bind Head Tapping Screw-1 3.5X11 MFZN2W3 T P # 1 + B I N D Connector Assembly S P 束 線 (WH48820) VU891300 Cord Holder ビ ニ タ イ 黒 1 . 0 芯 L Partition Assembly B 仕...
-
Page 61: Key Bed Assembly
CLP-265GP I KEY BED ASSEMBLY G Side View G Top View G Front View 部 品 名 PART NO. DESCRIPTION REMARKS REF NO. QTY RANK KEY BED ASSEMBLY 棚 板 A s s ’ y CLP-265GP Key bed Assembly 棚 板... -
Page 62: Back Top Board Assembly
CLP-265GP I BACK TOP BOARD ASSEMBLY G Top View G SEC. A-A 5a 5b 部 品 名 PART NO. DESCRIPTION REMARKS REF NO. QTY RANK BACK TOP BOARD ASSEMBLY 背 面 框 A s s ’ y CLP-265GP WH355800 Back Top Board Assembly 背... - Page 63 CLP-265GP I PANEL ASSEMBLY G Rear View 29 31 G Rear View 10 15 12 10 13 14 G Rear View G Rear View G Rear View 22 50 G Rear View G Front View...
-
Page 64: Panel Assembly
CLP-265GP PART NO. DESCRIPTION 部 品 名 REMARKS REF NO. QTY RANK PANEL ASSEMBLY パ ネ ル A s s ’ y CLP-265GP Panel Assembly パ ネ ル A s s ’ y (WH35670) WH367900 Control Panel コ ン パ ネ 印 刷 品 WH438600 Panel (L) LEFT... -
Page 65: Music Rest Assembly
CLP-265GP I MUSIC REST ASSEMBLY G Rear View G Side View 部 品 名 PART NO. DESCRIPTION REMARKS REF NO. QTY RANK MUSIC REST ASSEMBLY 譜 面 板 A s s ’ y CLP-265GP WH354600 Music Rest Assembly 譜 面 板 A s s ’ y Music Rest 譜... -
Page 66: Top Board Assembly L
CLP-265GP I TOP BOARD ASSEMBLY L G Front View G Bottom View 部 品 名 PART NO. DESCRIPTION REMARKS REF NO. QTY RANK TOP BOARD ASSEMBLY (L) 屋 根 ( 大 ) A s s ’ y CLP-265GP WH355100 Top Board Assembly (L) LARGE 屋... - Page 67 4 4a 4d 3 3a 3d F6 F2 14a 14c...
-
Page 68: Top Board Assembly S
CLP-265GP PART NO. DESCRIPTION 部 品 名 REMARKS REF NO. QTY RANK TOP BOARD ASSEMBLY (S) 屋 根 ( 小 ) A s s ’ y CLP-265GP Top Board Assembly (S) SMALL 屋 根 ( 小 ) A s s ’ y (WH35490) WH358600 Top Board (S) -
Page 69: Arm Assembly L
CLP-265GP I ARM ASSEMBLY L G Top View G Front View G Side View 部 品 名 PART NO. DESCRIPTION REMARKS REF NO. QTY RANK ARM ASSEMBLY L 腕 木 A s s ’ y ( L ) CLP-265GP WH355300 Arm Assembly L LEFT 腕... -
Page 70: Arm Assembly R
CLP-265GP I ARM ASSEMBLY R G Top View G Side View 3e 3d G Front View 部 品 名 PART NO. DESCRIPTION REMARKS REF NO. QTY RANK ARM ASSEMBLY R 腕 木 A s s ’ y ( R ) CLP-265GP WH355400 Arm Assembly R... -
Page 71: End Block Assembly (L, R)
CLP-265GP I END BLOCK ASSEMBLY (L, R) G END BLOCK ASSEMBLY L G Side View G Bottom View G END BLOCK ASSEMBLY R G Top View G Side View 部 品 名 PART NO. DESCRIPTION REMARKS REF NO. QTY RANK END BLOCK ASSEMBLY L 拍... -
Page 72: Key Cover Assembly
CLP-265GP I KEY COVER ASSEMBLY G Bottom View G Side View 13 14 部 品 名 PART NO. DESCRIPTION REMARKS REF NO. QTY RANK KEY COVER ASSEMBLY ス ラ イ ド 蓋 A s s ’ y CLP-265GP WH356500 Key Cover Assembly ス... -
Page 73: Front Rail Assembly
CLP-265GP I FRONT RAIL ASSEMBLY G Rear View G Top View 部 品 名 PART NO. DESCRIPTION REMARKS REF NO. QTY RANK FRONT RAIL ASSEMBLY 口 棒 A s s ’ y CLP-265GP Front Rail Assembly 口 棒 A s s ’ y (WH35570) WH363400 Front Rail... -
Page 74: Hp Jack Assembly
CLP-265GP I HP JACK ASSEMBLY 部 品 名 PART NO. DESCRIPTION REMARKS REF NO. QTY RANK HP JACK ASSEMBLY H P ジ ャ ッ ク A s s ’ y CLP-265GP HP Jack Assembly H P ジ ャ ッ ク A s s ’ y (WC04600) WC045900 Circuit Board... -
Page 75: Jack Assembly
CLP-265GP I JACK ASSEMBLY G Bottom View G Rear View G Side View 部 品 名 PART NO. DESCRIPTION REMARKS REF NO. QTY RANK JACK ASSEMBLY ジ ャ ッ ク A s s ’ y CLP-265GP Jack Assembly ジ ャ ッ ク A s s ’ y (WH35790) WH375700 Plate... -
Page 76: Ma80S Assembly
CLP-265GP I MA80S ASSEMBLY G Top View G Front View 部 品 名 PART NO. DESCRIPTION REMARKS REF NO. QTY RANK MA80S ASSEMBLY M A 8 0 S A s s ’ y CLP-265GP WC028900 MA80S Assembly M A 8 0 S A s s ’ y WC029000 MA80S Assembly M... -
Page 77: Fu60 Assembly
CLP-265GP I FU60 ASSEMBLY G Front View G Top View 部 品 名 PART NO. DESCRIPTION REMARKS REF NO. QTY RANK FU60 ASSEMBLY F U 6 0 A s s ’ y CLP-265GP VT152100 FU60 Assembly FU60 U F U 6 0 A s s ’ y VT152200 FU60 Assembly FU60 E,GBR... -
Page 78: Pedal Box Unit
CLP-265GP I PEDAL BOX UNIT G Front View G Side View G Top View G Bottom View Pedal assembly: See page 28. 13 14 部 品 名 PART NO. DESCRIPTION REMARKS REF NO. QTY RANK PEDAL BOX UNIT ペ ダ ル ボ ッ ク ス ユ ニ ッ ト CLP-265GP Pedal Box Unit ペダルボックスAss’y... -
Page 79: Pedal Assembly
CLP-265GP I PEDAL ASSEMBLY G Top View G Side View 100 110 170 260 PART NO. DESCRIPTION 部 品 名 REMARKS REF NO. QTY RANK PEDAL ASSEMBLY ペ ダ ル A s s ’ y CLP-265GP WH497300 Pedal Assembly (W) ペ... -
Page 80: Bench (Bc-100Pe)
CLP-265GP I BENCH(BC-100PE) Screw set x 4 (WF742600) x 4 (WF577600) 部 品 名 PART NO. DESCRIPTION REMARKS REF NO. QTY RANK BENCH 椅 子 CLP-265GP WG479600 Bench BC-100PE U/N/K 同 梱 品 セ ッ ト 椅 子 Bench BC-100PE 椅... - Page 81 CLP-265GP I KEYBOARD ASSEMBLY...
-
Page 82: Keyboard Assembly
CLP-265GP PART NO. DESCRIPTION 部 品 名 REMARKS REF NO. QTY RANK KEYBOARD ASSEMBLY G H 3 鍵 盤 A s s ’ y CLP-265GP V8278600 Keyboard Assembly GH3 A88 K6 G H 3 鍵 盤 Frame フレーム88アウトサート (VU42210) VU101000 White Key WHITE C 白... -
Page 83: Electrical Parts
CLP-265GP I ELECTRICAL PARTS PART NO. DESCRIPTION 部 品 名 REMARKS REF NO. QTY RANK ELECTRICAL PARTS 電 気 部 品 CLP-265GP WJ285800 Circuit Board D M シ ー ト (WJ28590)(X5830E0) WE490700 Circuit Board AJACK A J A C K シ ー ト (WE49060)(X6217B0) WE005500 Circuit Board... - Page 84 CLP-265GP PART NO. DESCRIPTION 部 品 名 REMARKS REF NO. QTY RANK US135100 Ceramic Capacitor-F (chip) チ ッ プ セ ラ ( F ) C0051 0.1000 16V Z RECT. US145100 Ceramic Capacitor-F (chip) C0051 0.1000 25V Z RECT. チ ッ プ セ ラ ( F ) UF017470 Electrolytic Cap.
- Page 85 CLP-265GP PART NO. DESCRIPTION 部 品 名 REMARKS REF NO. QTY RANK US135100 Ceramic Capacitor-F (chip) チ ッ プ セ ラ ( F ) C0303 0.1000 16V Z RECT. US145100 Ceramic Capacitor-F (chip) C0303 0.1000 25V Z RECT. チ ッ プ セ ラ ( F ) US065100 Ceramic Capacitor-F (chip) C0304...
- Page 86 CLP-265GP PART NO. DESCRIPTION 部 品 名 REMARKS REF NO. QTY RANK X5999400 I C IC008 PROG/WAVE1 MASK ROM (P2 ROM) XS534A00 IC010 NJM78M05DL1A I C REGULATOR +5V X6040A00 IC011 AK4385ET I C D/A CONVERTER X3505A00 IC014 NJM2068M-D(TE2) I C OP AMP X7351A00 IC014...
- Page 87 CLP-265GP PART NO. DESCRIPTION 部 品 名 REMARKS REF NO. QTY RANK RD356220 Carbon Resistor (chip) チ ッ プ 抵 抗 R0083 2.2K 63M J RECT. RD354470 Carbon Resistor (chip) R0084 47.0 63M J RECT. チ ッ プ 抵 抗 RD356330 Carbon Resistor (chip) R0085...
- Page 88 CLP-265GP DM and AJACK PART NO. DESCRIPTION 部 品 名 REMARKS REF NO. QTY RANK VY677700 Digital Transistor デ ジ タ ル ト ラ ン ジ ス タ TR007 DTB123YK T146 WG989900 Digital Transistor TR007 KRA226S-RTK/P デ ジ タ ル ト ラ ン ジ ス タ VY677700 Digital Transistor TR008...
- Page 89 CLP-265GP AJACK PART NO. DESCRIPTION 部 品 名 REMARKS REF NO. QTY RANK VB390600 Base Post Connector CN006 PH 10P TE ベ ー ス ポ ス ト LB918020 CN007 Base Post Connector XH 2P TE ベ ー ス ツ キ ポ ス ト VR496500 D0001 Diode...
- Page 90 CLP-265GP AJACK, DJACK and EQ PART NO. DESCRIPTION 部 品 名 REMARKS REF NO. QTY RANK VV556400 Transistor TR003 2SC2412K Q,R,S TP ト ラ ン ジ ス タ VV925400 TR003 Transistor (chip) 2SC2SC2712-GR(TE85 ト ラ ン ジ ス タ V4767500 TR003 Transistor 2SD0601ARL/AQL Q,R...
- Page 91 CLP-265GP PART NO. DESCRIPTION 部 品 名 REMARKS REF NO. QTY RANK US145100 Ceramic Capacitor-F (chip) -0111 0.1000 25V Z RECT. チ ッ プ セ ラ ( F ) UR847470 C0112 Electrolytic Cap. 47.00 25.0V RX TP ケ ミ コ ン...
- Page 92 CLP-265GP EQ, FU60 and GH3_EBUS L PART NO. DESCRIPTION 部 品 名 REMARKS REF NO. QTY RANK RD357180 Carbon Resistor (chip) R0308 18.0K 63M J RECT. チ ッ プ 抵 抗 RD355470 R0309 Carbon Resistor (chip) 470.0 63M J RECT. チ...
- Page 93 CLP-265GP GH3_EBUS L, GH3_EBUS M, GH3_EBUS H and HP PART NO. DESCRIPTION 部 品 名 REMARKS REF NO. QTY RANK RD356100 Carbon Resistor (chip) R0007 1.0K 63M J RECT. チ ッ プ 抵 抗 RD350000 R0008 Carbon Resistor (chip) 0 63M J RECT. チ...
- Page 94 CLP-265GP HP and MA80S PART NO. DESCRIPTION 部 品 名 REMARKS REF NO. QTY RANK FG414100 Ceramic Capacitor-B C0002 0.01UF 50V K セ ラ コ ン B FG644100 C0002 Electrolytic Cap. 0.0100 50V Z RX TP セ ラ コ ン ( F ) FG414100 C0003 Ceramic Capacitor-B...
- Page 95 CLP-265GP MA80S PART NO. DESCRIPTION 部 品 名 REMARKS REF NO. QTY RANK UR838100 C0020 Electrolytic Cap. 100.00 16.0V RX TP ケ ミ コ ン US062220 Ceramic Capacitor-SL(chip) C0021 220P 50V J RECT. チ ッ プ セ ラ ( S L ) US063100 Ceramic Capacitor-B (chip) チ...
- Page 96 CLP-265GP MA80S, NET1, PEDAL, PEDAL VR, PJK, PL and PNL PART NO. DESCRIPTION 部 品 名 REMARKS REF NO. QTY RANK VC742500 Metal Oxide Film Resistor R0027 10.0 1W J 酸 化 金 属 被 膜 抵 抗 VC742500 R0028 Metal Oxide Film Resistor 10.0 1W J 酸...
- Page 97 CLP-265GP PNL and PNR PART NO. DESCRIPTION 部 品 名 REMARKS REF NO. QTY RANK VD180000 LD084 SLZ-190B-03-T2 AKA L E D テ ー . フ ォ FUNCTION VQ323900 LD101 LED Display SL-9351S L E D デ ィ ス プ レ イ TEMPO/OTHER VALUE HF754470 R0010...
- Page 98 CLP-265GP PART NO. DESCRIPTION 部 品 名 REMARKS REF NO. QTY RANK VU067800 LD047 SEL6210S-TP5 RED L E D E.BASS VD180000 LD056 SLZ-190B-03-T2 AKA L E D テ ー . フ ォ ROOM VD180000 L E D テ ー . フ ォ LD057 SLZ-190B-03-T2 AKA CHORUS...
- Page 99 CLP-265GP PART NO. DESCRIPTION 部 品 名 REMARKS REF NO. QTY RANK X6296A00 Speaker(Woofer) 16cm 6ohm 40W ス ピ ー カ XL455A00 Speaker(Tweeter) 5.0cm 16ohm 60W ス ピ ー カ VC843500 Push Switch SDDLB13102 J.U.C.S プ ッ シ ュ S W...
- Page 100 <Page1> ■ CLP-265GP OVERALL CIRCUIT DIAGRAM 1/3 (DM) CLP-265GP Not installed Not installed 64M P2ROM 4M DRAM FLASH ROM Not installed to I6 Not installed from C3 from C3 Not installed CONTROLLER Not installed to B4 Not installed Not installed SWL01 Not installed to F2,I2...
- Page 101 <Page2> ■ CLP-265GP OVERALL CIRCUIT DIAGRAM 2/3 (GH3_EBUS L, GH3_EBUS M, GH3_EBUS H) CLP-265GP to DM-CN10 <Page1 O9> E-TKS E-TKS E-TKS GH3 EBUS L (A-1 ∼ C2) 28CC1-8822133 GH3 EBUS M (C#2 ∼ F#4) GH3 EBUS H (G4 ∼ C7) 28CC1-8822134 28CC1-8822135 CLP-265GP...
- Page 102 <Page3> SW MATRIX ■ CLP-265GP OVERALL CIRCUIT DIAGRAM 3/3 (AJACK, DJACK, EQ, FU60, HP, MA80S, MV, NET1, PJK, PNL, PNR, PEDAL, PEDAL-VR, PL) SW[0] SW[1] SW[2] SW[3] SW[4] SW[5] CLP-265GP DRV[0] DEMO PLAY/ -/NO METRONOME PAUSE DRV[1] TRANSPOSE SONG SELECT +/YES TEMPO UP DRV[2] LEFT...
- Page 103 <Page4> CLP-265GP BLOCK DIAGRAM CLP-265GP WOOFERS PANEL 1/2 KEYBOARD 88Keys(GH3) GH3_EBUS L GH3_EBUS M GH3_EBUS H NET1 PEDAL UNIT SWITCH Matrix SWITCH Matrix A-1 ∼ C2 C#2 ∼ F#4 G4 ∼ C7 PEDAL PEDAL-VR 14 pieces 18 pieces 8.38MHz 8.38MHz 8.38MHz +3.3D +3.3D...