Table of Contents
Advertisement
Advertisement
Table of Contents

Related Manuals for Indesit VIA640C


Summary of Contents for Indesit VIA640C
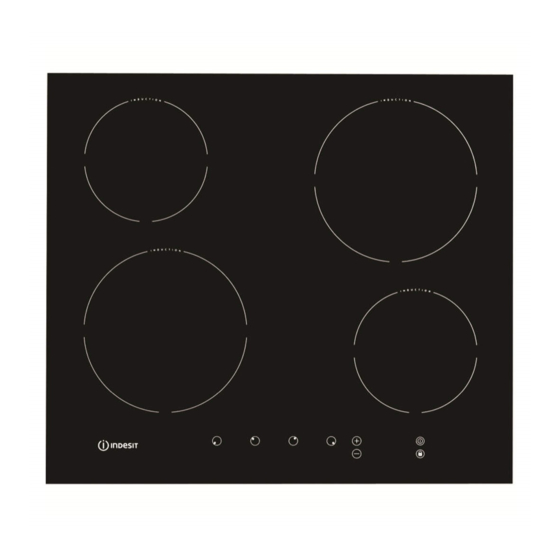
- Page 1 5413063 Issue 5 Aug. 2012 INDESIT TOUCH CONTROL INDUCTION HOBS Models Comm. Covered Code Italy Produced VIA640C 53019 Poland Produced VIA640C 79112 Service Information Indesit Company UK Ltd © 2012 Reg. Office: Peterborough PE2 9JB Registered in London: 106725...
-
Page 2: Table Of Contents
Indesit Company SAFETY NOTES & GENERAL SERVICING ADVICE 1. This manual is NOT intended as a comprehensive repair/maintenance guide to the appliance. 2. It should ONLY be used by suitably qualified persons having technical competence applicable product knowledge and suitable tools and test equipment. -
Page 3: Serial Number / Industrial Code Explanation
Indesit Company SERIAL NUMBER / INDUSTRIAL CODE EXPLANATION Serial Number Example 3 10 02 0895 Four remaining digits = Build number that day 895 built Third two digits = Day of manufacture 2 of month Second two digits = Month of manufacture October... -
Page 4: Introduction
Indesit Company INTRODUCTION OF INDESIT TOUCH CONTROL HOB VIA640C The above model was first produced in April 2008. Production was changed from Italy to Poland in April 2012. A new Commercial Code was also introduced. Model No. Commercial Code Colour... -
Page 5: Design Modifications
Indesit Company Earthing Requirement This hob MUST be Earthed Approvals 2006/95/EEC of 12/12/06 (Low Voltage) 89/336EEC of 03/05/89 (Electromagnetic Compatibility) 93/68EEC of 22/07/93 1275/2008 Stand-By / Off - Models produced from 10 December 2009 Notes: - The power ratings given are based on 240V AC. -
Page 6: Safety Information
Indesit Company SAFETY INFORMATION Never • Never leave children unsupervised where a cooking appliance is installed as all surfaces will be hot during and even after its use. • Never allow anyone to sit or stand on any part of the appliance. -
Page 7: Advice & Recommendations
Indesit Company ADVICE & RECOMMENDATIONS • This appliance was designed for non- • Certain fundamental rules must be followed professional, household use. when using electrical appliances. • Before using the appliance, read the instructions The following are of particular importance: in the owner’s manual carefully since it contains... -
Page 8: Installation & Fastening
Indesit Company INSTALLATION & FASTENING Taken from the Instructions for Installation and Use The following instructions are intended for a qualified fitter to guide him/her along the installation, adjustment and technical maintenance procedures as correctly as possible and in full compliance with the applicable norms in force. - Page 9 Indesit Company Ventilation Fig. 2 • The hob should be positioned at least 40 mm away from the back wall or any other vertical surface in order to allow for correct ventilation and to prevent min. 20 mm the surfaces around the appliance from overheating.
-
Page 10: Electrical Connection
Indesit Company ELECTRICAL CONNECTION THIS APPLIANCE MUST BE EARTHED • The electrical safety of this appliance can only be guaranteed if the latter is correctly and efficiently earthed, in compliance with regulations on electrical safety. Always ensure that this vital safety measure has been taken. -
Page 11: The Controls
Indesit Company THE CONTROLS INCREASE POWER button POWER and COOKING ZONE ON/OFF RESIDUAL HEAT SELECTED indicator light button indicators ON/OFF indicator light CONTROLS LOCKED indicator light CONTROL PANEL LOCK button COOKING ZONE SELECTOR buttons REDUCE POWER button • INCREASE POWER button switches on the •... -
Page 12: Start-Up & Use
Indesit Company START-UP & USE The glue applied to the gaskets leaves traces of grease on the glass. Before using the appliance, we recommend you remove these with a special non-abrasive cleaning product. During the first few hours of use there may be a smell of rubber which will disappear very quickly. - Page 13 Indesit Company Switching Off the Cooking Zones To switch off a cooking zone, select it using the corresponding selector button and press the button. The power of the cooking zone will progressively decrease until it is switched off. Controls Lock When the hob is switched on, it is possible to lock the controls to avoid accidental changes being made to the settings (by children, during cleaning, etc.)
-
Page 14: Practical Advice On Using The Hobs
Indesit Company PRACTICAL ADVICE ON USING THE HOBS Use cookware made from materials which are compatible with the induction principle (ferromagnetic material). We especially recommend pans made from cast iron, coated steel or special stainless steel adapted for induction. Use a magnet to test the compatibility of the cookware. -
Page 15: The Safety Devices
Indesit Company THE SAFETY DEVICES Pan Sensor Each cooking zone is equipped with a pan sensor device. The hotplate only emits heat when a pan with suitable measurements for the cooking zone is placed on it. If the indicator light is flashing, it may indicate: - •... -
Page 16: Practical Cooking Advice
Indesit Company PRACTICAL COOKING ADVICE ª Pressure cooking Frying Pressure cooker • Grilling Boiling • ¶ Crêpes Cooking on a high flame and browning (roasts, steaks, escalopes, fish fillets, fried eggs) ¶ § Fast thickening (liquid juices) Boiling water (pasta, rice, vegetables) Milk §... -
Page 17: Care & Cleaning
Indesit Company CARE & CLEANING Disconnect the hob from the electricity supply before carrying out any work on it. Cleaning the Appliance IMPORTANT: Do not use abrasive or corrosive detergents (for example, products in spray cans for cleaning barbecues and ovens), stain removers, anti-rust products, powder detergents or sponges with abrasive surfaces;... -
Page 18: Fault Codes
Indesit Company FAULT CODES Service Manual UK English 18 of 29... -
Page 19: Service Manual Uk English
Indesit Company FAULT CODES Service Manual UK English 19 of 29... -
Page 20: Fault Codes
Indesit Company FAULT CODES Service Manual UK English 20 of 29... -
Page 21: Dismantling Procedure
Indesit Company DISMANTLING INSTRUCTIONS Safety Notes 1. Before carrying out any work ensure that the appliance is disconnected from the mains supply. 2. Carry out insulation resistance, continuity and functional tests on the appliance after service. 3. Personal safety precautions must be taken to protect against accidents caused by sharp edges on metal, glass and plastic parts. - Page 22 Indesit Company C) Touch Control Printed Circuit Board Remove the hob top as in A). Remove the 2 ribbon cable connections. Remove the printed circuit board from the 6 pillars (use pliers to depress the tabs). D) Power Board & Filter Remove the hob top as in A).
- Page 23 Indesit Company Release the cable surround from the base panel. Slide the suppressor to the right (when viewed from the rear), releasing the securing tabs from the base plate. It may be necessary to ease the tabs carefully with a small flatbladed screwdriver if the fitting is tight.
-
Page 24: Wiring Diagrams
Indesit Company WIRING DIAGRAMS Induction 1400W Induction 2200W Induction 2200W Induction 1400W Service Manual UK English 24 of 29... -
Page 25: Service Manual Uk English
Indesit Company Service Manual UK English 25 of 29... -
Page 26: Programming The Power Module
Power Module will be required. There are two main methods. METHOD 1 - INDESIT ENGINEERS ONLY The appliance can be programmed via an Emit, using a USB lead (Part number C00222800), Hardware Key (Part Number C00115587), Hardware Key Adaptor (Part Number C00255979) and Memwriter software selecting the NEW PLATFORM option. - Page 27 Indesit Company USB Hardware Key - C00289048 USB Cable C00289046 Low Voltage USB Connection Connection Point The Hardware Key is connected to the hob via a Serial Port on the base of the hob. Remove the Serial Port Cover and make the connection as shown. For detailed information on Memwriter, refer to Manual C00256775.
- Page 28 Indesit Company METHOD 2 - ALL OTHER SUITABLY QUALIFIED PERSONS The appliance can be programmed using a Smartcard Reader (Part No. C00263927) and a Smartcard preprogrammed to the relevant model. 1. Disconnect the appliance from the electrical supply. 2. Insert the pre-programmed card into the Card Reader. Care must be taken at this point to ensure the card is inserted correctly with the Chip on the card facing the PCB of the Reader.
- Page 29 Indesit Company Service Manual UK English 29 of 29...