Table of Contents
Advertisement
Quick Links
Download this manual
See also:
User Manual
Advertisement
Table of Contents
Troubleshooting

Related Manuals for Philips BDL6551V


Summary of Contents for Philips BDL6551V
- Page 1 BDL6551V www.philips.com/welcome EN User manual Cleaning and troubleshooting...
-
Page 2: Safety And Troubleshooting Information
• If turning off the monitor by detaching the power cord, wait for 6 seconds before attaching the power cord for normal operation. • Please use approved power cord provided by Philips all the time. If your power cord is missing, please contact with your local service center. - Page 3 Service: • The casing cover should be opened only by qualified service personnel. • If there is any need for any document for repair or integration, please contact with your local service center. • Do not leave your monitor in a car/trunk under direct sun light. Consult a service technician if the monitor does not operate normally, or you are not sure what procedure to take when the operating instructions given in this manual have been followed.
-
Page 4: Regulatory Information
EQUIPMENT REGULATIONS. FCC DECLARATION OF CONFORMITY Trade Name: Philips Declaration of Conformity for Products Marked with FCC Logo, United States Only: This device complies with Part 15 of the FCC Rules. Operation is subject to the following two conditions: (1) this device may not cause harmful interference, and (2) this device must accept any interference received, including interference that may cause undesired operation. - Page 5 POLISH CENTER FOR TESTING AND CERTIFICATION NOTICE The equipment should draw power from a socket with an attached protection circuit (a three-prong socket). All equipment that works together (computer, monitor, printer, and so on) should have the same power supply source. The phasing conductor of the room’s electrical installation should have a reserve short-circuit protection device in the form of a fuse with a nominal value no larger than 16 amperes (A).
- Page 6 INFORMATION FOR UK ONLY WARNING - THIS APPLIANCE MUST BE EARTHED. Important: This apparatus is supplied with an approved moulded 13A plug. To change a fuse in this type of plug proceed as follows: 1. Remove fuse cover and fuse. 2.
- Page 7 User Manual BDL6551V RoHS (Hg) (Pb) (Cd) (PBB) (Cr 6 SJ/T11363-2006 SJ/T11363-2006 (PBDE)
- Page 8 Please find out about the local regulations on how to dispose of your old monitor from your local Philips dealer. (For customers in Canada and U.S.A.) This product may contain lead and/or mercury.
-
Page 9: Table Of Contents
3.5. EXTERNAL AUDIO CONNECTION 3.5.1. CONNECTING EXTERNAL SPEAKERS 3.5.2. CONNECTING EXTERNAL AUDIO DEVICE 3.6. CONNECTING ANOTHER BDL6551V MONITOR OSD MENU 4.1. NAVIGATING THE OSD MENU 4.1.1. NAVIGATING THE OSD MENU USING THE REMOTE CONTROL 4.1.2. NAVIGATING THE OSD MENU USING THE MONITOR’S CONTROL BUTTONS 4.2. - Page 10 6.2. TYPES OF PIXEL DEFECTS + DOT DEFINITION 6.3. BRIGHT DOT DEFECTS 6.4. DARK DOT DEFECTS 6.5. PROXIMITY OF PIXEL DEFECTS 6.6. PIXEL DEFECT TOLERANCES CLEANING AND TROUBLESHOOTING 7.1. CLEANING 7.2. TROUBLESHOOTING TECHNICAL SPECIFICATIONS...
-
Page 11: Unpacking And Installation
User Manual BDL6551V UNPACKING AND INSTALLATION 1.1. UNPACKING • This product is packed in a carton, together with the standard accessories. • Any other optional accessories will be packed separately. • The weight of the product differs - depending on the type. Due to the size and weight it is recommended to move it by 2 people. -
Page 12: Portrait Mounting
User Manual BDL6551V 1.4. PORTRAIT MOUNTING Wall mounting holes Notes: • Metric 6 (10mm) screws (having a length 10-15mm longer than the thickness of the mounting bracket) are needed for wall mounting (not included). Tighten the screws securely (recommended torque: 470 - 635N•cm) •... -
Page 13: Parts And Functions
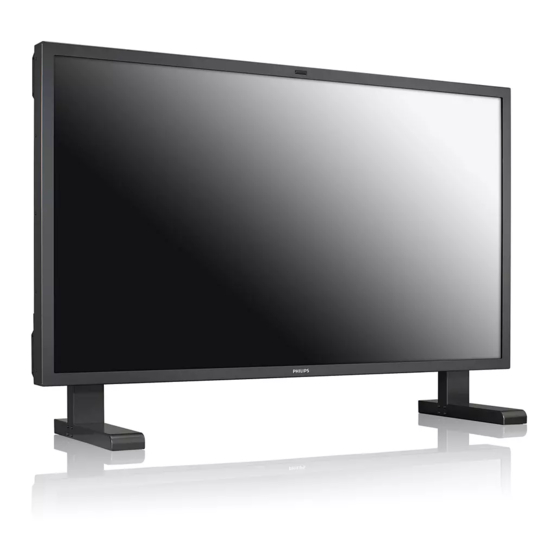
User Manual BDL6551V PARTS AND FUNCTIONS 2.1. FRONT VIEW 1. Remote control sensor, ambient light sensor and power indicator • Receives command signals from the remote control. • Detects the ambient lighting condition around the monitor. • Indicates the operating status of the monitor:... -
Page 14: Rear View
User Manual BDL6551V 2.2. REAR VIEW Dent depth: 6mm 1. ENTER/VIDEO SOURCE button • Use this button to select the input source. • When the On Screen Display menu is active, use this as the SET button. 2. MENU button •... -
Page 15: Input/Output Terminals
Press to switch the main power on/off. 15. AC IN (10 A) Connect the supplied power cord to the wall outlet. 16. AC OUT (5.0 A) Connect to the AC IN socket of another BDL6551V monitor or an external media device. RETURN TO THE CONTENTS... -
Page 16: Remote Control
User Manual BDL6551V 2.4. REMOTE CONTROL 2.4.1. GENERAL FUNCTIONS POWER button Press to switch on the monitor from standby mode. Press again to turn it off to standby mode. SMART button To select smart picture mode from: • HIGHBRIGHT: for moving image such as Video •... - Page 17 User Manual BDL6551V DISPLAY button To turn on/off the setting information displayed on the upper right corner of the screen. MENU button To turn the OSD menu on/off. UP button • To move the highlight bar up to adjust the selected item when OSD menu is on.
-
Page 18: Inserting The Batteries In The Remote Control
User Manual BDL6551V 2.4.2. INSERTING THE BATTERIES IN THE REMOTE CONTROL 1. Remove the cover on the rear of the remote control. 2. Insert two AAA size 1.5V batteries ensuring that the “+” and “-” ends of the batteries are correctly aligned. -
Page 19: Connections To External Equipment
User Manual BDL6551V CONNECTIONS TO EXTERNAL EQUIPMENT 3.1. USING THE CABLE RETAINER 3.2. USING THE SWITCH COVER You can use the switch cover to prevent the monitor from being turned on or off accidentally. 3.3. CONNECTING EXTERNAL EQUIPMENT (DVD/VCR/VCD) 3.3.1. -
Page 20: Using S-Video Input
User Manual BDL6551V 3.3.2. USING S-VIDEO INPUT 1. Connect the S-Video connector of the external device to the S-VIDEO input of the monitor. 2. Connect the red (R) and white (L) audio jacks of the device to the AUDIO IN (AUDIO2 or AUDIO3) jacks of the monitor. -
Page 21: Using Hdmi Input
User Manual BDL6551V 3.3.4. USING HDMI INPUT Connect the HDMI connector of the external device to the HDMI input of the monitor. 3.4. CONNECTING A PC 3.4.1. USING VGA INPUT 1. Connect the 15-pin VGA connector of the PC to the VGA IN connector of the monitor. -
Page 22: Using Dvi Input
User Manual BDL6551V 3.4.2. USING DVI INPUT 1. Connect the DVI-D connector of the PC to the DVI-D connector of the monitor. 2. Connect the audio cable to the AUDIO IN (AUDIO1) input of the monitor. 3.4.3. USING HDMI INPUT 1. -
Page 23: External Audio Connection
User Manual BDL6551V 3.5. EXTERNAL AUDIO CONNECTION 3.5.1. CONNECTING EXTERNAL SPEAKERS 1. Connect the speaker wires to the external speaker (SPEAKERS) output of the monitor. 2. Turn on the monitor. Note: Before connecting the speaker wires to the monitor, turn off your monitor. -
Page 24: Connecting Another Bdl6551V Monitor
Note: The number of displays that can be used in a daisy-chain configuration will depend on the resolution of the input signal being used. • Connect the VGA OUT connector of the monitor to the VGA IN connector of another BDL6551V monitor. • Connect the RS232C OUT connector of the monitor to the RS232C IN connector of another BDL6551V monitor. -
Page 25: Osd Menu
User Manual BDL6551V OSD MENU An overall view of the On-Screen Display (OSD) structure is shown below. You can use it as a reference for further adjusting your monitor. 4.1. NAVIGATING THE OSD MENU 4.1.1. NAVIGATING THE OSD MENU USING THE REMOTE CONTROL 1. -
Page 26: Navigating The Osd Menu Using The Monitor's Control Buttons
User Manual BDL6551V 4.1.2. NAVIGATING THE OSD MENU USING THE MONITOR’S CONTROL BUTTONS 1. Press the MENU button to display the OSD menu. 2. Press the / button to choose the item you want to adjust. 3. Press the ENTER/VIDEO SOURCE button to enter the submenu. -
Page 27: Osd Menu Overview
User Manual BDL6551V 4.2. OSD MENU OVERVIEW 4.2.1. PICTURE MENU P IC T UR E BR IGH TNE S S CON T RA ST S HA RP NE S S BL ACK L E V E L NOI S E RE DU CTI O N... - Page 28 User Manual BDL6551V COLOR CONTROL Note: This function is only available when COLOR TEMPERATURE is set to USER. With this function you can adjust the color tones of the image precisely by changing the R (Red), G (Green) and B (Blue) settings independently.
-
Page 29: Screen Menu
User Manual BDL6551V 4.2.2. SCREEN MENU S CR EE N H P O SI T I O N V P O S IT I O N CL OCK CL OCK P HAS E ZOOM M O DE CU S TOM ZOO M... - Page 30 User Manual BDL6551V • REAL - This mode displays the image pixel-by-pixel on screen without scaling the original image size. • 21:9 - The picture is enlarged to 16:9 format. This mode is recommended when displaying pictures that have black bands at the top and bottom (letterbox format).
-
Page 31: Audio Menu
User Manual BDL6551V 4.2.3. AUDIO MENU AU DI O V O L UM E M UT E AU DI O S O UR CE S P EA KE R AU DI O RE S E T Se l A djus t... -
Page 32: Pip Menu
User Manual BDL6551V 4.2.4. PIP MENU Note: For COMPONENT, VGA, DVI-D and HDMI inputs only. P IP P IP SI Z E P IP AUD IO P IP RE SE T Se l A djus t E nter PIP SIZE Select the size of the sub picture in the PIP (Picture-in-Picture) mode. -
Page 33: Configuration 1 Menu
User Manual BDL6551V 4.2.5. CONFIGURATION 1 MENU CO N F IG U RAT IO N 1 AU TO AD JU ST P O W ER S AV E LA NGUA GE PANE L S AV ING CO L O R S Y S T E M... - Page 34 User Manual BDL6551V CONFIGURATION RESET Reset all settings in the CONFIGURATION 1 menu. Press the SET/PLUS button to open the submenu, and then press the UP/DOWN button to make selection. Select YES and press the SET button to restore settings to factory preset values. Press the EXIT button to cancel and then return to the previous menu.
-
Page 35: Configuration 2 Menu
User Manual BDL6551V 4.2.6. CONFIGURATION 2 MENU CO N F IG U RAT IO N 2 OSD TUR N OF F O SD MO D E IN FORM ATI ON OS D S L E E P T IM E R... -
Page 36: Advanced Option Menu
User Manual BDL6551V 4.2.7. ADVANCED OPTION MENU AD VA NC ED OP TI ON I N P U T R E S O L U T I O N BLACK LEVEL EXPANSION G AM M A S E L E CT IO N... - Page 37 • OFF - Disable the film mode frame conversion function. This mode is suitable for TV broadcasting and VCR signals. IR CONTROL Select the operation mode of the remote control when multiple BDL6551V monitors are connected via the RS232C connection. Press the SET/PLUS button to open the submenu, and then press the UP/DOWN button to toggle between •...
-
Page 38: Date And Time
User Manual BDL6551V • H MONITORS - Select the number of monitors on the horizontal side. • V MONITORS - Select the number of monitors on the vertical side. • POSITION - Select the position of this monitor in the screen matrix. - Page 39 • If there are two schedule items programmed for the same time, then the highest numbered schedule has priority. MONITOR ID Set the ID number for controlling the monitor via the RS232C connection. Each monitor must have an unique ID number when multiple BDL6551V monitors are connected. Use the PLUS/MINUS button to select a monitor ID. DDC/CI Choose to turn ON or OFF the DDC/CI communication function.
-
Page 40: Input Mode
User Manual BDL6551V INPUT MODE VGA Resolution Active Resolution Standard Resolution H Pixels WVGA SVGA 1024 WXGA 1280 WXGA 1280 SXGA 1280 SXGA 1280 WXGA 1360 WXGA 1366 UXGA 1600 HD1080 1920 SDTV Resolution Active Resolution Standard Resolution H Pixels... - Page 41 User Manual BDL6551V • If a vertical and horizontal frequency-select mode exists, select 60Hz (vertical) and 31.5KHz (horizontal). In some cases, abnormal signals (such as stripes) might appear on the screen when the PC power is turned off (or if the PC is disconnected).
-
Page 42: Pixel Defect Policy
This notice explains the different types of pixel defects and defines the acceptable defect level for the BDL6551V LCD screen. In order to qualify for repair under warranty, the number of pixel defects must exceed a certain level which is given in the reference table. -
Page 43: Bright Dot Defects
PIXEL DEFECT TOLERANCES In order to qualify for repair due to pixel defects during the warranty period, a PDP / TFT panel in a Philips Plasma / LCD- display must have pixel or sub-pixel defects exceeding the tolerances listed in the following table. -
Page 44: Cleaning And Troubleshooting
User Manual BDL6551V CLEANING AND TROUBLESHOOTING 7.1. CLEANING Cautions When Using the Display • Do not bring your hands, face or objects close to the ventilation holes of the display. Top of display is usually very hot due to the high temperature of exhaust air being released through the ventilation holes. -
Page 45: Troubleshooting
User Manual BDL6551V 7.2. TROUBLESHOOTING Symptom No picture is displayed 1. The power cord is disconnected. 2. The main power switch on the back of 3. The selected input has no connection. 4. The monitor is in standby mode in VGA... -
Page 46: Technical Specifications
User Manual BDL6551V TECHNICAL SPECIFICATIONS Display Item Screen Size (Active Area) Aspect ratio Number of pixels Pixel pitch Displayable colors Brightness (typical) Dynamic contrast ratio Contrast ratio (typical) Viewing angle In/Out Terminals Item Speaker Output Internal Speaker Audio Output RCA Jack x 1... - Page 47 User Manual BDL6551V Dimension [W x H x D mm] With Stand Without Stand Weight With Stand Without Stand Environmental Condition Item Operational Temperature Storage Operational Humidity Storage Operational Pressure Storage / Shipment Internal Speaker Item Type Input Impedance Output Sound Pressure Frequency Response 1500 x 1021.4 x 421.7 mm...