Pioneer MVH-AV290BT Owner's Manual
Rds av receiver
Hide thumbs
Also See for MVH-AV290BT:
- Owner's manual (40 pages) ,
- Quick start manual (33 pages) ,
- Installation manual (53 pages)
Table of Contents

Related Manuals for Pioneer MVH-AV290BT


Summary of Contents for Pioneer MVH-AV290BT
- Page 1 MVH-AV290BT RDS AV RECEIVER Important (Serial number) Owner’s Manual The serial number is located on the bottom of this unit. For your own security and convenience, be sure to record this number on the enclosed warranty card.
-
Page 2: Table Of Contents
Contents ■ ■ ■ Thank you for buying this Pioneer product. Registration and S till image files ....17 Theme menu ....24 Please read through these instructions so you connection of Bluetooth Starting procedure .........17 Selecting the theme color .......24 will know how to operate your model properly. - Page 3 Contents Bluetooth ............35 WMA ..............35 AAC ...............35 Detailed information regarding connected iPod devices ............35 Using app-based connected content ....35 Notice regarding video viewing ......35 Notice regarding MP3 file usage ....36 Using the LCD screen correctly ......36 Specifications..........36...
-
Page 4: Precaution
Part 15 of the FCC Rules. These limits are the use of headphones may create a traffic hazard and is MODEL NO. : MVH-AV290BT designed to provide reasonable protection against illegal in many areas. Contains FCC ID : AJDK083 harmful interference in a residential installation. -
Page 5: Important Safety Information
(possibly resulting in serious injury or death) and/ WARNING nearest authorized Pioneer Service Station. Do not use this or unlawful if used while driving. To prevent such functions from product in this condition because doing so may result in a... -
Page 6: Handling The Usb Connector
Some of the settings and recorded contents will not be reset. Pioneer cannot guarantee compatibility with all USB mass Manual storage devices and assumes no responsibility for any loss of data on media players, iPhone, smartphone, or other Data subject to erasure devices while using this product. -
Page 7: Basic Operation
Basic operation Checking part names and Plugging and unplugging a USB stor- age device functions p This product may not achieve optimum performance with some USB storage devices. p Connection via a USB hub is not possible. p A USB cable is required for connection. 1 Pull out the plug from the USB port of the USB cable. -
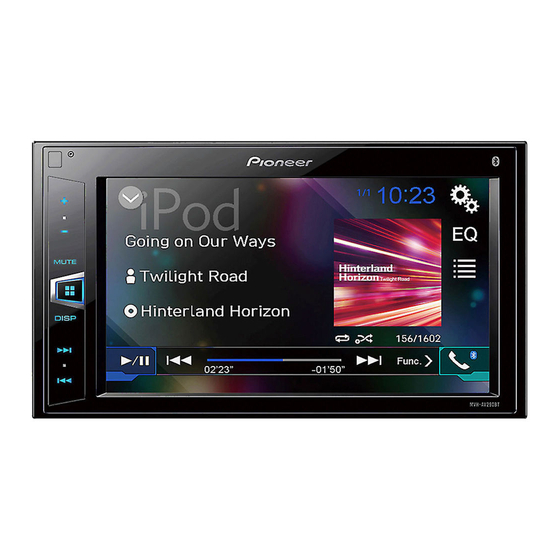
Page 8: How To Use The Screens
Basic operation How to use the screens Time and date setting screen 2016 Month/Date d/m/y m/d/y Time Format 12hour 24hour Setting menu screen Top menu screen System 6/10 Radio Current source Phone menu screen AV source icons Bluetooth Radio iPod Rear View Phone Book Audio... -
Page 9: Supported Av Source
Basic operation p To protect the LCD screen from damage, be sure to touch the Supported AV source Switching the operation panel screen only with your finger gently. You can play or use the following sources with this product. Using the common touch panel keys : Switches the operation panel of AV ... -
Page 10: Registration And Connection Of Bluetooth Device
Registration and connection of Bluetooth device Displaying the “Bluetooth” Connecting to a Bluetooth device Switching visibility automatically screen This function sets whether or not to make this product visible to the other device. This function connects the last connected Bluetooth device to 1 Press 1 Display the “Bluetooth”... -
Page 11: Updating Bluetooth Software
Registration and Hands-free phoning connection of Bluetooth telephone Displaying the Phone menu Bluetooth device connected indicator screen The device number of the connected device is displayed. 1 Press 2 Touch [Bluetooth Memory Clear]. 2 Touch Reception status of 3 Touch [Clear]. The Phone menu screen appears. -
Page 12: Receiving A Phone Call
Hands-free phoning Receiving a phone call Dialing from the history Adjusting the other party’s listening volume 1 Touch to answer the call. 1 Display the “Phone menu” screen. This product can be adjusted to the other party’s listening Displaying the Phone menu screen on page 11 ... -
Page 13: Setup For Ipod
Hands-free Setup for iPod phoning When using an iPod with this product, configure the settings of iPod / iPhone with a 30-pin connector this product according to the device to be connected. The received call and the dialed number histories iPod compatibility When connecting via CD-IU201V (sold ... -
Page 14: Radio
Radio Level1 to Level4: Starting procedure Displays the preset channel list. Sets the level of sensitivity for FM to Level1 to Level4 (for Select an item on the list ("1" to "6") AM Level1 or Level2). 1 Press p The FM “Level4” (AM “Level2”) setting allows reception of to switch to the preset channel. -
Page 15: Compressed Audio Files
Compressed audio files Displays the artwork when the file Starting procedure Plays files in random order. with the artwork is being played. : Does not play files in random order. The artwork file type needs to be JPEG, 1 Press and the file size should be less than 99 KB. -
Page 16: Compressed Video Files
Compressed video files Starting procedure Hides the touch panel keys. 6/10 To display again the keys, Compressed audio files on page 15 touch anywhere on the screen. Selecting files from the file Stop name list 6/10 Abcdefghi Abcdefghi You can select files to view using the file name list. Full 1 Touch 9999’99”... -
Page 17: Still Image Files
Still image files Selecting files from the file Hides the touch panel keys. 6/10 To display again the keys, name list touch anywhere on the screen. You can select files to view using the file name list. Rotates the displayed 1 Touch picture 90°... -
Page 18: Ipod
iPod Video source screen Audio source screen 1 Sets a shuffle play. iPod iPod 6/10 6/10 : Plays randomly songs or videos within the selected list. Abcdefghi Abcdefghi : Plays album randomly. Abcdefghi Audio source screen 2 iPod 99999/99999 6/10 99999/99999 Full 9999’99”... -
Page 19: Starting Procedure
iPod Bluetooth audio player and apply the parking brake. p By pressing and hold the button, you can also Playback screen 1 perform fast reverse or fast forward. Bluetooth p Before using the Bluetooth audio player, register and con- Starting procedure 6/10 nect the device to this product. -
Page 20: Aux Source
2 Confirm that “AUX Input” is turned on. CAUTION 3 Press Pioneer recommends the use of a camera which outputs mirror reversed images, otherwise the screen image may 4 Touch [AUX]. appear reversed. -
Page 21: Setting The Camera For Rear View Mode
System settings p Immediately verify whether the display changes to a p To set the rear view camera for Rear View mode, set “Back 6 Press once again. rear view camera image when the shift lever is moved to Camera Input” to “On”. Proceed to 16-point adjustment. -
Page 22: Adjusting The Picture
System settings 2 Touch [Dimmer Settings]. The time display of the dimmer duration adjusting “Dimmer” can be changed the setting or the time bar is depending on the clock display setting. to switch it to on or off. 3 Touch [Day/Night] to switch the following ... -
Page 23: Audio Adjustments
Audio adjustments Displaying the “Audio” setting Adjusting source levels Adjusting the subwoofer screen settings SLA (source level adjustment) lets you adjust the volume level of each source to prevent radical changes in volume when switch- p This function is available only when “Subwoofer” is “On”. ing between sources. -
Page 24: Boosting The Bass
Audio adjustments Theme menu Boosting the bass Selecting the theme color Customizing the equalizer curves A theme color can be selected from 3 different colors. 1 Display the “Audio” setting screen. You can adjust the currently selected equalizer curve setting as desired. -
Page 25: Favorite Menu
Favorite menu Common operations Registering your favorite menu items in shortcuts allows you to 2 Touch the desired mode. quickly jump to the registered menu screen by a simple touch on Full: the “Favorites” screen. 6/10 A 4:3 picture is enlarged in the horizontal direction only, p Up to 12 menu items can be registered in the favorite menu. -
Page 26: Other Functions
Do not shorten any leads. If you do, the protection WARNING circuit (fuse holder, fuse resistor or filter, etc.) may Pioneer does not recommend that you install this fail to work properly. product yourself. This product is designed for ... -
Page 27: Notice For The Blue/White Lead
Connection The black cable is ground. When installing this unit Notice for the blue/white lead Power cord or power amp (sold separately), make sure to connect the ground wire first. Ensure that the ground wire is When the ignition switch is turned on (ACC ON), a control properly connected to metal parts of the car’s body. -
Page 28: Speaker Leads
Connection lead must be connected to the power supply side of the Power amp (sold separately) parking brake switch. a Power supply side b Parking brake switch Without internal amp c Ground side Parking Brake Important The speaker leads are not used when this connection is in use. -
Page 29: Ipod / Iphone
Connection iPod / iPhone For details on how to connect an external device using a separately sold cable, refer to the manual for the cable. For details concerning the connection, operations and compatibility of iPhone, refer to Setup for iPod on page 13. iPod / iPhone with Lightning connector Connecting via the USB port... -
Page 30: External Video Component And The Display
Connection Installation 9 Red, white Precautions before installation External video component and a To Yellow the display b To Red, white CAUTION c To video output d To audio outputs Never install this product in places where, or in a manner e External video component (sold separately) that: The appropriate setting is required to use the external video... -
Page 31: Installation Using The Screw Holes On The Side Of This Product
Installation Improper installation of the unit with the surface tilted more than these tolerances increases the potential for errors in the vehicle’s location display, and might otherwise cause reduced display performance. 30° 1 Microphone lead 2 Groove When installing, to ensure proper heat dispersal when using 2 Attach the microphone clip to the sun visor. -
Page 32: Adjusting The Microphone Angle
Refer to the table below to identify the Cables are not connected correctly. problem, then take the suggested corrective action. If the error — Connect the cables correctly. persists, record the error message and contact your dealer or your nearest Pioneer service center. -
Page 33: Detailed Information For Playable Media
— Disconnect the USB storage device and do not use it. Turn your dealer or an authorized Pioneer Service Station for the ignition switch to OFF, then to ACC or ON and then assistance. -
Page 34: Copyright And Trademark Notice
Appendix Video files compatibility (USB) Example of a hierarchy Media compatibility chart Files may not be played back properly depending on the This product assigns folder numbers. The user cannot environment in which the file was created or on the contents assign folder numbers. -
Page 35: Bluetooth
Notice regarding video viewing Pioneer accepts no responsibility for data lost from an iOS is a trademark on which Cisco holds the trademark right in Remember that use of this system for commercial or public view- iPod, even if that data is lost while using this product. -
Page 36: Notice Regarding Mp3 File Usage
The LCD screen is exposed in order to increase its visibility Load impedance ....4 Ω (4 Ω to 8 Ω [2 Ω for 1 ch ] allowable) nearest authorized Pioneer Service Station. within the vehicle. Please do not press strongly on it as this Preout output level (max) ............2.0 V may damage it. - Page 37 Appendix Max current supply ..............1.0 A USB Class ..........MSC (Mass Storage Class) File system ..............FAT16, FAT32 MP3 decoding format ......MPEG-1 & 2 A udio Layer 3 WMA decoding format ..Ver.7, 7.1, 8, 9 (2 ch audio) (Windows Media Player) AAC decoding format ..MPEG-4 A AC (iTunes encoded only) (Ver.