Table of Contents
Advertisement
Advertisement
Table of Contents

Related Manuals for Asus VIVOMINI VC66 SERIES


Summary of Contents for Asus VIVOMINI VC66 SERIES
- Page 1 VivoMini VC66 Series User Manual...
- Page 2 ASUS will only be responsible for or indemnify you for loss, damages or claims based in contract, tort or infringement under this Warranty Statement. This limit also applies to ASUS’ suppliers and its reseller. It is the maximum for which ASUS, its suppliers, and your reseller are collectively responsible.
-
Page 3: Table Of Contents
Installing or upgrading the M.2 SSD ............27 Installing or upgrading the wireless card ..........28 Installing 2.5” HDD / SSD ................29 Appendix Safety information ...................32 Setting up your system.................32 Care during use ....................32 Regulatory notices ...................34 ASUS contact information ................38 VivoMini VC66 Series... -
Page 4: About This Manual
VivoMini's data and components. Typography Bold text Indicates a menu or an item to select. Italic This indicates sections that you can refer to in this manual. VivoMini VC66 Series... -
Page 5: Package Contents
* Actual product specifications and package contents may vary depending on the model type, country, or region. • I f the device or any of its components fail or malfunction during normal or proper use and it is still within the warranty period, bring the device and the warranty card to you nearest ASUS Service Center. VivoMini VC66 Series... - Page 6 VivoMini VC66 Series...
-
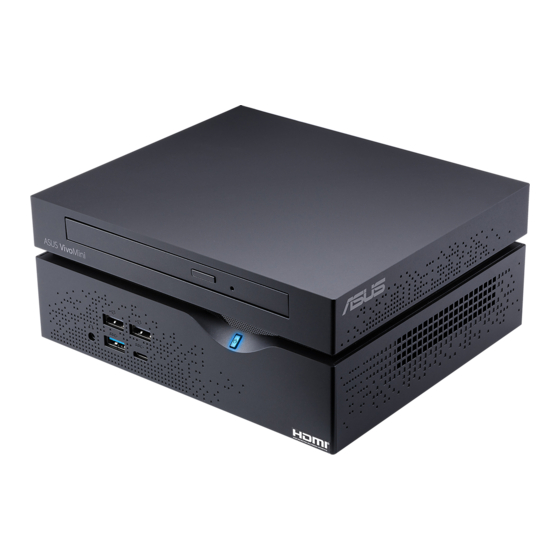
Page 7: Getting To Know Your Vivomini
Getting to know your VivoMini... -
Page 8: Features
Headphone jack This port allows you to connect amplified speakers or headphones. USB 3.0 port The USB 3.0 (Universal Serial Bus 3.0) port provides a transfer rate up to 5 Gbit/s and is backward compatible to USB 2.0. VivoMini VC66 Series... -
Page 9: Power Button
HDDs, speakers, cameras and printers. Power button The power button allows you to turn the VivoMini on or off. You can also press the power button once to put your VivoMini to sleep mode. VivoMini VC66 Series... -
Page 10: Left Side
IMPORTANT! For optimum air flow, ensure that the air vents are free from obstructions. Right side Air vents The air vents allow air to enter your VivoMini chassis. IMPORTANT! For optimum air flow, ensure that the air vents are free from obstructions. VivoMini VC66 Series... -
Page 11: Rear Panel
DVI port This port allows you to connect your VivoMini to an external display. Serial (COM) connector The 9-pin serial (COM) connector allows you to connect devices that have serial ports such as mouse, modem, or printers. VivoMini VC66 Series... -
Page 12: Hdmi Port
The USB 3.0 (Universal Serial Bus 3.0) port provides a transfer rate up to 5 Gbit/s and is backward compatible to USB 2.0. Memory card slot This built-in memory card reader slot supports MMC, SD, SDHC, and SDXC card formats. VivoMini VC66 Series... -
Page 13: Using Your Vivomini
Using your VivoMini... -
Page 14: Getting Started
• T o disconnect your VivoMini from its main power supply, unplug your VivoMini from the power socket. • Power adapter information: - Input voltage: 100-240Vac - Input frequency: 50-60Hz - Rating output current: 6.32A max. (120W) / 9.23A max. (180W) - Rating output voltage: 19V / 19.5V VivoMini VC66 Series... -
Page 15: Connect The Usb Cable From Keyboard Or Mouse
To connect a keyboard and mouse to your VivoMini: Connect the USB cable from your keyboard and mouse to any of the USB ports of your VivoMini. Connecting keyboard or mouse via USB port VivoMini VC66 Series... -
Page 16: Connect A Display Panel To Your Vivomini
• HDMI connector • DisplayPort connector • DVI connector To connect a display panel to your VivoMini: Connect a display cable either to the HDMI, DisplayPort or DVI port. Connecting display via HDMI port Connecting display via DisplayPort VivoMini VC66 Series... - Page 17 Connecting display via DVI port VivoMini VC66 Series...
-
Page 18: Turn On Your Vivomini
Turn on your VivoMini Press the power button to turn on your VivoMini. VivoMini VC66 Series... -
Page 19: Turning Your Vivomini Off
BIOS Setup. • You have installed a new system component that requires further BIOS settings or update. WARNING! Inappropriate BIOS settings may result to instability or boot failure. We strongly recommend that you change the BIOS settings only with the help of a trained service personnel. VivoMini VC66 Series... -
Page 20: Quickly Enter The Bios
To load the default values for each of the parameters in your BIOS: • Enter the BIOS by following the steps mentioned in the Quickly enter the BIOS section. • Navigate to the Exit menu. • Select the Load Optimized Defaults option, or you may press <F5>. • Select Yes to load the default BIOS values. VivoMini VC66 Series... -
Page 21: Upgrading Your Vivomini
Upgrading your VivoMini... -
Page 22: Upgrading Memory Modules
2GB, 4GB, 8GB, or 16GB unbuffered non-ECC 1.35 V DDR4 260-pin SO-DIMMs for a maximum of 32GB memory. IMPORTANT! Refer to http://www.asus.com for the list of compatible DIMMs. You can only install 1.35 V DDR4 SO-DIMM to the VivoMini’s DIMM slots. - Page 23 Lift and remove the top cover and set it aside. IMPORTANT! Remove the top cover carefully to prevent pulling on and causing damage to the cables connected. This may vary per model. Remove the screw from the HDD layer. VivoMini VC66 Series...
- Page 24 Align and insert the memory module into the slot and press it down (A) until the retaining clips snaps back into place and it is securely seated in place. Repeat the same steps to install the other memory module. VivoMini VC66 Series...
- Page 25 Replace the HDD layer. NOTE: Ensure to organize the cables to prevent any damage to your VivoMini and to ensure the HDD layer can be replaced successfully. Replace the screw to secure the HDD layer. VivoMini VC66 Series...
- Page 26 VivoMini and to ensure the top cover can be replaced successfully. 11. Reattach the screws to secure the cover back on the bottom side of the main box, then replace the rubber feet back on each screw hole. VivoMini VC66 Series...
-
Page 27: Installing Or Upgrading The M.2 Ssd
Align and insert the M.2 SSD into its slot inside the VivoMini, then secure it with a screw. Follow steps 8-11 under the Upgrading memory modules section to replace the top cover and HDD layer of your VivoMini. VivoMini VC66 Series... -
Page 28: Installing Or Upgrading The Wireless Card
Connect the black antenna to MAIN or and the white antenna to AUX or on the wireless card (C). Follow steps 8-11 under the Upgrading memory modules section to replace the top cover and HDD layer of your VivoMini. VivoMini VC66 Series... -
Page 29: Installing 2.5" Hdd / Ssd
Follow steps 1-4 under the Upgrading memory modules section to remove the top cover of your VivoMini. Remove four (4) screws from the HDD/SSD bracket. Remove the HDD/SSD bracket. Remove the cable from the holder, then remove the holder from the HDD/SSD bracket. VivoMini VC66 Series... - Page 30 Connect the cable to the HDD/SSD, then align the bracket to the HDD/SSD compartment of your VivoMini and secure the bracket with the screws previously removed. Follow steps 10-11 under the Upgrading memory modules section to replace the top cover of your VivoMini. VivoMini VC66 Series...
-
Page 31: Appendix
Appendix... -
Page 32: Safety Information
Care during use • Do not walk on the power cord or allow anything to rest on it. • Do not spill water or any other liquids on your system. • When the system is turned off, a small amount of electrical current still flows. Always unplug the power cord from the power outlets before cleaning the system. VivoMini VC66 Series... - Page 33 This symbol of the crossed out wheeled bin indicates that the product (electrical, electronic equipment, and mercury-containing button cell battery) should not be placed in municipal waste. Check local technical support services for product recycling. VivoMini VC66 Series...
-
Page 34: Regulatory Notices
REACH Complying with the REACH (Registration, Evaluation, Authorization, and Restriction of Chemicals) regulatory framework, we publish the chemical substances in our products at ASUS REACH website at http://csr.asus.com/english/REACH.htm ASUS Recycling/Takeback Services ASUS recycling and takeback programs come from our commitment to the highest standards for protecting our environment. -
Page 35: Rf Exposure Warning
This digital apparatus does not exceed the Class B limits for radio noise emissions from digital apparatus set out in the Radio Interference Regulations of the Canadian Department of Communications. This class B digital apparatus complies with Canadian ICES-003. VivoMini VC66 Series... -
Page 36: Wireless Operation Channel For Different Domains
Wireless Operation Channel for Different Domains N. America 2.412-2.462 GHz Ch01 through CH11 Japan 2.412-2.484 GHz Ch01 through Ch14 Europe ETSI 2.412-2.472 GHz Ch01 through Ch13 Regional notice for Singapore This ASUS product complies with IMDA Complies with IMDA Standards Standards. DB103778 VivoMini VC66 Series... -
Page 37: Energy Star Complied Product
All ASUS products with the ENERGY STAR logo comply with the ENERGY STAR standard, and the power management feature is enabled by default. The monitor and computer are automatically set to sleep after 10 and 30 minutes of user inactivity. -
Page 38: Asus Contact Information
+1-510-739-3777 +1-510-608-4555 Web site http://usa.asus.com Technical Support Support fax +1-812-284-0883 General support +1-812-282-2787 Online support http://qr.asus.com/techserv ASUS COMPUTER GmbH (Germany and Austria) Address Harkort Str. 21-23, D-40880 Ratingen, Germany +49-2102-959931 Web site http://www.asus.com/de Online contact http://eu-rma.asus.com/sales Technical Support Telephone +49-2102-5789555... -
Page 39: Declaration Of Conformity
(1) This device may not cause harmful interference, and (2) this device must accept any interference received, including interference that may cause undesired operation. Representative Person’s Name : Steve Chang / President Signature : Date : Dec. 24, 2016 Ver. 140331 VivoMini VC66 Series... - Page 40 VivoMini VC66 Series...