Table of Contents
Advertisement
Advertisement
Table of Contents

Related Manuals for Rinnai RO-E6206XA-EM


Summary of Contents for Rinnai RO-E6206XA-EM
- Page 1 Operation / Installation Manual Electric Oven RO-E6206XA-EM Rinnai Corporation...
-
Page 2: Table Of Contents
Troubleshoot ---------------------------------------------------------------------------------------------------------------------------------12 Installation ------------------------------------------------------------------------------------------------------------------------------------13 IMPORTANT To register your product warranty, please paste the serial numbers stickers enclosed with the packaging on your warranty card. Please contact your local Rinnai Customer Care Centre should you require further assistance. Version: 2015 12... -
Page 3: Safety Warnings
SAFETY WARNINGS Please read this user manual thoroughly before attempting to use appliance for the first time. This manual contains important information on safe installation, use and care of the appliance. Keep these instructions for reference and pass them on to any future user. Unpacking ... -
Page 4: Appliance Specifications
APPLIANCE SPECIFICATIONS Voltage and frequency of power supply 220V – 240V / 50Hz . 60Hz Total connected load 2875W Appliance dimension W594 X D594 X H568.8 mm Cavity dimension W470 X D410 X H340 mm Oven capacity 70 litres Maximum temperature Net weight Approx. -
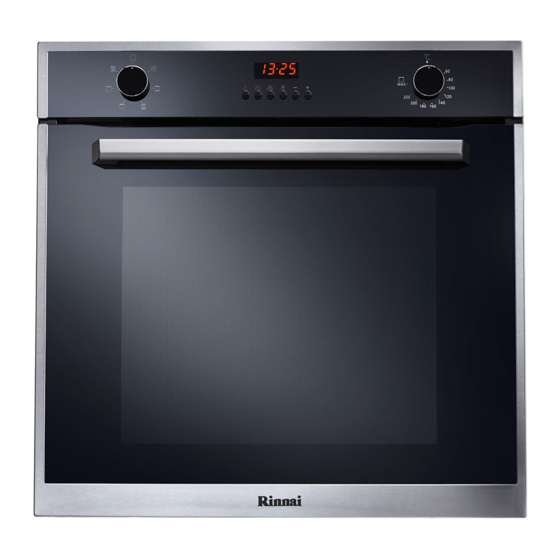
Page 5: Guide To The Appliance
GUIDE TO THE APPLIANCE H Rotisserie (1) A Control panel I Grilling rack (1) H Guides for sliding in the racks J Universal pan (1) G Oven rack K Deep baking tray (1) F Dripping pan or baking pan USING FOR THE FIRST TIME Pre-cleaning the accessories New appliances have a slight smell on first use. -
Page 6: Oven Operation
OVEN OPERATION Notes on cooking with the programmer: Notes on cooking without the programmer: Select the desired cooking mode using the MODE Select the desired cooking mode using the MODE SELECTOR. SELECTOR. Select the desired temperature using the ... - Page 7 Manual operation mode When the set cooking time has elapsed, oven stops operating automatically. The “AUTO” symbol flashes If programmer setting has been set, the “AUTO” symbol and an audible alarm sounds. Press TIMER button flashes in the display. to cancel the alarm and the clock display To clear the setting, press MANUAL button ...
-
Page 8: Oven Function
OVEN FUNCTION Mode setting This programme allows 6 function (5 heating) settings. Grill Conventional Fan Assisted Grill "Top Oven" Fast Cooking Oven Light Conventional mode 2145-2540W Position knob “C”: Between 60℃ and Max. on this setting, The top and bottom heating elements come on. This is the classic, traditional type of oven which has been perfected , with heat distribution and reduced energy consumption. - Page 9 Grill 2385-2835W Position of thermostat knob “C”: Max. The top central heating elements comes on. The extremely high and direct temperature of the grill makes it possible to brown the surface of meats and roasts while locking the juices in to keep them tender.
- Page 10 Grilled chicken 55-60 Fan Assisted Grill Cuttlefish 30-35 With rotisserie 70-80 Veal on the spit 70-80 Chicken on the spit 70-75 Chicken (on the spit) + potatoes (roasted) 70-75 Lamb on the spit 70-80 Frozen food Fast cooking Pizza Courgette and prawn pie Country style spinach pie 30-35 Turnovers...
-
Page 11: Using The Accessories
USING THE ACCESSORIES Oven accessories can be positioned in accordance to individual cooking requirments. Always keep the oven door shut when using the rotisserie and start with the oven cold in order to avoid scalding yourselves when positioning the spit. ... -
Page 12: Maintenance And Care
Avoid using abrasive cleaning agents on the oven For purchase of cavity walls. We highly recommend you to apply spare part, please mild cleaning agents onto a damp cloth, and then check with your local Rinnai Customer wipe the oven interior. Care Centre. -
Page 13: Troubleshoot
Grease or food spatters can also cause excessive smoking. If the problem persists despite observing the above checks, please contact your local Rinnai Customer Care Centre for assistance. For service calls under warranty, please note that it is necessary to product your proof... -
Page 14: Installation
INSTALLATION Installation must be performed by qualified personnel only. The manufacturer declines all responsibility for improper installation and does not accept responsibility for appliance warranty in the event of damage caused by incorrect installation. Fit the appliance in appropriate cabinet ... - Page 15 Ventilation Electrical connections To ensure adequate ventilation, a minimum Connecting the supply cable to the power mains ventilation gap of 45mm is required from the back of appliance to cabinet wall. Install a standardized plug corresponding to the load indicated on the rating label attached to the ...
- Page 16 URL: www.rinnai.co.id Macau |澳門 ประเทศไทย Thailand | Rinnai Appliance Service Center Rinnai (Thailand) Co., Ltd. / Lucky Flame Co., Ltd. Edificio Industrial, 3 andar F.A da Zona Macau 61/1 Soi Kingkaew 9, Kingkaew Rd. 林內爐具服務中心 Racha Thewa, Bangphli, Samutprakarn 10540, Thailand 澳門青洲跨境工業大廈3樓F座...