Table of Contents
Advertisement
Available languages
Available languages
UK -
Installation and operating instructions
FR -
Manuel d'installation et d'utilisation
Jøtul F 305 R B
Jøtul F 305 B
Jøtul F 305 C B
UK - Register your fi replace at jotul.com for a 25-year warranty.
The manuals which are enclosed with the product must be kept throughout the product's entire service life. Les manuels
fournis avec le produit doivent être conservés pendant toute la durée de vie du
Jøtul F 305 Series
Jøtul F 305 R LL
Jøtul F 305 LL
Jøtul F 305 C LL
Jøtul F 305 R SL
Jøtul F 305 SL
Jøtul F 305 C SL
produit..
3
31
Advertisement
Chapters
Table of Contents

Related Manuals for Jøtul F 305 R B


Summary of Contents for Jøtul F 305 R B
- Page 1 Jøtul F 305 Series UK - Installation and operating instructions FR - Manuel d’installation et d’utilisation Jøtul F 305 R B Jøtul F 305 R LL Jøtul F 305 R SL Jøtul F 305 B Jøtul F 305 LL Jøtul F 305 SL Jøtul F 305 C B...
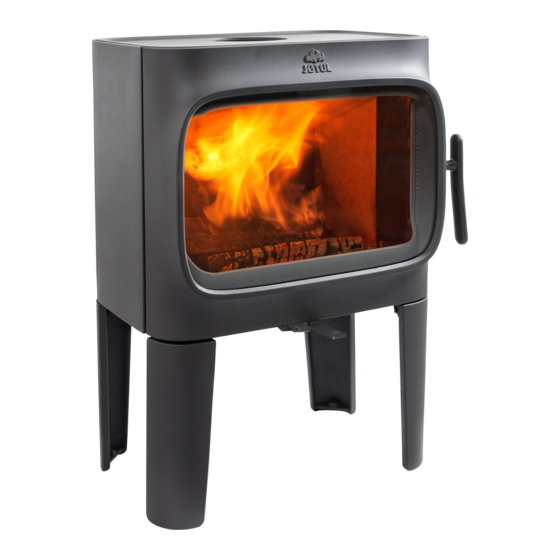
- Page 2 Jøtul F 305 R Jøtul F 305 R B Jøtul F 305 R LL Jøtul F 305 R SL Jøtul F 305 - incl. steel convection shield Jøtul F 305 B Jøtul F 305 LL Jøtul F 305 SL Jøtul F 305 C - incl.
-
Page 3: Table Of Contents
ENGLISH Table of contents 1.0 Relationship to the authorities Technical data ......... 3 • Installation of a fi replace must be carried out in compliance Relationship to the authorities ....3 with national laws and regulations. All local ordinances, including those that refer to national and European standards, must be complied with when products are Safety ............ -
Page 4: Safety
ENGLISH 3.0 Safety • Only remove ash when the fi replace is cold. Ash can contain hot embers and should therefore be placed in a non- fl ammable container. NB! To guarantee optimal performance and safety, Jøtul • Ash should be placed outdoors or be emptied in a place recommends that its stoves are fi... - Page 5 ENGLISH...
- Page 6 ENGLISH...
- Page 7 ENGLISH...
- Page 8 ENGLISH...
- Page 9 ENGLISH...
- Page 10 ENGLISH...
- Page 11 ENGLISH...
- Page 12 ENGLISH...
- Page 13 ENGLISH...
- Page 14 ENGLISH...
- Page 15 ENGLISH...
- Page 16 ENGLISH...
- Page 17 ENGLISH Fresh air supply Fig. 2C, through the fl oor and basement The air used for combustion in any well-insulated house needs to be replaced. This is particularly important in houses with mechanical ventilation. Such replacement air can be procured in several ways.
-
Page 18: Installation
ENGLISH 4.0 Installation Fig. 4 NB: Check that the fi replace is undamaged before installation begins. NB: The product is heavy! Ensure you have help when positioning and installing it. Make sure the product does not topple over. NB: Make sure that furniture and other household items are not so close as to get dried up by the stove. - Page 19 ENGLISH Fig. 6 Fig. 8 1. First remove the outside air cover (A) by unscrewing the screws (B). 1. Take the approval label (A) out of the ash pan and fasten it with the nut (B), as displayed. The nut needs to be tightened only with the fi...
-
Page 20: Approval Label
ENGLISH Fig. 10 4.3 Outside air connection If external air supply is not used Fig. 12 8. Adjust the base with the height adjustment screws using the hex key placed in the bag of screws. NB! Take into account the height of the fl oor plate. 9. - Page 21 ENGLISH Outside air connection through bottom Outside air connection through bottom plate in base plate in base Fig. 13 Fig. 15 1. Place a cardboard plate on the back of the bottom plate before knocking out the cover (A) with a hammer in order to prevent the pieces from damaging something around them.
- Page 22 ENGLISH Fig. 17 Protection grid for sweep ball When a steel chimney is installed to the top outlet, a protection grid for sweep ball must always be installed to the top outlet (optional equipment). 4.5 Fitting a fl ue pipe with a top outlet The product is supplied from the factory with the smoke outlet fi...
- Page 23 ENGLISH Fig. 19 4.6 Fitting a fl ue pipe with a rear outlet The product is supplied from the factory with the smoke outlet fi tted for the top outlet. If you want a rear outlet, proceed as follows: Fig. 21 3.
- Page 24 ENGLISH Fig. 23 Fig. 25 4. Unscrew the screws (B) and remove the cover (A) of the rear outlet from the inside of the burn chamber. 8. Place the gasket (B) on the edge of the fl ue pipe (A). Fig.
-
Page 25: Daily Use
ENGLISH 4.7 Performance check 5.0 Daily use Always check the control handles once the product has been assembled. These should move easily and work in a Odours when using the fi replace for the satisfactory manner. fi rst time Fig. 26 When the fi... -
Page 26: Maintenance
ENGLISH 5.1 Danger of overheating Initial lighting • Open the air vent and ignition vent by pulling the handles The fi replace must never be used in a (fi g. 26) all the way out. (Use a glove or something similar to protect your hand in case the handles are hot.). -
Page 27: Servicing
ENGLISH 6.3 Sweeping fl ue pipes to the 7.0 Servicing chimney Warning! Any unauthorised changes to the product are Flue pipes must be swept through the fl ue pipe sweeping illegal! Only original spare parts may be used! hatch or through the door opening. The baffl e and exhaust defl... - Page 28 ENGLISH 7.2 Dismounting the door Fig. 31 Fig. 29 2. Unscrew the screw (B) and loosen the handle (A). 3. Take out the spring (C) and the two washers (D). 4. Take out the door hook (E) and the washer (F). 1.
- Page 29 ENGLISH Fig. 33 Adjusting the door Fig. 35 7. Remove the glass (A) carefully. Remove the gaskets (B) and (C), and clean the gasket grooves. 8. Glue on new gaskets. 1. The door can be adjusted upwards or downwards slightly Fig.
-
Page 30: Optional Extras
ENGLISH 8.0 Optional extras 10.0 Guarantee terms Our guarantee covers: 8.1 Kit for outside air connection Jøtul AS guarantees that the external cast-iron parts are Outside air connection, Ø80 mm - Cat. no. 51047509 free from defects in materials or manufacturing at the time of Outside air connection, Ø... -
Page 31: Données Techniques
FRANCAIS Sommaire 1.0 Relations avec les autorités Données techniques ......31 • L’installation d’un poêle est soumise aux lois et réglementations Relations avec les autorités ....31 nationales en vigueur. Toutes les réglementations locales, y compris celles se rapportant aux normes nationales et Sécurité... -
Page 32: Sécurité
FRANCAIS 3.0 Sécurité Pieds courts (Équipements disponibles en option) Remarque : Afi n d’assurer un niveau de rendement et de Le poêle Jøtul F 305 Series avec pieds courts (Jøtul F 305 sécurité optimal, l’installation d’un poêle Jøtul doit être R SL, F 305 SL et F 305 C SL) peut uniquement être installé... - Page 33 FRANCAIS...
- Page 34 FRANCAIS...
- Page 35 FRANCAIS...
- Page 36 FRANCAIS...
- Page 37 FRANCAIS...
- Page 38 FRANCAIS...
- Page 39 FRANCAIS...
- Page 40 FRANCAIS...
- Page 41 FRANCAIS...
- Page 42 FRANCAIS...
- Page 43 FRANCAIS...
- Page 44 FRANCAIS...
- Page 45 FRANCAIS Amenée d’air frais Fig. 2C, par le sol et la cave Dans une maison bien isolée, l’air utilisé pour la combustion doit être renouvelé. Ceci est particulièrement important dans une maison avec ventilation mécanique. Plusieurs méthodes sont possibles. Le plus important est de faire arriver l’air dans la pièce où...
-
Page 46: Installation
FRANCAIS 4.0 Installation Fig. 4 Assurez-vous que l’appareil est en bon état avant de procéder à l’installation. L’appareil est lourd ! Prévoyez de l’aide pour le montage et la mise en place. Remarque : Assurez-vous que les meubles et autres articles ménagers ne soient pas trop près et risquent d’être séchés par le poêle. - Page 47 FRANCAIS Fig. 6 Fig. 8 2. Retirer les gants du cendrier. 3. Sortir le défl ecteur, le pare-cendres et le sachet de vis du poêle. 4. Vérifi er que les commandes de réglage (C) se déplacent librement. 5. Retirer la plaque de fond (A) en saisissant le coin avant gauche.
- Page 48 FRANCAIS Étiquette d’homologation 4.2 Installation Jøtul F 305 avec socle Si l’arrivée d’air extérieur n’est pas utilisée Fig. 10 Fig. 11 1. Retirer la plaque d’homologation (A) du cendrier et la fi xer à l’aide de l’écrou (B), comme indiqué. L’écrou doit être uniquement serré...
- Page 49 FRANCAIS Raccordement de l’air extérieur à Raccordement de l’air extérieur à travers le socle travers la plaque de fond dans le socle A travers la sortie arrière dans le socle Fig. 14 Fig. 12 1. Placer un morceau de carton à l’intérieur de la plaque arrière pour empêcher des pièces du couvercle d’endommager le socle.
- Page 50 FRANCAIS Fig. 16 Grille de protection pour outil de ramonage Remarque : Quand une cheminée en acier est installée à la sortie par le haut, une grille de protection pour outil de ramonage doit toujours être installée à la sortie supérieure (équipement optionnel).
- Page 51 FRANCAIS Fig. 18 4.6 Montage d’un conduit de fumée avec sortie par l’arrière Le produit est livré avec un conduit d’évacuation de la fumée prévu pour une sortie par le haut. Si vous souhaitez une évacuation par l’arrière, procédez comme suit : Fig.
- Page 52 FRANCAIS Fig. 22 Fig. 24 4. Desserrer les vis (B) et enlever le couvercle (A) de la sortie arrière de l’intérieur du poêle. 8. Placer le joint d’étanchéité (B) sur le bord du conduit de fumée (A). Fig. 23 5. Fixer la sortie des fumées (A) à la sortie à l’arrière avec les deux vis (C) depuis l’intérieur du poêle.
-
Page 53: Utilisation Au Quotidien
FRANCAIS 4.6 Test de fonctionnement 5.0 Utilisation au quotidien Inspectez toujours les poignées de commande une fois l’appareil monté. Les éléments mobiles doivent fonctionner Odeurs perceptibles lors de la première librement. utilisation du poêle Fig. 25 Lors de la première utilisation, le poêle peut émettre un gaz irritant et dégager des odeurs désagréables. -
Page 54: Maintenance
FRANCAIS Bois d’allumage (bois fendu menu) : 5.1 Risque de surchauffe Longueur : max. 41 cm Diamètre : 2 à 5 cm Ne surchauffez jamais le poêle Quantité nécessaire à l’allumage : 6 à 8 morceaux La surchauffe est provoquée par un excès de combustible Bois (bois fendu) : et/ou d’air qui donne lieu à... -
Page 55: Entretien
FRANCAIS 6.2 Nettoyage et élimination de la suie 7.0 Entretien Pendant l’utilisation, de la suie peut se déposer sur les Avertissement ! Toute modifi cation non autorisée du surfaces internes du poêle. La suie est un bon isolant. Elle produit est interdite ! Utilisez uniquement des pièces réduit donc le rendement thermique du poêle. - Page 56 FRANCAIS 7.2 Démontage de la porte. Fig. 30 Fig. 28 2. Desserrer la vis (B) et retirer la poignée (A). 3. Retirer le ressort (C) et les deux rondelles (D). 4. Retirer le crochet de porte (E) et la rondelle (F). 1.
- Page 57 FRANCAIS Fig. 32 Ajuster la porte Fig. 34 7. Retirer la vitre (A) délicatement. Retirer les joints (B) et (C), et nettoyer les rainures des joints. 8. Coller de nouveaux joints. 1. La porte peut être légèrement ajustée vers le haut ou vers le bas du côté...
-
Page 58: Équipements Disponibles En Option
FRANCAIS 8.0 Équipements 10.0 Garantie disponibles en option La société Jøtul offre une garantie sur les pièces extérieures en fonte en cas de vice de matière et/ou de fabrication à compter de la date de l’achat / de l’installation du poêle. L’acheteur 8.1 Raccordement prise d’air extérieur est en droit de retourner la marchandise à... - Page 60 Jøtul pursue a policy of constant product development. Products supplied may therefore differ in specifi cation, colour and type of accessories from those illustrated and described in the brochure. Jøtul vise sans cesse à améliorer ses produits. C’est pourquoi, il se réserve le droit de modifi er les specifi...