LG MS259 SERIES Owner's Manual
Hide thumbs
Also See for MS259 SERIES:
- Owner's manual (60 pages) ,
- Owner's manual (28 pages) ,
- Owner's manual (24 pages)

Related Manuals for LG MS259 SERIES


Summary of Contents for LG MS259 SERIES
-
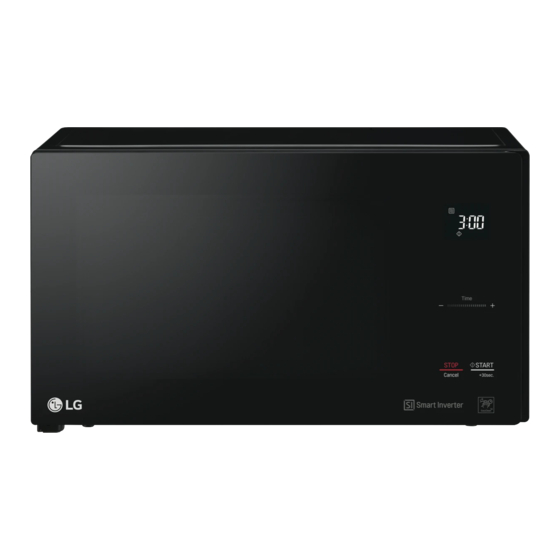
Page 1: Microwave Oven
OWNER’S MANUAL MICROWAVE OVEN Please read this owner’s manual thoroughly before operating. MS259 **** / MS429 **** (optional, please check model specification) MFL69621102 www.lg.com... -
Page 2: Table Of Contents
CONTENTS CONTENTS How the Microwave Function Works IMPORTANT SAFETY INSTRUCTIONS Microwaves are a form of energy similar to radio, television waves, and ordinary daylight. Normally, BEFORE USE microwaves spread outwards as they travel through the Unpacking & Installing This oven, however, has a magnetron that is designed 10 Control Panel to make use of the energy in microwaves. - Page 3 cause death or serious injury. plants, soil, pets or any other living matter inside it.) oven must only be used for heating or cooking food. or safety risk such as fire, causing burns with reduced be burnt. cooking. ever heat baby bottles with the lid or teat still fitted. oing so can cause an explosion.
- Page 4 mode (for ovens with Combination function) • e careful when handling the container. icrowave heating of beverages can result in delayed eruptive boiling, therefore care must be taken when handing the container. will be...
- Page 5 must not be used trays and racks them ot doing so could cause them to burst or rupture. liquid and may even cause a fire. ot doing so could cause leak from the container (for ovens fitted with these functions) his model doesn't provide a temperature probe.
- Page 6 arm houses; y clients in hotels, motels and other residential environments; ed and breakfast type environments. his product is intended for domestic household applications only and not for commercial use. t must not be used in mobile applications. nly connect the supply lead plug to an earthed power outlet socket that has the same rating and specification requirement of the oven.
- Page 7 refer to the lways install the oven according to the installation requirements that are outlined in this manual. o not use any steam cleaners to clean the oven. aution, hot surface hen the symbol is used, It means that the surfaces are liable to get hot during use.
-
Page 8: Before Use
BEFORE USE BEFORE USE UNPACKING & INSTALLING By following the basic steps on these two pages you will be able to quickly check that your oven is operating correctly. Please pay particular attention to the guidelines on where to install your oven. When unpacking your oven make sure you remove all accessories and packing materials. - Page 9 BEFORE USE Press the STOP button, and press the START button one time to start 30 seconds of cooking time. The DISPLAY will count down from 30 seconds. When it reaches 0 it will chime briefly. Open the oven door and test the temperature of the water.
-
Page 10: Control Panel
BEFORE USE CONTROL PANEL Part REHEAT See page 14 “Reheat” POPULAR MENU / SENSOR COOK See page 15 "Popular Menu" / "Sensor Cook" SOFTEN See page 18 “Soften ” MELT See page 19 “Melt” PROOF See page 20 “Proof” KEEP WARM See page 21 “Keep warm”... -
Page 11: Slide Touch Key
BEFORE USE SLIDE TOUCH KEY THE RIGHT TOUCH By using the slide touch, you can adjust the cooking 1. (-), (+) keys at both ends of Slide Touch Key can time or Defrost weight. be used like the normal touch keys. By repeatedly touching the key once like the picture, you can set up the Cooking time or Defrost weight. -
Page 12: Setting Clock
BEFORE USE SETTING CLOCK MORE/LESS When your oven is plugged in for the first time or By using the ( - ) or ( + ) key, manual cook settings when power resumes after a power interruption, can be adjusted to cook food for a longer or shorter the numbers in the display reset to ' 12H '. -
Page 13: How To Use
HOW TO USE HOW TO USE MICROWAVE POWER LEVELS MANUAL COOKING Your microwave oven is equipped with 10 power levels to give you maximum flexibility and control over cooking. (timed cooking) The adjacent table will give you some idea of which foods are prepared at each of the various power levels. -
Page 14: Child Lock
HOW TO USE CHILD LOCK This is a unique safety feature that prevents If the CHILD LOCK was already set and you unwanted oven operations. Once the CHILD touch another key pad, the word Loc shows in LOCK is set, no cooking can take place. the display. -
Page 15: Popular Menu / Sensor Cook
HOW TO USE Initial Weight Code Menu Instructions nsil Temperature Limit Refrigerated 1. Cut leftover pie into pieces. 0.2 - 0.6 kg Microwave- 2. Place food on a microwave-safe dish. safe dish (150 - 200 g . Place food in the oven. Choose the menu and / piece) weight, press START. -
Page 16: Popular Menu / Sensor Cook Instructions
HOW TO USE POPULAR MENU / SENSOR COOK INSTRUCTIONS Initial Weight Code Menu Instructions nsil Temperature Limit Bacon 4 thin Refrigerated 1. Place food on paper towels on a microwave-safe dish. Microwave- rashers Cover with paper towels. safe dish 2. Place food in the oven, choose the menu, press START. - Page 17 HOW TO USE Initial Weight nsil Code Menu Instructions Temperature Limit 1. Prepare frozen vegetables(carrots, broccoli, Frozen 0.2 - 0.8 kg Frozen Microwave- cauliflower, zucchini, beans, peas). Vegetables safe bowl 2. Place food in a microwave-safe bowl. 3. Add amount of water according to the quantity( 0.2 - 0.4 kg: 2 tablespoons, 0.5 - 0.8 kg: 4 tablespoons).
-
Page 18: Soften
HOW TO USE SOFTEN The oven uses low power to soften foods (butter, cream cheese and ice cream) See the following table. Example: To Soften 0.2 kg Cream Cheese. 1. Open the Door. Press Clear. 2. Press Soften twice . ‘2’... -
Page 19: Melt
HOW TO USE MELT The oven uses low power to melt foods (butter, cheese and chocolate). See the following table. Example: To Melt 0.2 kg Chocolate 1. Open the Door. Press Clear. 2. Press Melt three times . ‘3’ will show in the display. 3. -
Page 20: Proof (Fermenting)
HOW TO USE PROOF (fermenting) This feature allows you to make Yogurt by pressing the Proof button. To make 0.6 kg yogurt 1. Open the Door. Press Clear. 2. Press Proof once . ‘1’ will show in the display. 3. Close the Door. START. -
Page 21: Keep Warm
HOW TO USE KEEP WARM The Keep Warm function will keep hot food that has just been cooked at serving temperature. Use microwave-safe utensils. Example: To keep food warm for 90minutes 1. Open the Door. Press Clear. 2. Press Keep Warm once . -
Page 22: Inverter Defrost
HOW TO USE INVERTER DEFROST Four defrost sequences are preset in the oven. • The length of defrosting time varies according to The INVERTER DEFROST feature provides you how solidly the food is frozen. with the best defrosting method for frozen foods. •... -
Page 23: Microwave-Safe Utensils
MICROWAVE-SAFE UTENSILS MICROWAVE-SAFE UTENSILS test. Do not heat dinner plates that use any painted on decorative as they will arc if the paint has metallic content. - Page 24 FOOD CHARACTERISTICS & MICROWAVE COOKING...
-
Page 25: Food Characteristics & Microwave Cooking
FOOD CHARACTERISTICS & MICROWAVE COOKING oven especially if the foil passes too closely to the walls of the oven during rotation. -
Page 26: To Clean Your Oven
TO CLEAN YOUR OVEN times and may even damage the oven. Disconnect the mains plug from the power outlet before cleaning the oven to eliminate the possibility of electric shock. STOP Steam or condensation build up inside the door is normal if foods a re heated for a long period on higher power levels. - Page 27 'Food' on the display. When 'Food' appears on the display, the microwave will not operate Why doesn't the microwave oven work when as it assumes that no food has been placed inside. 'Food' in the 'Food' appears on the display? display will also appear and the remaining time will be cancelled, if the door is opened and closed during cooking and the START button is not pressed within 5 minutes of doing so.
-
Page 28: Technical Specifications
Class B equipment is equipment suitable for use in domestic dwellings and domestic dwellings directly connected to a low voltage power supply network which supplies buildings used for domestic purposes. You can download an owner's manual at http://www.lg.com... - Page 29 LGEAP Printed in China...