Riello RS 100 Installation, Use And Maintenance Instructions
Forced draught gas burners
Hide thumbs
Also See for RS 100:
- Installation, use and maintenance instructions (81 pages) ,
- Installation, use and maintenance instructions (72 pages) ,
- Installation, use and maintenance instructions (25 pages)
Table of Contents
Advertisement
Installation, use and maintenance instructions
Instrucciones de Instalación, Funcionamiento y Mantenimiento
Instruções de Instalação, Funcionamento e Manutenção
Forced draught gas burners
GB
Quemadores de gas
E
Queimadores a gás
P
Progressive two-stage operation
Funcionamiento a dos llamas progresivas
Funcionamento a duas chamas progressivas
CODE - CÓDIGO
3785104
3785105
3785304
3785305
3785504
3785505
MODEL - MODELO
RS 70
RS 70
RS 100
RS 100
RS 130
RS 130
TYPE - TIPO
821 T1
821 T1
822 T1
822 T1
823 T1
823 T1
2916004 (0)
Advertisement
Table of Contents

Related Manuals for Riello RS 100


Summary of Contents for Riello RS 100
- Page 1 Funcionamento a duas chamas progressivas CODE - CÓDIGO MODEL - MODELO TYPE - TIPO 3785104 RS 70 821 T1 3785105 RS 70 821 T1 3785304 RS 100 822 T1 3785305 RS 100 822 T1 3785504 RS 130 823 T1 3785505 RS 130 823 T1...
-
Page 2: Table Of Contents
CONTENTS TECHNICAL DATA .......page 2 Variants ..........2 Accessories . -
Page 3: Technical Data
TECHNICAL DATA MODEL RS 70 RS 100 RS 130 821 T1 822 T1 823 T1 OUTPUT 2nd stage 465 - 814 698 - 1163 930 - 1512 400 - 700 600 - 1000 800 - 1300 Mcal/h min. 1st stage... -
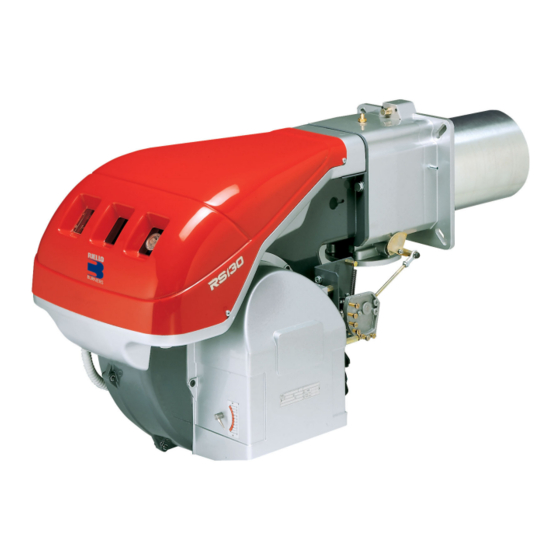
Page 4: Burner Description
511 296 215 555 840 250 - 385 179 430 1161-1296 214 134 221 2” 1 - Thermal insulation screen RS 100 527 312 215 555 840 250 - 385 179 430 1161-1296 214 134 221 2” 2 - Extensions 6)(A) for slide bars 15)(A) RS 130 553 338 215 555 840 280 - 415 189 430 1161-1296 214 134 221 2”... -
Page 5: Firing Rates
MINIMUM OUTPUT must not be lower than the minimum limit shown in the diagram. RS 70 = 192 kW RS 100 = 232 kW RS 130 = 372 kW Important The FIRING RATE value range has been obtained considering an ambient temperature of 20 °C, and an atmospheric pressure of 1000... -
Page 6: Gas Pressure
• Natural gas G20 PCI 10 kWh/Nm • Gas ring 2)(B)p.7 adjusted as diagram (C)p.7. • Gas pressure at burner output of 825 kW, taken from table RS 100, column 1 = 5 mbar • Pressure in combustion chamber = 3 mbar 5 + 3 = 8 mbar pressure required at test point 1)(B). -
Page 7: Installation
The range of lengths available, L (mm), is as follows: Blast tube 12): RS 70 RS 100 RS 130 • short • long For boilers with front flue passes 15) or flame... -
Page 8: Setting The Combustion Head
SETTING THE COMBUSTION HEAD Installation operations are now at the stage where the blast tube and sleeve are secured to the boiler as shown in fig. (A). It is now a very simple matter to set up the combustion head, as this depends solely on the output developed by the burner in 2nd stage operation. -
Page 9: Gas Line
Gas train L Burner puts of more than 1200 kW; therefore only for model RS 130. Ø C.T. Code RS 70 RS 100 RS 130 Code Code 14 - Gas train/burner adaptor. 1” 3970145 • •... -
Page 10: Electrical System
LAYOUT (A) Burners RS 70 - RS 100 - RS 130 • Models RS 70 - RS 100 - RS 130 leave the factory preset for 400 V power supply. • If 230 V power supply is used, change the... - Page 11 D3141 Fuses and cables cross-section layouts (B) and RS 70 - RS 100 - RS 130 with leak detection control device VPS (C), see table (D). Cross-section when not indicated: 1,5 mm KEY TO LAYOUTS (B - C)
- Page 12 LAYOUT (A) CALIBRATION OF THERMAL RELAY Calibration of thermal cut-out 7)(A)p. 3 This is required to avoid motor burn-out in the event of a significant increase in power absorp- tion caused by a missing phase. • If the motor is star-powered, 400 V, the cursor should be positioned to "MIN".
-
Page 13: Adjustments Before Firing
ADJUSTMENTS BEFORE FIRST FIRING MIN GAS PRESSURE SWITCH AIR PRESSURE SWITCH Adjustment of the combustion head, and air and gas deliveries has been illustrated on page 7. In addition, the following adjustments must also be made: - open manual valves up-line from the gas train. -
Page 14: Burner Calibration
BURNER CALIBRATION The optimum calibration of the burner requires an analysis of the flue gases at the boiler outlet. Adjust successively: 1 - First firing output 2 - 2nd stage burner output 3 - 1st stage burner output Burner off 1st stage 4 - Intermediate outputs between 1st and 2nd stage 5 - Air pressure switch... -
Page 15: 1St Stage Output
Adjusting air delivery Progressively adjust the end profile of cam 3)(A) by turning the screws 5). - Turn the screws clockwise to increase air delivery. - Turn the screws counter-clockwise to reduce air delivery. 3 - 1ST STAGE OUTPUT Burner power in 1st stage operation must be selected within the firing rate range shown on page 4. -
Page 16: Air Pressure Switch
5 - AIR PRESSURE SWITCH (A) AIR PRESSURE SWITCH 14)(A)p. 3 Adjust the air pressure switch after having per- formed all other burner adjustments with the air pressure switch set to the start of the scale (A). With the burner operating in 1st stage, increase adjustment pressure by slowly turning the rela- tive knob clockwise until the burner locks out. -
Page 17: Burner Operation
BURNER OPERATION NORMAL FIRING BURNER STARTING (A) (n° = seconds from instant 0) • : Control device TL closes. Servomotor starts: it rotates during opening up to the angle set on cam with orange lever. After about 3s: • 0 s : The control box starting cycle begins. •... -
Page 18: Final Checks
FINAL CHECKS (with burner running) FLAME INSPECTION WINDOW • Disconnect one of the wires on the minimum gas pressure switch: • Open remote control device TL: • Open remote control device TS: the burner must stop • Disconnect the common wire P from the air pressure switch: •... -
Page 19: Burner Start-Up Cycle Diagnostics
BURNER START-UP CYCLE DIAGNOSTICS During start-up, indication is according to the followin table: COLOUR CODE TABLE Sequences Colour code Pre-purging Ignition phase Operation, flame ok Operating with weak flame signal Electrical supply lower than ~ 170V Lock-out Extraneous light Legenda: Yellow Green RESETTING THE CONTROL BOX AND USING DIAGNOSTICS... -
Page 20: Fault - Probable Cause - Suggested Remedy
SIGNAL FAULT PROBABLE CAUSE SUGGESTED REMEDY 2 x blinks After pre-purge and - The solenoid VR allows little gas through ....Increase safety time, the burner - Solenoid valves VR or VS fail to open ....Renew the coil or rectifier panel goes tolock-out and the - Gas pressure too low . -
Page 21: Status (Optional)
STATUS Accessory available on request. STATUS See page 2. (optional) ASSEMBLY The burners are preset to accept the Status. To assemble, proceed as follows: - Connect Status 1) using connector 2) fitted on the bracket 3). Assembly - Fasten Status to the bracket using the screws 4) supplied with the kit.