
Related Manuals for Philips SE250


Summary of Contents for Philips SE250
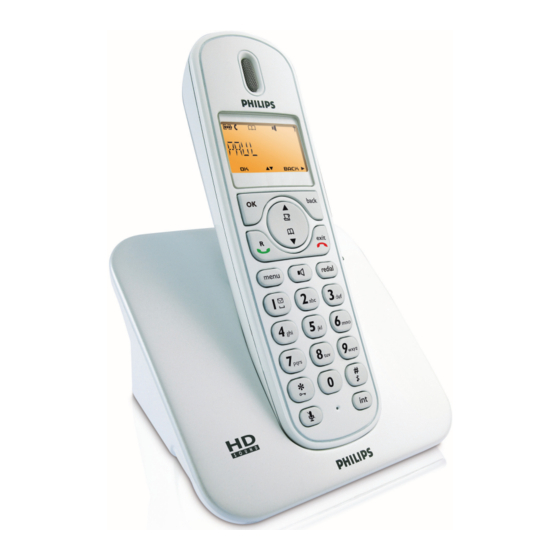
- Page 1 Register your product and get support at www.philips.com/welcome Telephone Warning Use only rechargeable batteries. Charge the handset for 24 hours before use. CD250 SE250...
-
Page 3: Table Of Contents
What’s in the box Overview of your phone Display icons Overview of the base station Getting started Connect the base station 11 Wall mounting the base (SE250 only) Install your phone 3.3.1 Install battery 3.3.2 Charge battery Welcome mode Using multipacks... - Page 4 5.6.4 Delete all redial numbers Using the Call log 5.7.1 Access the Call log 5.7.2 Save call list entry into the phonebook 5.7.3 Delete a call list entry 5.7.4 Delete all call list entries Using the Intercom 5.8.1 Intercom another handset 24 5.8.2 Transfer an external call to another handset...
-
Page 5: Important
• Never use any other battery than the one delivered with the product or recommended by Philips: risk of explosion. • Always use the cables provided with the product. • Handsfree activation could suddenly... -
Page 6: Conformity
158ºF). • Battery life may be shortened in low temperature conditions. Conformity We, Philips, declare that the product is in compliance with the essential requirements and other relevant provisions of Directive 1999/5/EC. This product can only be connected to the analogue telephone networks of the countries mentioned on the packaging. -
Page 7: Electric, Magnetic And
Philips plays an active role in the development of international EMF and safety standards, enabling Philips to anticipate further developments in standardisation for early... -
Page 8: Your Phone
Your phone Congratulations on your purchase and welcome to Philips! To fully benefit from the support that Philips offers, register your product at www.philips.com/welcome. What’s in the box Handset 2 AAA rechargeable batteries User manual Note * You may find in the box the line adaptor delivered separately from the line cord. In this case, you have to connect the line adaptor to the line cord first before plugging the line cord to the line socket. -
Page 9: Overview Of Your Phone
Overview of your phone Earpiece Display See page 9 for an overview of the display icons. OK key o In idle mode: Long press to toggle between displaying the handset name and the date/time. In other modes: Select the function displayed on the screen. - Page 10 In other modes: Long press to return to idle mode. Short press to move to the previous menu level. Menu key m In idle mode: Go to the main menu. Redial key r Access the Redial list in idle mode. When making a call, press to redial the last number dialed.
-
Page 11: Display Icons
Display icons Indicates that the battery is fully charged. This icon blinks during charge and when the battery is low. When the Icon is empty the battery is practically discharged. Note If WARNING BATT appears together with a blinking battery icon, batteries of the wrong type are installed in the handset. -
Page 12: Overview Of The
Overview of the base station Paging key a Page handset. Long press to start registration procedure. Your phone... -
Page 13: Getting Started
Always use the telephone line cord supplied with the unit. Otherwise, you may not get a dial tone. Wall mounting the base (SE250 only) The base is designed to support wall mounting. To wall mount the base, follow the instructions below. -
Page 14: Install Your Phone
bracket and ➁ rotating the bracket outward. Turn the bracket around. Attach the bracket to the opposite side of the base station. Insert screws (not included) into the wall. Align the mounting holes on the back of the base with the screws on the wall. -
Page 15: Charge Battery
Place the batteries in the correct polarity as indicated and replace the cover. 3.3.2 Charge battery Warning The handset must be charged for at least 24 hours before using it for the first time. When the battery level becomes low, the low battery sensor alerts you by sounding an audible tone and blinking the battery icon. -
Page 16: Using Multipacks
Press o to confirm your selection. (WAITING will be displayed while the default line settings and menu language for the selected country are automatically configured.) The product now goes to the DATE/TIME selection menu. Enter the current date (DD/MM) and press o to confirm. -
Page 17: Menu Structure
Menu structure The chart below shows the menu tree of your phone. Press the menu key m to enter each option. Press c to go to the previous level in a menu. Use navigation keys n to navigate within the menus. Menus PHONEBOOK NEW ENTRY... - Page 18 CLOCK&ALARM DATE/TIME SET FORMAT ALARM ALARM TONE ADVANCED SET CHANGE PIN REGISTER UNREGISTER SEL. COUNTRY RESET AUTO PREFIX RECALL TIME DIAL MODE FIRST RING Enter date Enter time TIME FORMAT 12 HOURS 24 HOURS DATE FORMAT DD/MM MM/DD ON ONCE ON DAILY MELODY 1 MELODY 2...
-
Page 19: Using Your Phone
Using your phone Make a call 4.1.1 Predialling Dial the number (maximum 24 digits). Press t. • The call is initiated. You may insert a prefix number to the beginning of your predial number, see “Set Prefix” on page 31 for more information. -
Page 20: Call Using Direct Access Memory
4.1.7 Call using Direct Access Memory In idle mode, long press 1 or 2 to dial a stored direct access memory number. Note See section 5.5.6 for instructions on how to store, edit, and delete direct access memory numbers. 4.1.8 Enter a Dialing Pause Make a long press # after entering one or more digits to enter a pause in the dialling sequence. -
Page 21: Use More Of Your Phone
Use more of your phone Switch the handset on/off Press h for at least one second to switch the handset on. To switch it off, press and hold h in idle mode for at least 5 seconds. Keypad lock/unlock Press and hold * for 3 seconds to lock/ unlock the keypad in idle mode. -
Page 22: Using Your Phonebook
During a call, press l to activate the loudspeaker mode. Press l again to deactivate the loudspeaker mode. Using your Phonebook Your phone can store up to 100 phonebook memories. Each phonebook entry can have a maximum of 24 digits for the phone number and 12 characters for the name. -
Page 23: Delete A Phonebook Entry
• A validation tone is emitted. 5.5.4 Delete a phonebook entry Press m in idle mode, scroll n to PHONEBOOK and press o, scroll n to DELETE and press Scroll n to select an entry to delete and press o. DELETE? is displayed on the screen. -
Page 24: Using The Redial List
scroll n to DIRECT MEM. and press o. Scroll n to KEY 1 or KEY 2 and press o. • The stored number is displayed (if any). Press m to enter direct memory menu. Scroll n to DELETE and press CONFIRM? is displayed on the screen. -
Page 25: Delete All Redial Numbers
Note Press c to discard the deletion. The screen returns to the previous high menu level. 5.6.4 Delete all redial numbers Press r in idle mode and press o. Scroll n to DELETE ALL and press CONFIRM? is displayed on the screen. Press o again to confirm deletion. -
Page 26: Delete A Call List Entry
5.8.1 Intercom another handset Note If the handset does not belong to CD250/255 or SE250/255 range, this function may not be available. Press i in idle mode. • If you have two handsets, the other handset is paged automatically. -
Page 27: Answer An External Call During Intercom
Note If there is no answer from the called handset, press i to resume the external call. 5.8.3 Answer an external call during intercom During intercom, a new call tone is emitted when there is an incoming external call. Press t to answer the external call and end the intercom. -
Page 28: Clock And Alarm Settings
• Each digit blinks to indicate dial out. 5.11 Clock and Alarm settings This feature allows you to set the date, time and alarm settings for your phone. The default date and time are 01/01 and 00:00 respectively. 5.11.1 Set Date and Time Press m in idle mode, scroll n to CLOCK&ALARM, and press o, press o to enter DATE/TIME. -
Page 29: Set Alarm
Change the Handset Name You can name the handset and display the handset name in idle mode. The default handset name of your handset is PHILIPS. Press m in idle mode, scroll n to PERSONAL SET and press o, and then press o again to enter HANDSET NAME. -
Page 30: Set The Ring Melody
Press m in idle mode, scroll n to PERSONAL SET and press o. Scroll n to HANDSET TONE and press o, and then press o again to enter RING VOLUME. Scroll n to your desired volume level and press o to confirm. •... -
Page 31: Advanced Settings
free talk mode. This allows you to charge the handset during calls. The default setting for auto hang up is Press m in idle mode, scroll n to PERSONAL SET and press o. Scroll n to AUTO HANG-UP and press o. The current setting is shown. -
Page 32: Unregister
Note If no action is taken on the handset within 90 seconds, the registration procedure will be aborted. If this happens, repeat Step 1. On the handset, press m, scroll n to ADVANCED SET and press o, scroll n to REGISTER and press o. -
Page 33: Set Prefix
Warning Upon reset, all your personal settings, call log and redial list entries will be deleted and the phone will return to its default settings. However, your phonebook will remain unchanged after reset. Note You may have to configure your phone once again. -
Page 34: Change The Dial Mode
Ring Volume LEVEL 3 Ring Melody MELODY 1 Earpiece/ Medium (VOLUME 3) Speaker Volume Key Beep Display COUNTRY Language DEPENDENT Auto Hang- Handset PHILIPS Name Time/Date 00:00; 01-01 Alarm Alarm Tone MELODY 2 Dial Mode COUNTRY DEPENDENT Recall Time COUNTRY DEPENDENT... -
Page 35: Technical Data
(H × D × W) Technical data / Frequently asked questions Handset: • 135.5 grams • 162mm × 30.5mm × 48.5mm (H × D × W) SE250 Base: • 145.5 grams • 77mm × 115mm × 116.5mm (H × D × W) Handset: •... -
Page 36: Connection
Connection The handset does not switch on! • Charge the batteries: Put the handset on the base station to charge. After a few moments, the phone will switch The handset does not charge! • Check charger connections. icon is not blinking during charge! •... -
Page 37: Product Behaviour
Product behaviour Keypad does not work! • Unlock your keypad: Long press * in idle mode. The handset warms up when making a long call! • This is a normal behavior. The handset consumes energy while calling. The handset cannot be registered to the base station! •... -
Page 38: Index
10 INDEX Access phonebook 20 Access Redial list 22 Access the Call log 23 Activate/Deactivate loudspeaker mode 19 Add/Edit Direct Access Memory 21 Adjust earpiece or speaker volume 19 Advanced settings 29 Alarm Tone 27 Answer a call 18 Answer an external call 25 Auto Hang-Up 28 Call from redial list 17 Call from the call log 17... - Page 39 Menu structure 15 Modify a phonebook entry 20 Mute/Unmute microphone 19 Overview of the base station 10 Overview of your phone 7 Paging 25 Personal settings 27 Phonebook 20 PIN 29 Predialling 17 Recall time 31 Redial list 22 Register 29 Reset Unit 30 Ring Melody 28 Ring Volume 27...
- Page 40 ©2008 Koninklijke Philips Electronics N.V. All rights reserved Reproduction in whole or in part is prohibited without the written consent of the copyright owner Document number: 3111 285 40903 (GB)