Table of Contents
Advertisement
Advertisement
Table of Contents

Related Manuals for Thinky ARV-310


Summary of Contents for Thinky ARV-310
- Page 1 EX-4030 Vacuum Mixer Thinky Mixer ARV-310 Instruction Manual ・ For your safety, read this manual carefully before starting the operation of the unit and be sure to understand the contents. ・ Always keep this manual in the designated place for easy access when needed.
-
Page 2: Introduction
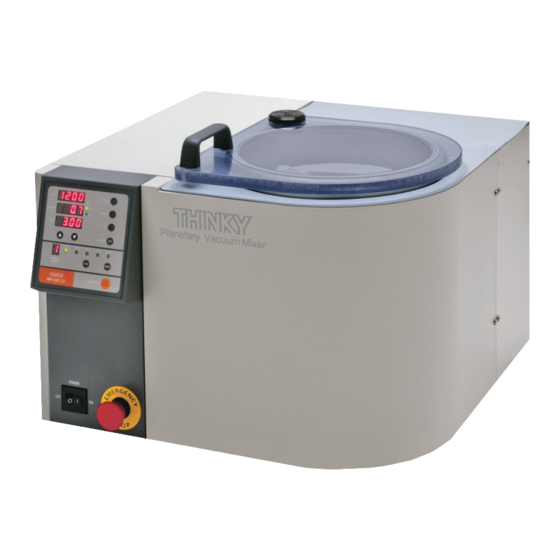
Introduction Introduction Thinky Mixer “ARV-310” is a planetary centrifugal mixer for mixing several liquid or powder materials and de-aerating them at the same time. Be sure to carefully read this manual and understand the contents before using ARV-310. Some parts inside of this unit are driven on hazardous voltage, rotate with high rpm, or operate for vacuum decompression. - Page 3 If the clause is ignored, the unit could be damaged. Indicates referential information or points which are helpful for handling the unit. Indicates sections and items to be referred to. ARV-310...
- Page 4 Introduction ● Any result caused by the use not described in the manual is entirely out of Thinky’s responsibility. ● Details of all illustrations and explanation in this manual are subject to change without prior notice following continual improvement of the unit.
-
Page 5: Table Of Contents
Seals and Warning Labels..........1-4 1-2-2 Locations of Seals and Labels .........1-6 2. Outline and Specifications ........2-1 Outline................2-1 Specifications ..............2-3 Name of Each Component ........2-5 Names of Functions of Operating Parts ....2-6 2-4-1 Control Panel ..............2-6 2-4-2 Other Operating Parts ............2-9 ARV-310... -
Page 6: Table Of Contents
Adjustment of Counter Balance ........4-6 4-1-6 Closing Lid................4-7 Turning ON/OFF of Power.........4-8 4-2-1 Turning ON of Power............4-8 4-2-2 Turning OFF of Power............4-9 Operation ..............4-10 4-3-1 Setting of Mixing Recipes ..........4-10 4-3-2 Operation................4-17 4-3-3 Taking Out Container............4-20 Memory Registration ..........4-21 ARV-310... - Page 7 5. Maintenance............5-1 Inspection ..............5-1 5-1-1 Daily Inspection..............5-1 5-1-2 Weekly Inspection..............5-2 Cleaning...............5-3 Changing of Vacuum Pump Oil .........5-4 5-3-1 Checking Oil...............5-4 5-3-2 Oil Change .................5-6 5-3-3 Filter Checking ..............5-9 Troubleshooting ............5-11 Error Display..............5-13 Limited Warranty and After-Sale Service ....5-15 ARV-310...
-
Page 8: Safety Precautions
・ Do not obstruct heat release. ・ Do not operate the unit continuously for a long time. Keep some cooling time. ・ While not using the unit, keep the power plug pulled off from the consent. ARV-310... -
Page 9: Installation
− Where working ambient environment for the unit is NOT as specified. ・ Do not damage, modify or forcibly bend or pull the power cable. Do not put anything on the power cable either. ・ Do not use a damaged power cable. ARV-310... -
Page 10: Operation
・ Turn OFF the POWER switch in case of a power failure. 1-1-4 Maintenance ・ Pull off the power plug before opening the cover for maintenance work. ・ Do not disassemble any parts for your own inspection and repair. ARV-310... -
Page 11: Labels
If any label gets dirty, damaged or illegible, immediately contact the dealer where you purchased the unit. A new one will be supplied at your own cost. ・ Do not remove or stain any label. 1-2-1 Seals and Warning Labels ① ② ③ ARV-310... - Page 12 1. Safety Precautions ④ ⑤ ⑥ ⑦ ⑧ ⑩ ⑨ ⑪ ⑫ ⑬ ARV-310...
-
Page 13: Locations Of Seals And Labels
1. Safety Precautions 1-2-2 Locations of Seals and Labels <Top Surface> <Inside of Cover> ⑬ ⑫ ⑥ ④ ⑤ <Left Side> <Front Side> ③ (On the inner surface ② ① <Rear Side> of cover) ⑧ ⑨ ⑪ ⑩ ⑦ ARV-310... -
Page 14: Outline And Specifications
2. Outline and Specifications 2. Outline and Specifications 2-1 Outline ● Purpose of this Unit Thinky Mixer “ARV-310” is a planetary centrifugal mixer for mixing several liquid or powder materials and de-aerating them at the same time. ● Principle of Operation Material container is to rotate while revolving in a set radius. - Page 15 ・ High viscosity resins can be de-aerated in a short period of time without overflow. ・ Highly constant reproducibility can be expected in mixing and de-aerating with no variation, no matter who runs it. ARV-310...
-
Page 16: Specifications
2. Outline and Specifications 2-2 Specifications Product Vacuum mixer “Thinky Mixer” Model ARV-310 Method Vacuum-type, planetary, propeller-less mixing method Operating time 0 sec. – 30 min. (Max. 30 min. run/Setting in the setting range unit of 1 sec.) Revolution speed Max. - Page 17 If the oil gets clotted, leave the unit at normal temperature for a while before using the unit. ・ *: Do not decompress materials to below saturated vapor pressure of water, organic solvent, etc. that exists in the materials. ARV-310...
-
Page 18: Name Of Each Component
2-3 Name of Each Component <Top Surface> Vacuum Pump (Inside of the unit) Vacuum Chamber Cup Holder <Front Side> Control Panel POWER Switch Front-side Shipping Lock Screw EMERGENCY Button <Rear Side> External Vacuum Pipe Oil Peephole Power Inlet Rear-side Shipping Lock Screw ARV-310... -
Page 19: Names Of Functions Of Operating Parts
Lights up while the VACUUM indicator ④ indicates the vacuum decompression pressure value by the unit of kPa. torr lamp Lights up while the VACUUM indicator ⑤ indicates the vacuum decompression pressure value by the unit of Torr. ARV-310... - Page 20 VACUUM OFF Used for setting vacuum decompression not to ⑪ button be used when setting vacuum decompression pressure. Pressing this button during vacuum pump operation stops the vacuum pump and air in the vacuum chamber is released to ambient pressure. ARV-310...
- Page 21 Pressing it for more than one sec. registers operating conditions. STEP button Used for selecting the STEP number. ⑮ Press to change the STEP number in the order from STEP 1 thru 5. OPERATION Used for starting or pausing operation. ⑯ START/STOP button ARV-310...
-
Page 22: Other Operating Parts
(①、③、⑦) on the control panel start blinking with a buzzer sound. This button is locked when pushed in (push-lock type). For restarting, turn the button C.W. to release the lock, turn OFF (O) the POWER switch, and turn it ON (I). ARV-310... -
Page 23: Installation
3. Installation 3. Installation 3-1 Checking of Accessories This Thinky ARV-310 is packed together with the following accessories in addition to the main unit. After unpacking the case, check the contents immediately. Instruction manual 1 copy (this manual) Vacuum pump oil... -
Page 24: Filling Vacuum Pump With Pump Oil
1) Remove four screws and open the cover on the left side of the unit. Cover 2) Open the cap of oil inlet of the vacuum pump. DO NOT confuse the oil inlet with the exhaust outlet. Exhaust Outlet (Gold Color) Vacuum Pump Oil Inlet (Hex-head Screw, Painted) ARV-310... - Page 25 5) Release the mouthpiece of the filter replacement inlet and open the cover of the replacement inlet. Filter Replacement Inlet Mouthpiece 6) Confirm the filter is in the pump. 7) Close the replacement inlet cover and fasten it with the mouthpiece. ARV-310...
- Page 26 3. Installation 8) Close the cover on the left side of the unit and fix it with four screws. Cover Take oil out of the vacuum pump if you transport the unit again. ARV-310...
-
Page 27: External Vacuum Pipe
Vacuum Pump Side Vacuum Chamber Side ● Standard Joints Extraction Mouth Elbow Joint Hose Joint Hose Band Vacuum Hose (ID: 11 mm) 3/8 PT Screw for Pipes (with Tape Seal) 3/8 PT Screw for Pipes (with Tape Seal) ARV-310... - Page 28 Fitting part (1) can be attached with the joint with 3/8 PT screw. Fix the fitting part firmly using an adjustable wrench, etc. and turn the joint to detach (or attach) it. Affix tape seal to the screw part to avoid air leakage. ARV-310...
-
Page 29: Removal Of Shipping Locks
3. Installation 3-4 Removal of Shipping Locks The Thinky ARV-310 is locked with two (2) fasteners for fixing the unit’s rotating mechanism and preventing damages during shipment. Loosen the shipping locks in the following procedure to install the mixer. 1) Turn the front-side shipping lock screw with the standard box wrench clockwise until the wrench stops. - Page 30 At this time, tighten each of the front-side/rear-side shipping lock screws alternately little by little. Tightening either of them firmly at a time may incline the base plate causing damage of the unit. ARV-310...
-
Page 31: Power Connection
After removing the transfer lock, connect the power cable in the procedure below: 1) Connect the attached power cable to the power inlet on the rear side. Power Inlet 2) Insert the plug of the power cable into the power outlet. ARV-310... -
Page 32: Operation
*2 :Maximum mass is the gross weight of the container and material (when 300 ml-container is used), or of the container, material and adaptor (when 150 ml-container is used). ARV-310... -
Page 33: Preparation Of Materials And Container
Specifications of outer and inner lids with holes ・ Outer and inner lids with holes for 300 ml-container ・ Outer and inner lids with holes for 150 ml-container ARV-310... -
Page 34: Supplying Materials
・ Make sure to check that the thread section of the container is free from dirt, wear or damage. ・ Do not use any container that is damaged or with a lid that cannot be closed securely. ARV-310... -
Page 35: Loading Container
3) Insert the adapter for 150ml-container into the cup holder aligning three (3) keyways of the adapter with three (3) projections of the cup holder. 4) Insert the 150 ml-container with materials into the adapter. Push it until it comes into contact with the rear end. ARV-310... - Page 36 Hold and pull the handle of the lid upward, and turn it counter-clockwise to open the lid. Cup Holder 3) Insert the 300ml container into the cup holder adjusting three (3) keyways on the container wall to three (3) projections of the cup holder. 300 ml-container ARV-310...
-
Page 37: Adjustment Of Counter Balance
Adjust the counter balance dial to the measured gross weight of material container in the step 1) described in “4-1-4 Loading Container”. Counter Balance Indicator Counter Balance Adjustment Dial ARV-310... -
Page 38: Closing Lid
After adjusting the revolution balance, close the lid of the unit. Hold and pull the handle of the lid upward, and turn it clockwise until the lid is closed Check that no part of the cloth or foreign object is pinched anywhere on the unit at this time. ARV-310... -
Page 39: Turning On/Off Of Power
2) Press the POWER switch to turn the power ON (I). ・ When the power is supplied, the lamps and indicators on the control panel light up. ・ Now the unit became ready for operation. Control Panel POWER Switch ARV-310... -
Page 40: Turning Off Of Power
Turn OFF the power to the unit in the procedure below: 1) Press the POWER switch to turn the power OFF (O). ・ The lamps and the indicators on the control panel light out. Control Panel POWER Switch 2) Pull off the power plug from the outlet. ARV-310... -
Page 41: Operation
・ Right after turning ON the power, the set value of the MEMORY 1 is displayed on every indicator. ・ The factory shipment values have been set for delivery. SPEED Indicator SPEED Button VACUUM Indicator VACUUM Button TIME Indicator TIME Button UP Button VACUUM OFF DOWN Button Button 4-10 ARV-310... - Page 42 3. Operation by vacuum decompression only Turn OFF the revolution speed (on the SPEED indicator) and the processing time (on TIME indicator) and set the vacuum decompression pressure value. For details, refer to “3. Setting Procedure for Vacuum Decompression”. 4-11 ARV-310...
- Page 43 ・ The brightness of the VACUUM indicator changes and then you can set the vacuum decompression pressure value. 5) Press the UP or DOWN button to display the vacuum decompression pressure value to set on the VACUUM indicator. 4-12 ARV-310...
- Page 44 ・ The brightness of the TIME indicator changes and then you can set the operating time. 8) Press the UP or DOWN button to display the operation time to set on the TIME indicator. 9) Press the TIME button. ・ The operation time is set. 4-13 ARV-310...
- Page 45 ・ The brightness of the VACUUM indicator changes and then you can set the vacuum decompression pressure value. 5) Press the VACUUM OFF button. ・ The VACUUM indicator lights out and then setting the vacuum decompression pressure value becomes impossible. 4-14 ARV-310...
- Page 46 ・ The brightness of the TIME indicator changes and then you can set the operating time. 7) Press the UP or DOWN button to display the operation time to set on the TIME indicator. 8) Press the TIME button. ・ The operation time is set. 4-15 ARV-310...
- Page 47 3) Press the UP or DOWN button to display the vacuum decompression pressure value to set on the VACUUM indicator. 4) Press the VACUUM button. ・ The vacuum decompression pressure value is set. 4-16 ARV-310...
-
Page 48: Operation
・ During vacuum decompression, vacuum forms inside of the vacuum chamber and the lid is sealed against the chamber with air pressure. Open the lid after the unit stops completely and the reduced vacuum pressure in the vacuum chamber has been released to ambient pressure. 4-17 ARV-310... - Page 49 ● Stopping of Vacuum Pump Press the VACUUM OFF button to stop the vacuum pump only. ・ The vacuum pump stops and the air pressure in the vacuum chamber is released to ambient pressure. 4-18 ARV-310...
- Page 50 ・ The buzzer stops and the blinking lamps and indicators on the control panel light out. ・ The power is supplied and the lamps and indicators on the control panel light up as part of usual power-on operation. 4-19 ARV-310...
-
Page 51: Taking Out Container
・ The finished status varies depending on the type, viscosity and specific gravity of materials as well as property and amount of additives, even when the mixing recipes are identical. It is advisable to change the conditions several times and set the standard time. 4-20 ARV-310... -
Page 52: Memory Registration
Such recipes, however, are lost once the power gets turned OFF or when another memory is recalled. To keep such recipes, register or overwrite them in one of the nine (9) memories. 4-21 ARV-310... - Page 53 MEMORY STEP Button Button Step 3 Memory 3 (STEP 3) STEP MEMORY Button Button Step 4 Memory 4 (STEP 4) MEMORY STEP Button Button Step 5 Memory 5 (STEP 5) MEMORY STEP Button Button Memory 9 MEMORY Button 4-22 ARV-310...
- Page 54 The STEP number indication lamp turns lit in order of the STEP number STEP 1→STEP 2→STEP 3→STEP 4→STEP 5 each time the STEP button is pressed. 4-23 ARV-310...
- Page 55 The mixing recipes with the following step numbers are all deleted at the time of the memory registration. To register them in the memory, make sure to light up the last STEP number of the step to register. 4-24 ARV-310...
- Page 56 To recall the memory, press the MEMORY button to display the number of the memory to execute on the MEMORY NUMBER indicator. The memory number indication lamp turns lit in order of the memory number 1→2→3→4→5 … →9 each time the MEMORY button is pressed. 4-25 ARV-310...
- Page 57 ・ After the step number is lit up, the mixing recipes registered to that step number are displayed. The STEP number indication lamp turns lit in order of the STEP number STEP 1→STEP 2→STEP 3→STEP 4→STEP 5 each time the STEP button is pressed. 4-26 ARV-310...
-
Page 58: Maintenance
5. Maintenance 5. Maintenance 5-1 Inspection For using the Thinky ARV-310 in a safe manner, perform inspections regularly. ・ Pull off the power plug before performing inspection. 5-1-1 Daily Inspection Check the followings every day. ○ Check if any materials or foreign objects are adhering inside or around the cup holder and rotary sections. -
Page 59: Weekly Inspection
When the oil is contaminated, change the oil. For details, refer to “5-3-1 Checking Oil”. ○ Check if any dust or foreign objects are adhering the vacuum pump filter. If any adhesion is observed, remove it. For details, refer to “5-3-3 Filter Checking”. ARV-310... -
Page 60: Cleaning
5. Maintenance 5-2 Cleaning If the Thinky ARV-310 becomes dirty, clean it in the procedure below: ・ Pull off the power plug before performing cleaning. 1) Press the POWER switch to turn the power OFF (O). 2) Pull off the power plug from the consent. -
Page 61: Changing Of Vacuum Pump Oil
1. Oil condition and level 2. Time to reach vacuum decompression 1. Oil Condition and Level Check the oil contamination and oil level through the window placed on the rear side of the unit. <Oil Check Window> 2/3 of Window Centerline ARV-310... - Page 62 ・ Depending on materials that got mixed in the oil, changing oil only once may not be sufficient. In such case, repeat changing oil two or three times. ・ Odor of solvents, etc. is difficult to get rid of. It cannot be completely eliminated. ARV-310...
-
Page 63: Oil Change
1) Press the POWER switch to turn the power OFF (O). 2) Pull off the power plug from the consent. 3) Remove four screws and open the cover on the left side of the unit. Cover ARV-310... - Page 64 5). <Vacuum Pump> Oil Outlet 5) Close the oil outlet. 6) Open the cap of the oil inlet. DO NOT confuse the oil inlet with the exhaust outlet. Exhaust Outlet (Gold Color) Vacuum Pump Oil Inlet (Hex. Screw, Painted) ARV-310...
- Page 65 For replacing entire oil, the amount of oil to feed is about 0.2 lit. <Oil Check Window> 2/3 of Window Centerline 8) Close the cap of the oil inlet. 9) Close the cover on the left side of the unit and fix it with four screws. ARV-310...
-
Page 66: Filter Checking
1) Press the POWER switch to turn the power OFF (O). 2) Pull off the power plug from the consent. 3) Remove four screws and open the cover on the left side of the unit. Cover ARV-310... - Page 67 5) Check if any dust or foreign objects are on the filter. 6) If any, remove it. 7) Close the replacement inlet cover and fasten it with the mouthpiece. 8) Close the cover on the left side of the unit and fasten it with four screws. 5-10 ARV-310...
-
Page 68: Troubleshooting
5. Maintenance 5-4 Troubleshooting If you have any troubles or problems with the Thinky ARV- 310, check the followings first before asking for repair. If the problem still cannot be cleared after checking, contact the dealer where you purchased the unit or Thinky. - Page 69 Check if the amount of each material is incorrect. Vacuum Check if vacuum pump oil is 5-3 Changing decompression contaminated. of Vacuum cannot be Moisture, solvents, etc. may get Pump Oil properly done. mixed in the oil. Change the oil. 5-12 ARV-310...
-
Page 70: Error Display
If the cause of an error is clear, remove it. If the causes or the contents of the error are not clear, contact the dealer where you purchased the unit or Thinky direct. For details of the contact, refer to “Introduction” in this Manual. - Page 71 Cause Measures Err7 - Err9 All these are related to Contact the dealer electronic circuit where you purchased the malfunction or the control unit or Thinky direct. software. ECon Inverter detected an Restart the unit. abnormality. ErVA Reduced vacuum pressure Contact the dealer does not reach the set value.
-
Page 72: Limited Warranty And After-Sale Service
THINKY. In the event that this product should fail during this period, THINKY reserves the right to either replace or repair the product at its own discretion. If the product becomes defective during the warranty period, THINKY will repair or replace... - Page 73 1. Damage during Transportation of delivery. Any damages during shipment must be claimed within 5 days for insurance claims after equipment is received. 2. The cost of returning the product to THINKY (i.e. this is the user’s responsibility) 3. Any product removed serial numbers or identification altered in any way 4.
- Page 74 The Company is not liable for damages caused by Customer's inappropriate operation or maintenance of this System. Thinky Corporation’s liability under this warranty shall not be available for the any troubles and damages caused by unauthorized revision and alteration of this manual.