
Related Manuals for Uniden G37 Series


Summary of Contents for Uniden G37 Series
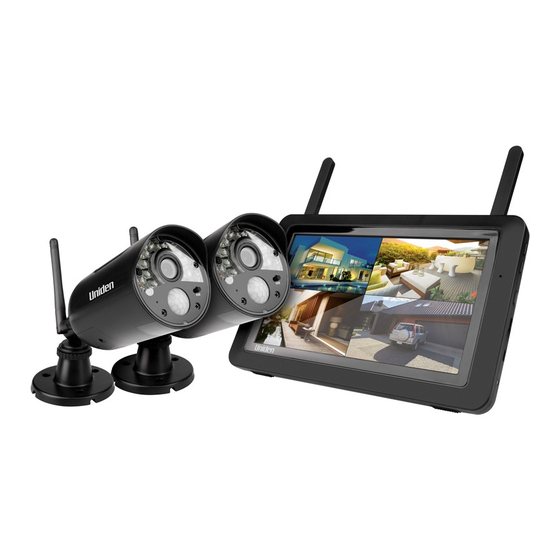
- Page 1 G37xx Series VIDEO SURVEILLANCE SYSTEM For more exciting new products please visit our website: Australia: www.uniden.com.au...
-
Page 2: Important Safety Instructions
IMPORTANT SAFETY INSTRUCTIONS This manual contains important information about this product’s operation. If you are installing this product for others, you must leave this manual or a copy with the end user. When using your equipment, always follow basic safety precautions to reduce the risk of fire, electric shock and injury to persons, including the following: •... - Page 3 • Clean only with a dry cloth. Failure to follow the instructions in this operating manual will void the warranty. Uniden assumes no liability for damages to property or injury to persons caused by improper handling or failure to comply with these safety...
-
Page 4: Table Of Contents
BASIC OPERATION ....................9 Hardware ..........................9 G37xx Monitor ........................9 G3700 Camera ........................10 G3700L Camera ........................10 USING G37 SERIES ....................11 MONITOR SCREEN ......................11 G37XX OPERATION ......................12 LCD DISPLAY ......................... 13 SYSTEM MENUS ....................... 16 OVERVIEW .......................... -
Page 5: What's In The Box
• Image may vary slightly from the actual product. • If any item is missing or damaged, contact your place of purchase immediately. Never use damaged products! • Need help? Get answers at our website: www.uniden.com.au for Australian model. All trademarks are registered trademarks of their respective owners. -
Page 6: Installation
INSTALLATION General Placement Considerations • The cameras included with your monitor are weatherproof and have an IP65 weather rating. Water can be sprayed on them and they will still work; however, the cameras cannot be submerged underwater. • Although the cameras can be exposed directly to the rain, it is recommended that, if they are used outdoors, they be mounted under some type of cover like a patio overhang or eave. -
Page 7: Installing The Monitor
3 - 4 seconds to POWER power it up. The monitor displays the Uniden Guardian screen for a few seconds and then transitions to the LIVE view if the paired camera has been powered on. Otherwise Out of Range message displays. -
Page 8: Night Vision
If... Try... there is no camera picture Verify that the power supply adaptor for the camera(s) is plugged in. the picture quality is poor Clean the camera lens. a white image appears at night The camera’s infra-red LED shines due to the invisible light that reflects off surfaces such as glass, causing white light. -
Page 9: Basic Operation
BASIC OPERATION HARDWARE G37xx Monitor No. What it is LCD Screen: Displays video from the camera(s) or system operation interface. Microphone Wireless Antenna Power Button/ Scan Button: Press and hold about 5 seconds to turn the receiver on/off. Press and release while the unit is powered on to turn Scan mode on/off. -
Page 10: G3700 Camera
G3700 Camera G3700L Camera What it is Camera Antenna: Sends and receives signals to/from the monitor. IR LEDs. Infrared LEDs provide viewing in low/ no light conditions. Camera Lens: Catches the video in front of the lens and transmits video from camera to monitor. -
Page 11: Using G37 Series
USING THE G37 SERIES MONITOR SCREEN The G37xx monitor’s screen has 3 main parts: Live View area. The main screen area displays live video from the camera(s). • Pop Out Menu Tab. Tap this tab to display 4 menus that let you manage the •... -
Page 12: G37Xx Operation
Channel Cycling Modes There are two ways to cycle between channels - Scan and Auto Sequence. With Scan mode, the monitor’s screen and speakers are off until a camera detects motion. That camera then displays at full screen (sound and video on) until there has been no motion for 15 seconds. -
Page 13: Lcd Display
G37xx Live Screen Icons Different icons display on the monitor screen depending on what is going on with your cameras. This image shows an example of what could be on your screen (the video image is removed to make it easier to see the icons). A table follows of possible icons and their definitions. - Page 14 G37xx Icon What it does • Shows how strong the camera’s signal is. Signal SIGNAL INDICATOR ranges from 4 bars down to 0 bars (out of range). This graphic displays if an SD card is inserted into the SD CARD INDICATOR monitor.
- Page 15 Indicates the LCD monitor’s battery life: BATTERY INDICATOR • Flashing Red - Low battery • Blue - Full battery • Flashing Blue - Charging When you tap this icon on the screen, the monitor breaks ZOOM INDICATOR the screen image into 5 areas. Tap the area you want to see in Zoom.
-
Page 16: System Menus
SYSTEM MENUS OVERVIEW This section describes the G37xx pop-up menu screens in detail. These pop-up menus enable you to: Set the spotlight camera settings • Set alarms tone volume • Set the brightness of the display • Set up cameras for recording, motion detection, and other system and network •... - Page 17 to allows you to set the length of time the light stays on after it is triggered. Options are 1, 3, or 10 minutes, or Off. option lets you set a start and end time and also the day for the light camera to turn itself on and off.
-
Page 18: Alarm
ALARM When motion triggers the camera to begin recording, the monitor sounds an alarm tone. This screen lets you determine how loud that tone will be. . The following screen displays. Tap + or - to increase or decrease the alarm volume. Tap when you are finished. -
Page 19: General Settings
GENERAL SETTINGS The General Settings screen contains 6 subsections, each of which may contain sub-screens These sub-screens let you set features about your system. You can turn cameras on and off, establish a specific schedule for specific cameras to record, set the date and time, and motion detection sensitivity, among other features. - Page 20 Main Screen Sub-Screens What it Does System Date & Time • Time Setting. Set the current time (in- Settings (see (see page 27) cluding Daylight Savings Time). page 27) • Time Zone. Set the time zone for your G37xx system. •...
-
Page 21: Camera Setup Screen
CAMERA SETUP SCREEN The Camera Setup screen lets you: Pair cameras • Turn cameras on and off • Adjust the resolution • Pairing Your cameras in the kit are paired to the monitor at the factory. When you add a new camera to your system, you have to “introduce”... - Page 22 On/Off When you add a camera to your system, pair up the camera with the monitor and the system will automatically turn it on. Tap the following icons as they This screen should display: appear on the screens: ...
-
Page 23: Recording Setup Screen
RECORDING SETUP SCREEN Use the Recording Setup screen to: Set the length of time the system will automatically record when something • triggers motion sensitivity. Schedule a set time and duration to automatically record from a specific camera. • Set up file retention requirements •... -
Page 24: Schedule Recording
Schedule Recording This feature lets you set up a block of time for a camera to record on a weekly schedule. You can set up multiple cameras to record at the same time and the recording times can overlap between cameras. (Default=No schedule recording) # Total recording time is limited to the space available on the SD card. - Page 25 Delete a schedule for predetermined recording time and length ; the Schedule Recording Overview screen displays. in the lower left corner. The Schedule Recording Setup screen MODIFY displays. Select a camera. If you want to modify or delete schedule recording for more than one camera to record at the same time, select other cameras.
- Page 26 File Overwrite This feature lets you set the system to automatically overwrite the oldest files once the SD card is full. This will allow you to continue recording. If you do not allow overwrite, recording stops when the SD card is full. to access the File Overwrite function.
-
Page 27: System Settings Screen
SYSTEM SETTINGS SCREEN Use these setting options to configure your system: Date and Time • Time Zone • Language • Default Settings • Format Memory Card • Information • Tap the following icons as they This screen should display: appear on the screens: ... -
Page 28: Time Zone
Time Zone Time Zone allows you to set the time zone your monitor is in. Your system will know that your request refers to the time zone the monitor is in. [Default = (GMT+10:00) Canberra,Guam, Melbourne, Sydney]. . The Time Zone screen displays. Scroll up and down to your camera’s time zone and then tap it. -
Page 29: Default Settings
Default Settings to return your system to the original default settings. on the Restore Default Settings screen. to confirm the reset. to return to the previous screen. Format SD Card Formatting the SD card erases all data stored on the card. (Default = to reformat your SD card. -
Page 30: Motion Detection Settings Screen
# Uniden recommends that you check your monitor firmware version against the most recent version (http://www.uniden.com.au) at least twice a year. If you need to upgrade your monitor firmware (see page 34). - Page 31 Sensitivity This selection allows you to set the camera’s motion detection sensitivity levels to High, Low, or Off. . The following screen displays. Tap High, Low, or Off to set sensitivity. to return to the previous screen. # Note: Even if the sensitivity set to OFF, it will still detects an object with heat with PIR sensor (couldn’t be switch off) to trigger recording and push alarm notification (if internet was avaiable).
-
Page 32: Network Setup Screen
NETWORK SETUP SCREEN This selection lets you determine your network connection type, reset the App password and review your network details. to see the Network Setup screen and option. Advanced Setup to display the Advanced Setup screen. 2. Tap on your selection and fill in the fields requested. Tap SAVE DHCP Static IP... - Page 33 Reboot the monitor when prompted. Reset Password The Reset Password feature resets the Guardian Full HD app’s password to the default (000000). ; the Reset Password screen displays again. Tap to return to the Network Setup screen. to return to the general Settings screen. Information This screen displays current IP information when the system is connected to the internet.
-
Page 34: Firmware Upgrade Screen
FIRMWARE UPGRADE SCREEN Uniden recommends that you periodically check your monitor firmware version against the most recent version (www.uniden.com.au). See page 48 to copy the new firmware to your monitor’s SD card. Tap the following icons as they This screen should display: appear on the screens: ... - Page 35 Upgrade from Server Use the Ethernet cable (provided) to connect your monitor to your router. to upgrade the firmware through the Server. A confirmation screen displays. Tap The system checks to see if new firmware is available. If new firmware is available, the monitor installs it and automatically reboots.
-
Page 36: G37Xx Operation Basics
G37XX OPERATION BASICS This section gives you instructions on how to perform the most commonly used actions for the G37xx. There is also a table of other actions you might find useful. MANUALLY RECORDING LIVE VIDEO (NOT SCHEDULED) From a single-channel mode Live view screen, tap the blue for the camera to begin recording. -
Page 37: Adding New Cameras
If you tap on a day that is not highlighted, there will be no action taken at all. Tap on the recording you want to view. It begins playing. Control icons display across the bottom of the screen. Next Home Stop Forward Record... - Page 38 1. From the Recorded File List, tap icon. videos 2. Tap to confirm deletion. Take snapshots Download Uniden’s Guardian Full HD app to take and manage snapshots of recorded video. View snapshots Download Uniden’s Guardian Full HD to take and manage snapshots of recorded video.
- Page 39 Delete snapshots Download Uniden’s Guardian Full HD app to take and manage snapshots of recorded video. Modify password Go to Advanced Settings in Guardian Full HD app (see (smartphone only) page 45) to change the app password. Reset password 1. From General Settings/Network Setup, tap (Resets the app 2.
-
Page 40: Remote Viewing
REMOTE VIEWING Overview You can use the Guardian Full HD app to remotely view the system. Download the app through Apple App Store or Google Play Store. Set Up the Guardian Full HD App 1. Connect the G37xx monitor to your router using the Ethernet cable included. Turn on the monitor. - Page 41 Tap on the option, Add Device. You have the option to either add the device manually or you can scan the QR code. If you want to manually add the device tap on the option, Add, to get the screen shown below.
- Page 42 Tap on the Name field, and enter a name for your system. Tap on the UID field and enter the UID code found on the cradle. Enter the default password ‘000000’, and then tap Save. You could opt to scan the QR Code too, in that case, tap the option QR Code Add Device screen.
-
Page 43: Live View
Live View From the Device List screen, tap on the snapshot view to display the Live View. Icon/Option Function Tap on this icon to view the saved snapshots. Tap to take a snapshot in Live View. Tap to turn on/off audio. Tap and Press and hold to talk through the camera. -
Page 44: Advanced Settings
Advanced Settings Password Uniden strongly recommends changing the default password to a more personalized password. After your device displays on your Device List screen, tap on the icon to access the Edit Device screen. If you forgotten the password, please reset network setup (see page 34). - Page 45 Modify Password On the Advanced Setting screen, tap the option, Modify Password option to key in and confirm the new password. Video Quality On the Advanced Setting screen, tap the option, Video Quality, to select the resolution of the video. The option available are: Max, High, Medium, Low, Min.
- Page 46 Light Settings (for G3700L only) On the Advanced Setting screen, tap the option, Light Settings to configure G3700L light on duration, timer and light intensity. Alert Interval On the Advanced Setting screen, tap the option, Alert Internal, to determine how frequent to receive push notification or to switch off push notification.
- Page 47 About Device On the Advanced Setting screen, tap the option, Device Info, to view the model name and network information. G37XX 192.168.1.1 192.168.1.1 255.255.255.0...
-
Page 48: Maintaining Your System
UPGRADING YOUR G37XX MONITOR FIRMWARE Check your system firmware version on the Network Information screen. Go to www.uniden.com.au and search for the G37xx product page. Check the current firmware version against your system firmware level. If you need to update your G37xx firmware, download the most current firmware version to your system’s... -
Page 49: Troubleshooting
If you have any trouble with your system, try these simple steps. If you are still having a problem with your camera, check the manual that came with your camera. If you still have a question, visit the Uniden website at www.uniden.com.au for assistance. -
Page 50: Interference
The camera won’t pair • Making sure the camera is plugged in. with the monitor. • Pressing and releasing the pairing button quickly. Do not press and hold the pairing button. • Check if other cameras in the area are also in Pairing mode. -
Page 51: Specifications
SPECIFICATIONS G37xx Monitor Specifications Display Size / Type 7” TFT LCD Panel Resolution 1024 x 600 Viewing Angle 120° SD Card Supported up to 64GB (8GB included) Power Requirement 5V 2A DC Power Consumption Max 10W Battery Type/Capacity 3.7V 2000mAh Hours of Battery Operation 1.5 hours Battery charging time... - Page 52 G3700 Camera Specifications Image Sensor 1/2.7 inch Color CMOS Image Sensor Effective Pixel Area 1920 x 1080 Image Processing Format H.264 Image Resolution / Frame Rate 1080P up to 10fps / 720P up to 24fps Lens 3.6mm F1.9 Low Light Resolution 1-8 lux Low Light Solution 16 IR LEDs, 1 low light sensor...
- Page 53 G3700L Camera Specifications Image Sensor 1/2.7 inch Color CMOS Image Sensor Effective Pixel Area 1920 x 1080 Image Processing Format H.264 Image Resolution / Frame Rate 1080P up to 10fps / 720P up to 24fps Lens 3.6mm / F1.8 Night Vision Up to 12 meters IR cut filter Viewing Angle...
-
Page 54: One-Year Limited Warranty
(“Uniden Aust”) . Terms of Warranty Uniden Aust warrants to the original retail purchaser only that the G37xx Series (“the Product”), will be free from defects in materials and craftsmanship for the duration of the warranty period, subject to the limitations and exclusions set out below. - Page 55 (such as a legible copy of the sales docket) to Uniden. Please refer to the Uniden website for address details. You should contact Uniden regarding any compensation that may be payable for your expenses incurred in making a warranty claim.
- Page 56 ©2016 Uniden Australia Pty Ltd Printed in PRC...