
Related Manuals for Uniden G17xx Series


Summary of Contents for Uniden G17xx Series
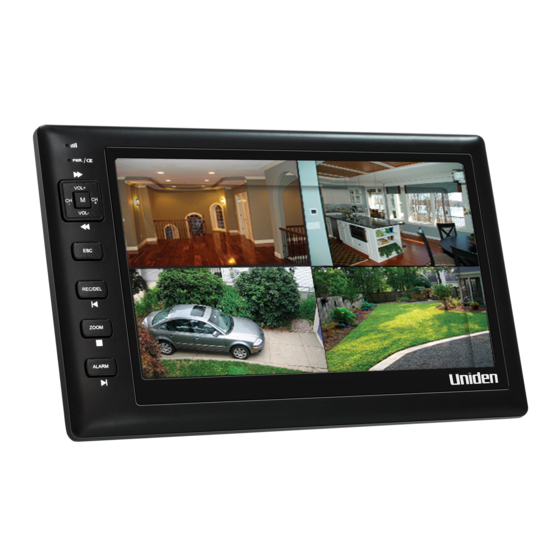
- Page 1 G17xx Series VIDEO SURVEILLANCE SYSTEM For more exciting new products please visit our website: Australia: www.uniden.com.au New Zealand: www.uniden.co.nz...
-
Page 2: Important Safety Instructions
IMPORTANT SAFETY INSTRUCTIONS This manual contains important information about this product’s operation. If you are installing this product for others, you must leave this manual or a copy with the end user. When using your equipment, always follow basic safety precautions to reduce the risk of fire, electric shock and injury to persons, including the following: • This equipment is NOT waterproof. - Page 3 • Clean only with a dry cloth. Failure to follow the instructions in this operating manual will void the warranty. Uniden assumes no liability for damages to property or injury to persons caused by improper handling or failure to comply with these safety...
-
Page 4: Table Of Contents
Pairing Accessory Cameras to the Monitor ..................10 BAsIC oPeRAtIon ....................11 Monitor ................................ 11 Screen Icons ............................... 12 Camera .................................13 Using Your G17xx Series ......................... 14 sCReen DesCRIPtIons ...................16 Main Menu Screen ..........................16 Camera Setup ............................18 Recorder Setup ............................21 Event List .............................. - Page 5 MAIntAInInG YouR sYsteM .................44 Upgrading Your Uniden G17xx Series Firmware ................44 Taking Care of Your Hardware ......................44 tRouBLesHootInG ..................45 sPeCIfICAtIon ....................47 one-YeAR LIMIteD WARRAntY ..............48...
-
Page 6: What's In The Box
• If any item is missing or damaged, contact your place of purchase immediately. Never use damaged products! • Need help? Get answers at our website: www.uniden.com.au for Australian model www.uniden.co.nz for New Zealand model. All trademarks are registered trademarks of their respective owners. -
Page 7: Installation
InstALLAtIon set up the Camera General Placement Considerations • The cameras included with your monitor are weatherproof and have an IP66 weather rating. Water can be sprayed on them and they will still work; however, the cameras cannot be submerged underwater. • Although the cameras can be exposed directly to the rain, it is recommended that, if they are used outdoors, they be mounted under some type of cover like a patio overhang or eave. - Page 8 Mount the Camera Base The following tools are required: • Electric Drill • 5mm Drill Bit • 15mm Drill Bit • No. 2 Phillips Screwdriver 1. Hold the base of the camera stand where you want to mount it and mark the location of the screw holes.
-
Page 9: Attach The Camera
Attach the Camera Attach the camera Tighten the brace against to the mounting the camera to screw and turn it secure it to the desired in place. direction. Loosen the wingnut to Adjust the post to unlock the the correct angle, mounting then tighten the post. -
Page 10: Set Up The Monitor
7. After the system powers on, adjust the camera viewing position if needed. Pairing Accessory Cameras to the Monitor The cameras that come with your G17xx Series are paired to your monitor at the factory. To pair the camera to the monitor, follow the steps below. -
Page 11: Basic Operation
BAsIC oPeRAtIon Monitor No Keys/ M (MENU) Playback Other Indicators Mode Link LED (Green) Power/Charge LED (Red) Channel Cursor Left Change Switch (CH-) Camera (-) Volume Cursor Down Skip Backward (VOL -) Volume Cursor Up Skip Forward (VOL +) Channel Cursor Right Change Switch + (+) -
Page 12: Screen Icons
ALARM Next File Power Button screen Icons Icon What it indicates Signal Indicator Channel Indicator Recording Indicator (Red) Quad Display Scan Display Camera Displayed There are seven audio levels. Monitor Power Indicator YYYY-MM-DD Date and Time AMhh:mm:ss In ZOOM mode - Zoom Level Indicator. X1 - Normal view. -
Page 13: Camera
• The G17xx Series will return to the selected mode (option selected in the multi channel idle display) from any screen after the monitor is idle for two minutes in full screen. -
Page 14: Using Your G17Xx Series
PC’s memory slot or transfer the recorded files from the memory card to the computer. Uniden Media Player must be installed; it is included on the CD. To view on TV: Use the AV cable to connect the... - Page 15 Set the date and time See SyStem Setup, page 26. Transfer a recording from Remove the memory card from the monitor and the monitor’s SD card to the insert it in an adaptor. Insert the SD adaptor into computer. your PC. Select a destination to store the files. Watch live video on your See page 40 for details on downloading and smartphone...
-
Page 16: Screen Descriptions
DesCRIPtIons Main Menu screen The G17xx Series main menu lets you select from 8 screens to set your system preferences, from camera brightness to setting up and viewing recordings. This section describes the screens in detail. It provides a path to the screen being viewed and operation procedures for that screen. - Page 17 RECORDER Record Schedule Sets up a schedule for pre- SETUP determined recording times and lengths. Motion Detection Records when something moves Sensitivity in front of the camera. Continues recording for 2, 5, or 10 minutes. Motion detection is on by default. Format Storage Formats SD card.
-
Page 18: Camera Setup
MEMORY CARD Allows the oldest files to be deleted OVERWRITE when you want to record once the memory card is full. CAMeRA setuP From this selection on the main menu - This screen should display: The Setup detAil optioNS screen has three options: • Pair a New Device • Image Brightness • Activate or Deactivate... - Page 19 2. Press again to begin camera pairing. PAIRInG 3. Quickly (within 30 seconds) press the key on the camera cable. The green Pair LED on the selected camera blinks once, pauses, and then stays on to indicate that data transmission is in progress. pAired displays on the screen if pairing is successful or pAiriNG FAil if it isn’t.
- Page 20 1. With the Setup detAil optioNS screen displayed for a camera, press highlight the Brightness selection. VoL+ VoL- 2. Press to adjust the camera’s brightness; the five levels are OFF, 1 - 4. The default level is 2. 3. Press to accept the new setting and return to the Setup detAil optioNS screen.
-
Page 21: Recorder Setup
ReCoRDeR setuP From this selection on the main menu - This screen should display: The reCorder Setup screen has five options: • Record Schedule • Motion Detection Sensitivity • Format Storage • Setup Masking Area • Motion Record Time Record Schedule reCord SChedule lets you schedule recordings in 1 hour blocks. -
Page 22: Motion Detection Sensitivity
Assign MOTION or SCHEDULE recording mode to all cameras 1. From the main menu, select reCorder Setup. The reCord SChedule screen displays with the latest camera recording settings. 2. Press to show the recording options 3. Press to highlight either motioN or SChedule. Press to select it. -
Page 23: Format Storage
2. Press to select the camera for motion detection sensitivity adjustment. VoL+ VoL- 3. Press to adjust sensitivity level – OFF (no box highlighted)/ LEVEL 1 (low) / LEVEL 2 (medium) / LEVEL 3 (high). 4. When you have finished setting the camera’s motion sensitivity levels, press to accept the settings and press again to back out. -
Page 24: Record Time
2. Use to select a camera (1 - 4) for setting up the masking area. Press to enter the camera masking preview page. 3. A grid displays over the image on the screen. While in masking preview, use CH-, VoL+ VoL- , and to select the masking block(s) where motion is to... - Page 25 From this selection on the main menu - This screen should display: Play Back Recorded File CH-, VoL+ VoL- 1. Use , and to select the dAte and hour folders containing recorded file(s). Press to confirm and enter each file. CH-, VoL+ VoL- 2.
-
Page 26: System Setup
sYsteM setuP SyStem Setup has five subscreens: • Date and Time • TV Output • Power Saving • Multi Channels Idle DIsplay • Default Date and Time 1. From the SyStem Setup screen, use to select yeAr, moNth, dAte, hour, and miNute. VoL+ VoL- 2. -
Page 27: Power Saving
Power Saving Use this setting to determine how long your system will remain in an idle mode until it moves into power saving mode. Power Saving mode turns off the LCD screen to conserve the monitor’s battery or to not have a bright LCD when sleeping. If Power Saving mode is on, motion detection events will turn the LCD screen back on. -
Page 28: Alarm Buzzer
to choose between QuAd and 5, 10, and 15 second intervals. Press to accept the change and return to the multi ChANNel diSplAy screen. • The Activate or Deactivate setting (CAmerA Setup screen) affects which cameras display in Scan mode. • Audio is available from camera 1 in Quad mode, from whatever camera is a previously viewed channel, or from a channel triggered by motion detection. -
Page 29: Pan Tilt Zoom
PAn tILt ZooM This setting lets you change the orientation of the camera (pan and tilt) and the zoom distance. VoL+ VoL- 1. From the main menu, use , and to select pAN tilt zoom and press . The first camera displays in single camera mode. ZooM ZooM 2. -
Page 30: Scan Activated Cameras
sCAn ACtIVAteD CAMeRAs VoL+ VoL- 1. From the the main menu, press , and to select SCAN ACtivAted CAmerAS and press to enter Scanning mode. 2. The screen scans between the cameras according to the scan time set up in the multi ChANNelS idle diSplAy screen (refer to page 27). - Page 31 SD card not present — SD card is locked. — SD card is unformatted — SD card is damaged. — # Please use well-known brands of micro SD cards to avoid operation errors. The G17xx Series supports up to 32GB microSD cards.
-
Page 32: Special Features
• Playing back recorded files on a PC ReMote ACCess The Uniden G17xx Series let you view live video from your system on your television or PC (home or remote) or on wireless devices such as an iPhone®, iPad®, or AndroidTM smartphone or tablet. - Page 33 Install Uniden Remote Service Software 1. Insert the G17xx Series Remote Software CD in your PC’s CD ROM. 2. Select Uniden Remote Service and double-click to install. 3. The WelCome window appears. Click NeXt to select an installation folder. 4. The default folder is located at C:\ Program Files\.
- Page 34 6. The iNStAllAtioN Complete screen displays when the software is installed. Click CloSe to leave the Installation wizard. 7. Turn on the G17xx Series monitor and connect it to the PC using the USB cable. 8. A NeW hArdWAre FouNd iNdiCAtor appears on the lower right-hand side...
- Page 35 9. Click StArt to activate OMGuard Remote Service. The omGuArd Setup screen displays. 10. Select or enter the following: • Display language (Default = English). • USB 2.0 Camera (from USB Video Device dropdown list) • DID Code (located on the back of the monitor) • Security Code (The default security code is 12345.) # You can set up a different security code at this time, but be sure and use that code when you’re using the app and setting up a Portal account.
-
Page 36: Setting Up A Portal Account
We recommend you check this box to receive updates. 9. Click in the check box (6) to receive information on special offers from Uniden. 10. Click SuBmit (7). The NeW ACCouNt CreAted screen displays. - Page 37 (2). Select your model/enter the did Code 1. The video SyStem reGiStrAtioN screen displays. Select G17XX SerieS. 2. Click the radio button by your system (3). 3. Enter the DID code in all capital letters (4). 4. Click CoNtiNue (5).
-
Page 38: Record Video Through The Portal
(see page 35). 11. Click StArt. # The security code you enter on the Uniden Video Portal and the apps must match the security code you entered during Uniden Remote Service software installation. Anytime you change the security code in that software, you must make the corresponding change on the Portal or the apps. -
Page 39: Take A Snapshot Through The Portal
Play Back Recorded files on Your PC The files that record on the G17xx Series record onto the microSD card. You can take that card and play it on your PC. You will need: • G17xx Series microSD card... -
Page 40: Downloading And Using The Apps
Android Download You can use a Google® Android smart phone or tablet with your Uniden Guardian 2 System to remotely connect to and view live camera video. Follow these steps to download, add, and use the app. 1. From your Android... -
Page 41: App Operation
App operation When you open the app on your Android phone, the image displayed on the main screen is the last camera image, captured automatically, from your previously established session. Tap to add an additional Guardian system. Tap to enter SyStem Setup page. -
Page 42: Iphone
In a similar fashion to the Android smart phone, you can use the Apple® iPhone® smart phone or iPad® tablet with your Uniden Guardian System to remotely connect to and view camera videos. Follow these steps to download the Uniden Guardian iPhone®appand set it up to work with your Uniden Guardian system. - Page 43 Tap to add an additional Guardian system. Tap to enter SyStem Setup page. Tap to refresh the system. Tap to enter the app iNFormAtioN page. The screen displays the app version number and the API version number. Tap oK to exit. If you have multiple systems, scroll down and tap on the system image you want to view.
-
Page 44: Maintaining Your System
Both the cameras and monitor firmware display. Go to www.unidenvideo.com to check the current firmware level. Compare it to your system firmware level. If you need to update your G17xx Series firmware, download the most current firmware version to your system’s microSD card and then upload that firmware to the monitor. -
Page 45: Troubleshooting
• Decreasing motion sensitivity (see page 22). Motion detection goes off • Refer to General Placement Considerations on when there’s nothing there. page 7. • You must install Uniden Media Player to play I can’t play my video clips back recorded files. This player is found on the in another program CD included in the box. - Page 46 LCD back on. on the screen • Making sure the G17xx Series is turned on. There is no video (or au- • Making sure the AV plugs are inserted into the dio) when I try to watch live correct jacks on the television.
-
Page 47: Specification
sPeCIfICAtIon Camera Monitor Maximum Channels Communication Range 150 ms in open space Monitor Resolution 800 x 480 Camera Resolution 640 x 480 Operating Temperature -10°C ~ +50°C Operating Voltage DC 5V / 1A Current Consumption 550mA (max) 860mA (max) Night Vision Dimension 123L x 65H x 65W mm 200L x 122H x 25W mm... -
Page 48: One-Year Limited Warranty
Warrantor The warrantor is either Uniden Australia Pty Limited ABN 58 001 865 498 (“Uniden Aust”) or Uniden New Zealand Limited (“Uniden NZ”) as the case may be. Terms of Warranty Uniden Aust/NZ warrants to the original retail purchaser only that the G17xx Series (“the Product”), will be free from defects in materials and craftsmanship for the duration... - Page 49 Product does not conform with this warranty, you should deliver the Product, together with satisfactory evidence of your original purchase (such as a legible copy of the sales docket) to Uniden at the addresses shown below. You should contact Uniden regarding any compensation that may be payable for your expenses incurred in making a warranty claim.
- Page 52 ©2013 Uniden Australia Pty Ltd/Uniden New Zealand Limited Printed in PRC...