Table of Contents
Advertisement
Advertisement
Table of Contents

Related Manuals for Midland XT-60


Summary of Contents for Midland XT-60
- Page 1 XT·60 DUAL BAND (PMR446/LPD) WALKIE-TALKIE › Instruction Guide up to 10Km...
-
Page 2: Content Of The Package
Content of the package • 2 transceivers with belt clip • 1 USB cable • 1 double fast desktop charger • 2 rechargeable battery packs 700mAh Coverage (referred to PMR frequency band) The maximum range depends on terrain condition and is obtained during use in an open space. -
Page 3: Main Functions
Main functions • Dual Band LPD/PMR transceiver Channels: 24 PMR446 (8+16 pre-programmed) + 69 LPD • Side Tone: end transmission noise muffler • LCD display with backlight • Low battery indicator • Auto power save: automatic current economy circuit • 38 CTCSS and 83 DCS tones in TX and RX •... - Page 4 Above all….Safety! Warnings ! Do not open the radio for any reason! The radio’s precision mechanics and electronics require experience and specialized equipment; for the same reason, the radio should under no circumstances be realigned as it has already been calibrated for maximum performance.
-
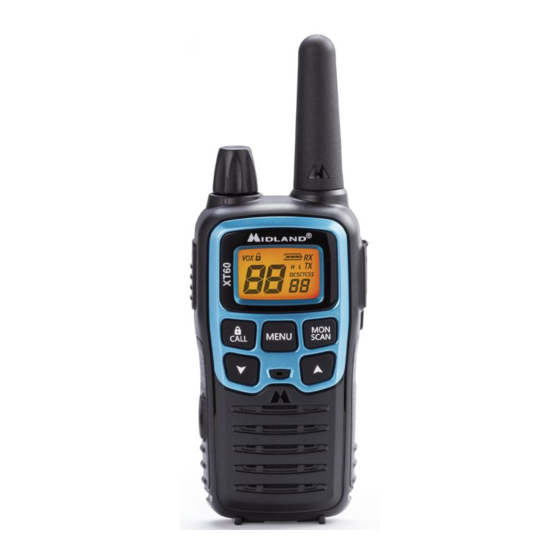
Page 5: Identifying The Parts
Identifying the parts DCSCTCSS MENU MENU SCAN SCAN CALL CALL XT60 user’s manual DCSCTCSS DCSCTCSS... - Page 6 LCD Display Selected channel (P1-P8/9P-24P: PMR446 /1-69:LPD) VOX - Function activated - Keypad lock activated - Battery status indicator H/L - Indicates the high / low power selection in transmission (only in PMR band) RX - Radio in rx mode (busy channel) TX - Radio in transmission (PTT pressed) DCS/CTCSS - Type of sub-audio tone selected Code of the selected CTCSS or DCS tone...
-
Page 7: Preparing The Transceiver
Preparing the transceiver The radio can be recharged with different type of batteries: here below the possibilities. Note: To optimize the recharge process, we suggest you switch off the radio to recharge it. Recharging the NIMH batteries (3 x AAA) Place your transceiver into the cradle of the desktop charger or connect the USB cable to the proper jack of the radio. -
Page 8: Installing/Removing The Battery Pack
Installing/removing the battery pack Remove the belt clip; Open the battery compartment as shown in picture 1; Remove or insert the battery pack; Close the battery cover and fix the belt clip. PICTURE 1 XT60 user’s manual... -
Page 9: Basic Operation
Basic operation Turning on/off To turn on the transceiver, turn the VOLUME knob clockwise until you hear it clicks: the LCD display will light up and do an Auto-Test. Subsequently you will hear 2 beeps of different tones. To turn off the transceiver, turn the knob counter-clockwise until you hear another click. -
Page 10: Display Backlight
MON button (Monitor) The Monitor button is for temporarily excluding (opening) the squelch, in order to listen to signals that are too weak to keep the squelch permanently opened. By excluding the squelch you will avoid listening the communication “chopped” by the squelch. -
Page 11: Menu Button
Power Save The battery power saving feature enables a reduction in the consumption of up to 50%; power saving comes on automatically when the transceiver does not receive any signal for more than 5 seconds. When the batteries are discharged, bt LO appears on the display: replace the batteries or recharge the battery pack. -
Page 12: Vox Function
Choosing high or low transmission power (PMR band) Batteries are drained more quickly during transmission. In order to extend the battery life you can select the low power when transmitting over short distan- ces. Procedure: Press the MENU button for 3 times and Pr H will be displayed. Select L using the scroll buttons / . -
Page 13: Call Function
ROGER BEEP (End transmission tone) When your transmission is finished (PTT released), XT60 gives out a sound that indicates to the other party that s/he can start talking. This function is enabled by default. To deactivate it: Press 5 times the MENU button in the PMR band until the display shows “rb on”;... - Page 14 Troubleshooting and radio reset Your Midland XT60 is designed to provide you with years of optimal perfor- mance. If for some reason problems arise, refer to this chapter before contac- ting a service centre in your region. Reset If your transceiver experiences a logical malfunction (improper symbols on the display, blocking of functions, etc.), it may not be experiencing a true failure,...
-
Page 15: Technical Specifications
Technical specifications Channels ..................24 PMR; 69 LPD Frequency range ......... 446.00625 ÷ 446.09375MHz (PMR) ................433.075 - 434.775MHz (LPD) Channel spacing ..........12.5 KHz (PMR); 25 KHz (LPD) Power supply ..............700mAh battery pack ..................3x AAA type 4.5V(Alkaline) ............3.6V(Rechargeable) batteries +/- 10% VDC Temperature .................. - Page 16 XT60 user’s manual | 15...
- Page 17 Importado por: ALAN COMMUNICATIONS, SA C/Cobalt, 48 - 08940 Cornellà de Llobregat (Barcelona - España) www.midland.es El uso de este equipo puede estar sujeto a la obtención de la correspondiente autorización administrativa. Lea atentamente las instrucciones antes de usar el equipo.