Table of Contents
Advertisement
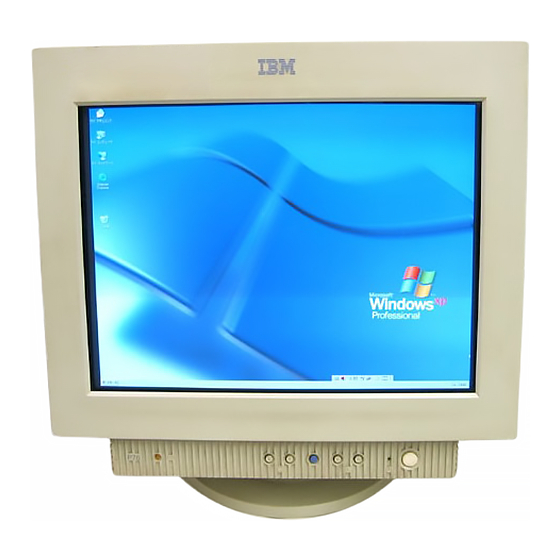
6550-23N/23S/33N/63N/63S/73N
SERVICE MANUAL
Picture tube
Viewable image size
Resolution
Standard image area
Deflection frequency
AC input voltage/current
Power consumption
Dimensions
Mass
SPECIFICATIONS
0.24 mm aperture grille pitch
17 inches measured diagonally
90-degree deflection
Approx. 327 × 243 mm (w/h)
× 9
7
5
(12
/
/
inches)
8
8
16.0" viewable diagonal
Horizontal: Max. 1600 dots
Vertical: Max. 1200 lines
Approx. 312 × 234 mm (w/h)
× 9
3
1
(12
/
/
inches)
8
4
Horizontal: 30 to 94 kHz
Vertical: 48 to 120 Hz
300 < Total Line < 1700
100 to 240 V, 50 – 60 Hz, Max. 1.7 A
Max. 130 W
Approx. 406 × 416 × 431 mm
(w/h/d)
(16 × 16
× 17 inches)
1
/
2
Approx. 20 kg (44 lb 1 oz)
Canadian Model
6550-23N : Chassis No. SCC-L29D-A
6550-63N : Chassis No. SCC-L29G-A
S. Hemisphere Model
6550-23S : Chassis No. SCC-L29E-A
6550-63S : Chassis No. SCC-L29H-A
Japan Model
6550-33N : Chassis No. SCC-L29F-A
6550-73N : Chassis No. SCC-L29J-A
D99
* Recommended horizontal and vertical timing condition
• Horizontal sync width should be more than 1.0 µsec.
• Horizontal blanking width should be more than
3.0 µsec.
• Vertical blanking width should be more than 500 µsec.
Design and specifications are subject to change without
notice.
MODEL
BODY COLOR
6550-23N
6550-23S
WHITE TYPE
6550-33N
6550-63N
6550-63S
BLACK TYPE
6550-73N
COLOR MONITOR
6550-23N/63N
US Model
AEP Model
6550-23S/63S
6550-33N/73N
CHASSIS
SPEC.
DEST.
US, CND, AEP
SH
J
US, CND, AEP
SH
J
Advertisement
Table of Contents

Related Manuals for IBM 6550-23N


Summary of Contents for IBM 6550-23N
-
Page 1: Service Manual
6550-23N/23S/33N/63N/63S/73N SERVICE MANUAL 6550-23N/63N US Model Canadian Model AEP Model 6550-23N : Chassis No. SCC-L29D-A 6550-63N : Chassis No. SCC-L29G-A 6550-23S/63S S. Hemisphere Model 6550-23S : Chassis No. SCC-L29E-A 6550-63S : Chassis No. SCC-L29H-A 6550-33N/73N Japan Model 6550-33N : Chassis No. SCC-L29F-A 6550-73N : Chassis No. -
Page 2: Power Led
6550-23N/23S/33N/63N/63S/73N DIAGNOSIS Failure Power LED HV/+B Failure Blink Amber (On 0.5 sec, Off 0.5 sec) H Stop or V Stop (Included S-Cap) Blink Amber (On 0.5 sec, Off 0.5 sec) ABL Failure Blink Amber (On 0.5 sec, Off 1.5 sec) Aging/Self-Test Blink Amber (On 0.5 sec, Off 0.5 sec) .. - Page 3 6550-23N/23S/33N/63N/63S/73N SAFETY CHECK-OUT After correcting the original service problem, perform the fol- LEAKAGE TEST lowing safety checks before releasing the set to the customer: The AC leakage from any exposed metal part to earth ground 1. Check the area of your repair for unsoldered or poorly-sol- and from all exposed metal parts to any exposed metal part hav- dered connections.
-
Page 4: Table Of Contents
6550-23N/23S/33N/63N/63S/73N TABLE OF CONTENTS Section Title Page 1. GENERAL ..............1-1 2. DISASSEMBLY 2-1. Cabinet and EMI Shield Removal ...... 2-1 2-2. A and D Boards Removal ........2-2 2-3. Service Position ............ 2-2 2-4. Picture Tube Removal .......... 2-3 3. -
Page 5: General
The operating instructions mentioned here are partial abstracts SECTION 1 from the Operating Instruction Manual. The page numbers of the Operating Instruction Manual remein as in the manual. GENERAL Getting Started Getting started Getting Started Getting Started Use of the Tilt-Swivel Precautions Identifying Parts and Controls This monitor can be adjusted within the angles shown... -
Page 6: Adjusting The Picture Brightness And Contrast
Customizing Your Monitor Getting Started Getting Started Customizing Your Monitor Before adjusting Step 5: Adjust the monitor’s controls Setup Introducing the On-screen • Connect the monitor and the computer, and turn them on. according to your personal Display System This monitor works with platforms running at horizontal preference Selecting the On-screen Display frequencies between 30 and 94 kHz. -
Page 7: Screen Display
Customizing Your Monitor Getting Started Customizing Your Monitor Press the ?// buttons to adjust the settings. Press the ?// buttons to adjust the settings. Using the SIZE/CENTER Using the GEOMETRY screen Display screen Display The SIZE/CENTER settings allow you to adjust the The GEOMETRY settings allow you to adjust the shape and picture’s size, centering, or zoom. - Page 8 Customizing Your Monitor Getting Started Customizing Your Monitor Press the ./> buttons to select the color Press the ?// buttons to adjust the settings. Using the COLOR On-screen Using the CONVERGENCE temperature. Display screen Display You can change the monitor’s color temperature. For The CONVERGENCE settings allow you to adjust the example, you can adjust or change the colors of a picture on quality of the picture by controlling the convergence.
- Page 9 Customizing Your Monitor Getting Started Customizing Your Monitor Adjusting the moire Changing the on-screen display position Using the LANGUAGE Using the OPTION On-screen screen Display Display If elliptical or wavy patterns appear on the screen, adjust the You can change the OSD position (for example, when you moire cancellation level.
- Page 10 Customizing Your Monitor Getting Started Customizing Your Monitor DISTORTED SHAPE Locking the controls Using the HELP On-screen Resetting the Adjustments If the shape of the picture on the screen seems distorted, try adjusting the picture’s geometry. Press the / button to Display You can protect adjustment data by locking the controls.
-
Page 11: Preset Modes
43.3 kHz 85 Hz VESA CHANGE PC SE T T I NG power consumption in three stages as shown below. • IBM recommends that you switch off your monitor at the end of 800 × 600 46.9 kHz 75 Hz VESA... -
Page 12: Troubleshooting
(page12). the front panel • If the problem persists, call the IBM HelpCenter. In the US. call 1-800-772-2227 In Canada call 1-800-565-3344 • Note the model name and the serial number of your monitor. Also note the make and name of your computer and graphic... -
Page 13: Specifications
If the u indicator is still flashing, there is a potential monitor failure. Inform the IBM HelpCenter of the monitor’s condition. Be sure to note the model name and serial number of your monitor. Also note the make and model of... -
Page 14: Disassembly
6550-23N/23S/33N/63N/63S/73N SECTION 2 DISASSEMBLY 2-1. CABINET AND EMI SHIELD REMOVAL Four screws (+BVTT 3 x 8) EMI shield Three screws (+BVTT 3 x 8) Claw Two screw covers (UL and LL) Claw Two screw covers Four screws (UR and LR) -
Page 15: A And D Boards Removal
6550-23N/23S/33N/63N/63S/73N 2-2. A AND D BOARDS REMOVAL A board Four screws (Washer head +P 3 x 8) Three screws (+BVTT 3 x 12) CN601 Cable stopper Screw (+BVTT 3 x 8) D board Cable cover Cable holder 2-3. SERVICE POSITION A board (Note) The electric potential of heat sink of IC401 is not GND. -
Page 16: Picture Tube Removal
6550-23N/23S/33N/63N/63S/73N 2-4. PICTURE TUBE REMOVAL A board Two extention coils Screw (+BVTT 4 x 8) Two claws CN303 Degaussing coil assembly Stand assembly Two screws (+BVTP 4 x 16) 2 pin Neck assembly Deflection yoke 8 pin CN601 Four screws... - Page 17 6550-23N/23S/33N/63N/63S/73N MEMO ○ ○ ○ ○ ○ ○ ○ ○ ○ ○ ○ ○ ○ ○ ○ ○ ○ ○ ○ ○ ○ ○ ○ ○ ○ ○ ○ ○ ○ ○ ○ ○ ○ ○ ○ ○ ○ ○...
-
Page 18: Safety Related Adjustment
6550-23N/23S/33N/63N/63S/73N SECTION 3 SAFETY RELATED ADJUSTMENT • HV Protector Circuit Check When replacing or repairing the shown below table, the following operational checks must be performed as a Using an external DC Power Supply, apply the voltage safety precaution against X-rays emissions from the unit. -
Page 19: Adjustments
Connect the communication cable of the computer to the connector located on the D board on the monitor. Run the service software and then follow the instruction. 1-690-391-21 A-1500-819-A 3-702-691-01 Interface Unit Connector Attachment IBM AT Computer To BUS CONNECTOR as a Jig D-sub mini Din 4 Pin 4 Pin... - Page 20 6550-23N/23S/33N/63N/63S/73N • Convergence Rough Adjustment • Convergence Specification 1. Enter the white crosshatch signal (white lines on black). 2. Adjust roughly the horizontal and vertical convergence at four-pole magnet. MODE All mode 3. Adjust roughly HMC and VMC at six-pole magnet.
-
Page 21: Diagrams
SECTION 5 DIAGRAMS 5-1. BLOCK DIAGRAMS CN305 +180V IC001 IC002 RGB DRIVE, OSD MIX +80V RGB OUT CN313 J001 B GND 1 D BOARD B IN B IN CN502 BLUE 1 B OUT B OUT +12V G GND 1 GREEN G IN G OUT G IN... - Page 22 +12V RELAY DRIVE IC901 CPU IC902 DEF CONTR0L Q519 RY500 T505 S901-S906,S908 IC501 PWM CONTROL KEY SCAN L509 LED RED BUFF LED GRN BUFF Q521 D912 L511 T503 OSC OUT X901 X902 BUFF DF AMP V DF 24MHz Q505 Q504 S0-S4 OSC IN S-CAP CHANGE...
-
Page 23: Circuit Boards Location
5-3. SCHEMATIC DIAGRAMS AND PRINTED • Divided circuit diagram WIRING BOARDS 5-2. CIRCUIT BOARDS LOCATION One sheet of D board circuit diagram is divided into four Note: sheets, each having the code D-a to D-d . For example, the • All capacitors are in µF unless otherwise noted. (pF: µµF) destination ab1 on the D-a sheet is connected to ab1 on the Capacitors without voltage indication are all 50 V. -
Page 24: Schematic Diagram Of D Board
(1) Schematic Diagram of D (a-d) Boards KEY SCAN C929 0.001 STBY 5V B:CHIP IC701 CXA8070AP CONVERGENCE R940 S901 CONTROL RESET 2.7k D935 JW901 :RN-CP HZS5.1N 5V-2 JW(5) A_GND C716 0.033 D_GND R943 S903 B:CHIP BRIGHT- V_SIN R944 S904 VPOSIN BRIGHT+ :CHIP R703... - Page 25 STBY D GND IIC CLK IIC CLK R903 1k :CHIP IIC DATA IIC DATA STBY R904 CN901 :CHIP D901 R917 R905 R916 :S-MICRO R906 MA111 :CHIP :CHIP :CHIP DDCSCL :CHIP R921 TEST 0 :CHIP DDCSDA TO A BOARD D905 R912 D906 1SS119 1k :CHIP...
- Page 26 C553 C545 bc14 bc10 bc12 bc11 bc13 R556 0.001 0.022 B:CHIP B:CHIP :RN-CP C562 C555 C546 220p CH:CHIP L513 R567 R564 C558 10µH C557 R554 :RN-CP :CHIP 150k :RN-CP IC401 11.5 TDA8177 V OUT IC501 D522 R529 Q506 -14.2 0.3 14.1 µPC6757CS 1SS119 2SA1309A...
- Page 27 180V B-SS3483<U/C>-D..-P4-24 CN600 CN604 AC IN CN502 :S-MICRO TO A BOARD CN305 D BOARD * MARK LIST 6550-23N/23S/63N/63S 6550-33N/73N • Divided circuit diagram JW601 12.5MM Not used One sheet of D board circuit diagram is divided into four JW602 12.5MM Not used sheets, each having the code D-a to D-d .
- Page 28 CONVERGENCE CONTROL, DEDFLECTION, CPU, POWER SUPPLY — D BOARD — Schematic diagram Ò Ò Ò Ò Ò 5-16 5-15 -d board...
- Page 29 VIDEO — A BOARD — • D BOARD SEMICONDUCTOR LOCATION D704 – DIODE D901 D902 IC401 D401 – D903 – IC501 D402 – D904 IC502 D403 D905 – IC503 D404 D906 IC601 D501 – D907 IC602 D502 – D908 IC603 D504 –...
-
Page 30: Schematic Diagram Of A Board
(2) Schematic Diagram of A Board D311 C351 1PS226-115 FB302 CN313 IC001 :PROT JW301 R030 CXA2067S RGB DRIVE, OSD MIX :CHIP B:CHIP 20MM :CHIP :S-MICRO J001 R330 R361 B.GND1 :CHIP IC002 D211 LM2415T C251 BLUE1 1PS226-115 FB202 C. SYNC RGB OUT :PROT JW201 G.GND1... -
Page 31: Semiconductors
5-4. SEMICONDUCTORS BA00AST LA6510 STK391-110 DTC114TSA 2SC5302-SONY-CC LA6500FA PETA114EK-115 PDTC114EK-115 2SA1037AK-T146-QR 2SA1037AK-T146-R 2SC1623-L5L6 2SC2412K-T-146-QR MARKING SIDE VIEW LM2415T TDA8177 2SC2610 BA05T 2SC3941A-Q MARKING SIDE VIEW L7805CV DTC143ESA TA7805S 11 pin ZIP M24C08-MN6T TEA1504-N2 TOP VIEW 2SK2098-01MR-F119 IRFU110 CXA2067S 8 pin DIP 2SK2605LBSONY IRFU110A CXA8071CP... - Page 32 D1NL40-TA FMQ-G2FS D2L40-TA ERA34-10 ERB91-02 HSS82 HSS83TD HZS5.1NB2 HZT33-02 RGP02-20EL-6394 RGP10DG23 RL3Z-LF014-302 HZS10NB2 CATHODE HZS12NB2 HZS4.7NB2 HZS5.6NB2 MTZJ-T-77-18 RB4410QT-77 RD10ES-B2 ANODE RD12ES-B2 RD18ES-B2 RD5.1ES-B2 D3S4M RD5.6ES-B2 EGP10D 1SR139-400 ERC81-004 1SS119-25 RH-1A RGP10JPKG23 CATHODE CATHODE ANODE ANODE HZU5.6B2TRF D4SB60L MA111 ANODE CATHODE SPR-325MVW FMC-26UA...
-
Page 33: Exploded Views
6550-23N/23S/33N/63N/63S/73N SECTION 6 EXPLODED VIEWS NOTE: • Items with no part number and no • Items marked " * " are not stocked since ¡ The components identified by mark description are not stocked because they they are seldom required for routine are critical for safety. -
Page 34: Picture Tube
6550-23N/23S/33N/63N/63S/73N 6-2. PICTURE TUBE ¡ The components identified by mark Les composants identifiés par une ¡ 7-685-663-71 +BVTP 4X16 are critical for safety. marque sont critiques pour la 7-685-881-09 +BVTT 4X8 Replace only with part number specified. sécurité. Ne les remplacer que par une pièce portant le numéro spécifié. -
Page 35: Packing Materials
6550-23N/23S/33N/63N/63S/73N 6-3. PACKING MATERIALS ¡ The components identified by mark Les composants identifiés par une ¡ are critical for safety. marque sont critiques pour la Replace only with part number specified. sécurité. Ne les remplacer que par une pièce portant le numéro spécifié. -
Page 36: Electrical Parts List
6550-23N/23S/33N/63N/63S/73N 6550-23N/23S/33N/63N/63S/73N ¡ The components identified by mark Les composants identifiés par une SECTION 7 ¡ marque sont critiques pour la sécurité. are critical for safety. Ne les remplacer que par une pièce Replace only with part number specified. ELECTRICAL PARTS LIST portant le numéro spécifié. - Page 37 6550-23N/23S/33N/63N/63S/73N ¡ The components identified by mark Les composants identifiés par une ¡ are critical for safety. marque sont critiques pour la sécurité. Replace only with part number specified. Ne les remplacer que par une pièce portant le numéro spécifié.
- Page 38 6550-23N/23S/33N/63N/63S/73N ¡ Les composants identifiés par une The components identified by mark ¡ marque sont critiques pour la sécurité. are critical for safety. (a)(d) Ne les remplacer que par une pièce Replace only with part number specified. portant le numéro spécifié.
- Page 39 6550-23N/23S/33N/63N/63S/73N ¡ The components identified by mark Les composants identifiés par une ¡ are critical for safety. marque sont critiques pour la sécurité. Replace only with part number specified. Ne les remplacer que par une pièce portant le numéro spécifié.
- Page 40 6550-23N/23S/33N/63N/63S/73N ¡ Les composants identifiés par une The components identified by mark ¡ marque sont critiques pour la sécurité. are critical for safety. Ne les remplacer que par une pièce Replace only with part number specified. portant le numéro spécifié.
- Page 41 6550-23N/23S/33N/63N/63S/73N ¡ The components identified by mark Les composants identifiés par une ¡ are critical for safety. marque sont critiques pour la sécurité. Replace only with part number specified. Ne les remplacer que par une pièce portant le numéro spécifié.
- Page 42 6550-23N/23S/33N/63N/63S/73N ¡ The components identified by mark Les composants identifiés par une ¡ marque sont critiques pour la sécurité. are critical for safety. Ne les remplacer que par une pièce Replace only with part number specified. portant le numéro spécifié.
- Page 43 6550-23N/23S/33N/63N/63S/73N ¡ The components identified by mark Les composants identifiés par une ¡ are critical for safety. marque sont critiques pour la sécurité. Replace only with part number specified. Ne les remplacer que par une pièce portant le numéro spécifié.
- Page 44 6550-23N/23S/33N/63N/63S/73N ¡ The components identified by [ in this Les composants identifiés par une The components identified by mark ¡ marque sont critiques pour la sécurité. are critical for safety. manual have been carefully factory- Ne les remplacer que par une pièce Replace only with part number specified.