
Related Manuals for Sears FREE SPIRIT C249 30737 0


Summary of Contents for Sears FREE SPIRIT C249 30737 0
- Page 1 OWNER`S MANUAL ELLIPTICAL Model No. C249 30737 0 FREE SPIRIT ELLIPTICAL SERVICE Is at YOUR SERVICE • Assembly • Operation • Exercise • Parts • Warranty CAUTION You must read and understand this owner’s manual before operating unit.
-
Page 2: Table Of Contents
Manufacture s One-Year Limited Warranty Your Free Spirit Club Elliptical is warranted for one year from the date of purchase against defects in material when used for the purpose intended, under normal conditions and provided it receives proper care. Any part found defective or missing will be sent at no cost when returned in accordance with the terms of this warranty. -
Page 3: Safety Precautions
SAFETY PRECAUTIONS Thank you for purchasing our product. Even though we go to great efforts to ensure the quality of each product we produce, occasional errors and /or omissions do occur. In any event should you find this product to have either a defective or a missing part please contact the manufacturer at 1-888-707-1880 for a replacement. -
Page 4: Hardware List
HARDWARE LIST #96. 3/8" x 2T #84. 3/8" x 23 x 2T Spring Washer (1pc) Curved Washer (2pcs) #66. M5 x 10m/m #103. 3/8" x 3/4" Phillips Head Screw (4pcs) Hex Head Screw (2pcs) #60. 3/8" x 2-1/4" Hex Head Screw (1pcs) #83. - Page 5 #71. 5/16" x 7T #104. 5/16 x 1-1/4" #80. 5/16" x 20 x 1.5T Nylon Nut (2 pcs) Hex Head Screw (2 pcs) Flat Washer (2 pcs) #87. 3.5x12m/m #105. M5 x 15m/m Phillips Head Self Tapping Screw (8pcs) Screw (14pcs) #107.
-
Page 6: Assembly Instruction
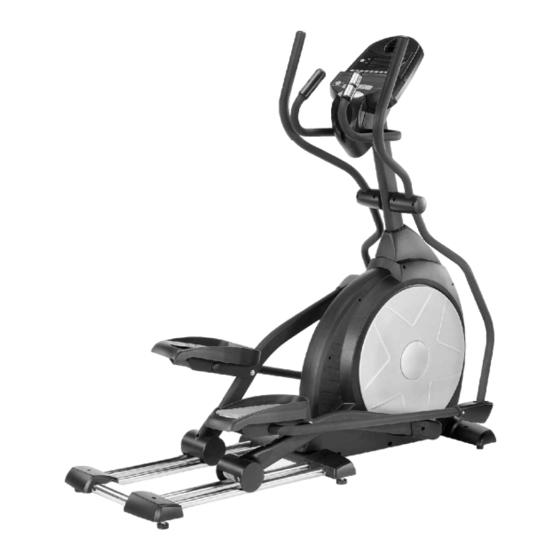
ASSEMBLY INSTRUCTION This manual is designed to help you easily assemble, adjust and use this machine. Please read this manual carefully. For the sake of familiarizing yourself with the parts identified in the instruction, first study the overview drawing. Set all parts in a clear area on the floor and remove the packing material. Refer to the parts list for help to identify the parts. - Page 7 ©2007...
- Page 8 STEP 3 HANDLE BAR ASSEMBLY 1. Install the 2 pcs of 17m/m Wave Washers (83) onto the Left and Right side of the Handle Bar axle. 2. Slide the Left and Right Handle Bars (10&11) onto the appropriate side of the axle. 3.
- Page 9 STEP 4: CONNECTING ARM ASSEMBLY 1. Align the hole in the end of the Connecting arms (L&R)(8&9)(pivoting rod end) with the hole in the bracket of the Handle Bars (L&R)(10&11). The rod end should be on the inside of the Handle Bars (L&R)(10&11) bracket.
- Page 10 STEP 5 PLASTIC ASSEMBLY 1. Install the Connecting Arm Covers (L & R) (57 & 58) over the connection of the rod end and Handle Bars (L & R) (10 & 11) with 4pcs of M5 x 15m/m Phillips Head Screws (105) and 2pcs of 3.5x12m/m Self Tapping Screws (87) by using the Short Phillips Screw Driver(107).
- Page 11 ©2007...
-
Page 12: Care And Maintenance
CARE AND MAINTENANCE Your elliptical is made of the highest quality materials. It is so important that you take care of your elliptical on a regular basis. 1.Your elliptical is for indoor use only and should not be used or stored in damp areas. Wipe all perspiration from your elliptical after each use. -
Page 13: Computer
COMPUTER OPERATION INSTRUCTIONS Power up The Elliptical is supplied with an external power supply. When power is connected to the Elliptical, the console will automatically power up. If there is no input to the console for 20 minutes the console will go to stand-by mode. In stand-by mode the console display will turn off. - Page 14 Quick Start This is the quickest way to start a workout. After the console powers up you just press the Start key to begin, this will initiate the Quick Start mode. In Quick Start the Time will count up from zero and the workload may be adjusted manually by pressing the Up or Down buttons.
-
Page 15: Computer
The consoles include a built-in fan to help keep you cool. To turn the fan on, flip the switch on the right side of the console case. Each of the programs can be customized with your personal information and changed to suit your needs. Some of the information asked for is necessary to ensure the readouts are correct. -
Page 16: Programs
6. Once the program starts you will be at level one. This is the easiest level and it is a good idea to stay at level one for a while to warm up. If you want to increase the work load at any time press the Up key; the Down key will decrease the work load. -
Page 17: Fat Burn
Fat Burn The Fat Burn program is designed, as the name implies, to maximize the burning of fat. There are many schools of thought on the best way to burn fat but most experts agree that a lower exertion level which stays steady is the best. - Page 18 5. Now you are asked to adjust the Max Level. This is the peak exertion level you will experience during the program. The factory setting is level seven. Adjust the level and then press enter. 6. Now you are finished editing the settings and can begin your workout by pressing the Start key. You can also go back and modify your settings by pressing the Enter key.
- Page 19 Interval The Interval program takes you through high levels of intensity followed by periods of low intensity. This program increases your endurance by depleting your oxygen level followed by periods of recovery to replenish oxygen. Your cardio vascular system gets programmed to use oxygen more efficiently this way. To start the Interval program follow the instructions below or just press the Interval button then the Enter button and follow the directions in the message window.
- Page 20 4. You are now asked to enter your Weight. You may adjust the Weight number using the Up and Down keys or the numeric key pad, then press enter to continue. 5. Next is Time. You may adjust the Time and press enter to continue. 6.
- Page 21 PROFILE Manual Mode Strength Program Hill Program Interval Program Fatburn Program HR 1 Cardio Program HR 2 ©2007...
- Page 22 Heart Rate programs Before we get started, a word about Heart Rate: The old motto, “no pain, no gain”, is a myth that has been overpowered by the benefits of exercising comfortably. A great deal of this success has been promoted by the use of heart rate monitors. With the proper use of a heart rate monitor, many people find that their usual choice of exercise intensity was either too high or too low and exercise is much more enjoyable by maintaining their heart rate in the desired benefit range.
-
Page 23: Rate Of Perceived Exertion
Rate of Perceived Exertion Heart rate is important but listening to your body also has a lot of advantages. There are more variables involved in how hard you should workout than just heart rate. Your stress level, physical health, emotional health, temperature, humidity, the time of day, the last time you ate and what you ate, all contribute to the intensity at which you should workout. -
Page 24: Using A Heart Rate Transmitter
Using a Heart Rate Transmitter How to wear your wireless chest strap transmitter: 1. Attach the transmitter to the elastic strap using the locking parts. 2. Adjust the strap as tightly as possible as long as the strap is not too tight to remain comfortable. 3. - Page 25 5. Now you are asked to adjust the Heart rate Level. This is the heart rate level you will experience during the program. Adjust the level and then press enter. 6. Now you are finished editing the settings and can begin your workout by pressing the Start key. You can also go back and modify your settings by pressing the Enter key.
-
Page 26: Parts List
PARTS LIST KEY NO. PART NO. DESCRIPTION O'TY 1753001 Main Frame 1753002 Rail Assembly 1753004 Cross Bar 1753005 Bushing Housing, Pedal Arm 1753006 Pedal Arm(L) 1753007 Pedal Arm(R) 1753008 Connecting Arm (L) 1753009 Connecting Arm (R) 1753010 Handle Bar (L) 1753011 Handle Bar (R) 1753012... - Page 27 36~1 1753036-1 Handpulse Assembly Top KEY NO. PART NO. DESCRIPTION O'TY 36~2 1753036-2 Handpulse Assembly Bottom 1753036-4 3x20 m/m__ Tapping Screw 36~4 1753037 Power Supply 1753038 54_Transportation Wheel 1753039 72_Slide Wheel, Urethane 40~1 1753040-1 3/8" x 2"_ Flat Head Socket Screw 40~2 1753040-2 35x10m/m_ Cushion...
- Page 28 1753078 5/16" x 35 x 1.5T _ Flat Washer 1753079 5/16" x 23 x 1.5T _ Flat Washer KEY NO. PART NO. DESCRIPTION O'TY 1753080 5/16" x 20 x 1.5T _ Flat Washer 1753082 J Bolt 1753083 17m/m _Wavy Washer 1753084 3/8"...
- Page 29 DIAGRAM ©2007...
- Page 30 ©2007...
-
Page 31: Trouble Shooting
TROUBLE SHOOTING Problem Cause Correction Monitor does not display Adaptor not plugged into the stepper Plug the adaptor into the stepper Adaptor not plugged into the outlet Plug the adaptor into the wall outlet No speed or distance Sending unit not connected Securely plug sending unit into extension displays on the monitor wire and the back of the monitor... - Page 32 PROGRAMS The program you follow should be determined by your fitness level, available time and goals. It is highly recommended that you review pages 14-17 and obtain a better understanding of your capabilities and the intensity that best suits you and your goals. First time exercisers should follow program #1 and gradually build up both the time and intensity of your workout.
-
Page 33: Training Guidelines
TRAINING GUIDELINES Exercise is one of the most important factors in the overall health of an individual. Listed among its benefits are: ž Increased capacity for physical work (strength endurance) ž Increased cardiovascular (heart and arteries/veins) and respiratory efficiency ž Decreased risk of coronary heart disease ž... - Page 34 Specificity Different forms of exercise produce different results. The type of exercise that is carried out is specific both to the muscle groups being used and to the energy source involved. There is little transfer of the effects of exercise, i.e. from strength training to cardiovascular fitness. That is why it is important to have an exercise program tailored to your specific needs.
- Page 35 The target is not a magic number, but a general guide. If you’re above average fitness, you may work quite comfortably a little above that suggested for your age group. The following table is a guide to those who are keeping fit. Here we are working at about 80% of maximum. Target heart Rate 10 Second Count Beats per Minute...
- Page 36 STRETCHING Stretching should be included in both your warm up and cool down, and should be performed after 3-5 minutes of low intensity aerobic activity or callisthenic type exercise. Movements should be performed slowly and smoothly, with no bouncing or jerking. Move into the stretch until slight tension, not pain, is felt in the muscle and hold for 20-30 seconds.
- Page 37 ©2007...
-
Page 38: Ordering Replacement Parts
3. MODEL NUMBER 4. NAME OF ITEM Serial No. Your sears merchandise takes on added value when you discover that Sears has Model and serial Service Units throughout the Country. Each is staffed by Sears, Trained number may be found Technicians Sears approved methods. - Page 39 Pour service en francais: 1-800-LE-FOYER (1-800-533-6937) www.sears.ca ®/TM Trademarks of Sears, Roebuck and Co. used under license by Sears Canada ® Marque deposée/ Marque de commerce de Sears, Roebuck and Co. utilisée en vertu d’une licence de Sears Canada ©2007...