
Related Manuals for Paxar 9416LX


Summary of Contents for Paxar 9416LX
- Page 1 Monarch ® Equipment Equipment 9416 XL ® ® Thermal Manual Manual Transfer Printer TC9416TTEM Rev. AE 1/08 ©2004 Paxar Americas, Inc. a subsidiary of Avery Dennison Corp. All rights reserved.
- Page 2 Each product and program carries a respective written warranty, the only warranty on which the customer can rely. Paxar reserves the right to make changes in the product, the programs, and their availability at any time and without notice. Although Paxar has made every effort to provide complete and accurate information in this manual, Paxar shall not be liable for any omissions or inaccuracies.
-
Page 3: Table Of Contents
Calibrating the Supply ... 3-15 Adjusting the Black Mark/Die Cut Sensor ... 3-16 Printing ... 4-1 Care and Maintenance... 5-1 Clearing Supply Jams... 5-1 Cleaning the Printhead ... 5-2 Cleaning the Platen Roller and Printer ... 5-4 Table of Contents i... - Page 4 Troubleshooting ...6-1 Printing Problems and Solutions ...6-1 Printing Test Labels ...6-4 Calibrating the Supply ...6-5 Specifications and Accessories ... A-1 Printer Specifications ... A-1 Supply Specifications ... A-2 Ribbon Specifications ... A-2 Printer Accessories ... A-2 ii Table of Contents...
-
Page 5: Getting Started
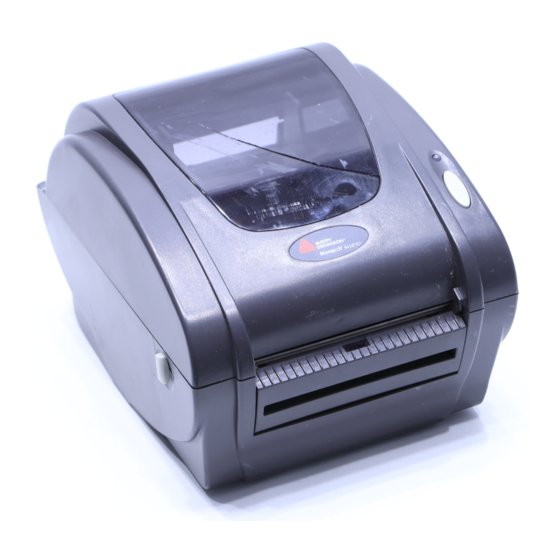
The Monarch 9416 XL® Thermal Transfer printer is a desktop thermal transfer and thermal direct printer. It can print labels, tags or receipts (with or without bar codes) in peel mode (one label at a time) or non-peel mode (labels in strips). - Page 6 To connect the power supply: 1. Place the printer in a location that allows easy access to the front of the printer. The printer should never be operated while resting on its side or 2.
- Page 7 3. Turn off the printer. Press the switch on the back of the printer to the OFF position (O). 4. Plug the three-hole end of the AC adapter cable into the three-pronged outlet in the power supply. 5. Plug the round end of the power supply cable (labeled “printer”) into the socket at the back of...
- Page 8 C o n n e c t i n g t h e C o m m u n i c a t i o n C a b l e Before the printer can accept print jobs from the host, you must ♦...
-
Page 9: Usb Port
For serial communication: 1. Turn off the printer before connecting the cable. 2. Connect a serial printer cable from the host to the serial port at the back of the printer. 3. Secure the cable with the connecting screws. The factory defaults are 9600 Baud, no parity, 8-bit data frame, 1 stop bit, and DTR flow control (96, N, 8, 1, DTR). -
Page 10: Reading The Indicator Light
R e a d i n g t h e I n d i c a t o r L i g h t The indicator light monitors the printer's status. Indicator Light GREEN FLASHING GREEN FLASHING RED ORANGE No light... -
Page 11: Loading A Ribbon
See Chapter 3, “Loading Supplies” for more information. The printer automatically detects if a ribbon is installed when you turn on the printer and switches to thermal transfer printing mode. Make sure the ribbon window and the supply door are closed when you turn do not use a ribbon for printing. - Page 12 To load the ribbon: 1. Push down on the ribbon window to unlock it and raise the window. The ribbon take-up core should already be on the take-up reel. Attach the take-up core to the front hub, as shown. Take-up Core Back Hub Front Hub 2-2 Loading A Ribbon...
- Page 13 3. Open a package of new ribbon, taking care not to wrinkle or crush the ribbon. 4. Slide the ribbon onto the ribbon reel as far as it will go. Ribbon on Ribbon Reel Ribbon Leader Back Hub Take-up Core Loading A Ribbon 2-3...
- Page 14 7. Press the release levers towards the front of the printer to release the supply door. 8. Lift open the supply door. The supply door support at the right-hand rear of the printer holds the supply door open. 9. Feed the end of the ribbon under the printhead and around the take-up core.
- Page 15 12. Close the supply door by lifting the supply door slightly and pulling the bottom of the supply door support forward towards the front of the printer. Close the supply door slowly and make sure it latches securely. If you do not latch the supply door...
-
Page 16: Replacing A Ribbon
R e p l a c i n g a R i b b o n To replace a ribbon: 1. Push down on the ribbon window to unlock it and raise the window. Remove and discard the used ribbon and take-up core. -
Page 17: Loading Supplies
L o a d i n g S u p p l y f o r N o n - P e e l M o d e This section describes how to load supplies in the printer to print in non-peel (continuous) mode. Make sure the black mark/die cut sensor is set correctly for your supply type. - Page 18 2. Press the release levers (located on both sides of the printer) towards the front of the printer to release the supply door. 3. Lift open the supply door. The supply door support at the right-hand rear of the printer holds the supply door open.
- Page 19 4. Remove the supply holder guide from one end of the supply holder. (The supply holder is normally attached with a line to the inside of the printer, not free-standing as shown below. Do not cut the line.) Supply Holder Guides 5.
- Page 20 Supply Roll Mount IMPORTANT INFORMATION Make sure the plastic line attaching the supply holder to the printer is tucked down out of the way of the supply holder and supply holder guides. Otherwise, the plastic line may wrap around the supply holder or get caught on the supply holder guides.
-
Page 21: Platen Roller
8. Slide the supply guides to their widest position. 9. Feed the supply, printing side up, under the white roller, under the supply guides, and over the platen roller. White Roller Supply Guides Platen Roller Loading Supplies 3-5... - Page 22 12. Close the supply door by lifting the supply door slightly and pulling the bottom of the supply door support forward towards the front of the printer. Close the supply door slowly and make sure it latches securely.
-
Page 23: Loading Labels For Peel Mode
Unwrap and discard supply with any glue residue. 2. Press the release levers (located on both sides of the printer) towards the front of the printer to release the supply door. 3. Lift open the supply door. The supply door support at the right-hand rear of the printer holds the supply door open. - Page 24 Peel Door 5. Remove the supply holder guide from one end of the supply holder. (The supply holder is normally attached with a line to the inside of the printer, not free-standing as shown below. Do not cut the line.)
- Page 25 Mount IMPORTANT INFORMATION Make sure the plastic line attaching the supply holder to the printer is tucked down out of the way of the supply holder and supply holder guides. Otherwise, the plastic line may wrap around the supply holder or get caught on the supply holder guides.
- Page 26 9. Slide the supply guides to their widest position. 10. Remove the first two labels from the backing paper. 11. Feed the labels, printing side up, under the white roller, under the supply guides, and over the platen roller. White Roller 12.
- Page 27 16. Close the supply door by lifting the supply door slightly and pulling the bottom of the supply door support forward towards the front of the printer. Close the supply door slowly latches securely. If you do not latch the supply door...
- Page 28 17. Press the FEED button. A label separates from the backing paper. Remove the peeled label and another one prints. Hold the leading edge of peeled labels when printing on supply 18. Calibrate the supply if necessary. See “Calibrating the Supply,” for more information. 3-12 Loading Supplies NOTE longer than six inches.
-
Page 29: Loading Fan-Fold Supplies
4. Feed the fan-fold supplies, printing side up, into the external supply slot on the back of the printer and through the external supply guides. 5. Press the release levers (located on each side of the printer) towards the front of the printer to release the supply door. - Page 30 12. Close the supply door by lifting the supply door slightly and pulling the bottom of the supply door support forward towards the front of the printer. Close the supply door slowly and make sure it latches securely.
-
Page 31: Calibrating The Supply
3. To calibrate the supply, release the FEED button after the indicator light starts flashing ORANGE. The printer calibrates the black mark or die cut sensor, measures the label length, and prints the test labels. To calibrate the ribbon, release the FEED button after the printer starts flashing RED. -
Page 32: Adjusting The Black Mark/Die Cut Sensor
A d j u s t i n g t h e B l a c k M a r k / D i e C u t S e n s o r The printer has a black mark/die cut sensor,... -
Page 33: Printing
1. Turn on the printer. 2. Download a format and a batch. Refer to the Packet Reference Manual for information on downloading print jobs. 3. The printer prints the labels, either in peel mode or non-peel mode. 4. Remove the printed labels. Printing 4-1... - Page 34 4-2 Printing...
-
Page 35: Care And Maintenance
When you are printing and a jam occurs, the indicator light turns RED. To clear the jam: 1. Turn off the printer. Press the switch on the back of the printer to the OFF position (O). You should turn off the printer’s power before you clear a supply jam. -
Page 36: Cleaning The Printhead
1. Turn off the printer. Press the switch on the back of the printer to the OFF position (O). 2. Press the release levers towards the front of the printer to release the supply door. - Page 37 3. Lift open the supply door. A supply door support at the right-hand rear of the printer holds the supply door open. 4. Moisten a cotton swab with isopropyl alcohol. 5. Rub the cotton swab across the printhead to remove any build-up.
-
Page 38: Cleaning The Platen Roller And Printer
C l e a n i n g t h e P l a t e n R o l l e r a n d P r i n t e r Moisten a cotton swab with isopropyl alcohol and run the cotton swab across the platen roller. -
Page 39: Troubleshooting
GREEN, but the printer does not print. Action Check the power connections from the power supply to the printer and the AC outlet. See "Connecting the Power Supply" in Chapter 1 for more information. Check the cable connections from the host to the printer. - Page 40 6-2 Troubleshooting Action Calibrate the supply. 1. Turn off the printer. 2. Load supply for non-peel mode. See Chapter 3, “Loading Supplies,” for more information. 3. Press and hold the FEED button while turning on the printer.
- Page 41 (contrast). Refer to the Packet Reference Manual, for more information. Supply might be caught in the printer. See "Clearing Supply Jams" in Chapter 5 for more information. Make sure the supplies and ribbon are loaded correctly. See Chapter 2, “Loading Ribbon,” and Chapter 3, “Loading Supplies”...
- Page 42 The second label shows the model number, software version, communication settings, speed, contrast, gap sensor setting, label length, and total number of inches printed. 4. To resume normal printing, turn off the printer, wait two seconds, then turn it back on again. 6-4 Troubleshooting...
-
Page 43: Calibrating The Supply
3. To calibrate the supply, release the FEED button after the indicator light starts flashing ORANGE. The printer calibrates the black mark or die cut sensor, measures the label length, and prints the test labels. To calibrate the ribbon, release the FEED button after the printer starts flashing RED. - Page 44 6-6 Troubleshooting...
-
Page 45: Specifications And Accessories
S P E C I F I C A T I O N S A N D A C C E S S O R I E S This chapter includes printer, supply, and ribbon specifications. It also lists the printer’s accessories. -
Page 46: Supply Specifications
S u p p l y S p e c i f i c a t i o n s Supply Types: Supply Widths: Supply Lengths: (for peel): NOTE: Hold the leading edge of peeled labels when printing on supply longer than six inches. R i b b o n S p e c i f i c a t i o n s Types: Core Diameter:... - Page 48 Visit www.monarch.com for sales, service, supplies, information, and telephone numbers for our locations throughout the world. TOLL FREE: 1-800-543-6650 (In the U.S.A.) 1-800-363-7525 (In Canada)