Brookstone FLIGHTFORCE Manual
Hide thumbs
Also See for FLIGHTFORCE:
- User manual (36 pages) ,
- Manual (27 pages) ,
- Safety and operating instructions manual (15 pages)
Table of Contents
Advertisement
Advertisement
Table of Contents

Related Manuals for Brookstone FLIGHTFORCE


Summary of Contents for Brookstone FLIGHTFORCE
- Page 1 FLIGHT FORCE ™ MICRO DRONE For ages 14+...
-
Page 2: Table Of Contents
Performing a 360º Stunt Roll . . . . . . . . . . . . . . . . . . . . . . . . . . 38 TABLE OF CONTENTS Low Battery Warning . - Page 3 IMPORTANT SAFETY INSTRUCTIONS CAUTION All of the safety and operating instructions should be read, • TO REDUCE THE RISK OF ELECTRIC SHOCK, DO NOT REMOVE COVER . adhered to and followed before the unit is operated . THERE ARE NO SERVICEABLE PARTS INSIDE . •...
- Page 4 MICRO DRONE WARNINGS: 8 . If you are flying the Micro Drone with others, make sure all spectators are behind you . 1 . The Micro Drone is designed for INDOOR or OUTDOOR 9 . For best performance, it is recommended that you flight .
- Page 5 WARNING! BATTERY WARNINGS RECHARGEABLE BATTERY (MICRO DRONE): • Choking/Cutting Hazard . Small Parts/Sharp Rotor Blades . This device contains a non-removable Lithium-Polymer battery . • Keep hands, hair and loose clothing away from the propel- The included charger is built specifically for the Micro Drone ler when the power switch is turned to the ON position .
- Page 6 • Rechargeable batteries are to be removed from the item DANGER before being charged (if removable) . To reduce the risk of electric shock, burns, fire or injury: • Rechargeable batteries are only to be charged under adult 1 . Do not use while bathing or in a shower . supervision .
- Page 7 WARNING 8 . Never block the air openings of the unit with materials such as clothing, plastic bags or papers, or place it on a soft 1 . Close supervision is necessary when this appliance/ surface such as a bed or couch, where the air openings product is used by or near children or mentally may be blocked .
-
Page 8: Fcc Information
FCC INFORMATION • Connect the equipment to an outlet on a circuit different from that to which the receiver is connected . Caution: Changes or modifications not expressly approved • Consult the dealer or an experienced radio/TV technician by the party responsible for compliance could void the user’s for help . - Page 9 NOTES NOTES...
-
Page 10: Location Of Parts And Controls
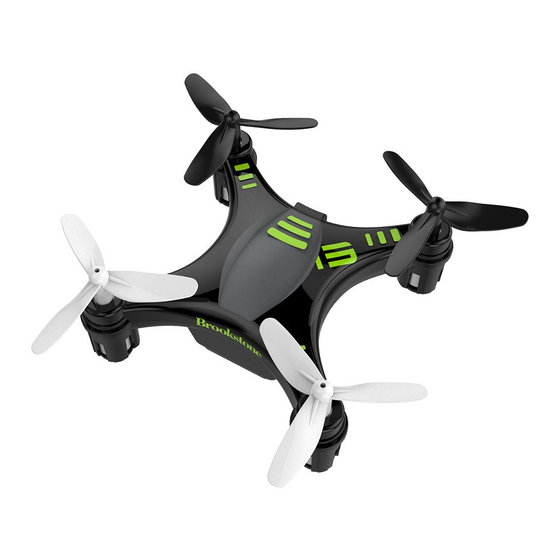
LOCATION OF PARTS AND CONTROLS LOCATION OF PARTS AND CONTROLS Front Rotor Blades (2) Landing Gear On/Off Switch 12 . Backward Trim Button Front LED Indicator (2) On/Off Switch Left Trim Button 13 . Forward Trim Button Rear LED Indicator (2) Charging Socket 10 . -
Page 11: Controller Battery Installation
CONTROLLER BATTERY INSTALLATION CHARGING THE MICRO DRONE BATTERY Switch the Micro Drone OFF . Connect the included Unscrew the battery cover from the back of the USB cable to the unit making sure the arrow side of controller as shown in figure A . the connector is on top side facing the top of the Micro 2 . -
Page 12: Syncing The Micro Drone
SYNCING THE MICRO DRONE 2 . Connect the USB end of the cable to your computer’s USB port as shown in figure D . Important! When syncing the Micro Drone with the controller, always make sure that the Micro Drone is on a flat level surface and that your digital trim settings are in the center position. -
Page 13: Preparing For Flight
PREPARING FOR FLIGHT 4 . Push the THROTTLE CONTROL STICK all the way forward (one beep will sound) and then pull the Verify that there are 2 AAA batteries inside the remote THROTTLE CONTROL STICK all the way back . A control unit and the Micro Drone has been fully charged . -
Page 14: Flying Tips
FLYING TIPS RECOGNIZING THE FRONT AND REAR OF THE MICRO DRONE • It is recommended to operate the Micro Drone in a wide open space . The ideal space should have a 200-foot The drone has a “front” and a “rear . ” radius . -
Page 15: 3/4 Channel Select
3/4 CHANNEL SELECT 4 CHANNEL FLIGHT CONTROLS (ADVANCED FLYING) The Micro Drone can be controlled in 3 Channel mode Below is a list of basic flight functions . While learning to fly the (beginner) or 4 Channel mode (advanced flying) . The Micro Micro Drone, it is best to start in a large space until you get used Drone default setting is 4 Channel mode . - Page 16 2 . While in the air, move the THROTTLE CONTROL STICK 3 . While in the air, move the DIRECTION CONTROL STICK left and the Micro Drone will rotate left . up and the Micro drone will move forward . Move the THROTTLE CONTROL STICK right and Move the DIRECTION CONTROL STICK down and the the Micro Drone will rotate right (see figure H) .
-
Page 17: Channel Flight Controls (Beginner Flying)
3 CHANNEL FLIGHT CONTROLS (BEGINNER FLYING) 4 . While in the air, move the DIRECTION CONTROL STICK left and the Micro Drone will bank to the left . Below is a list of basic flight functions . While learning to fly the Move the DIRECTION CONTROL STICK right and the Micro Drone, it is best to start in a large space until you get Micro Drone will bank to the right (see figure J) . - Page 18 2 . While in the air, move the DIRECTION CONTROL STICK 3 . While in the air, move the DIRECTION CONTROL STICK left and the Micro Drone will rotate left . up and the Micro Drone will move forward . Move the DIRECTION CONTROL STICK right and Move the DIRECTION CONTROL STICK down and the the Micro Drone will rotate right (see figure L .
-
Page 19: Switching To Medium & High Speed Mode
SWITCHING TO MEDIUM AND HIGH SPEED MODE UNDERSTANDING TRIM ADJUSTMENTS To change the drone's flight speed from the default (low speed) FORWARD/BACKWARD TRIM to medium and high speed: • If the Micro Drone is drifting forward or backward, the FORWARD/BACKWARD TRIM may need to be adjusted 1 . -
Page 20: Level Surface Gyro Calibration
LEVEL SURFACE GYRO CALIBRATION RIGHT/LEFT TRIM • If the Micro Drone is drifting left or right, the LEFT/RIGHT If the Micro Drone becomes unstable during the course of TRIM may need to be adjusted (see figure P) . flying, or after a crash, the onboard gyro chip may need to be recalibrated . -
Page 21: Performing A 360º Stunt Roll
PERFORMING A 360º STUNT ROLL LOW BATTERY WARNING Once the Micro Drone is airborne, press the DIRECTION CONTROLLER CONTROL STICK straight down . When the controller batteries are low, the POWER LED 2 . Move the lever in the direction you wish to perform the INDICATOR will turn on . -
Page 22: Replacing The Propeller Blades
REPLACING THE PROPELLER BLADES TROUBLESHOOTING The Micro Drone's propeller system is a precision instrument ISSUE SOLUTION that may need repair or replacement for optimal flight No power Switch the ON/OFF switch to ON . function. Crash landing from high-speed aerial flights may (controller) cause damage to your Micro Drone's propellers. -
Page 23: Care And Maintenance
Dimensions . . . . . . . . . . . . . . . . . . . . . 2 . 3 x 2 . 3 in (58 . 4 x 58 . 4 mm) © Brookstone 2016... -
Page 24: Warranty
Limited Warranty does not apply to any non-Brookstone products . Manufacturers or suppliers other than Brookstone may provide their own warranties to the purchaser, but Brookstone, in so far as permitted by law, provides these products “as is . ”... - Page 25 Find thousands more great ideas online 317916 317920 317938 Merrimack, New Hampshire, USA 03054 • 800-846-3000 • Brookstone . c om...