Table of Contents
Advertisement
463822004 / 0–4165331 (01-09-04)
NATURAL GAS
463822004
ASSEMBLY/USE & CARE
MANUAL
THIS GRILL IS FOR
OUTDOOR USE ONLY
CAUTION:
Read and follow all safety
statements, assembly instructions, and use
and care directions before attempting to
assemble and cook.
INSTALLER / ASSEMBLER:
instructions with consumer.
CONSUMER:
Keep this manual for future
reference.
WARNING
!
Failure to follow all manufacturer's
instructions could result in serious personal
injury and/or property damage.
CAUTION
!
Some parts may contain sharp edges –
especially as noted in the manual! Wear
protective gloves if necessary.
If you have any questions or need
assistance during assembly, please call
1-800-241-7548.
Visit us on the web at: www.charbroil.com
C O L U M B U S , G A
Leave these
Advertisement
Table of Contents

Related Manuals for Char-Broil quickset


Summary of Contents for Char-Broil quickset
-
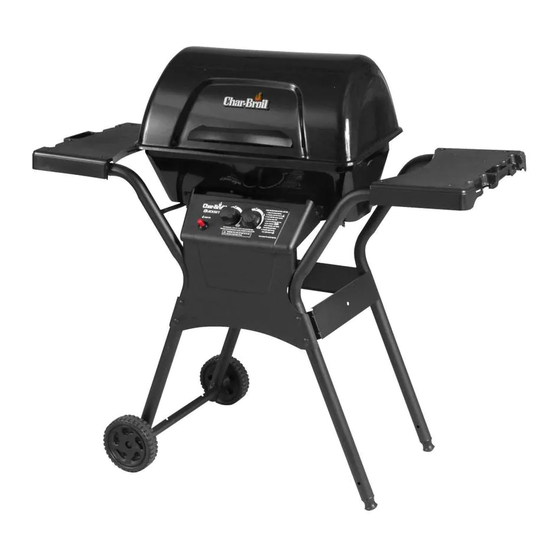
Page 1: Natural Gas
NATURAL GAS 463822004 ASSEMBLY/USE & CARE MANUAL THIS GRILL IS FOR OUTDOOR USE ONLY CAUTION: Read and follow all safety statements, assembly instructions, and use and care directions before attempting to assemble and cook. INSTALLER / ASSEMBLER: Leave these instructions with consumer. CONSUMER: Keep this manual for future reference. -
Page 2: Grill Service Center
WARNING Installation Safety Precautions • This grill is designed for natural gas use at 7 inch water column supply pressure. Verify supply pressure with your local gas FOR YOUR SAFETY company. If supply pressure is different than 7 inch, contact a 1. -
Page 3: Table Of Contents
Safety Symbols........2 QuickSet Grills for a period of three (3) years from the date of purchase;... -
Page 4: Parts List
PARTS LIST – Model No. 463822004 Key Qty. Description Part # Key Qty. Description Part# Lower SwingAway ....4152125 12’ Natural Gas Hose....4158033 Cooking Grate . -
Page 5: Parts Diagram
PARTS DIAGRAM – Model No. 463822004 463822004 • 5... -
Page 6: Assembly
ASSEMBLY – Model No. 463822004 Parts to assemble: A. Lay leg assemblies on their sides. 2 Leg Assembly B. Place front panel on legs. 1 Front Panel C. Braces attach to inside of legs. 1 Side Support Brace D. Secure with carriage bolts and tee knobs. 4 Carriage Bolt, 2”... - Page 7 Parts to assemble: 1 Condiment Basket A. Stand cart upright. B. Place condiment basket hooks over front panel bolts on inside of front leg. See inset . C.. Place condiment basket hooks over back support brace bolts on outside of brace.
- Page 8 Parts to assemble: 1 V Bar A. Place V bar onto supports at each end of grill bottom. V Bar NOTE: Ceramic briquets are not required. Parts to assemble: 2 Side Shelf A. Place shelves onto legs. 8 Wing Screw or B.
- Page 9 Parts to assemble: 1 Grill Lid 1 Handle 1 Logo Plate 2 Metal Wing Nut 2 Hinge Pin Handle 2 Hitch Pin Logo Plate A. Attach lid to grill bottom with hinge and hitch pins. Grill Lid B. Attach handle to lid with two (Lid style may vary) metal wing nuts.
- Page 10 Parts to assemble: 1 Cooking Grate A. Place cooking grate onto grate rests in grill bottom. NOTE: For illustration purposes, SwingAways are not shown. Cooking Grate Parts to assemble: 1 Grease Clip A. Hang grease clip beneath grill bottom. B. Hang an empty soup can (not included) from grease clip.
- Page 11 Parts to assemble: 1 12’ Natural Gas Hose A. Beneath control panel, thread the natural gas hose onto the valve assembly and wrench-tighten the connection. Natural Gas Hose See Use & Care section for important safety instructions. Please read “Connecting Your Grill to the Natural Gas Source”, “Leak Test”, and “Burner Flame Check”...
-
Page 12: Use And Care
Connecting Your Grill to the Natural Gas Source USE AND CARE A professionally-installed shut-off valve between the supply Natural Gas Connections and Service Regulators piping and the socket is recommended, but not required, by Above 1/2 psi. the National Fuel Gas Code. Socket connection must be made outdoors. - Page 13 The appliance and its individual shut off valve must be disconnected from the gas supply piping system during any pressure testing on that system at test pressures in excess of 1/2 psig (3.5kPa). The appliance must be isolated from the gas supply piping system by closing its individual manual shutoff valve during any pressure testing of the gas supply piping system at test pressures equal to or less than 1/2 psi (3.5kPa).
- Page 14 Safety Tips WARNING When grill is not in use, turn off all control knobs and gas source. For Safe Use Of Your Grill And To Avoid Serious Never move grill while in operation or still hot. Injury: Use long-handled barbecue utensils and oven mitts to avoid •...
-
Page 15: Grill Lid
Burner Flame Check CAUTION • Light burner, rotate knobs from HIGH to LOW. You should see a smaller flame in LOW position than seen on HIGH. Always check flame prior to each use. If only low flame is seen refer to If burner does not light, turn knobs to , wait 5 "Sudden drop or low flame"... - Page 16 Cleaning The Burner Assembly CAUTION Follow these instructions to clean and/or replace parts of burner assembly or if you have trouble igniting grill. Refer to illustration NATURAL HAZARD • SPIDERS on following page. Turn gas off at control knobs and gas source. FACT: Sometimes spiders and other small insects climb into Remove cooking grate and V-Bar.
- Page 17 Burner Electrode Burner Tube Valve Clip Ignitor Wire 463822004 • 17...
-
Page 18: Cooking Chart
Cooking Chart Cooking times and temperatures may vary according to specific recipes, cooking conditions or barbecue equipment used. Take these factors into consideration to insure best results. If you use the indirect cooking method (indirect cooking is lighting only one burner and placing food on opposite side of cooking grate), allow more grilling time. -
Page 19: Food Safety
Company. Thermos® is a registered trademark of the Thermos Company and its affiliates. Artisan Collectiion by Char-Broil™, C3 and Design™, Char-Broil and Design™, Flame Design™, FlavorTents™, Grill 2 Go™, Grillin’ Stick™, Keeper of the Flame™, Keepers of the Flame™, Natural Grip™, Outdoor Cooking Collection and Design™, Patio Bistro™, PrecisionFlame™, Pro-Check™, QuickSet Grills and Design™, SmokerTents™, The Big East™. -
Page 20: Troubleshooting
Troubleshooting Problem Possible Cause Prevention/Solution Burner(s) will not light • Wire(s) and/or electrode covered with • Clean wire(s) and/or electrode with rubbing alcohol and clean using ignitor. cooking residue. swab. • Electrode and burner are wet. • Wipe dry with cloth. •...