Table of Contents
Advertisement
Available languages
Available languages
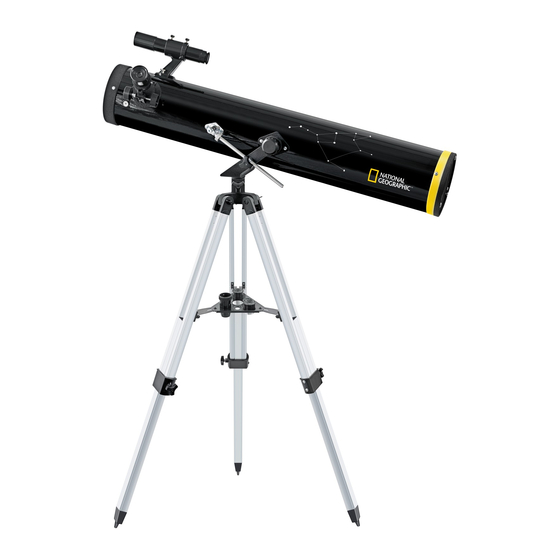
TELESKOPE
mit AZ Montierung
TELESCOPES
with AZ Mount
Bedienungsanleitung
Bedienungsanleitung
DE
Operating Instructions
Operating Instructions
EN
Mode d'emploi
FR
Handleiding
NL
Istruzioni per l'uso
Istruzioni per l'uso
IT
Instrucciones de uso
Instrucciones de uso
ES
Instrukcja obsługi
PL
Руководство по эксплуатации
Руководство по эксплуатации
RU
Advertisement
Table of Contents

Related Manuals for National Geographic 114/900 az


Summary of Contents for National Geographic 114/900 az
- Page 1 TELESKOPE mit AZ Montierung TELESCOPES with AZ Mount Bedienungsanleitung Bedienungsanleitung Operating Instructions Operating Instructions Mode d’emploi Handleiding Istruzioni per l’uso Istruzioni per l’uso Instrucciones de uso Instrucciones de uso Instrukcja obsługi Руководство по эксплуатации Руководство по эксплуатации...
- Page 2 (DE) WARNUNG! Schauen Sie mit diesem optischen Gerät niemals direkt oder in die Nähe der Sonne! Achten Sie besonders darauf, wenn es von Kindern benutzt wird! Es besteht ERBLINDUNGSGEFAHR! Verpackungsmaterial (Plastiktüten, Gummibänder, etc.) von Kindern fernhalten! (EN) CAUTION: Never attempt to observe the sun with this telescope. Make sure children do not attempt to observe the sun with the telescope.
- Page 3 (DE) Gebrauchsanleitung..................6 (EN) Instruction Manual..................10 (FR) Mode d’emploi ....................14 (NL) Gebruiksaanwijzing ..................18 (IT) Istruzioni per l’uso..................22 (ES) Instrucciones de uso..................26 (PL) Instrukcja Obsługi ..................30 (RU) Руководство по эксплуатации ..............34...
- Page 4 No. 1 No. 1b 1& No. 1a 1& No. 1c No. 4 No. 1d No. 2 No. 3 1& Zubehör kann je nach Modell variieren. Gli accessori possono variare a seconda del modello. Accessories may vary depending on the model. Los accesorios pueden variar según el modelo.
- Page 5 No. 5 No. 6 No. 7 No. 8 No. 9a No. 9b No. 10 No. 11 No. 12a No. 12b No. 13 No. 14a No. 14b No. 16 No. 15a No. 17 No. 15b...
- Page 6 Allgemeine Informationen Zubehör kann je nach Modell variieren. Zu dieser Anleitung Alle Teile (No. 1-3) Lesen Sie bitte aufmerksam die Sicherheitshinweise in dieser Anleitung. Teleskop-Tubus Verwenden Sie dieses Produkt nur wie in der Anleitung beschrieben, um Schäden am Gerät oder Verletzungen zu vermeiden. Bewahren Sucherfernrohr oder LED-Sucher Sie die Bedienungsanleitung auf, damit Sie sich jederzeit über alle Justierschrauben (nur Sucherfernrohr)
- Page 7 EN FR NL IT ES PL RU 4. Zubehörablage 7.4. Sucher-Montage (Typ IV) – Sucherfernrohr mit Quick-Einschub Sucher und Sucher-Halterung befinden sich vormontiert in der Verpackung. Halten Sie die Zubehörablage (10) auf die Halterungen (22) an den Schieben Sie den Fuß der Sucher-Halterung vollständig in die entsprechende Stativbeinen.
- Page 8 Bevor Sie die Okulare und den Zenitspiegel einsetzen, entfernen Sie die Staubschutzkappe aus dem Okularstutzen (6). Lockern Sie die TIPP! Klemmschraube (No. 12a, X) am Okularstutzen und stecken Sie zuerst den Beginnen Sie jede Beobachtung mit einem Okular mit Zenitspiegel hinein. Ziehen Sie die Klemmschraube (X) danach wieder an. niedriger Vergrößerung (z.B.
-
Page 9: Hinweise Zur Reinigung
EN FR NL IT ES PL RU Anschließend setzen Sie zunächst das Okular mit der größten Brennweite Sternbild LEIER / M57 (No. 25) in die Barlow-Linse ein und fixieren Sie es mit der Klemmschraube (No. Rektaszension: (Stunden : Minuten) 21, Z). Deklination: +33°... -
Page 10: General Information
General Information Accessories may vary depending on the model. About this Instruction Manual All parts (No. 1-3) Please read the safety instructions in this manual carefully. To avoid damage Telescope tube to the unit and the risk of injury, only use this product as described in the manual. -
Page 11: Protection Caps
FR NL IT ES PL RU 4. Accessories tray Important: Make sure the LED finder scope lens points towards the main tube end (No. 1, 4). Hold the accessories tray (10) against the fastening devices (22) on the There are two clamping screws (No. 1c, 14) and a spring-loaded counter tripod legs. -
Page 12: Notes On Cleaning
10.2. On reflecting telescopes Formula for calculating magnification: Loosen the clamping screws on the eyepiece supports (6). Insert the 20 mm Focal length (Telescope) ÷ Focal length (Eyepiece) = Magnification eyepiece (18) directly into the eyepiece supports. Hand tighten the clamping screws (No. -
Page 13: Troubleshooting
FR NL IT ES PL RU Part III – Appendix 2. Troubleshooting 1. Possible observation targets Problem: Solution: No picture Remove dust protection cap and The following section details several interesting and easy-to-find celestial sunbathe-shield from the objective open- objects you may want to observe through your telescope. The pictures at ing. - Page 14 Informations générales Les accessoires peuvent varier en fonction du modèle. A propos de ce manuel Toutes les pièces (No. 1-3) Veuillez lire attentivement les consignes de sécurité présentées dans ce Tube du télescope manuel. N’utilisez ce produit comme décrit dans ce manuel, afin d’éviter tout risque de blessure ou de dommage sur l’appareil.
- Page 15 DE EN NL IT ES PL RU Attention: Veillez à ce que l‘objectif du chercheur soit dirigé en direc tion de l‘ouverture du tube (graphique 1, 4). INDICATION: Un petit niveau sur le dépôt pour accessoires peut vous 7.4. Assemblage du chercheur (type IV) - aider lors de l‘arrangement horizontal de votre pied.
- Page 16 Avant d‘insérer les oculaires et le miroir zénith ôtez le capuchon protecteur antipoussière de la rallonge pour oculaire (6) et du miroir zénith. INDICATION: Desserrez la vis de serrage (No. 12a, X) de la rallonge pour commencez chaque observation avec un oculaire à faible oculaire et insérez d‘abord le miroir zénith.
- Page 17 DE EN NL IT ES PL RU Constellation Füchslein / M27 (No. 26) INDICATION: L’ascension droite: (heures : minutes) La lentille à redressement n‘est pas faite pour l‘observation Déclinaison: +22° 43' (degré : minutes) astronomique. Pour ce faire n‘utilisez que le miroir zénith Distance : 1360 années lumière de la terre.
- Page 18 Algemene informatie Accessoires kunnen variëren, afhankelijk van het model. Over deze handleiding Delen (No. 1-3) Leest u aandachtig de veiligheidsinstructies in deze handleiding. Gebruik dit Telescoopbuis product, om schade aan het apparaat of verwondingen te voorkomen, alleen zoals in de handleiding is beschreven. Zoekertelescoop of LED-zoeker Bewaar deze gebruikershandleiding zodat u zich op elk moment weer kunt Regelschroeven (enkel zoekertelescoop)
- Page 19 DE EN FR ES PL RU 7.4. Zoekermontage (type IV) – Zoekertelescoop met Quick-invoeging Tip: Zoeker en zoekerhouder (No. 1a, 2) bevinden zich voorgemonteerd in de Een kleine waterpas op het accessoireplankje kan helpen verpakking. het statief waterpas op te stellen. Schuif de voet van de zoekerhouder volledig in de passende basis aan de telescoopbuis (No.
- Page 20 Let op dat het oogglas naar boven is gericht. In andere gevallen de 5. Zoeken naar sterren klemschroef (No. 12a, X) verwijderen van de oogglassteunen en draai de Zenitspiegel is deze positie. Verwijder de stofbeschermingskap van de In het begin valt de oriëntering aan de sterrenhemel beslist niet mee, omdat buisopening (No.
- Page 21 DE EN FR ES PL RU Sterrenbeeld VOS / M27 (No. 26) Tip: Rechte klimming: (Uren : Minuten) Voor astronomische observatie is de omkeerlens niet Declinatie: +22° 43' (Graden : Minuten) geschikt. Gebruik hierbij uitsluitend de zenitspiegel en Afstand: 1.360 lichtjaar van de aarde verwijderd een oculair.
-
Page 22: Informazioni Generali
Informazioni generali Gli accessori possono variare a seconda del modello. Informazioni sul presente manuale Componenti (fig. 1-3) Leggere con attenzione le avvertenze di sicurezza riportate nel manuale. Per B Tubo del telescopio evitare danni all‘apparecchio o possibili lesioni, utilizzare questo prodotto C Cercatore o cercatore a LED soltanto come descritto manuale. - Page 23 DE EN FR NL ES PL RU 4. Montaggio del portaccessori: 7.4. Montaggio del cercatore (tipo IV) – Cercatore ad innesto rapido Il cercatore e il supporto del cercatore si trovano già montati all’interno della Tenere fermo il portaccessori (10) sui supporti di fissaggio (22) posti sulle confezione.
- Page 24 Prima di montare gli oculari e il diagonale, rimuovere i coperchietti di prote- 5. Osservazione di stelle zione dal portaoculare (6) e dal diagonale a specchio. Allentare la vite di fissaggio (fig. 12a, X) sul portaoculare e inserire il All‘inizio l‘orientamento nel cielo stellato risulterà sicuramente difficile, poiché diagonale.
-
Page 25: Manutenzione
DE EN FR NL ES PL RU Costellazione LIRA / M57 (fig. 25) Ascensione retta: (ore : minuti) NOTE per la pulizia Declinazione: +33° 02‘ (gradi : minuti) Distanza: 2.412 anni luce dalla terra La famosa nebulosa anulare M57 viene spesso citata come esempio di Pulire le lenti (gli oculari e/o gli obiettivi) soltanto con un panno morbido e nebulosa planetaria e di oggetto estivo da osservare nell‘emisfero boreale. -
Page 26: Informaciones De Carácter General
Informaciones de carácter general Los accesorios pueden variar según el modelo. Sobre este manual Piezas (No. 1-3) Lea atentamente las indicaciones de seguridad recogidas en este manual. Tubo telescópico Emplee este producto exclusivamente de la forma descrita en el manual, Buscador óptico o buscador LED con el fin de evitar daños en el aparato o lesiones. - Page 27 DE EN FR NL IT PL RU 4. Montaje del depósito Importante: Asegúrese de que el objetivo del buscador esté orientado hacia la abertura del tubo (No. 1, 4). Sujete el depósito para los accesorios (10) en los soportes (22) de las patas En el soporte del buscador hay dos tornillos prisioneros (No.
-
Page 28: Montaje
10.2. en telescopios reflectores (de espejo) 5. Búsqueda de estrellas Afloje los tornillos prisioneros del soporte para el ocular (6). Extraiga el ocu- lar de la distancia focal máxima de 20 mm (18) incluido en el volumen de Al principio seguramente le resultará difícil orientarse en el cielo, ya que las suministro y coloque éste directamente en el soporte del ocular. - Page 29 DE EN FR NL IT PL RU Constelación ORION / M42 (No. 24) SUGERENCIA: Ascensión recta: (Horas : Minutos) La lente de inversión de la imagen no resulta adecuada Declinación: -05° 25' (Grados : Minutos) para la observación astronómica. En este caso, basta Distancia: 1.344 años luz de la tierra con que utilice un espejo cénit y un ocular.
- Page 30 Ogólne informacje Akcesoria różnią się w zależności od modelu. Informacja dotycząca tej instrukcji Wszystkie części (No. 1-3) Należy uważnie przeczytać wskazówki dotyczące bezpieczeństwa zawarte w Tubus teleskopu tej instrukcji. Produktu należy używać zgodnie z opisem w instrukcji, pozwoli to uniknąć uszkodzeń urządzenia oraz obrażeń. Szukacz lunetkowy lub szukacz z diodą...
- Page 31 DE EN FR NL IT 4. Zakładanie półki Ważne: Proszę zwrócić uwagę, aby obiektyw szukacza pokazywał w kierunku wlotu tubusa (No. 1,4). Przytrzymaj półkę na osprzęt (10) na zamocowaniach (22) na nogach Na uchwycie szukacza znajdują się 2 śruby zaciskowe (No. 1c, 14) i statywu.
- Page 32 5. Wyszukiwanie gwiazd przekręcić zwierciadło zenitalne w tą pozycję. Proszę usunąć pokrywy przeciwpyłowe z wlotu tubusa (No. 11, X). Początkowo orientacja na gwiaździstym niebie z pewnością sprawi Ci 10.2. w teleskopach zwierciadlanych (reflektorach) trudność, ponieważ gwiazdy oraz gwiazdozbiory znajdują się stale w Proszę...
-
Page 33: Wskazówki Dotyczące Czyszczenia
DE EN FR NL IT Gwiazdozbiór Lisek / M27 (No. 26) WSKAZÓWKA: Rektascencja: (godziny : minuty) Soczewka odwracająca nie nadaje się do obserwacji Deklinacja: +22° 43' (stopnie : minuty) astronomicznych. Odległość: 1.360 lat świetlnych oddalona od ziemi Tu należy posługiwać się zwierciadłem zenitalnym i okularem. - Page 34 Общая информация Оснастка может изменяться в зависимости от модели. О данном руководстве Устройство телескопа (No. 1-3) Внимательно прочтите инструкции по технике безопасности в данном Труба телескопа руководстве. Используйте данное устройство только в соответствии с Искатель описаниями в руководстве для исключения риска получения травмы или повреждения...
- Page 35 DE EN FR NL IT ES PL Тонкая настройка по оси восхождения Выравнивание искателя Чтобы закрепить рычаг тонкой настройки по оси восхождения (17), Выравнивание искателя типов 1 и 4 сначала вставьте его в держатель (Х) на монтировке (No. 9а). Прежде чем начать наблюдение, следует отрегулировать трубу искателя.
- Page 36 Использование телескопа Формула вычисления увеличения: Фокусное расстояние (Телескоп) ÷ Фокусное расстояние (окуляра) = Увеличение Монтировка например: В комплекте телескопа поставляется азимутальная монтировка, которую 700 mm ÷ 20 mm 35 x легко использовать. Она позволяет перемещать трубу телескопа по вертикали и горизонтали. 700 mm ÷...
- Page 37 DE EN FR NL IT ES PL Возможные объекты наблюдения Устранение возможных проблем Нет изображения Снимите с трубы пылезащитную Мы хотим предложить вам ряд очень интересных небесных объектов, крышку и защиту от солнечного света. которые легко наблюдать. На соответствующих иллюстрациях в конце руководства...
- Page 38 No. 18 No. 19 No. 20 No. 21 No. 22 2! 1* f=20 mm f=12.5 mm f=4 mm No. 23 The Moon No. 24 Orion Nebula (M 42) No. 25 Ring Nebula in Lyra constellation (M 57) No. 26 Dumbbell Nebula in the Vulpecula (Fox) constellation (M 27)
- Page 40 Experience the National Geographic Channel. Visit our website: www.nationalgeographic.com © 2012 National Geographic Society NATIONAL GEOGRAPHIC and Yellow Border Design are trademarks of the National Geographic Society. All rights reserved. Meade Instruments Europe GmbH & Co. KG Gutenbergstr. 2 · DE-46414 Rhede www.bresser.de ·...