Table of Contents
Advertisement
Advertisement
Table of Contents

Related Manuals for Korg nanoKEY Studio


Summary of Contents for Korg nanoKEY Studio
-
Page 2: Table Of Contents
Table of Contents Thank you for purchasing the Korg nanoKEY Studio. In order to use this product in a computer music environment, you’ll need to adjust the MIDI settings of the host application. Please fol- Main Features ..............3 low the directions in the host application’s owner’s manual to difine Preparation .............. -
Page 3: Main Features
Perfect Chords Access to Your Favorite Settings In addition to the keys, the nanoKEY Studio also provides eight touch-sen- Take control of your entire computer music system! The sitive pads. These pads can be used to play drum sounds and trigger sam- nanoKEY Studio allows you to create eight entirely different soft- ples. -
Page 4: Preparation
USB cable. If a malfunction occurs that cannot be resolved no matter how many times the nanoKEY Studio is turned off, then on, remove the batteries, and then install them again. (Battery) TIP Either alkaline or nickel-metal hydride batteries can be used. -
Page 5: Using A Usb Connection
Using a USB Connection Wireless Connection Setup In order to use the nanoKEY Studio wirelessly, a wireless connection must be established. Refer to “Using a wireless connection” in the Making Connections and Turning On the Power Quick Start Guide to set up the wireless connection. -
Page 6: Software Setup
Software setup Before using the nanoKEY Studio, it may be necessary to first con- nect the nanoKEY Studio to your computer and specify the MIDI port settings, or to load any software synthesizers and to specify recording settings for individual tracks in your DAW software. For... -
Page 7: Functions And Operation Of Controls
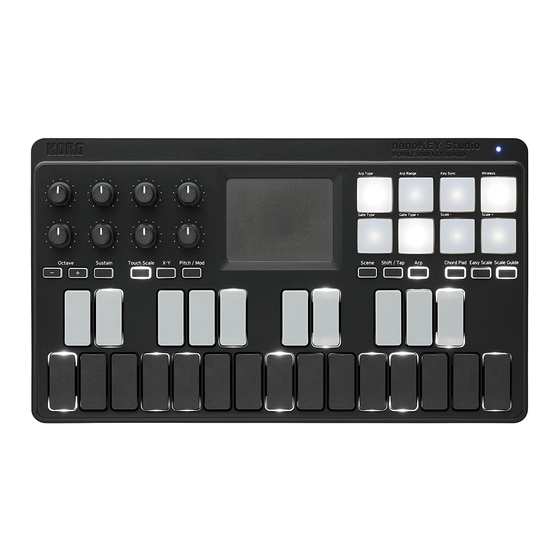
Functions and Operation of Controls Mode switch Touchpad Trigger pads USB port Knobs Octave buttons Sustain button Touch Scale button X-Y button Pitch/Mod button 12, 13 Touchpad 10. Power LED 15, 16, 17 6, 7, 8 11. Trigger Pads 12. Eazy Scale button 13. -
Page 8: Keyboard
Keyboard Sustain Pressing this button will send a sustain message. The keyboard features 25 velocity sensitive keys used to transmit Note being held when you press the Sustain button—and notes note messages. played while the Sustain button is pressed will be sustain, even after you remove your finger(s) from the keyboard. -
Page 9: Touchpad
Touchpad Pitch/Mod X-axis/Y-axis In the Pitch/Mod mode, pitch bend mes- Modulation sages and modulation messages are Touch scale Touchpad transmitted with the touchpad. As you trace your fingertip across the Touchpad, the Touch Scale Based on where you first touched the mode generates only notes that are in tune with the specified scale touchpad, you can control the pitch Pitch Bend... -
Page 10: Trigger Pads
Setting the Scale and Key The eight velocity-sensitive pads are excellent for playing and pro- The nanoKEY Studio allows you to choose a particular musical scale gramming drum parts in real time, as well as triggering samples. and set the key, or root note, of that scale. The Scale and Key you... -
Page 11: Arpeggiator
Down types. peating pattern. Use the Arp button to turn this feature On and Off. The nanoKEY Studio also contains a variety of rhythm patterns that can make the Arpeggiator much more interesting—and useful! Using the Arpeggiator, Keyboard, Trigger Pads and/or the Touchpad allows Alt2: There are two styles of Arpeggios that alternate between you to infuse your performance great rhythmic dexterity. - Page 12 Setting the Tempo (Tap Tempo function) Arp Range While the Arpeggiator is on, press the Shift/Tap button several By increasing the Arp Range, the Arpeggio pattern can repeat over times at a steady interval, along with the beat of the song, to set a number of octaves, before re-starting with the original notes the tempo (BPM) of the Arpeggiator.
-
Page 13: Other Functions
Selecting a Scene The nanoKEY Studio contains eight user-configurable scenes. By switching scenes, the nanoKEY Studio can access different software titles, or address a different set of parameters on a DAW system, etc. While holding down the Scene button, press one of the Trigger... -
Page 14: Customizing Controllers
These parameters determine how your software will react when ware. you operate a controller on the nanoKEY Studio in a specific Scene. Eight user-configurable scenes can be created and saved in the nanoKEY Studio. By preparing a separate Scene for each software title you are using, you can achieve instant control of them all simply by switching scenes. -
Page 15: Scene Parameters
Scene Parameters Pad Behavior ........[Momentary, Toggle] Select the trigger pad behavior from the following two types. Momentary When “Assign Type” is set to “Note”, a note-on message is transmitted Keyboard when you press a Trigger Pad, and a note-off message is transmitted when you release the Trigger Pad. - Page 16 Y-axis CC Number ..........[0...127] MIDI messages from the Knobs. When set to “Global”, MIDI messages will be transmitted on the This parameter specifies the value of the control change mes- Global MIDI Channel, specified in the global parameters. sage that will be transmitted. CC Number ............
- Page 17 CC Number ............[0...127] • X-Axis/Y-Axis This parameter specifies the CC number of the control change Assign Type ......[Control Change, No Assign] message that will be transmitted. This parameter specifies the MIDI messages assigned to the Off Value ..............[0...127] X-axis and Y-axis of the touchpad.
- Page 18 Touchpad (Pitch/Mod mode) Sustain Button When the touchpad is in Pitch/Mod mode, MIDI messages are trans- Assign Type ....[Note, Control Change, No Assign] mitted on the same MIDI channel assigned to the keyboard. This parameter specifies the MIDI message assigned to the Sus- •...
-
Page 19: Global Parameters
Sustain button, and a control This parameter specifies the Global MIDI channel that the change message with the Off Value is transmitted when you release nanoKEY Studio is operating on. This can be set to match the the button MIDI channel of your software. - Page 20 Controllers Trigger Pad Velocity Constant Value ....[1...127] This parameter specifies the velocity value that will be transmit- Key Velocity Curve .............. ted when the Trigger Pad velocity curve has been set to “Const.” ..[Light, Mid-Light, Normal, Mid-Heavy, Heavy, Const] Trigger Pad Sensitivity ..........
-
Page 21: Auto Power Off
Easy Scale mode, in one-octave units......[Disable, 30 min, 1 hour, 2 hours, 4 hours] When operating on batteries, the nanoKEY Studio can be set to MIDI automatically turn off after a set period of inactivity to preserve MIDI Clock Source ....[Auto, Internal, External-USB]... - Page 22 LEDs will light up or to “Disable” so that they will not light up. If the Keyboard, Knobs, etc. are operated while the LED Illumina- tion is active, the nanoKEY Studio returns to its previous condi- tion. This setting is applied whether the nanoKEY Studio is op- erating with a USB connection or on batteries.
-
Page 23: Appendix
With a USB connection: settings of the nanoKEY Studio will be restored to the factory set- • If the nanoKEY Studio is connected to a computer via a USB hub, tings when the blinking stops. the nanoKEY Studio may not turn on due to insufficient power. In... -
Page 24: Scale List
2 (Dorian) C, D ♭ , E ♭ , F, G, A ♭ , B ♭ • In order to use the functions of the nanoKEY Studio, your soft- minor 3 (Phrygian) ware must be set up. For the setup, refer to “Customizing Con- C, D, E ♭... -
Page 25: Arpeggio Rhythm Pattern List
Arpeggio rhythm pattern list... -
Page 26: Specifications
(wireless connection): iPhone/iPad installed with iOS 8 or later Quick Start Guide and compatible with Bluetooth 4.0 For the purpose of improvement, the specifications and nanoKEY Studio operation is not guaranteed with all devic- appearance are subject to change without notice. es that satisfy these operating requirements. - Page 27 ©2016 KORG INC. www.korg.com...