
Related Manuals for Panasonic PT-AX100E


Summary of Contents for Panasonic PT-AX100E
-
Page 1: Lcd Projector
LCD Projector Operating Instructions PT-AX100E Model No. Before operating this product, please read these instructions carefully and save this manual for future use. TQBJ0204... -
Page 2: Important Safety Notice
We hope it will help you to get the most out of your new product, and that you will be pleased with your Panasonic LCD projector.The serial number of your product may be found on its bottom. You should note it in the space provided below and retain this booklet in case service is required. - Page 3 IMPORTANT: THE MOULDED PLUG (U.K. only) FOR YOUR SAFETY, PLEASE READ THE FOLLOWING TEXT CAREFULLY. This appliance is supplied with a moulded three pin mains plug for your safety and convenience. A 13 amp fuse is fitted in this plug. Should the fuse need to be replaced, please ensure that the replacement fuse has a rating of13 amps and that it is approved by ASTA or BSI to BS1362.
-
Page 4: Table Of Contents
Projection method ... 15 Front leg adjuster and throwing angle... 15 Lens shift and positioning... 16 Connections ... 18 Before connection to the projector ... 18 Connecting with AV devices... 18 Connecting with HDMI/PC ... 18 Basic Operation Switching the projector on/off ... 19 Mains lead... - Page 5 TEMP and LAMP Indicators ... 36 Controlling alerts ... 36 Care and Replacement ... 37 Before cleaning ... 37 Cleaning your projector ... 37 Before replacing the Lamp unit ... 38 When to replace the Lamp unit ... 38 Replacing the lamp unit... 39 Troubleshooting...
-
Page 6: Precautions With Regard To Safety
Do not place the projector on top of surfaces which are unstable. If the projector is placed on top of a surface which is sloped or unstable, it may fall down or tip over, and injury or damage could result. - Page 7 Strong light is emitted from the projector’s lens. If you place directly into this light, it can hurt or damage your skin. Do not look into the lens while the projector is being used. Strong light is emitted from the projector’s lens. If you look directly into this light, it can hurt and damage your eyes.
-
Page 8: Cautions
It is a good idea to clean the inside of the projector before the season for humid weather arrives. Ask your nearest Authorised Service Centre to clean the projector when required. -
Page 9: Before Use
Do not subject the projector to excessive vibration or shocks. The projector lens need to be handled with care. Cover the lens with the lens cover when transporting the projector. Cautions when installing Avoid setting up in places which are subject to vibration or shocks. -
Page 10: Cautions On Use
Do not project the same image for long periods of time, as this may remain as an afterimage on the liquid crystal panel. The liquid crystal panel of the projector is built with very high precision technology to provide fine picture details. Occasionally, a few stuck pixels may appear on the screen as fixed points of blue, green or red. -
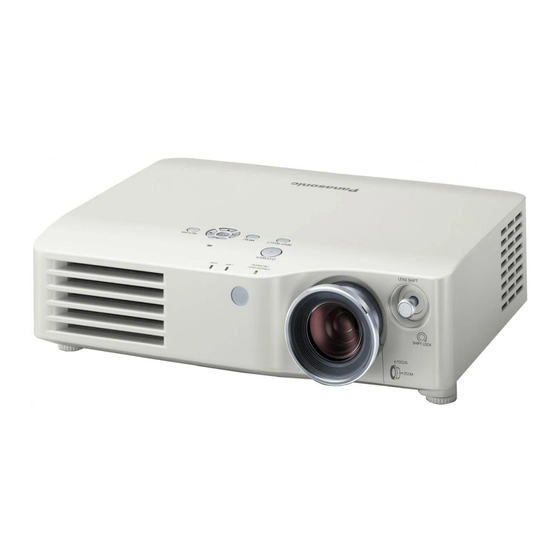
Page 11: About Your Projector
About Your Projector Remote control Front, back and top view POWER Turn the POWER on/off. (page 19) PICTURE MODE THEATER ROOM Switch to the best setting for a darker room. LIVING ROOM Switch to the best setting for a bright room. -
Page 12: Projector
Do not cover the ventilation openings or place anything within 10 cm (4") of them as this may cause damage or injury. While the projector is not in use, attach the Lens cover to protect the lens. 12 - E... - Page 13 Do not cover the ventilation openings or place anything within 10 cm (4") of the vents as this may cause damage or injury. This projector should only be used with the attached Mains lead to ensure optimum performance and avoid damage to the projector.
-
Page 14: Setting Up
* The results above are approximate and may differ slightly from the actual measurements. NOTE: Do not use the projector at a raised or a horizontally tilted position as it may cause malfunction of the projector. Make sure the projector lens surface is parallel with the screen. You can tilt the projector body approximately ±... -
Page 15: Projection Method
Projection method You can use the projector with any of the following 4 projection methods. To set the desired method in the projector, see “INSTALLATION” on page 35. Setting on a desk/floor and projecting from front INSTALLATION: FRONT/DESK Mounting in the ceiling and... -
Page 16: Lens Shift And Positioning
Setting up Lens shift and positioning If the projector is not positioned right in front of the centre of the screen, you can adjust the projected image position by moving the Shift lever within the shift range of the lens. - Page 17 NOTE: When the projector is located right in front of the screen and the Shift lever is centred, you will get the best quality of the projection image. When the Shift lever is at the vertical limit of the shift range, you cannot move the lever to the horizontal limit, likewise when the Shift lever is at the horizontal limit of the shift range, you cannot move the lever to the horizontal limit.
-
Page 18: Connections
Connections Before connection to the projector Read and follow the operating and connecting instructions of each peripheral device. The peripheral devices must be turned off. Use cables that match each peripheral device to be connected. Confirm the type of video signals. See “List of compatible signals” on page 41. -
Page 19: Switching The Projector On/Off
ORANGE Flashing NOTE: While the projector is cooling the lamp, do not switch the MAIN POWER off or unplug the Mains lead. Disconnecting 1. Make sure the MAIN POWER is switched off and unplug the Mains lead from the wall socket. -
Page 20: Switching On The Projector
See page 34 about switching on/off the STARTUP LOGO. Some small rattling or tinkling sound may be heard when starting up, but this is normal and does not affect the performance of the projector. Switching off the projector 1. Press the POWER button. -
Page 21: Projecting An Image
2. Adjust the projected image with the Shift lever. See "Lens shift and positioning" on page 16. Unlock 3. Adjust the angle of the projector. Screw down the Front leg adjuster and adjust the angle vertically. NOTE: Do not touch the Air exhaust port as this may cause burns or injury. -
Page 22: Remote Control Operation
Remote control operation Operating range You can operate the projector with the Remote control within the remote range 7 m. Facing to the projector Ensure the Remote control emitter is facing to the Remote control signal receptor on front of the projector and press the required buttons to operate. -
Page 23: Switching The Aspect Ratio
Switching off the projector automatically You can switch off the POWER automatically by setting the SLEEP feature. -
Page 24: Adjusting The Image
Remote control operation Adjusting the image You can display one of the PICTURE or ADVANCED menu items by pressing the PICTURE ADJUSTMENT button. Press the button to switch between PICTURE and ADVANCED menu. Press F G to select the required menu item and I H to adjust. - Page 25 Adjust the vividness of the colour. COLOUR Setting range: -30 to +30 Default: 0 Adjust the colour tone. TINT Setting range: -30 to +30 Default: 0 Adjust the brightness of the colour. BRIGHTNES Setting range: -20 to +20 Default: 0 4.
-
Page 26: Settings
Menu Navigation The menu system allows you to access functions which do not have their own dedicated buttons on the Remote control. The menu options are structured and categorised. You can navigate through the menu with F G I H buttons. Navigating through the MENU Displaying the Main menu... -
Page 27: Sub-Menu
Sub-menu Sub-menu items vary by the selected input signal. PICTURE menu See “PICTURE Menu” on page 28. Sub-menu items PICTURE MODE CONTRAST BRIGHTNESS COLOUR TINT SHARPNESS COLOUR TEMPERATURE DYNAMIC IRIS LIGHT HARMONIZER ADVANCED MENU FAVOURITE SAVE FAVOURITE LOAD SIGNAL MODE 1. -
Page 28: Picture Menu
PICTURE Menu PICTURE MODE Depending on the projection environment, you can use these preset parameter settings to optimise image projection. Press I H to cycle through the options. For a bright room Setting for a general image, such as NORMAL sports or games DYNAMIC Bright and sharp setting... -
Page 29: Tint
TINT You can adjust the skin tone in the projected image. More greenish reddish Setting range: -32 to +32 When PC is connected, this function is available with 1 125 (1 080)/60i, 1 125 (1 080)/50i, 1 125 (1 080)/60p and 1 125 (1 080)/50p signals only. -
Page 30: Favourite Save
PICTURE Menu NR (Noise Reduction) You can switch the automatic noise reduction system on/off. Press I H to select the required setting. • ON: Automatic noise reduction • OFF: No noise reduction NOTE: Applying noise reduction may affect image quality. MPEG NR You can switch the automatic noise reduction system for MPEG format images on/off. -
Page 31: Position Menu
POSITION Menu See “Navigating through the MENU” on page 26. H - POSITION You can move the projected image horizontally for fine adjustment. Move Move left V - POSITION You can move the projected image vertically for fine adjustment. Move Move down DOT CLOCK... -
Page 32: Aspect
POSITION Menu ASPECT You can switch the aspect ratio manually when needed. Aspect ratio options and projection example If you apply the aspect ratio options to the projected image, the result will be as follows. The result may differ due to the input signals. See “Switching the aspect ratio” on page 23. VIDEO/S-VIDEO/COMPONENT Not available with 1 125 (1 080)/50i, 1 125 (1 080)/60i, 1 125 (1 080)/50p, 1 125 (1 080)/60p, 1 125 (1 080)/24p, 750 (720)/50p and 750 (720)/60p signals. -
Page 33: Wss
Setting range: 0 to +10 OVER SCAN is not available with PC signals. POSITION Menu KEYSTONE If the projector is aligned non-perpendicularly to the screen, or if the projection screen has an angled surface, you can vertically correct keystone. Image... -
Page 34: Option Menu
LEFT BACK COLOUR You can choose a BLUE or BLACK screen for when the projector is idle. Press I H to select an option. STARTUP LOGO You can switch on/off the logo that is displayed when starting up. Press I H to select an option. -
Page 35: Installation
Press I H to cycle through the options. See “Switching off the projector automatically” on page 23. ALTITUDE If you use the projector at high elevations, set the fan speed to HIGH. Press I H to select HIGH or LOW. NOTE: At 1 400 m (4593 ft) above sea level, the setting must be HIGH. -
Page 36: Temp And Lamp Indicators
TEMP and LAMP Indicators Controlling alerts If a problem should occur with the projector, the TEMP and/or LAMP indicators will alert you. Respond to the alert as follows. 1. Confirm the POWER indicator status and turn off the projector in the proper way. -
Page 37: Care And Replacement
Cleaning the Air filter If the Air filter is excessively dirty, the internal temperature of the projector increases and may cause malfunction. Clean the Air filter regularly every 100 hours of usage. 1. Turn the projector upside down and place it gently on a soft cloth. -
Page 38: Before Replacing The Lamp Unit
The Lamp unit is consumable and the brightness decreases by duration of usage. The LAMP indicator will alert you of the replacement timing at 1 800 hours, and at 2 000 hours, the projector will be turned off. 1 800 or 2 000 hours is a rough guidance and might be shortened by the usage conditions, characteristics of the lamp unit, environmental conditions, and so on. -
Page 39: Replacing The Lamp Unit
If the lamp usage time has passed 2 000 hours (when LAMP POWER has been set to NORMAL), the projector will switch to standby mode after approximately 10 minutes of operation. The resetting procedure should thus be completed within 10 minutes. -
Page 40: Troubleshooting
The SHUTTER function may be in use. The lens cover may still be attached to the lens. The lens focus may not have been set correctly. The projector may not be at the correct distance from the screen. The lens may be dirty. -
Page 41: Technical Information
Technical Information List of compatible signals Display resolution Mode (dots) NTSC/NTSC 4.43/ 720 x 480i PAL-M/PAL60 PAL/PAL-N/SECAM 720 x 576i 525i (480i) 720 x 480i 625i (576i) 720 x 576i 525p (480p) 720 x 483 625p (576p) 720 x 576 1 125 (1 080)/60i 1 920 x 1 080i 1 125 (1 080)/50i... -
Page 42: Serial Terminal
Serial terminal The serial connector which is on the connector panel of the projector conforms to the RS-232C interface specification, so that the projector can be controlled by a personal computer which is connected to this connecter. Connection Serial terminal adapter... -
Page 43: Basic Format
3 bytes (02h) The projector can not receive any command for 10 seconds after the lamp is switched on. Wait 10 seconds before sending the command. If sending multiple commands, check that a response has been received from the projector for one command before sending the next command. -
Page 44: Cable Specifications
Power condition Input signal Picture mode Shutter function Freeze function SLEEP function Cable specifications (When connected to a a personal computer) Projector 44 - E NGLISH Parameter 000 = OFF VID = VIDEO IN RG1 = PC IN Parameter: NAT=NATURAL... -
Page 45: Menu Structure
Menu structure PICTURE Menu ... 28 H PICTURE MODE ... 28 H CONTRAST... 28 H BRIGHTNESS ... 28 H COLOUR ... 28 H TINT... 29 H SHARPNESS ... 29 H COLOUR TEMPERATURE ... 29 H DYNAMIC IRIS ... 29 H LIGHT HARMONIZER... -
Page 46: Specifications
Specifications Power supply Power consumption Amps Panel size (diagonal) Aspect ratio LCD panel Display method Drive method Pixels Lens Lamp Luminosity Horizontal scanning frequency Scanning frequency Vertical scanning (for RGB signal) frequency Dot clock frequency COMPONENT (YP ) signals Colour system Projection size Throw distance Screen aspect ratio... - Page 47 S-VIDEO IN VIDEO IN PC IN Connectors COMPONENT IN HDMI IN SERIAL Cabinet Dimensions Weight Operating environment Certifications Power supply Operating range Weight Remote control Dimensions Ceiling bracket Options Projection screen Serial adapter Specifications Single - line, Mini DIN 4p Ω...
-
Page 48: Dimensions
Dimensions Units: mm (inch) 102.5 (4-1/32) 395 (15-17/32) 48 - E NGLISH... -
Page 49: Trademark Acknowledgements
Trademark acknowledgements VGA and XGA are trademarks of International Business Machines Corporation. S-VGA is a registered trademark of the Video Electronics Standards Association. HDMI, the HDMI logo and High-Definition Multimedia Interface are trademarks or registered trademarks of HDMI Licensing LLC. The font used in the on-screen displays is a Ricoh bitmap font, which is manufactured and sold by Ricoh Company, Ltd. -
Page 50: Index
Capturing Remote control button Front leg adjuster Adjusting Image positioning GAMMA H- POSITION HDMI Connecting SIGNAL LEVEL Terminal INPUT Button on the projector INPUT GUIDE Remote control button ...29 Selecting signal INSTALLATION Projection method ...29 KEYSTONE LAMP Indicator Indicator status... - Page 51 MAIN POWER ...19 On/Off ...13 Switch Mains lead ...9 Accessory ...19 Connection MENU ...12 Button on the projector ...26 Main menu ...26 Opening the menu ...11 Remote control button ...30 MPEG NR ...30 NR (Noise Reduction) OPTION ...34 Operation ...27 Sub-menu ...34...