Table of Contents
Advertisement
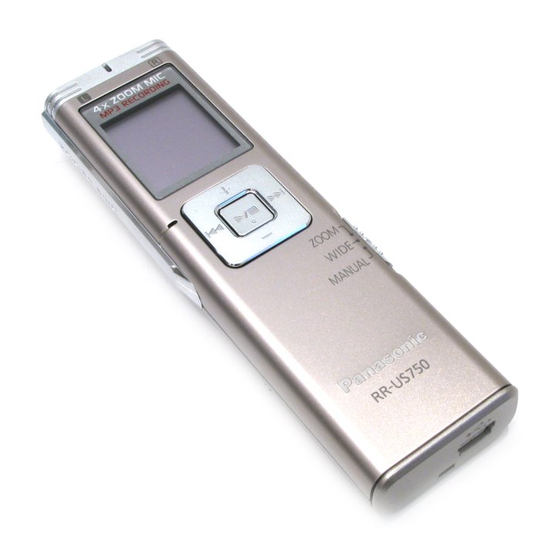
The illustration shows RR-US750.
Dear customer
Thank you for purchasing this product.
For optimum perfor mance and safety, please read these
instructions carefully.
Before connecting, operating or adjusting this product, please read
the instructions completely. Please keep this manual for future
reference.
E
Operating Instructions
IC Recorder
RR-US950
Model No.
RR-US750
RQT9124-B
Advertisement
Table of Contents

Related Manuals for Panasonic RR-US750


Summary of Contents for Panasonic RR-US750
- Page 1 The illustration shows RR-US750. Dear customer Thank you for purchasing this product. For optimum perfor mance and safety, please read these instructions carefully. Before connecting, operating or adjusting this product, please read the instructions completely. Please keep this manual for future reference.
-
Page 2: Enjoy With This Unit
Enjoy with This Unit Recording Meeting Lesson Lecture Playing back to listen • Recorded file • MP3 music file with speaker Connecting this unit to a computer Using a computer • Charge the battery • Copy/Organise (Delete) recorded files/ Play back to listen From a computer •... -
Page 3: Table Of Contents
Table of contents Preparation Enjoy with This Unit ... 2 Supplied accessories ... 2 Part names ... 4 Inserting/Charging the battery ... 5 Hold function ... 6 Turning ON/OFF the Power ... 6 Setting the time ... 7 Basic Operations Recording settings ... -
Page 4: Part Names
Part names Main unit Bottom side Display Remaining memory/Recording level XPLPEP XPLPEP SPEED File number Recording (Playback) elapsed time/ Possible recording time (Remaining playback time), Current time etc. Recording (Playback) time/ Recording date Recording indicator (red) LCD display + (Volume) Zoom microphone (front) u (Fast backward) q / g (Play/Stop/Enter) -
Page 5: Inserting/Charging The Battery
Inserting the rechargeable battery Make sure the battery faces the right directions. • If rechargeable batteries are to be used, rechargeable batteries manufactured by Panasonic are recommended. Charging the battery using a computer • Press to stop the unit. STOP •... -
Page 6: Hold Function
Hold function Before operating, switch Hold off, when finished, switch Hold Hold off g Hold function This function prevents accidental operation when you put the unit in your pocket or bag. It also prevents battery loss from accidental unit operation. g When you set Hold on Button operations are ignored even if you press buttons by mistake. -
Page 7: Setting The Time
Setting the time After the battery is inserted, “ purchase). (After approx. 1 minute, the display changes to “ The clock is used for preserving recording date and setting timer recording. Please set the time first. Recording is possible even if the clock is not set. However, the Recording date, Recording start time is displayed as “ When “... -
Page 8: Recording Settings
Recording settings This unit has 4 recording setting items related to recording quality. Using different combinations of recording settings, you can adjust audio quality according to recording situations. Recording Setting contents and setting item display Recording High-quality mode ( ➜ page 9) Long recording Switching Stereo... -
Page 9: Recording
Recording • Switch Hold off ( ➜ page 6). • Press to stop the unit. STOP Slide recording position switch to select a position. Switch modes according to situations ( ➜ page 8). Select a folder for recording. The folder is switched each time you press Select among “... -
Page 10: Playing
Playing • Switch Hold off ( ➜ page 6). • Press • Select a folder ( ➜ right). • Select a file ( ➜ right). Press q / g (Playback starts). •FOLDER/ − MENU Adjusting the volume STOP Turn up the volume: Press + Turn down the volume: Press –... -
Page 11: Display While Stopped
In that case, connect stereo earphones (not included). Plug type: ø 3.5 mm stereo mini plug Recommended additional earphones: Panasonic RP-HV250 (the product number is correct as of January 2008.) Insert securely. The built-in speaker is turned off when earphones... -
Page 12: Deleting Recorded Fi Les
Deleting recorded files • Select a folder ( ➜ page 10). Press ERASE unit is stopped. Press u , i to select the file. STOP Deleting one file Deleting all files in one folder Deleting all files in folder A through D Deleting all files in all folders Formatting this unit... -
Page 13: Locking Recorded Fi Les (File Protection)
Locking recorded files (File protection) Locked files cannot be deleted on this unit (except formatting). Use this function to protect files. • Select a folder ( ➜ page 10). • Press STOP Press and hold •FOLDER/ − MENU the menu screen is displayed. STOP “... -
Page 14: Changing Recording Settings
Changing recording settings (Stereo/Monaural, Microphone sensitivity) Switching Stereo/Monaural • Set the Recording position switch to “MANUAL” ( ➜ page 8). •FOLDER/ − MENU • Press STOP Press and hold the menu screen is displayed. “ Press u , i to select “ and press q / g to enter. -
Page 15: Changing Recording Settings (Zoom Microphone)
Monitoring the recording in progress Connect stereo earphones (not included). Plug type: ø 3.5 mm stereo mini plug Recommended additional earphones: Panasonic RP-HV250 (the product number is correct as of January 2008.) LP EP Insert securely. ” and g Adjusting the... -
Page 16: Timer Recording
Timer recording Timer Recording can be set to make one recording at a specified time on this unit. A recording automatically starts at the start time and ends at the finish time. • Set the time beforehand ( ➜ page 7). •... -
Page 17: Preventing Unnecessary Recording (Vas)
Preventing unnecessary recording (VAS)/Confirming possible (remaining) recording time VAS (Voice Activated System) function Recording stops automatically when silence •FOLDER/ − MENU continues for about 3 seconds. If the unit detects sound, the recording resumes. Recording • Press STOP indicator STOP Press and hold the menu screen is displayed. -
Page 18: Setting The Playback Speed Control Function
Setting the Playback speed control function Playback speed can be adjusted at 5 different speeds. Press and hold “ SPEED “ ” is not displayed when “ ” is selected. Press i to select “ •FOLDER/ − MENU STOP Press u , i to select playback speed When pressing i , the playback speed becomes faster and the blinking bar moves to the right. -
Page 19: Reducing Noise (Eq Setting)
Reducing noise (EQ setting)/Slight return playback Reducing noise (EQ setting) This function makes it easier to hear sounds during playback. You cannot make this setting when “ ” is selected. Press and hold •FOLDER/ − MENU playback until “ ” (blinking) STOP and “... -
Page 20: Repeat Play/Successive Play
Repeat play/Successive play, A-B Repeat play Repeat play/Successive play Each time you press REPEAT playback style is switched as follows. ALL → ALL “ALL” display The selected file until the last file in the selected folder are played successively. The unit stops when the playback finishes. -
Page 21: Dividing Fi Les
Dividing files One file can be divided up to 30 times. While playing, press •FOLDER/ − MENU at the point where you wish to divide the file. INDEX/DIVIDE The playback pauses and STOP “ ” (blinking) and “ (lighting) are displayed. (“... -
Page 22: Index Function
Index function The term Index for this unit refers to a mark (point) that is added to a desired stop point when playback is jumped (skipped). When you press u , i while playing, the playback is skipped to the closest Index point. The maximum number of Indexes is 16 per 1 file. - Page 23 Cancelling the Index • Select a file or folder which has Index to be cancelled ( ➜ page 10). • Press to stop the unit. STOP •FOLDER/ − − MENU Press and hold INDEX/DIVIDE menu screen is displayed. “ ” (blinking) is displayed. Press +, –...
-
Page 24: Security Functions
Security functions If you set a password, password authentication is necessary when playing back this unit or connecting to a computer. When the unit is lost or stolen, the recorded data stored in this unit cannot be played or the computer does not recognise this unit as long as the password does not match. - Page 25 Authenticating the password Perform step in page 24. (Enter the password.) g When the password matches The security lock is temporarily released and the audio file can be played. (“ ” blinks while temporarily cancelling.) In the cases below, the security lock is set again. •...
-
Page 26: Cancelling The Operation Beep
Cancelling the operation beep Recording to other devices Press and hold •FOLDER/ − − MENU screen is displayed. “ displayed. •FOLDER/ − MENU Press +, – to select STOP “ enter. Press u , i to select “ enter. Setting the operation beep ON: Select “... -
Page 27: Connecting This Unit To A Computer
Connecting this unit to a computer You can copy files recorded on this unit to the computer or charge the battery. • Start the computer beforehand. • Press to stop the unit. STOP 1. Insert the USB cable into this unit. 2. -
Page 28: Opening The Folder Of This Unit Using A Computer
Opening the folder of this unit using a computer The illustrations show Windows XP (OS). The display may differ depending on the OS. • Connect this unit to a Computer beforehand ( ➜ page 27). 1. Click [Start] → [My Computer]. This unit is displayed as a removable disk. -
Page 29: Importing The Recorded Fi Les In This Unit To A Computer/Organising Fi Les
Importing the recorded files in this unit to a computer/Organising files • Open the removable disk (this unit) displayed on the computer screen and open the audio folder (A to D) beforehand ( ➜ page 28). Importing recorded files to a computer 1. -
Page 30: Returning The Fi Les Imported To The Computer To This Unit
Returning the files imported to the computer to this unit • Open the audio folder (A to D) of this unit beforehand ( ➜ page 28). Returning recorded files to this unit from the computer 1. Select the recorded file imported to the computer ( ➜... -
Page 31: Listening To The Music On This Unit (Transferring Mp3 Music Fi Les To This Unit)
Listening to the music on this unit (Transferring MP3 music files to this unit) You can enjoy music by transferring MP3 music files stored in the computer to this unit. Transferring MP3 music files to this unit from the computer •... -
Page 32: Listening To The Music On This Unit (Playing Mp3 Music Fi Les On This Unit)
Listening to the music on this unit (Playing MP3 music files on this unit) • Remove the USB cable ( ➜ page 27). • Press Press (MUSIC folder). •FOLDER/ − MENU Press u , i to select the STOP file you want to listen. After selection, the length of the music and the total number of files in MUSIC folder are displayed. -
Page 33: Creating Mp3 Music Fi Les
Creating MP3 music files This unit is not equipped with the function or computer software to create MP3 file from music CD. You can create MP3 music files using separately sold computer software, etc. Windows XP or Windows Vista users can create MP3 music files using Windows Media Player 11. Following is the example of operating instructions when using Windows XP and Windows Media Player 11. -
Page 34: System Requirements
✽ Depending on the computer environment, malfunctions may occur (e.g. Audio data recorded on this unit cannot be used, etc.). Panasonic and Panasonic dealers cannot be held liable for any lost audio data or other direct or indirect damage except in cases of intentional or gross negligence. -
Page 35: Q & A (Frequently Asked Questions)
• Cannot play because the file format is different. • The Voice Editing cannot be used for this product because the recording format differs from the format used for other Panasonic IC recorders. The recording format used for this product is MP3 format. -
Page 36: Troubleshooting Guide
Troubleshooting guide Before requesting service, make the following checks. If you are in doubt about some of the check points, or if the remedies indicated in the chart do not solve the problem, consult your dealer for instructions. Symptom Battery Cannot recharge the battery. - Page 37 Symptom Display “ ”appears. “ ” is not displayed on menu screen. • “ ” has been set. When set to “ “ ”appears. Record The memory is used completely earlier than expected. (“ ” is displayed earlier than expected.) Recording stops halfway.
- Page 38 Troubleshooting guide Symptom Record The playback time is longer than the recording time. Cannot set timer recording. Timer recording does not work. Files created through timer recording are shorter than periods set with the timer. Playing Cannot play the recorded file though it was recorded on this unit.
- Page 39 Symptom Playing There is no sound from the earphones or it is difficult to hear or noisy. Sound is distorted. No sound from the speaker. I hear noises. Recorded sounds contain noise that makes it difficult to hear sounds. Others The power cannot be turned T h e p ow e r a u t o m a t i c a l ly turns off.
-
Page 40: Sales And Support Information (For The United Kingdom And Republic Of Ireland)
• Or go on line through our Internet Accessory ordering application at www.panasonic.co.uk. • Most major credit and debit cards accepted. • All enquiries transactions and distribution facilities are provided directly by Panasonic UK Ltd. • It couldn’t be simpler! •... - Page 41 -If you see this symbol- Information on Disposal for Users of Waste Electrical & Electronic Equipment (private households) This symbol on the products and/or accompanying documents means that used electrical and electronic products should not be mixed with general household waste. For proper treatment, recovery and recycling, please take these products to designated collection points, where they will be accepted on a free of charge basis.
-
Page 42: Care And Use
Care and use To reduce risk of radio interference caused by headphone- or earphone-cables, only use adequate accessories with the cable length less than 3 m. g Unit • Do not heat or expose to flame. • Do not leave the battery in an automobile exposed to direct sunlight for a long period of time with doors and windows closed. -
Page 43: Maintenance
g Precautions for listening with the Headphones or Earphones • Do not play your headphones or earphones at a high volume. Hearing experts advise against continuous extended play. • If you experience a ringing in your ears, reduce volume or discontinue use. •... -
Page 44: Specifi Cations
Battery (AAA LR03) Recording mode Alkaline : Approx. 2 hours battery Rechargeable ∗2 Using recommended Panasonic Alkaline battery. ∗3 When zoom microphone is off. ∗4 When audio is output from speaker (Volume: 13, EQ: off, playback speed control: × 1) Standard recordable time... - Page 45 This product may receive radio interference caused by mobile telephones during use. If such interference is apparent, please increase separation between the product and the mobile telephone. CAUTION Danger of explosion if battery is incorrectly replaced. Replace only with the same or equivalent type recommended by the manufacturer.
- Page 46 MEMO...
- Page 48 Matsushita Electric Industrial Co., Ltd. Web Site: http://panasonic.net Pursuant to at the directive 2004/108/EC, article 9 (2) Panasonic Testing Centre RQT9124-B Panasonic Marketing Europe GmbH Winsbergring 15, 22525 Hamburg, Germany H0108TY0...