Panasonic RR-US591 Operating Instructions Manual
Hide thumbs
Also See for RR-US591:
- Operating instructions manual (44 pages) ,
- Specifications (2 pages)
Table of Contents
Advertisement
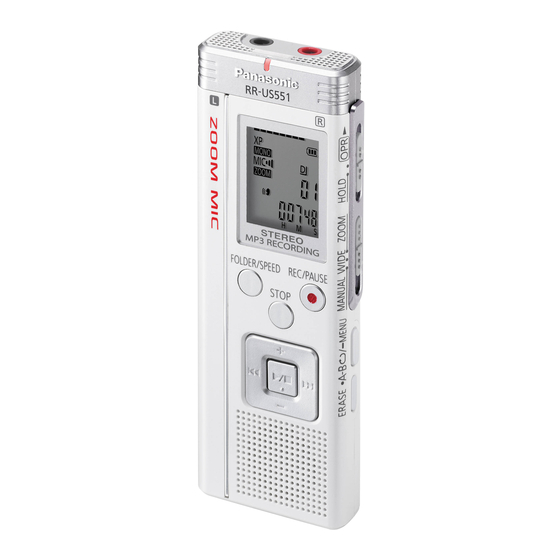
The illustration shows RR-US591.
Dear customer
Thank you for purchasing this product.
For optimum performance and safety, please read these instructions carefully.
Before connecting, operating or adjusting this product, please read the
instructions completely. Please keep this manual for future reference.
E
Operating Instructions
IC Recorder
RR-US591
Model No.
RR-US571
RR-US551
VQT2M18
Advertisement
Table of Contents

Related Manuals for Panasonic RR-US591


Summary of Contents for Panasonic RR-US591
-
Page 1: Operating Instructions
IC Recorder RR-US591 Model No. RR-US571 RR-US551 The illustration shows RR-US591. Dear customer Thank you for purchasing this product. For optimum performance and safety, please read these instructions carefully. Before connecting, operating or adjusting this product, please read the instructions completely. Please keep this manual for future reference. -
Page 2: Features
Supplied accessories Please check and identify the supplied Features accessories. Recording Use numbers indicated in parentheses when asking for replacement parts. (Product numbers correct as of January 2010. These may be subject to change.) (For the United Kingdom and Republic of Ireland) Meeting Lesson/Lecture Dictation... -
Page 3: Table Of Contents
Table of contents A-B Repeat play ............. 19 Preparation Security functions ............20 Features ................2 Recording using an external microphone ....... 22 Supplied accessories ............2 Recording from other devices ......... 22 Part names ............... 4 Recording to other devices ..........23 Inserting the batteries ............ -
Page 4: Part Names
Part names Main unit Recording indicator (red) USB jack LCD display Built-in microphone FOLDER/SPEED External microphone jack (MIC) STOP Headphone/earphone jack ( W ) + (Volume) Stand u (Fast backward) When you perform zoom q / g (Play/Stop/Enter) recording with the unit placed –... -
Page 5: Inserting The Batteries
Inserting the batteries The remaining battery display shown below is displayed while recording or playing. Blinking If the batteries run out, “ ” blinks. Replace the batteries as soon as possible. Remove the batteries from the unit if you will not use it for a long period of time. -
Page 6: Turning On/Off The Power
Turning ON/OFF the Power Hold function Button operations are ignored when you set Hold OPERATION/HOLD Switch OPR: operation HOLD Switching Hold on/off Hold on Hold off HOLD HOLD • When the Hold function is on, button operation is ignored even if the unit is on (“ ”... -
Page 7: Setting The Time
Setting the time When the power is turned on, “ ” blinks on the display when the time is not set (e.g. at the time of purchase). (In power-on condition, the display changes to “ ” (blinking) in approx. 1 minute.) The clock is used for preserving recording date. -
Page 8: Recording Settings
Recording settings Switching recording position REC/PAUSE This unit has 4 recording setting items related to recording quality. Using different combinations of This unit is equipped with 3 recording positions: [ZOOM], FOLDER/SPEED recording settings, you can adjust audio quality [WIDE] and [MANUAL]. The [ZOOM] and [WIDE] content STOP according to recording situations. -
Page 9: Recording
Recording Folder • Turn the power on ( ➜ page 6). • Press to stop the unit. STOP [Folder] for this unit means locations in which recording (music) files are stored. There are 4 Slide recording position switch to audio folders “ ”... -
Page 10: Playing
Playing Select a folder • Press to stop the unit. STOP • Select a folder ( ➜ right). The folder is switched each time you • Select a file ( ➜ right). FOLDER/SPEED press Select among “ ”, “ ”, “ ”, “ ”, “ ”. Press q / g (Playback starts). -
Page 11: Listening To The Audio Using Earphones
Confi rming the Connect stereo earphones (not included). remaining time Plug type: ø 3.5 mm stereo mini plug Recommended additional earphones: Panasonic RP-HV250 (the product Press and hold FOLDER/SPEED number is correct as of January 2010.) for 1 second or longer Monitoring the recording during playback. -
Page 12: Deleting Recorded Fi Les
Deleting recorded files Press q / g to enter. • Select a folder ( ➜ page 10). Press u , i to select “ ” ERASE Press while STOP and press q / g to enter. playing or the unit is stopped. -
Page 13: Locking Recorded Fi Les (File Protection)
Locking recorded files (File protection) Locked files cannot be deleted on this unit (except when formatting). Use this function to protect files. Press q / g to enter. • Select a folder ( ➜ page 10). STOP A-B / MENU •... -
Page 14: Changing Recording Settings (Monaural/Stereo, Microphone Sensitivity)
Changing recording settings (Monaural/Stereo, Microphone sensitivity) Switching Monaural/Stereo Changing microphone sensitivity STOP A-B / MENU • • Set the Recording position switch to • Set the Recording position switch to [MANUAL] ( ➜ page 8). [MANUAL] ( ➜ page 8). STOP STOP •... -
Page 15: Changing Recording Settings (Zoom Microphone/Recording Mode (Xp/Lp/Slp))
Changing recording settings (Zoom microphone/Recording mode (XP/LP/SLP)) Changing Zoom microphone setting How to set the recording mode When the zoom is set to “ ”, the surrounding sound volume (XP/LP/SLP) is lowered, and the sound in front is clearly recorded. When recording with zoom microphone, the audio becomes monaural. -
Page 16: Preventing Unnecessary Recording (Vas)
Press u , i to select “ ” and display. press q / g to enter. When the possible recording time is 1000 hours or longer, “ ” is displayed. (RR-US591 only) Then “ ” is displayed. The “ ” display while Start recording to activate this function. -
Page 17: Setting The Playback Speed Control Function
Setting the playback speed control function Playback speed can be adjusted at 21 different steps (50% to 200%). FOLDER/SPEED Press during playback. e.g. for 100% speed Playback speed adjustment display appears. (screen at right) The figure of 2 digits represents a speed step. FOLDER/SPEED (The figure returns to the file number after playback speed adjustment display finishes.) STOP... -
Page 18: Reducing Noise (Eq Setting)
Reducing noise (EQ setting)/Slight return playback Reducing noise (EQ setting) Setting Slight return playback This function makes it easier to hear sounds during playback. Slight Return Playback function: When u is pressed You cannot make this setting when “ ” is selected. during playback, the play point reverses about 5 seconds, and playback resumes from the point. -
Page 19: Repeat Play/Successive Play
Repeat play/Successive play, A-B Repeat play Repeat play/Successive play A-B Repeat play Playback repeats between the start point (A) A-B / MENU Each time you press • and finish point (B) if those points are set. while stopped, the playback Press while playing. -
Page 20: Security Functions
Security functions If you set a password, password authentication is necessary when playing back this unit or connecting to a computer. When the unit is lost or stolen, the recorded data stored in this unit cannot be played or the computer does not recognise this unit as long as the password does not match. - Page 21 Authenticating the password g When you have forgotten the password To initialize the password, delete all files. Perform step on page 20. Release all locks set on files in folder A through (Enter the password.) D ( ➜ page 13). Delete all files in folder A through D g When the password matches ( ➜...
-
Page 22: Recording Using An External Microphone
Recording using an external microphone/Recording from other devices Recording using an external Recording from other devices microphone • Set monaural/stereo to stereo ( ➜ page 14). • Change the setting to monaural/stereo on Head phone this unit according to the microphone’s jack monaural/stereo ( ➜... -
Page 23: Recording To Other Devices
Recording to other devices Cancelling the operation beep • Cancel the operation beep while copying ( ➜ right). STOP • Press to stop the unit. A-B / MENU • Mini microphone Press and hold for 1 A-B / MENU • jack second or longer. -
Page 24: Connecting This Unit To A Computer
Connecting this unit to a computer You can copy files recorded on this unit to the Even if you connect this unit to the computer without the battery computer. or with a depleted battery, the computer cannot recognise this unit ( ➜ page 33). •... -
Page 25: Opening The Folder Of This Unit Using A Computer
Opening the folder of this unit using a computer 2. Right-click to open the removable disk The illustrations show Windows XP (OS). The display may differ depending on the OS. (this unit). The folders (A to D, MUSIC) in this unit appear. •... -
Page 26: Importing The Recorded Fi Les In This Unit To A Computer/Organizing Fi Les
Importing the recorded files in this unit to a computer/Organizing files • Open the removable disk (this unit) displayed on Do not change the folder names the computer screen and open the audio folder If you change the names of folders (A, B, C, (A to D) beforehand ( ➜... -
Page 27: Returning The Fi Les Imported To The Computer To This Unit
Returning the files imported to the computer to this unit MP3 music files which were not recorded on • Open the audio folder (A to D) of this unit this unit can be played only in MUSIC folder. beforehand ( ➜ page 25). If the file is returned to folder A to D, it cannot Returning recorded files to this be played on this unit. -
Page 28: Listening To Music On This Unit (Transferring Mp3 Music Fi Les To This Unit)
Listening to music on this unit (Transferring MP3 music files to this unit) You can enjoy music by transferring MP3 music files stored in the computer to this unit. Transferring MP3 music files to Folder/file structure in MUSIC folder (example) this unit from the computer This is an example when M1 was loaded before M2 for M1 and M2, M1-1 was loaded before M1-2 for M1-1 and M1-2,... -
Page 29: Listening To Music On This Unit (Playing Mp3 Music Fi Les On This Unit)
When the length of one music file is 1000 hours or longer, time after Press q / g (Playback starts). “ ” is displayed as “ ”, Stop: “ ” ... (RR-US591 only) STOP Press q / g or... -
Page 30: Creating Mp3 Music Fi Les
Creating MP3 music files This unit is not equipped with the function or computer software to create MP3 file from music CD. You can create MP3 music files using separately sold computer software, etc. Windows XP or Windows Vista users can create MP3 music files using Windows Media Player 11 (using Windows Media Player 12 for Windows 7 users). -
Page 31: System Requirements
✽ This model is not compatible with TRC/ADPCM format IC recorders made by Panasonic. Also, files recorded on this unit cannot be played on those IC recorders and/or cannot be read using Voice Editing software supplied with those IC recorders. -
Page 32: Q & A (Frequently Asked Questions)
• The Voice Editing cannot be used for this product because the (Voice Editing) included in other recording format differs from the format used for other Panasonic Panasonic IC Recorder? IC recorders. The recording format used for this product is MP3 format. -
Page 33: Troubleshooting Guide
Troubleshooting guide Before requesting service, make the following checks. If you are in doubt about some of the check points, or if the remedies indicated in the chart do not solve the problem, consult your dealer for instructions. Symptom Checkpoints Battery Cannot use a battery that can be •... - Page 34 Troubleshooting guide Symptom Checkpoints Display • The operation program is damaged. Consult your dealer. “ ” appears. • You tried to play an MP3 file that cannot be played on this unit, or the “ ” appears. MP3 file is damaged. Delete the MP3 file that cannot be played. If the problem persists, the file system is damaged.
- Page 35 Symptom Checkpoints Playing Playback speed is too fast or slow. • You changed the playback speed ( ➜ page 17). The order of playing changed after • This occurs because files imported from the computer are placed at the end reloading files that were once imported in the folder.
-
Page 36: Sales And Support Information (For The United Kingdom And Republic Of Ireland)
• Or go on line through our Internet Accessory ordering application at www.pas-europe.com. • Most major credit and debit cards accepted. • All enquiries transactions and distribution facilities are provided directly by Panasonic UK Ltd. • It couldn’t be simpler! •... - Page 37 -If you see this symbol- Information on Disposal for Users of Waste Electrical & Electronic Equipment (private households) This symbol on the products and/or accompanying documents means that used electrical and electronic products should not be mixed with general household waste. For proper treatment, recovery and recycling, please take these products to designated collection points, where they will be accepted on a free of charge basis.
-
Page 38: Care And Use
Care and use To reduce risk of radio interference caused by headphone- or earphone-cables, only use adequate accessories with a cable length of less than 3 m. g Unit • Avoid using or placing this unit near sources of heat. •... -
Page 39: Maintenance
g Precautions for listening with the Headphones or Earphones • Do not play your headphones or earphones at a high volume. Hearing experts advise against continuous extended play. • If you experience a ringing in your ears, reduce volume or discontinue use. •... -
Page 40: Specifi Cations
Playable Bit Rate 8 kbps to 320 kbps approx. 45 h. approx. 35 h. (MUSIC folder) ∗2 Using Panasonic Alkaline battery. Playable Sampling 8 kHz to 48 kHz ∗3 When zoom microphone is off. Frequency (MUSIC folder) ∗4 When audio is output from speaker (Volume: 13,... - Page 41 Excessive sound pressure from earphones and This product may receive radio interference headphones can cause hearing loss. caused by mobile telephones during use. If such interference is apparent, please increase separation between the product and the mobile telephone. CAUTION Danger of explosion if battery is incorrectly replaced.
- Page 42 MEMO...
- Page 44 Web Site: http://panasonic.net Pursuant to at the directive 2004/108/EC, article 9(2) Panasonic Testing Centre Panasonic Marketing Europe GmbH VQT2M18 Winsbergring 15, 22525 Hamburg, Germany © Panasonic Corporation 2010 H0110TY0...