Table of Contents
Advertisement
Quick Links
StoreOnce 3100, 3500, 5100 and
5500 System Installation and
Configuration Guide
Abstract
This guide is for StoreOnce System Administrators. It assumes that the user has followed the instructions on the appropriate
Start Here poster to create a basic network connection to the StoreOnce System.
Part Number: BB917-90903
Published: March 2016
Edition: 2
Advertisement
Table of Contents

Related Manuals for HP StoreOnce 3100


Summary of Contents for HP StoreOnce 3100
- Page 1 StoreOnce 3100, 3500, 5100 and 5500 System Installation and Configuration Guide Abstract This guide is for StoreOnce System Administrators. It assumes that the user has followed the instructions on the appropriate Start Here poster to create a basic network connection to the StoreOnce System.
- Page 2 WARRANTY STATEMENT: To obtain a copy of the warranty for this product, see the warranty information website: http://www.hpe.com/support/Storage-Warranties Revision History Revision 1 December 2015 First edition with the HPE StoreOnce 3100, 3520 and 3540, and 5100 System product launch. Revision 2 March 2016 Second edition updated for the StoreOnce 5500 System product launch.
-
Page 3: Table Of Contents
Login to the StoreOnce System and check status................21 StoreOnce CLI............................21 5 Configuring licenses..................23 Capacity expansion, StoreOnce 5500....................23 Pre-installed Capacity licenses.....................23 Capacity expansion, StoreOnce 3100 System, StoreOnce 3500 Series and StoreOnce 5100 System..............................23 Security...............................24 Target devices and stores........................24 StoreOnce Optional Hardware......................24 Checking for installed licenses......................24... - Page 4 Initiator (VTL only)........................52 16 Hardware overview reference section.............53 StoreOnce 5500 System........................53 StoreOnce 5500 System front and rear views, server..............53 Front and rear views of the disk enclosure..................54 StoreOnce 3100 System........................55 StoreOnce 3500 Series........................56 Storage expansion.........................56 Optional hardware.........................56 Front and rear views ........................56 StoreOnce 5100 System........................57...
- Page 5 17 Optional PCIe cards..................60 PCIe slot allocation at delivery......................60 Port numbering on PCI cards......................61 Viewing hardware options........................62 Licensing hardware options......................62 18 More about network configuration..............63 Understanding hardware configuration options..................63 Connecting to a 1 GbE network....................63 Connecting to a 10 GbE network....................63 Key definitions............................64 Network bonding modes........................65 VLAN guidelines..........................66...
-
Page 6: Preparing For Basic Configuration
1 Preparing for Basic Configuration This guide assumes that the user has followed the instructions on the printed Start Here poster to install the StoreOnce System in the Data Center and establish an initial 1 GbE network connection for the StoreOnce Management Console. IMPORTANT: All tasks described in this guide require an admin user logon. -
Page 7: Storeonce Systems
Four PCIe slots are available for 10 GbE Network and FC PCIe cards. Optional PCIe cards (page 60). StoreOnce 3100 System Table 3 StoreOnce 3100 System Storage capacity 8 TB (4 x 2 TB disks) Storage Expansion Options None StoreOnce Optional Hardware... -
Page 8: Storeonce 5100 System
StoreOnce 5100 System Table 6 StoreOnce 5100 System Storage capacity 48 TB (12 x 4 TB disks) Maximum capacity = 288 TB Storage Expansion Options Up to five 48 TB Capacity Upgrade Kits may be connected to base unit, each requires a separate license StoreOnce Optional Hardware Four PCIe slots are available for 10 GbE Network and FC PCIe cards. - Page 9 StoreOnce System CLI Reference Guide (for software version 3.14.0 and later): This is the full reference guide for the StoreOnce Command Line Interface (CLI). StoreOnce System Linux and UNIX Configuration Guide: This guide explains how to configure StoreOnce Systems with supported Linux and UNIX operating systems. OST plug-in documents: Various guides are available describing how to configure backup applications for use with StoreOnce Catalyst.
-
Page 10: Sas Cabling For Storeonce 5500 Systems
2 SAS cabling for StoreOnce 5500 Systems This chapter describes how to connect multiple disk enclosures to the StoreOnce 5500 System, which has two RAID controller cards. It is included at the front of this guide for users who have ordered a multi-enclosure configuration at installation because they need to understand how to cable the disk enclosures to the correct RAID controller card. -
Page 11: Expansion Guidelines
Figure 1 Cabling between head server, PCIe slot 2, and bundled enclosure IOM A IOM A IOM B IOM B From Drawer 2, I/O module A, port 1 Drawer 1, I/O module A, port 2 Drawer 2, I/O module B, port 1 Drawer 1, I/O module B, port 2 RAID card in PCI slot 2, port 1 Drawer 1, I/O module A, port 1... -
Page 12: Sas Cable Lengths
Make the connection from the P2 of the RAID controller to the newly added enclosure. IMPORTANT: Do not disturb the SAS cabling between P1 of the RAID controller card and the existing enclosure. Connect the IOM B modules in the two enclosures. SAS cable lengths The StoreOnce implementation uses Managed Cables, making it easier to identify faults. -
Page 13: Expansion Installation Scenarios
Expansion installation scenarios Two enclosures either side of the head server. The following diagram illustrates the cabling for all four enclosures where two enclosures are above and two enclosures are below the head server. This configuration provides equal weight distribution in the rack. Refer to the StoreOnce 5500 System Capacity Upgrade Guide for detailed step-by-step cabling instructions. - Page 14 configuration provides easier access to the head server when cabling multiple enclosures. There is a 1U support shelf underneath the lowest disk enclosure. NOTE: If you choose not to follow one of the recommended configurations, your system may experience errors with the StoreOnce SAS check function that checks SAS cable integrity. Figure 3 Cabling showing two enclosures installed below the head server IOM A IOM A...
- Page 15 Figure 4 Cabling showing four enclosures installed below the head server IOM A IOM A IOM B IOM B IOM A IOM A IOM B IOM B IOM A IOM A IOM B IOM B IOM A IOM A IOM B IOM B NOTE: Enclosure #1 and Enclosure #3 are in Storage Cluster 1, connected to the RAID...
-
Page 16: Powering Up And Setting Up Ilo4
3 Powering up and setting up iLO4 If the StoreOnce system has not yet been powered on, as described in the appropriate Start Here poster, or if you need to configure iLO 4 from a direct connection, perform the following steps. -
Page 17: Powering Up Storeonce 3100, 3500 And 5100 Systems
Powering up StoreOnce 3100, 3500 and 5100 Systems Perform a final check to ensure all cables are connected correctly and securely: Power cable(s) Keyboard and monitor cables Network cable to LAN port 1 Network cable to iLO port Optional hardware, StoreOnce 3500 Series and StoreOnce 5100 System... -
Page 18: Ilo Functionality
Figure 6 Powering up HPE StoreOnce 3500 Series and 5100 System System health LED Power LED and on/off button NIC status LED UID LED iLO functionality StoreOnce Systems are built on ProLiant server hardware and use the embedded Integrated Lights-Out 4 (iLO 4) management technology. iLO enables secure remote monitoring and console access via a web browser. - Page 19 Select the iLO 4 Configuration Utility. Select Network Options. Configure your network settings and press F10 to save. To configure iLO4, all systems...
-
Page 20: To Set Up A Basic Network Configuration
Then exit. The system will continue to boot normally into the StoreOnce OS. To set up a basic network configuration If you have not already done so, run the basic network script net set address as described in the Start Here poster for your product, to configure a static address for LAN port 1 (eth0). Make a note of the IP address details, which you will need to log into the StoreOnce System from a web browser. -
Page 21: Logging In To The Storeonce System And Checking Status
4 Logging in to the StoreOnce System and checking status The examples in this guide illustrate how to use the StoreOnce GUI to carry out configuration tasks. However, all tasks may also be performed from the StoreOnce CLI, as described in the StoreOnce System CLI Reference Guide. - Page 22 StoreOnce CLI commands require an SSH client application (freely available from the internet) and must be run from a SSH terminal session on a machine that is on the same network as the StoreOnce appliance: ssh <username>@<ip_address> NOTE: StoreOnce CLI commands can also be run from a local console (Keyboard and Monitor) attached to the appliance, for example, if the network is not yet configured.
-
Page 23: Configuring Licenses
Capacity expansion, StoreOnce 3100 System, StoreOnce 3500 Series and StoreOnce 5100 System The StoreOnce 3100 System has 4 x 2 TB disks and does not support capacity expansion. The StoreOnce 3500 Series is supplied with 12 disks; two models are available, StoreOnce 3540 System (12 x 4 TB disks) and StoreOnce 3520 System( 12 x 2 TB disks). -
Page 24: Security
PCIe cards (page 60) for more details. NOTE: The StoreOnce 3100 does not support optional PCIe cards. Checking for installed licenses In the Navigator pane, click on License Management. This page details of any licenses that have been already installed. The following example shows an HPE StoreOnce 3540 System which has been licensed for 100% storage capacity. -
Page 25: Applying A Demo License
StoreOnce GUI. The following example shows details from an StoreOnce 5100 System with four Capacity Upgrade Kits that have been installed and licensed prior to delivery. Go to the HP Passport website. Log in using your HP Passport user ID and password. Applying a demo license... -
Page 26: To Apply A Full License
Obtain the unique LTU key as instructed on the License Entitlement Certificate. You may use Cut and Paste to copy it to a temporary file or save it to a .DAT file. If you save the LTU as a file, sftp it into the StoreOnce System’s licenses directory. NOTE: See the StoreOnce System User Guide for more information about applying licenses from a file. -
Page 27: Setting Time Zone And Configuring Ntp Server
6 Setting time zone and configuring NTP server Using the StoreOnce GUI to set the time zone There is no default time zone set for your StoreOnce appliance. In the Navigator, select Time and Date. In Time zone setting, select your desired region from the Select Region drop down. The list will contain a list of continents to choose from. - Page 28 In the confirmation dialog box, click OK. If the NTP time is behind the currently configured time on the appliance, you will see a warning dialog box that reminds you to reboot the system using the system reboot command, and that system time will move backward as a result of that command. Setting time zone and configuring NTP server...
-
Page 29: Creating User Accounts And Changing Default Passwords
7 Creating user accounts and changing default passwords Introduction Two roles define the permissions associated with a user; they are called admin and user. Two default user accounts, one for each role, are created automatically when the system is installed Admin account: This account has permissions associated with an administrator who is responsible for configuring and managing the StoreOnce System. -
Page 30: To Change Passwords For Local Users
To change passwords for local users Log on as an Administrator and select User Management from the Device Configuration menu. Select the user whose password you wish to change and click Modify. For a local user, you can modify the user role or the user password, or both. Change the role of the user, if required. -
Page 31: Setting Up Email Alerts
8 Setting up email alerts The Email Setup page displays the current configuration for sending out event notifications—which may be Warnings, Alerts or Information—via email. The Email Setup page includes information needed to route the email (SMTP server), as well as the association of event types with destination email addresses. -
Page 32: Email Events Notification
Email Events notification Select Events from the Email menu option in the Navigator. The Events notified by email page lists the event types that may be notified by email and the addresses to which the email notifications are sent. There are three types of events that generate email notifications, listed under the Severity column once they have been setup in Manage Email Notifications. -
Page 33: Setting Up Snmp (Simple Network Management Protocol)
9 Setting up SNMP (Simple Network Management Protocol) There are a number of configuration tasks: If this is the first StoreOnce System to be added to the network, download the MIBs, Management Information Bases and register the MIBs with the Network Management application. -
Page 34: Storeonce Gui
Define the host to which the SNMP agent sends traps. Use the following StoreOnce CLI command (note that snmp v1 and v2 use different parameters to SNMP v3). snmp add trapsink Add SNMP users and set any authentication required. Use the following StoreOnce CLI command: snmp add user Send a test event to IRS and other trap recipients to test that SNMP is set up correctly and... - Page 35 In the Modify SNMP Agent window, modify the configuration of the SNMP Agent as desired, and click OK. Table 10 SNMP Agent configuration parameters Name Description System description This is the description for the StoreOnce system configured for the agent. SNMP version This is the SNMP version of the agent (version 1, 2, or 3).
- Page 36 Engine ID This optional device-specific parameter can be provided to an SNMP version 3 trap listener device such as HP SIM (or any third party tool) to listen to version 3 traps coming from the device.
-
Page 37: Generating The Ssl Certificate
10 Generating the SSL certificate SSL certificates The StoreOnce Management GUI is accessed via the HTTPS protocol which requires the exchange of an SSL (Secure Sockets Layer) certificate to authenticate the connection between web browser and the StoreOnce appliance. The StoreOnce appliance by default will return a generic SSL certificate which is created when the system is manufactured. -
Page 38: Expanding Storage Capacity, If Supported
11 Expanding storage capacity, if supported NOTE: The StoreOnce 3100 System does not support additional storage. StoreOnce 3500 Series The StoreOnce 3500 Series does not support the addition of storage expansion enclosures. It is supplied with 12 disks installed. The StoreOnce 3540 model is supplied with twelve 4–TB disks installed;... -
Page 39: Storeonce 5100 System And Storeonce 5500 System
If storage has been pre-configured, the following prompt is displayed. Click OK. The storage expansion configuration will be shown. See the online help for information about the fields on this page. NOTE: If the additional storage has not been pre-configured, there will be details in the Unconfigured Storage section. -
Page 40: Checking For The Latest Software
HPE Support team that the system is undergoing some form of maintenance, such as network reconfiguration, that does not require a case to be raised with HP Support. On the StoreOnce GUI select Eventsin the Navigator and go to the Settings tab. Or use the StoreOnce CLI command system enable remoteeventsuppression "reason", as described in the... - Page 41 Look for components that have a Recommended Action of either Upgrade or Downgrade. After you have run Scan or Scan All, components will automatically be selected for upgrade or downgrade. NOTE: When the firmware updates are initiated, the backup devices will be taken offline. Before performing this step, check that there are no outstanding backup jobs pending.
-
Page 42: Configuring Remote Support Via Stats
13 Configuring Remote Support via STaTS Remote Support via STaTS monitors your system and allows the system to proactively contact Hewlett Packard Enterprise if issues arise on the system. General procedure for setting up Remote Support via STaTS on the StoreOnce Management GUI Remote Support via STaTS is a standard feature that is enabled and available to all users. -
Page 43: More About Warranty Details
More about warranty details StoreOnce 3100 and 3500 Systems: These systems have a single entry. The warranty serial number covers both the server and the embedded disks. StoreOnce 5100 Systems: These systems have a separate entry for the server, where the warranty serial number covers both the server and the embedded disks. -
Page 44: Complete Network Configuration
For example: You may wish to use a bonded Port Set for the StoreOnce Management Console. StoreOnce 3100 System: You may wish to configure the remaining 1 GbE ports for dedicated backup and/or replication and StoreOnce Catalyst Copy. - Page 45 good practice to put the configuration name into the description field because the description is copied to the current configuration, when the configuration is activated. Click on the Create button. At this point a new configuration will be opened for you to edit. NOTE: If there is an existing configuration that you wish to use as a template, select it from the Copy Existing drop-down list.
- Page 46 Table 11 Network Configuration IP protocol and DNS fields (continued) Field name Description Protocol: IPv4 or IPv6 The radio button selected defines the Internet Protocol for the DNS servers. DNS Address 1/2/3 Up to three IPv4 and/or IPv6 DNS addresses may be defined.
- Page 47 Table 12 Network Configuration Port Set fields Field name Description Port Set Name The name of the Port Set Ports The ports that have been defined for use by the Port Set and their speed. All hardware products have four 1Gbit ports. 10Gbit ports may be available for some hardware products.
- Page 48 At this point you may choose to define the Subnets for the Port Set or to create additional Port Sets by clicking on Add in the Port set section. For the purposes of this example, we shall continue to Subnet configuration. TIP: It is good practice to Save the network configuration at regular intervals.
- Page 49 Repeat until all the Subnets for the selected Port Set have been defined. Each physical Port Set may be configured with one Subnet that uses the IPv4 protocol and one Subnet that uses the IPv6 protocol. If the Port Set is VLAN enabled, it is possible to add a total of 128 VLAN Subnets. These total values apply across the whole network configuration, not per Port Set.
-
Page 50: Additional Configuration Tasks
15 Additional configuration tasks Once you have completed configuration tasks for the StoreOnce System, be sure to save the configuration. Depending upon your backup environment. it may also be necessary to configure the media servers that are backing up to the StoreOnce System. Saving the configuration and keystore (page 50) Running a system confidence check (page 51) Configuring media servers to use StoreOnce Catalyst (page 51) -
Page 51: Running A System Confidence Check
[RESULT] PASSED ### SAS CONFIGURATION REPORT ################################################## Sas Configuration Check is supported only on HP StoreOnce multinode, 5500 and 4900 backup products. ### NOTE ###################################################################### For any warning or error messages in this report, please consult the troubleshooting section in the customer user guide and follow the steps to perform corrective action. -
Page 52: Driver Installation On Client Server (Optional, Vtl Only)
To create Virtual Tape Devices on the StoreOnce System, two drivers are required on the client server: HP LTO Tape driver: allows your system to recognize the Ultrium tape devices created by the StoreOnce System. Tape drivers can be installed from the HPE website for driver updates at http:// www.hpe.com/support/hpesc. -
Page 53: Hardware Overview Reference Section
16 Hardware overview reference section This chapter describes the front and rear views of each StoreOnce System. StoreOnce 5500 System The base StoreOnce 5500 System is a 2U server with 5U disk enclosure and 1U support shelf. Refer to SAS cabling for StoreOnce 5500 Systems (page 10) for examples of SAS cabling configurations. -
Page 54: Front And Rear Views Of The Disk Enclosure
Front and rear views of the disk enclosure For more information about LEDs see the StoreOnce 5500 System Maintenance and Service Guide. Figure 9 Front view of StoreOnce 5500 System disk enclosure Hard drive LEDs UID button/LED Internal health LED GSI LED Figure 10 Rear view of StoreOnce 5500 System disk enclosure 1, 7, 17, 22... -
Page 55: Storeonce 3100 System
StoreOnce 3100 System The StoreOnce 3100 System comprises a 1U 4–disk server, that provides four 1 GbE ports for connecting to an Ethernet network. It does not support 10 GbE Network or Fibre Channel connection. Figure 11 StoreOnce 3100 System front view Pull out label with serial number USB 3.0 port... -
Page 56: Storeonce 3500 Series
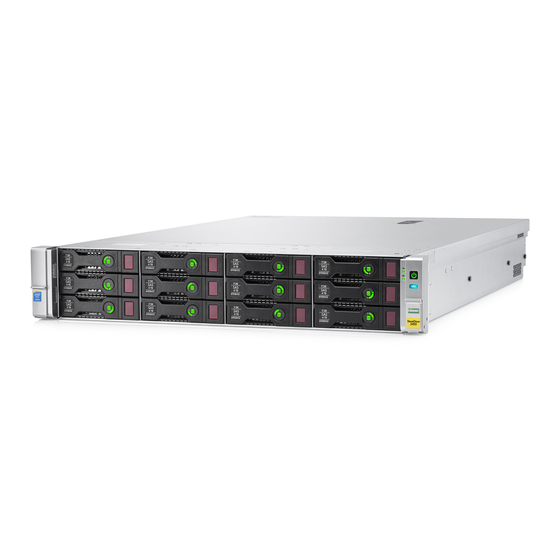
StoreOnce 3500 Series Storage expansion The StoreOnce 3500 Series does not support the addition of storage expansion enclosures. It is supplied with 12 disks installed. The StoreOnce 3540 model is supplied with twelve 4–TB disks installed. The StoreOnce 3520 model is supplied with twelve 2–TB disks installed. The base configuration for both models uses 50% of the available capacity (24 TB or 12 TB). -
Page 57: Storeonce 5100 System
Figure 14 StoreOnce 3500 Series rear view Slot 1, available for Optional Hardware Slot 2, SAS expander card Slot 3, RAID controller card Slot 4, available for Optional Hardware Slot 5, available for Optional Hardware Slot 6, available for Optional Hardware Optional serial port Power supply 1 (PS1) Power supply 2 (PS2) -
Page 58: Front And Rear Views
Front and rear views Figure 15 StoreOnce 5100 System front view NIC status LED Health LED Power on/standby button and system power LED UID button LED Figure 16 StoreOnce 5100 System rear view Slot 1, available for Optional Hardware Slot 2, SAS expander card Slot 3, RAID controller card Slot 4, available for Optional Hardware Slot 5, available for Optional Hardware... - Page 59 Figure 17 Cabling showing five Capacity Upgrade Kits below the head server JBOD1 JBOD2 JBOD3 JBOD4 JBOD5 SAS connector on RAID controller on head unit P1 connector on I/O module (SAS IN from head P2 connector on I/O module (SAS OUT to next unit or previous expansion shelf) expansion shelf) StoreOnce 5100 System with Capacity Expansion...
-
Page 60: Optional Pcie Cards
SFP+ transceivers are required with the FC cards and the 10 GbE SFP cards. No additional hardware is required for the 10 GbE Base-T cards. NOTE: The StoreOnce 3100 System does not support the addition of PCIe cards. Optional PCIe cards... -
Page 61: Port Numbering On Pci Cards
Figure 18 Rear view of StoreOnce 5100 System, highlighting additional PCIe slots Slot 1, populated with 10 GbE card Slot 4, populated with 10 GbE card Slot 5, populated with FC card Slot 6, populated with FC card Port numbering on PCI cards Figure 19 10 GbE cards Port 2 on 10 GbE cards Port 1 on 10 GbE cards... -
Page 62: Viewing Hardware Options
Viewing hardware options To view the hardware options that are currently installed, go to Device Configuration and select Optional Hardware. Locate the Fibre Channel Controller Licenses and the Network Controller Licenses sections. In the following example four FC cards have been installed, licensed and validated. NOTE: If adding optional hardware after installation, refer to the StoreOnce Optional Hardware Installation and Configuration Guide. -
Page 63: More About Network Configuration
Connection requires installation of additional PCIe cards, known as StoreOnce Optional Hardware. NOTE: The StoreOnce 3100 System does not support connection to 10 GbE networks. The StoreOnce 3500 Series, StoreOnce 5100 System and StoreOnce 5500 System support connection to 10 GbE networks. -
Page 64: Key Definitions
IMPORTANT: If you purchase the card(s) after installation, be sure to read the StoreOnce Optional Hardware Installation and Configuration Guide for instructions on installing and licensing them. Key definitions StoreOnce Systems support both IPv4 and IPv6 address protocols. IPv4 is available for backup to all target devices, for replication and StoreOnce Catalyst Copy between StoreOnce Systems, and for the StoreOnce Management Console. -
Page 65: Network Bonding Modes
and Replication between StoreOnce Systems. This is where the IP protocol and IP address details are defined for the subnet and the VLAN tag, if appropriate. ◦ If the Port Set is not VLAN enabled, it may be configured with one Data Subnet that uses the IPv4 protocol and one Data Subnet that uses the IPv6 protocol. -
Page 66: Vlan Guidelines
VLAN guidelines There is a fixed number of available physical NIC ports on the StoreOnce System, defined by the number of 1 GbE ports plus 10 GbE ports, therefore there is a limit on the number of physical Subnets to which the StoreOnce System can be directly connected. If your network requires more Subnets than this—for example, twenty—the network administrator can define 20 VLANs, each with its own Subnet and, typically, use a 10 GbE bonded link to the StoreOnce System as a trunk. -
Page 67: Configure Fibre Channel
StoreOnce Systems support data backup to StoreOnce Catalyst and VTL devices via Fibre Channel. NOTE: The Fibre Channel hardware option is not supported on the StoreOnce 3100 System. Fibre Channel hardware requirements If you intend to connect the StoreOnce System to a SAN, you must purchase and install one or more FC cards in the PCIe slots. -
Page 68: Configuring Fibre Channel
NOTE: Overlapping zones are supported. NOTE: The HP Brocade SAN Switches support NPIV natively but the Cisco SAN Switches require that it be turned on for each port used. Configuring Fibre Channel This section provides an overview only; see the StoreOnce System User Guide for detailed instructions with screenshot examples. -
Page 69: For Use With Vtl Libraries
NOTE: Once the client has Fibre Channel zoned with the StoreOnce appliance, there are a number of considerations for each operating system. See the HPE StoreOnce 3100, 3520, 3540 and 5100 User Guide for more details. For use with VTL libraries There are three StoreOnce GUI screens that relate to FC with VTL. -
Page 70: Support And Other Resources
Support Materials page: www.hpe.com/support/AccessToSupportMaterials IMPORTANT: Access to some updates might require product entitlement when accessed through the Hewlett Packard Enterprise Support Center. You must have an HP Passport set up with relevant entitlements. Related information The following documents provide related information:... -
Page 71: Websites
StoreOnce Optional Hardware Installation and Configuration Guide StoreOnce 5500 System Maintenance and Service Guide StoreOnce 550 System Capacity Upgrade Guide StoreOnce 3100, 3500 and 5100 System Maintenance and Service Guide StoreOnce 5100 System Capacity Upgrade Guide You can find these documents on: www.hpe.com/info/storeonce/docs... -
Page 72: A Warranty And Regulatory Information
A Warranty and regulatory information For important safety, environmental, and regulatory information, see Safety and Compliance Information for Server, Storage, Power, Networking, and Rack Products, available at www.hpe.com/support/Safety-Compliance-EnterpriseProducts. Warranty information HPE ProLiant and x86 Servers and Options www.hpe.com/support/ProLiantServers-Warranties HPE Enterprise Servers www.hpe.com/support/EnterpriseServers-Warranties HPE Storage Products www.hpe.com/support/Storage-Warranties... -
Page 73: Turkey Rohs Material Content Declaration
Local representative information Kazakh: Russia: Belarus: Kazakhstan: Manufacturing date: The manufacturing date is defined by the serial number. CCSYWWZZZZ (serial number format for this product) Valid date formats include: YWW, where Y indicates the year counting from within each new decade, with 2000 as the starting point;...