
Related Manuals for Westinghouse QR0492


Summary of Contents for Westinghouse QR0492
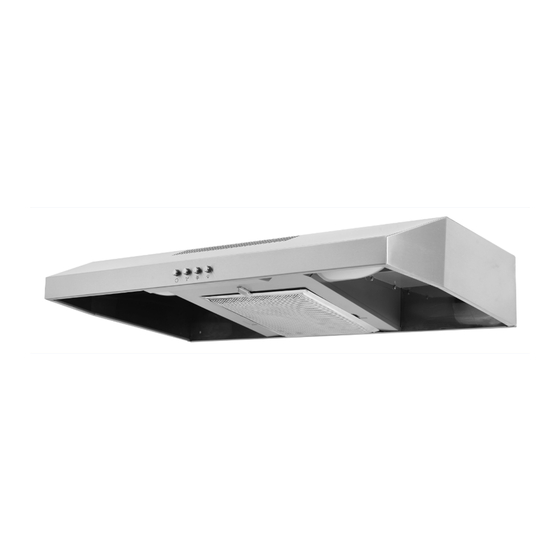
- Page 1 UNDER CABINET RANGE HOOD CAMPAÑA EXTRACTORA PARA INSTALACIÓN BAJO CABINETE OWNER’S MANUAL MANUAL DEL USARIO # QR0492...
-
Page 2: Table Of Contents
Keep this appliance clean and free of grease and residue build-up at all times to prevent fires. CAUTION: This device is for general ventilating use only . Do not use to exhaust hazardous or explosive materials and vapors . QR0492... - Page 3 Safety Information (continued) COOKING SAFETY INFORMATION WARNING: To reduce the risk of fire, use only metal duct work . Never use plastic duct work . 1 . Never leave the range hood unattended when in use . 2 . Never cook over open flames under the range hood. WARNING: To reduce the risk of fire or electric shock, do 1 .
-
Page 4: Warranty
Before you make your call, please ensure that you have: - Model number or description . - Proof of sale . - Details regarding the defect and/or part number . - Name(s) and address(es) of the owner and/or installer . QR0492... -
Page 5: Pre-Installation
Pre-Installation TOOLS/MATERIALS REQUIRED (NOT SUPPLIED) Measuring tape Level Utility knife Adjustable Pencil Tape wrench Flathead Needle nose Phillips screwdriver screwdriver pliers Hammer Electric drill Safety goggles Safety gloves CONGLOMKB .COM Please contact cs@conglomkb.com or 1-877-333-0098 for further assistance . -
Page 6: Package Contents
Quantity Range hood Aluminum & charcoal filter Square damper (located on the hood) Round damper (located on the hood) HARDWARE INCLUDED NOTE: Parts not shown to actual size. Part Description Quantity Long tapping screws (ST4x18mm) Short tapping screws (ST4x10-F-Hmm) QR0492... -
Page 7: Planning Installation
Pre-Installation (continued) PLANNING INSTALLATION Number of people required: 2 or more WARNING: Always wear safety goggles and gloves during Carefully check the range hood for damage and for missing parts installation . prior to installation . If there is any damage or if you are missing parts, do not proceed with the installation . - Page 8 90° Elbow 1 .52 m (5 ft) 90° Flat elbow 3 .66 m (12 ft) 2 .74 m (9 ft) Straight duct 2 .74 m (9 ft) Wall cap 0 m (0 ft) Fig . 9 Fig . 8 QR0492...
- Page 9 Pre-Installation (continued) WIRING CONNECTION REQUIREMENTS DANGER: Risk of electrical shock . This range hood must Installation work and electrical wiring must be done by a qualified be properly grounded . person(s) in accordance with all applicable codes and standards, including fire-rated construction. DANGER: Turn off the power circuit breaker or the power switch on the junction box before installing this...
-
Page 10: Installation
- Lift the lid (8) of the damper and screw the damper (C) to the range hood (A) with the two short tapping screws (BB) . - Seal the damper to the range hood (A) on all four sides with duct tape . QR0492... - Page 11 Installation (continued) INSTALLING THE CHARCOAL FILTER (SKIP THIS STEP IF YOU ARE USING EXTERIOR VENTING) NOTE: The charcoal filter should only be installed if you are not using an external venting system. - Turn the filter clip to either side and lift the aluminum filter. - Place the charcoal filter (B) in place, ensure that it covers the air outlet entirely.
- Page 12 Seal the joints with duct tape to ensure an airtight fit. FINAL STEP - Reconnect the power supply cable and wires to the electrical supply . Turn the power on and ensure that the lights and fan are operating correctly . QR0492...
-
Page 13: Operation
Operation NOTE: The fan and lights operate independently of each other. TURNING ON/OFF THE UNIT TURNING ON/OFF THE LIGHTS - To turn on the fan, press the appropriate speed control - Press the light switch (1) to turn on and off the lights . switch [Low Speed (3), High Speed (2)] to select the desired level of power . -
Page 14: Maintenance
- Push in the new bulb (2) and turn it clockwise . Do not release the bulb until you are sure the bulb has been securely installed . Then reconnect the power . - If new bulbs do not operate, ensure that they are inserted correctly . QR0492... -
Page 15: Care And Cleaning
Care and Cleaning RANGE HOOD WARNING: Failure to maintain basic standards of care and cleaning of the range hood will increase the risk of fire. The range hood should be cleaned (regularly internally and externally) to preserve its appearance and performance . Do Not: - Always clean in the direction of the grain (original - Do not use corrosive or abrasive detergents, steel... -
Page 16: Troubleshooting
- Check the light bulb to see if it is loose . If so, tighten . - Remove the problem bulb and insert one you know is working . If the properly functioning light does not come on, the problem may be the light assembly . Have the light assembly serviced or replaced . QR0492... -
Page 17: Specifications
757 mm (29 .8 in) W Top venting High 120V~60Hz 220 ± 2 x 40W Incandescent Back venting QR0492 Push Button 450 mm (17 .7 in) H 1 .2A E26 base light bulb Recirculating/ Inside venting 127 mm (5 in) H... -
Page 18: External Range Hood Diagram
(0 .47 in) (0 .78 in) 88 mm 250 mm (9 .84 in) 88 mm 21 mm (3 .46 in) (3 .46 in) (0 .82 in) 170 mm (6 .7 in) 127 mm (5 in) 450mm (17 .7 in) QR0492... -
Page 19: Service Parts
Service Parts If you are missing parts or if you require replacement parts, please contact our customer service team at cs@conglomkb.com or 1-877-333-0098 (8:30 am – 5 pm, EST, Monday–Friday). Identify the required part(s) and have the part number(s) ready. Part Description Code Quantity... -
Page 20: Índice
. PRECAUCIÓN: El único uso de este dispositivo debe ser de ventilación . No lo utilice para descargar materiales y vapores 6 . Los ventiladores con conductos siempre deben tener salida al peligrosos o explosivos . exterior . QR0492... - Page 21 Información de seguridad (continuación) INFORMACIÓN DE SEGURIDAD AL COCINAR ADVERTENCIA: Para reducir el riesgo de incendio, utilice 1 . Nunca deje la campana de extracción sin supervisión cuando esté sólo tubos metálicos . Nunca utilice tubos de plástico . funcionando . 2 .
-
Page 22: Garantía
Antes de llamar para presentar una reclamación, asegúrese de tener a la mano: - El número o la descripción del modelo . - El comprobante de compra . - Los detalles del defecto y o el número de pieza . - Nombre(s) y domicilio(s) del propietario y el instalador . QR0492... -
Page 23: Preinstalación
Preinstalación HERRAMIENTAS / MATERIALES NECESARIOS (NO INCLUIDOS) Cinta métrica Nivel Navaja Marcador o lápiz Cinta adhesiva Llave inglesa Destornillador de Destornillador Pinzas de punta estrella (Phillips) plano Taladro eléctrico Gafas de Martillo o destornillador seguridad eléctrico Guantes de seguridad CONGLOMKB .COM Por favor, contacte: cs@conglomkb.com o llamé... -
Page 24: Contenido Del Paquete
CONTENIDO DEL PAQUETE Pieza Descripción Cantidad Campana Filtro de carbón y aluminio Regulador cuadrado Regulador redondo ACCESORIOS INCLUIDOS NOTA: Las piezas no se muestran en su tamaño real Pieza Descripción Cantidad Tornillo autorroscante largo (ST4x18mm) Tornillo autorroscante corto (ST4x10-F-Hmm) QR0492... -
Page 25: Planificación De La Instalación
Preinstalación (continuación) PLANIFICACIÓN DE LA INSTALACIÓN Número de personas necesarias: 2 o más ADVERTENCIA: Siempre use gafas y guantes de Verifique cuidadosamente que la campana de extracción no tenga daños y seguridad durante la instalación . que falten partes antes de la instalación . Si hay algún daño o faltan partes, no prosiga con la instalación . - Page 26 1 .52 m (5 pies) Codo plano de 90° 3 .66 m (12 pies) Tubo recto de 2 .74 m (9 pies) 2 .74 m (9 pies) Tapa de pared 0 m (0 pies) Fig . 9 Fig . 8 QR0492...
- Page 27 Preinstalación (continuación) REQUISITOS DE CONEXIÓN DE LOS CABLES PELIGRO: Riesgo de descarga eléctrica . Esta campana El trabajo de instalación y el cableado eléctrico deberán realizarlos personas extractora debe estar correctamente conectada . calificadas de acuerdo con todos los códigos y normas aplicables, lo cual incluye una instalación contra incendios .
-
Page 28: Instalación
- Levante la tapadera (8) del regulador y atornille el regulador (C) en la campana extractora (A) con los dos tornillos autorroscantes cortos (BB) . - Selle el regulador (C) y la campana de extracción (A) en los cuatro lados con cinta para tubos . QR0492... - Page 29 Instalación (continuación) INSTALACIÓN DEL FILTRO DE CARBÓN (OMITA ESTE PASO SI ESTÁ UTILIZANDO VENTILACIÓN EXTERIOR) NOTA: El filtro de carbón activado sólo debe instalarse si no se utiliza ningún sistema de ventilación. - Gire el clip del filtro hacia cualquier lado y levante el filtro de aluminio. - Coloque el filtro de carbón (B) en su lugar y asegúrese de que cubra toda la salida de aire.
- Page 30 . PASO FINAL - Vuelva a conectar el cable de alimentación y el resto de cables al suministro eléctrico . Encienda la alimentación y asegúrese de que todas las luces y el ventilador funcionen correctamente . QR0492...
-
Page 31: Funcionamiento
Funcionamiento NOTA: El ventilador y las luces funcionan de forma independiente. ENCENDIDO Y APAGADO DE LA UNIDAD ENCENDIDO Y APAGADO DE LAS LUCES - Encienda el ventilador, presione el control de velocidad - Presione el interruptor de la iluminación (1) para encender apropiado [Velocidad baja (3), velocidad alta (2)] para y apagar las luces . -
Page 32: Mantenimiento
. No suelte la bombilla hasta que esté seguro de que está firmemente instalada . A continuación, vuelva a conectar la alimentación eléctrica . - Si las nuevas bombillas no funcionan, asegúrese de que esté insertadas correctamente . QR0492... -
Page 33: Cuidado Y Limpieza
Cuidado y limpieza CAMPANA EXTRACTORA ADVERTENCIA: Si no se mantienen los estándares de cuidado y de limpieza básicos de la campana extractora, aumenta el riesgo de incendio . El interior y el exterior de la campana extractora deben limpiarse regularmente para conservar su apariencia y desempeño . Qué... -
Page 34: Solución De Problemas
- Retire la bombilla que tiene el problema y sustitúyala con una que funcione . Si la bombilla que funciona correctamente no se enciende, el problema puede ser de la lámpara . Pida que reparen o sustituyan la lámpara . QR0492... -
Page 35: Especificaciones
757 mm (29 .8 pulg) de ancho 2 x 40w bombilla Ventilación superior Alta 120V~60Hz incandescente, 220 ± Ventilación posterior QR0492 Botones 450 mm (17 .7 pulg) de profundidad Recirculación/ 1 .2A con base de tipo Baja Ventilación interior 127 mm (5 pulg) de alto... -
Page 36: Diagrama Exterior De La Campana Extractora
(0 .47 pulg) (0 .78 pulg) 88 mm 250 mm (9 .84 pulg) 88 mm 21 mm (3 .46 pulg) (3 .46 pulg) (0 .82 pulg) 170 mm (6 .7 pulg) 127 mm (5 pulg) 450mm (17 .7 pulg) QR0492... -
Page 37: Refaccións
Refacciones Si le faltan piezas o requiere refacciones, escríbale a nuestro equipo de servicio al cliente a cs@conglomkb.com o llame al 1-877-333-0098 (de lunes a viernes, de 8:30 a. m. a 5:00 p. m. EST). Identifique la(s) pieza(s) requerida(s) y tenga lista su descripción. Pieza Descripción Código Cantidad... - Page 38 Made in China / Hecho en China and WESTINGHOUSE are trademarks of Westinghouse Electric Corporation. Used under license by Conglom Inc. All Rights Reserved. y WESTINGHOUSE son marcas comerciales registradas de Westinghouse Electric Corporation y son usadas bajo licencia por Conglom Inc, todos los derechos reservados.