Table of Contents
Advertisement
Quick Links
Download this manual
See also:
User Manual
Advertisement
Chapters
Table of Contents

Related Manuals for LG G PAD 8.0 LG-V480


Summary of Contents for LG G PAD 8.0 LG-V480
- Page 1 日 本 語 ENGLISH 取扱説明書 User Guide LG-V480 www.lg.com MFL68624830 (1.0)
- Page 3 日本語 取扱説明書 • 画面表示およびイラス トが、 実際にタブレッ ト に表示される内容と異なることがあります。 • 本書に記載されている内容の一部は、 ソフ ト ウェアおよびサービスプロバイダによって、 お使いのタブレッ トに該当しない場合があり ます。 また、 本書のすべての情報は、 通知な しで変更されることがあります。 • このタブレッ トはタッチスクリーンキーボー ド が搭載されているため、 目の不自由な方のご 使用には適していません。 • Copyright ©2014 LG Electronics, Inc. All rights reserved. LGおよびLG ロゴは、 LG Groupとその関連会社の登録 商標です。 その他の商標は各所有者の所 有物です。 • Google™、 Google Maps™、 Gmail™、 YouTube™、 Hangouts™およびGoogle Play™は、 Google, Inc.の商標です。...
-
Page 4: Table Of Contents
目次 本書について........5 ピンチによるズーム ........ 21 画面の回転 ..........21 本書について ..........5 ホーム画面 ..........21 商標 ............. 6 ホーム画面のカスタマイズ ....23 DivX HD ........... 6 複数アプリの実行と切り替えおよび 重要な注意事項........7 停止 ............23 デュアルウィンドウの使用 ...... 24 タブレッ トの基本説明..... 11 ホーム画面のアプリアイコンの タブレッ トの概要 ........11 カスタマイズ ........... 25 タブレッ... - Page 5 ネッ トワークおよびデバイスへの. 新しい連絡先の追加 ....... 48 接続..........38 お気に入りの連絡先 ....... 48 Wi-Fi ............38 グループの作成 ........49 Wi-Fiネッ トワークへの接続 ....38 Eメール........50 Wi-FiをオンにしてWi-Fiネッ トワーク Eメールアカウン トの管理 ...... 50 に接続するには ........38 アカウン トフォルダーの操作....51 Bluetooth ..........39 Eメールの作成と送信 ......51 Bluetoothをオンにしてタブレッ...
- Page 6 Qメモ+ ............ 65 LG.Backup........ 94 Qリモート ..........67 タブレッ トのデータのバックアップと リス トアについて ........94 時計 ............69 タブレッ トデータのLG Backup ... 95 電卓 ............69 自動バックアップのスケジュール ..95 カレンダー ..........70 タブレッ トデータのリス トア ....96 タスク ............71 ファイルマネージャー ......71 タブレッ...
-
Page 7: 本書について
• タブレッ トを使用する前に、 本書を注意深くお読みください。 本書の内容を理 解されることにより、 本装置を確実に、 正しく安全に使用できます。 • 本書に記載されている画像やスクリーンショ ッ トの中には、 タブレッ ト上での表 示が異なる場合があります。 • 本書の内容は、 最終製品やサービスプロバイダまたは通信事業者によって提 供されるソフ トウェアと異なっている場合があります。 本書の内容は予告なく 変更される場合があります。 本ユーザガイ ドの最新バージョンについては、 LG のWebサイ ト (www.lg.com) をご覧ください。 • 本装置のアプリとその機能は国、 地域、 またはハー ドウェアの仕様によって異な る場合があります。 LGは、 LG以外のプロバイダによって開発されたアプリを 使用したために生じたパフォーマンスの問題に責任を負うことはできません。 • LGは、 レジス トリ設定の編集やオペレーティングシステムのソフ トウェアの変 更から生じる、 パフォーマンスや互換性問題には一切責任を負いません。 ご使... -
Page 8: Divx Hd
商標 • LGおよびLGロゴは、 LG Electronics社の登録商標です。 • その他の商標および著作権は各所有者の所有物です。 DivX.HD DivXビデオについて : DivX は、 Rovi Corporationの子会社であるDivX LLCにより開発されたデジタルビデオ形式です。 本製品は、 DivXビデオの再生 を確認する厳格なテス トに合格した、 DivX 公式認定済デバイスです。 詳細な 情報や、 ファイルをDivXビデオに変換するソフ トウェアツールについては、 divx. comにアクセスしてください。 DivXのビデオオンデマンドについて : 購入されたDivXビデオオンデマンド (VOD) のムービーを再生するためは、 本DivX Certified デバイスを登録 する必要があります。 登録コー ドを取得するには、 機器のセッ トアップメニュー の[DivX VOD]セクションを開きます。 登録方法の詳細については、 vod.divx. comにアクセスしてください。 DivX.Certified は、 プレミアムコンテンツを含む最大HD.720pのDivX ビデオの再生に対応しています。... -
Page 9: 重要な注意事項
重要な注意事項 本書をよく読んでから、 タブレッ トの使用を開始してくださ い。 タブレッ トに問題が発生したときは、 修理に出したり、 サービス担当者に電話した りする前に、 その問題についての説明がこのセクションに記載されていないかど うか確認してください。 1... タ ブレッ トのメモリ タブレッ トのメモリの使用状況を確認して、 不要なアプリをアンインス トールする などして、 利用可能なメモリを増やしてください。 アプリをアンインストールするには > > アプリタブ > 設定 > アプリの順にタップします。 2.すべてのアプリが表示されたら、 アンインス トールするアプリを選択します。 3.アンインストールをタップし、 OKをタップして確定します。 2... オ ープンソースのアプリおよびオペレーティングシステム (OS) をインストールする前に 警告 メーカーが提供する以外のOSをインス トールして使用すると、 タブレッ トに 不具合が生じることがあります。... - Page 10 警告 タブレッ トや個人のデータを保護するため、 アプリをダウンロー ドするのは Playス トアなどの信頼できるソースのみからにしてください。 不適切にイン ス トールされたアプリがあると、 タブレッ トが正常に動作しなかったり、 深刻な エラーが生じたりすることがあります。 これらのアプリと付随のデータや設定 は、 すべてタブレッ トからアンインス トールする必要があります。 3... 画 面ロックの使用 画面ロックを設定してタブレッ トのセキュリティを保護します。 > > ア > 表示 > 画面のロック > 画面のロックを選択の順にタ プリタブ > 設定 ップし、 スワイプ、 フェイスアンロック、 ノックコード、 パターン、 PIN、 パスワード から目的の画面ロックを選択します。 画面ロックの種類を忘れたときの安全対 策として、 バックアップPINを作成できます。 注意 : Googleアカウン トを作成するかGoogleアカウン トにサインインしてから 画面ロックを設定し、...
- Page 11 注意 : ハー ドリセッ トを実行すると、 ユーザーアプリおよびユーザーデータがすべ て削除されます。 メモ : .Googleアカウン トにログインしておらず、 パターンを忘れた場合は、 バ ックアップPINを入力する必要があります。 4... ハ ードリセッ トの実行 (工場出荷状態へのリセッ ト) タブレッ トにアクセスできなくなった場合は、 ハー ドリセッ ト (工場出荷状態へのリ セッ ト) を実行して初期化します。 1.タブレッ トの電源をオフにします。 2.最初に音量を下げるキー を押した状態で、 タブレッ トの右側にある電源/ロ ックキー を、 LGロゴが表示されるまで押し続けます。 3.LGロゴが表示されたら、 キーをすべて離します。...
- Page 12 5.工場出荷状態へのリセッ ト (Factory data rest) 画面が表示されたら、 キー をすべて離します。 6.音量キー のどちらかを押してカーソルをYesまで移動させ、 電源/ロッ クキー を押して続行します。 7.もう一度ボリューム音量キー のどちらかを押してカーソルをYesまで移 動させ、 電源/ロックキー を押して確定します。 8.タブレッ トでハー ドリセッ トが実行されます。 警告 ハー ドリセッ トを実施すると、 ユーザーアプリ、 ユーザーデータ、 およびDRM ライセンスがすべて削除されます。 5... 画 面がフリーズした場合 画面がフリーズする、 またはタブレッ トを操作しようとしても応答しない場合 は、 電源/ロックキー をLGロゴが表示されるまで8秒以上押し続け、 タブレッ トを再起動します。 問題が解決しない場合は、 サービスセンターにお問い合わ せください。...
-
Page 13: タブレッ トの基本説明
タブレッ トの基本説明 タブレッ トの概要 フロントカメラ 電源/ロックキー 音量キー イヤホンジャック 赤外線センサー microSDカードスロッ ト マイク microUSB接続ポート メインカメラ スピーカー. メモ : .このタブレッ トは、 デザインの観点か ら2つのスピーカーが背面に設けられてい ますが、 実際に音が出るのは片方のスピー カーからのみです。 これは製品の仕様であ り、 故障や不良などではありませんので、 ご 注意ください。 メモ : .ビデオ撮影やオーディオクリ ップの録音を行うときは、 マイクをふさい でいないか確認してください。... - Page 14 タブレッ トを使用されている方の写真を撮ったりビデオ を録画したりするために使用します。 ビデオチャ ッ トにも フロントカメラ 使用できます。 光学的性能を損なわないように清潔に 保ってください。 押すと、 画面をロック/ロック解除します。 押し続けると、 タブレッ トのオン/オフ、 再起動、 機内モー ドの有効化/無 電源/ロックキー 効化、 およびサウン ド設定の変更が行えます。 メディアの音量を調整できます。 両方のキーを同時に 音量キー 押したままにするとQメモ+機能が起動されます。 オプションのヘッ ドセッ トを差し込むと、 ハンズフリーで 会話できます。 また、 ヘッ ドフォンを差し込んで音楽を聴 イヤホンジャック くこともできます。 Qリモー トアプリのセンサーとして使用します。 赤外線センサー microSDカード 音楽、...
-
Page 15: タブレッ トの充電
警告 タブレッ トの上に重いものを置いたり座ったりすると、 液晶ディスプレイやタッ チスクリーンの機能を損なう可能性があります。 ヒント : • メニューキー. をタップすると、 開いているアプリで利用可能なオプショ ンを確認できます。 電源/ロックキー をLGロゴが • タブレッ トが操作に対して反応しない場合は、 表示されるまで8秒以上押し、 タブレッ トを再起動します。 タブレッ トの充電 タブレッ トに同梱されているACアダプタは、 タブレッ トの充電に使用します。 タ ブレッ トを初めて使用する前には、 タブレッ トを完全に充電してください。 には、 充電式バッテリが内蔵されています。 安全の メモ : .お使いの タブレッ ト ため、 製品に取り付けられたバッテリは取り外さないでください。 警告 : タブレッ トの充電中に画面の操作に問題がある場合は、 電源が不安定... -
Page 16: タブレッ ト使用時間の最適化
1.ACアダプタとUSBケーブルを接続します。 2.USBケーブル (下図参照) をタブレッ トのmicroUSB接続ポー トに差し込み ます。 3.ACアダプタを電源コンセン トに差します。 メモ : .バッテリを長持ちさせるには、 最初にバッテリを完全に充電する必要が あります。 タブレッ ト使用時間の最適化 充電後のバッテリを長持ちさせるために、 バックグラウン ドで継続的に実行する 必要のない機能をオフにします。 アプリやシステムリソースがどの程度バッテリ 電力を消費するかを監視することもできます。 タブレッ トの使用時間を延長するには • Wi-Fi、 Bluetooth、 GPSなど、 使用していない無線通信をオフにします。 • 画面の明るさを下げ、 画面のタイムアウ トの設定を短く します。... -
Page 17: バッテリーの用途の監視と制御
• Gmail™、 カレンダー、 連絡先、 およびその他のアプリの自動同期をオフにしま す。 • ダウンロー ドしたアプリが原因で、 タブレッ トの使用時間が短くなる場合があ ります。 • ダウンロー ドしたアプリを使用しているときは、 バッテリの充電レベルを確認し ます。 バッテリーの充電レベルを確認するには 1.ホーム画面から、 アプリ > 設定 > タブレッ ト情報 > バッテリーを タップします。 2.バッテリーの状態 (充電または低下) と残量(%)は、 画面の上部のメニューに 表示されます。 バッテリーの用途の監視と制御 1.ホーム画面から、 アプリ > 設定 > タブレッ ト情報 > バッテリー > バッテリー消費状況をタップします。 2.画面には、 バッテリーの使用時間と、 バッテリーを使用しているアプリやサービ スが、 使用量の多い順に表示されます。 microSDカードの挿入 この では、... -
Page 18: Microsdカードの取り外し
2. 接 点を画面側に向け、 microSDカー ドをスロッ トに差し込みます。 注意しな がら、 microSDカー ドスロッ トのカバーを静かにタブレッ トに押し込んでスロ ッ トを閉じます。 microSDカードの取り外し microSDカー ドをタブレッ トから安全に取り外すには、 最初にカー ドをマウン ト 解除する必要があります。 > 設定. > ストレージ > SDカードのマウ 1.ホーム画面から、 アプリ ント解除の順にタップします。 2.microSDカー ド トレイを開き、 カー ドを一度奥に押して手前に出します。... -
Page 19: Microsdカードの初期化
3.慎重にmicroSDカー ドをスロッ トから引き出します。 警告 : microSDカー ドを取り外す際は、 必ず最初にマウン ト解除してくださ い。 マウン ト解除せずに取り外すと、 microSDカー ドやタブレッ トが損傷した り、 microSDカー ドに保存されているデータが損なわれたりする場合があり ます。 microSDカードの初期化 警告 : 初期化すると、 microSDカー ドに保存されているファイルがすべて削 除されます。 1.ホーム画面から、 アプリ > 設定 > ストレージの順にタップします。 2.SDカードのデータを消去をタップします (2回) 。 3.ロック解除パターンを設定した場合は、 パターンを入力して、 SDカードのデ ータを消去をタップします。 カー ドが初期化され、 使用できるようになります。 メモ... -
Page 20: オン/オフ
画面をロックしたときに実行中のプログラムがあると、 画面のロック中もロック モー ドで実行されている可能性があります。 不要な電力消費を避けるために、 ロックモー ドにする前にすべてのプログラムを終了することをお勧めします (例 : Webアクセス、 データ通信) 。 タブレッ トのロックモー ドを解除するには、 電源/ロックキー を押します。 ロッ ク画面が表示されます。 ロック画面をタップして任意の方向にスライ ドすると、 ホーム画面のロックが解除されます。 最後に表示していた画面が開きます。 ノックオン機能を使用した画面のオン/オフ ノックオン機能を使用すると、 画面をダブルタップして、 画面のオンとオフを簡単 に切り替えることができます。 • 画面をオンにするには、 画面中央を素早く2回タ ップします。 • 画面をオフにするには、 ステータスバー、 ホーム画 面の何も表示されていない領域、 またはロック画 面を素早く2回タップします。... -
Page 21: ロック解除
ノックコード機能を使用した画面のロック解除 ノックコー ド機能を使用すると、 画面上のノック (またはタップ) 操作を組み合わ せて独自のロック解除コー ドを作成できます。 • オフ状態の画面の任意の場所で、 設定した一連の操作を行うと、 ホーム画面に 直接アクセスできます。 ノックコード機能を起動するには > 設定 > 表示 > 画面のロック > 画面の 1.ホーム画面から、 アプリ ロックを選択 > ノックコードの順にタップします。 2.ロック解除の操作を選択する方法について説明する一連の画面が表示されま す。 ロック解除操作を忘れたときの安全対策として、 バックアップPINを作成 する必要があります。... -
Page 22: ホーム画面
ホーム画面 タッチスクリーンのヒント タブレッ トを操作する方法について、 いくつかのヒン トをご紹介します。 メモ : . • アイテムを選択するには、 そのアイコンの中央をタップします。 • 強く押す必要はありません。 タッチスクリーンは感度が高いため、 軽く しっ かりタップするだけで感知します。 • 指の先を使って希望のオプションをタップします。 ほかのアイコンなどを同 時にタップしないように注意してください。 タップ 1本指で画面を軽く触れる操作です。 アイテム、 リンク、 ショー トカッ ト、 および画 面上のキーボー ドの文字を選択します。 ロングタップ(長押し) 画面上のアイテムをタップしたまま1秒以上触れ続ける操作です。 たとえば、 連 絡先の使用可能なオプションを開くには、 コンテキス トメニューが開くまで、 連絡 先リス トの連絡先にタップし続けます。 ドラック アイテムをタップしたまま、... -
Page 23: スワイプ
スワイプ 画面を指ですばやく上下左右にはらうようにする操作です。 たとえば、 ページの 切り替えや文字のフリ ック入力、 画面のロック解除などを行います。 スライ ド 画面内で表示しきれないときなど、 画面に軽く触れたまま、 目的の方向へなぞる 操作です。 たとえば、 画面のスクロールやページの切り替えを行います。 また、 音量や明るさの調整時にゲージやバーを操作します。 ピンチによるズーム ブラウザ、 マップ、 またはフォ トの使用中に、 拡大したい位置に人差し指と親指の 2本を置いて広げると、 内容をズームイン(拡大)できます。 逆に指を寄せると、 ズームアウ ト(縮小)できます。 画面の回転 アプリやメニューの多くで、 画面の向きはタブレッ トの持ち方(縦 ・ 横)に合わせて 表示されます。 ホーム画面 指を左右に滑らせる(スライ ド)で、 表示されるパネルが切り替わります。 各パネ ルは、... - Page 24 ステータスバー – 時間、 Wi-Fi信号強度、 バッテリース テータス、 および通知アイコンなど、 タブレッ トのステ ータス情報を表示します。 アプリアイコン – (アプリ、 ウィジェ ッ ト、 フォルダなど の) アイコンをタップすると、 開いて使用できます。 Quickキー – よく使用する機能にワンタップで簡単 にアクセスできます。 デュアルウィンドウキー – タップすると、 デュアルウィ ン ドウモー ドに変更します。 デュアルウィン ドウモー ド では、 画面を2分割して2つの異なるアプリを同時に 使用できます。 最近使用したアプリキー – タップすると、 最近使用し たアプリが表示されます。...
-
Page 25: ホーム画面のカスタマイズ
ホーム画面のカスタマイズ ホーム画面は、 アプリ、 ダウンロー ドしたもの、 ウィジェ ッ ト、 壁紙を追加してカス タマイズできます。 お気に入りアプリやウィジェ ッ トをホーム画面に追加すると、 タブレッ トがさらに便利に使用できます。 ホーム画面にアイテムを追加するには 1.ホーム画面の何もない場所をタップし続けます。 2.アプリまたはウィジェッ トタブをタップします。 3.目的のアイテムを目的の場所に ドラッグしたら、 指を持ち上げます。 アイテムをホーム画面から削除するには 移動するアイコンにタップしたまま に ドラッグし、 指を持ち上げます。 ヒント : .アプリアイコンをアプリ画面からホーム画面に追加するには、 追加す るアプリをタップしたまま、 目的の場所に ドラッグします。 ヒント : .フォルダ内に複数のアプリアイコンを追加できます。 ホーム画面で1 つのアプリアイコンを別のアプリアイコンの上に ドロップすると、 フォルダが 作成されます。... -
Page 26: デュアルウィンドウの使用
デュアルウィンドウの使用 デュアルウィン ドウ機能は、 画面を分割してマルチタスク、 ドラッグアン ド ドロッ プ、 自動リンク、 最近使用したアプリを有効にします。 をタップして画面を分割するか、 をアプリリス トが表示されるまで 長押しします。 2.アプリアイコンをタップするか、 目的の場所まで ドラッグします。 をタップして次のオプションを表示します。 タブを ドラッグしてウィン ドウ サイズを変更することもできます。 2つの画面を切り替えます。 アプリリス トを変更します。 フルスクリーン表示にします。 アプリを終了します。... -
Page 27: カスタマイズ
デュアルウィンドウ機能を無効化するには > アプリ. > 設定. > デュアルウィンドウの順にタップします。 2.デュアルウィン ドウのスイッチをタップし、 オフにします。 ヒント : 同時に2つのブラウザアプリを起動することができます。 ホーム画面のアプリアイコンのカスタマイズ ギャラリーの画像を使用して各アプリアイコンをカスタマイズできます。 1.アプリアイコンを、 現在の位置からアンロックされるまで長押しします。 その 後、 アイコンを画面に ドロップします。 編集アイコン がアプリアイコンの 右上隅に表示されます(下の左側の図を参照)。 2.もう一度アプリアイコンをタップすると選択可能なアイコンの一覧が表示さ れます(下の右側の図を参照)ので、 目的のアイコンのデザインを選択し、 OK をタップします。 または、 新規追加をタップしてアイコンのサイズを調整し、 ギ ャラリーから画像を選択します。... -
Page 28: クイックアクセス
他のホーム画面パネルを表示するには • ホーム画面で指を左または右にスライ ド(またはス ワイプ)ます。 • ホーム画面でピンチインしてミニパネルビュー(右 図参照)を表示した後、 表示するホーム画面パネル をタップします。 クイックアクセス クイックアクセスの項目を表示するには、 画面最下部 のキー領域任意の場所をタップし、 上方向に ドラッグ します。 Google NowおよびQメモ+が使用できま す(右図参照)。 通知 通知を使用すると、 新着メッセージ、 カレンダーイベン ト、 アラームのほか、 ダウン ロー ドなど各種のイベン トを通知します。... -
Page 29: アクセス通知
通知パネルからタブレッ トの現在のステータスと保留通知を参照できます。 通 知する内容があると、 その内容に応じたアイコンが画面最上部に表示されます。 保留通知のアイコンは左に、 Wi-Fiやバッテリの残量などのシステムのアイコン は右に表示されます。 保留通知 システム通知 アクセス通知 ステータスバーを下にスワイプすると、 通知パネルが開いて通知などが表示さ れます(下図を参照)。 通知パネルを閉じるには、 画面下部にあるバーを上にスワ イプします。 クイック設定バー – 左右にスワイプすると、 リス トが スクロールします。 アイコンをタップして機能を有 効/無効にします。 Qスライドアプリ – Qスライ ドアプリをタップする と、 画面に小さなウィン ドウとして開きます。 を タップして、 Qスライ ドアプリの削除、 追加、 並べ替え を行います。 左右にスライ ドさせて画面の明るさと音量を調整 します。... -
Page 30: 通知パネルのクイック設定
通知パネルのクイック設定 Wi-Fiなどの機能の設定を簡単に切り替えるには、 クイック設定を使用します。 ク イック設定は、 通知パネルの上部にあります。 メモ : .クイック設定バーのアイコンにタップし続けると、 該当する機能の設定 メニューが表示されます。 通知パネルのクイック設定のオプションを並べ替えるには 通知パネルを開き、 クイック設定を左にスワイプして をタップします。 項目 を並べ替えるには、 を目的の位置に ドラッグします。 さらにアイコンを追加 するには、 目的の機能にチェ ックを入れます。 通知パネル上のQスライ ドアプリ Qスライ ドアプリは、 クイック設定バーの下の通知パネル上のバーに表示されま す。 これらのアイコンを使用すると、 TVのピクチャーインピクチャーのように、 同じ画面上で素早く便利にマルチタスクを実行できます。 Qスライ ドは、 移動、 サイズ変更、 背景の透明度調整できる小さなアプリウィン ドウを画面上に表示 します。 メモ : .クイック設定バー上のQスライ ドアイコンをタップすると、 Qスライ ドア プリバーを削除できます。... -
Page 31: ステータスバー上の通知アイコン
ステータスバー上の通知アイコン 下の表に表示されているのは、 ごく一般的なアイコンの一部です。 アイコン 説明 機内モー ド Wi-Fiネッ トワーク接続中 有線ヘッ ドセッ ト接続中 Bluetoothオン システム警告 バイブモー ドオン サイレン トモー ドオン バッテリ完全充電 バッテリ充電中 コンテンツ共有オン データダウンロー ド中 データアップロー ド中 アラーム設定中 GPSオン... -
Page 32: 複数ユーザー
データ同期中 新着のGmailメッセージあり 新着のハングアウ トメッセージあり メロディ再生中 USBケーブルでPCに接続中 バッテリーセーブモー ドオン 複数ユーザー タブレッ トオーナーのIDは1つしか作成できませんが、 ユーザーのIDを複数追加 して、 他のユーザーが個別にタブレッ トにログインしてタブレッ トを独自に使用で きるようにすることができます。 各ユーザーは、 それぞれで個別にタブレッ ト設 定を行ったり、 個別のス トレージスペースを使用したり、 個別のアプリ更新権限を 持つことができます。 タブレッ トオーナーの権限 • タブレッ トオーナーのIDでログインしているときのみ、 新しいユーザーIDの追 加や既存のユーザーIDの削除を行うことができます。... - Page 33 複数のユーザーでタブレッ トを共有して使用する場合の制限 • すべてのユーザーは、 1つのバッテリー、 内部メモリ、 データ使用状況を他のす べてのユーザーと共有します。 • あるユーザーが設定した言語設定は、 他のすべてのユーザーに適用されます。 • 各ユーザーは、 独自のコンテンツやデータ (ホーム画面の設定、 音の設定など) を設定および使用できます。 • どのユーザーも、 更新アプリの新しいふるまい(許可)を他のすべてのユーザー の代理として受け入れることができます。 • メッセージやカレンダーでスケジュールされた予定の通知は、 指定のユーザー IDにのみ送信されます。 • あるユーザーがクラウ ドプリン トなどを使用して ドキュメン トの印刷を開始した ら、 その印刷ジョブはユーザーIDが変更されても継続されます。 • データ転送、 ダウンロー ド、 マルチメディア再生、 通信サービスは、 ユーザーID が変更されると停止します。 ただし、 Playス トア経由のデータ転送は、 ユーザ ーIDを変更した場合でも続行できます。 タブレッ トに新しいユーザーを追加するには > 設定.
-
Page 34: Qスライド
ユーザーを切り替えるには 1.電源/ロックキー を押してタブレッ トの画面をロックします。 2.もう一度電源/ロックキー を押し、 タブレッ トの画面を起動します。 3.画面下のカラー表示されたアイコンのいずれかをタップします。 オーナーID または作成した任意のユーザーIDを選択します。 Qスライド Qスライ ド機能を使用すると、 タブレッ トのディスプレイの上にウィン ドウをオー バーレイし、 マルチタスクを簡単に実現できます。 Qスライ ドウィン ドウは、 通知 パネルのQスライドアプリバーから、 またはQスライ ド機能に対応しているアプ リから直接開くことができます。 通知パネルを開き、 Qスライドアプリバ ーから目的のアプリをタップします。 または Qスライ ド対応のアプリを使用中に、 をタップします。 この操作により、 小さ なウィン ドウとして画面に継続的に表示 されます。... - Page 35 Qスライ ドの使用 Qスライ ド機能は、 関連するアプリを前面のウィン ドウで開き、 バックグラウン ドで 他のアプリにアクセスできるようにします。 開いたアプリは、 終了するまで継続 的に表示されます。 Qスライ ドを実行します。 Qスライ ドを終了し、 フルウィン ドウ表示 に戻ります。 Qスライ ドウィン ドウの透明度を調整し ます。 Qスライ ドを終了します。 Qスライ ドウィン ドウのサイズを調整し ます。 メモ : .Qスライ ド機能では同時に2つのウィン ドウをサポー トできます。 Qスラ イ ドがサポー トするアプリは、 動画、 インターネッ ト、 カレンダー、 Eメール、 ファ イルマネージャー、...
-
Page 36: スクリーンショ ッ トのキャプチャ
この機能を使用すると、 デフォル トのインターネッ トブラウザの画面の一部をキ ャプチャすることができます。 1.インターネッ トアプリを開き、 クリーンショ ッ トをキャプチャするページに移動 します。 > キャプチャプラスをタップします。 2.メニューキー 3.ブルーボックスを適切なサイズに調節した後、 保存をタップします。 選択され た領域が、 ギャラリーのCapture.plusフォルダに保存されます。 テキスト (文字) の入力方法 オンスクリーンキーボー ドは、 テキス ト (文字) 入力が必要な画面で自動的に表示 されます。 オンスクリーンキーボー ドを手動で表示する場合は、 テキス ト (文字) を入力するテキス トフィール ドをタップします。 本ガイ ドではLGキーボー ドにつ いて説明します。... -
Page 37: ジェスチャコン トロールを使用した予測変換の入力
タップすると、 メッセ ての文字が大文字にな ージフィール ドに新しい ります。 行が作成されます。 タップすると、 数字 タップすると、 スペ および記号のキーボー ースが挿入されます。 ドに切り替わります。 タップすると、 LGキーボー ド設定にアクセ タップして、 キーボー スします。 長押しすると、 クリ ップ トレイにア ドの言語を選択します。 クセスします。 ジェスチャコン トロールを使用した予測変換の入力 キーボー ドで文字を入力すると、 関連する予測変換が表示されます。 キーボー ドの左側をタップまたは上方向にフリ ックすると、 左側の予測変換が選択されま す。 キーボー ドの右側をタップまたは上方向にフリ ックすると、 右側の予測変換 が選択されます。... -
Page 38: 特殊文字の入力
拡張キー(数字)を表示するには • > キーボードの高さとレイアウト > 拡張キーボードのチェ ックマークを オンにすると、 キーボー ドの一番上の行に数字キーが表示されます。 メモ : .QWERTY、 QWERTZ、 AZERTYキーボー ド以外のカスタマイズはで きません。 この機能は一部の言語に対応していません。 特殊文字の入力 オンスクリーンのキーボー ドを使用すると、 特殊文字 ( 「á」 など) が入力できま す。 たとえば、 目的のキーをタップし続けます ( 「a」 のキーなど) 。 目的の文字が表示 されたら、 その文字の上に指をスライ ドさせてから離して入力します。 メモ : .右上隅のキーのシンボルは、 他の特殊文字も使用できることを示して います。... -
Page 39: Googleアカウントのセッ トアップ
Googleアカウントのセッ トアップ タブレッ トを始めて電源オンしたときに、 ネッ トワークをアクティブにし、 Google アカウン トにサインインし、 特定のGoogleサービスの使用法を設定できます。 Googleアカウントのセッ トアップ方法 • セッ トアップ画面からGoogleアカウン トにサインインします。 または • ホーム画面から、 アプリ > アプリタブ > 設定 > アカウントと同期 > アカウントを追加 > Googleの順にタップします。 すでにGoogleアカウン トを持っている場合は、 既存のアカウントをタップし、 Eメールア ドレスとパスワー ドを入力した後、 をタップします。 アカウン トを持 っていない場合は、 新しいアカウントをタップして、 新しいGoogleアカウン トを 作成するのに必要な情報を入力します。 タブレッ トにGoogleアカウン トをセッ トアップすると、 Web上のGoogleアカウン トと自動的に同期します。... -
Page 40: ネッ トワークおよびデバイスへの接続
ネッ トワークおよびデバイスへの接続 Wi-Fi Wi-Fiを使用すると、 ワイヤレスアクセスポイン ト (AP) の通信範囲内で高速イン ターネッ トアクセスを使用できます。 Wi-Fiネッ トワークへの接続 タブレッ トでWi-Fiを使用するには、 ワイヤレスアクセスポイン トまたは 「ホッ トス ポッ ト」 にアクセスする必要があります。 アクセスポイン トの中にはオープンなも のがあり、 簡単に接続できます。 一方、 隠されているものやセキュリティ機能を 使用するものもあります。 この場合は、 こうしたポイン トに接続できるようタブレ ッ トを構成する必要があります。 バッテリーを長持ちさせるためには、 使用して いないときはWi-Fiをオフにします。 Wi-FiをオンにしてWi-Fiネッ トワークに接続するには 1.ホーム画面から、 アプリ > アプリタブ > 設定... -
Page 41: Bluetooth
Bluetooth Bluetoothを使用してデータを送信できますが、 他の多くの携帯電話やタブレ ッ トのようにBluetoothメニューからではなく、 対応するアプリを実行して送信 します。 メモ : . • LGは、 Bluetoothワイヤレス機能を使用して送受信されるデータの損失、 傍受、 誤使用に関する責任を負いません。 • 適切にセキュリティ保護された信頼できるデバイスとの間でのみデータの 共有や受信を行ってください。 デバイスとの間に障害物があると、 送受信 可能な距離が短くなることがあります。 • 一部のデバイス、 特にBluetooth SIGによってテス トまたは認定されてい ないデバイスは、 お使いのタブレッ トと互換性がない場合があります。 Bluetoothをオンにしてタブレッ トをBluetoothデバイスとペアリ ングするには タブレッ トとBluetoothデバイスを接続するには、 あらかじめペアリングしておく 必要があります。 > アプリタブ > 設定 > Bluetoothの順 1.ホーム画面から、 アプリ にタップします。 2.Bluetoothスイッチ をタップしてオンにします。 3.タブレッ ト名の横のチェ ックボックスをタップして、 他のBluetoothデバイスか... - Page 42 4.使用可能なデバイスが一覧表示されます。 ペアリングするデバイスをタップ します。 メモ : .デバイスのタイプによっては、 パスキーを入力して確認しなければならな い場合や、 デバイスが自動的にペアリングを実行する場合があります。 5.ペアリングが正常に終了すると、 ペアリングしたデバイスとお使いのタブレッ トは接続します。 メモ : .お使いのタブレッ トは、 ハンズフリープロファイルをサポー トしていませ ん。 そのため、 Bluetoothヘッ ドセッ トやBluetooth対応デバイスなど一部 のアクセサリにあるコール機能は、 お使いのタブレッ トでは使用できません。 Bluetooth機能を使用したデータの送信 をタップします。 1.アイテムを開いて または アイテムを長押しすると表示されるメニューの共有を選択します。 または アイテムを開いてメニューキー > 共有の順にタップします。 2.Bluetoothをタップして、 Bluetoothを介して共有します。 メモ : .オプションの選択方法は、 データの種類によって異なることがあります。 3.データを送信するBluetooth対応デバイスを検索して送信します。...
-
Page 43: Smartshare
Bluetooth機能を使用したデータの受信 1.タブレッ トへのファイルの送信方法については、 お使いのBluetoothデバイ スのユーザーガイ ドを参照してください。 2.データを送信するBluetoothデバイスとお使いのタブレッ トをペアリングし て接続しておいてください。 その状態でデバイスからデータの送信操作を行 い、 タブレッ トがデータ受信の承認を求めたら、 承諾をタップします。 SmartShare SmartShare機能は、 ギャラリー、 音楽アプリなどで簡単に使用できます。 さまざまなデバイスでコンテンツを楽しむ タブレッ トのコンテンツは、 さまざまなデバイスと共有できます。 または をタップし、 SmartShareをタップすると、 ギャラリーや音楽アプリでコンテン ツを共有できます。 再生/送信 Play – TVやBluetoothスピーカーなどでコンテンツを再生できます。 Beam – BluetoothおよびSmartShare Beam対応デバイスにコンテンツを 送信できます。 • SmartShare.Beam – Wi-Fi Direct経由でコンテンツ機能を高速転送で きます。 <.Play.> <.Beam.>... -
Page 44: 楽しむ
近くにあるデバイスのコンテンツを楽しむ 近くにあるデバイス (PC、 NAS、 モバイルデバイスなど) のコンテンツを、 ギャラ リーや音楽アプリなどで楽しめます。 タブレッ トの接続 自分のタブレッ トや、 同じWi-Fiネッ トワーク内にあるその他のDLNA対応デバイ スを接続できます。 他のデバイスを検索する 周辺デバイスをタップすると、 DLNA対応デバイスが表示されます。 デバイスに接続すると、 コンテンツを表示できます。 クラウンドのコンテンツを使用する クラウ ド (Dropboxなど) 上のコンテンツを、 ギャラリーや音楽アプリなどで使用 できます。 クラウ ドの使用 メモ : .使用するクラウ ドによって、 サポー トされる機能が異なる場合がありま す。 また、 クラウ ドによってはデータの取得に時間がかかる場合があります。 1.ギャラリーまたは音楽アプリで、 クラウドを選択します。 2.使用するクラウ... -
Page 45: Qペア
Qペア タブレッ トと携帯電話を、 Qペアを介して接続することにより、 着信、 メッセージ、 およびSNSの通知をタブレッ トと携帯電話間で同期できます。 1.最初にタブレッ トでQペア を起動し、 初期設定 > OK > 開始をタップし た後、 携帯電話で同じ手順を実行します。 ヒント : Qペアは携帯電話にはプリインス トールされていない場合がありま す。 その場合は、 Google Playス トアに移動し、 「 QPair」 を検索してインス ト ールしてください。 メモ : . • QPairはAndroid 4.1以降が実行されている携帯電話で機能します。 携帯 電話のモデルによっては、 機能の一部が制限されることがあります。 • QペアはBluetooth機能を使用するので、 Qペアの使用中にBluetooth設 定を変更すると正常に機能しなくなる可能性があります。... - Page 46 2.Bluetooth接続は自動的にオンになります。 Qペア機能 着信通知 – 携帯電話に着信が入ると、 タブレッ トに通知を送信します。 通知には 呼び出し側の番号が表示され、 電話に出たり電話を拒否したりすることができま す。 着信音、 着信音量、 着信時のバイブレーションなどの通話設定を変更したり、 着信時に拒否メッセージを送信したりすることもできます。 メモ : .Bluetooth技術でサポー トされている通話だけを受信できます。 タブ レッ トからはQペア機能を使用して発信することはできません。 メッセージ通知 – 携帯電話がメッセージを受信するとタブレッ トに通知を送信し ます。 メッセージポップアップ、 メッセージプレビュー、 通知音、 通知バイブレーシ ョンなどのメッセージ設定も変更できます。 SNS通知 – 携帯電話がSNSの通知を受信すると、 タブレッ トのステータスバ ーに表示します。 メモ : .この機能を有効にするには、 携帯電話でQペアSNS通知オプションを オンにします (設定 > ユーザー補助 > QペアSNS通知) 。 このオプション を利用すると、...
-
Page 47: UsbケーブルでのPc接続
リを示すステッカーが表示されます。 USBケーブルでのPC接続 タブレッ トをPCに接続して充電したり、 タブレッ トからPC (またはその逆) にデー タを転送したりできます。 USB大容量のス トレージモードを使用した音楽、 写真、 ビデオの転 送 1.USBケーブルを使用してタブレッ トをPCに接続します。 2.PCにLG Android Platform Driverがインス トールされていない場合は、 手動で設定を変更する必要があります。 設定を変更するには、 ステータス バーを下方向にスライ ドさせ、 現在のUSB接続モー ド > メディアデバイス (MTP) をタップします。 3.これで、 PCでメディアデバイスの内容を確認して、 ファイルを転送できます。 メモ : .PC接続設定を変更する場合、 ステータスバーを下方向にスライ ドさ せ、 USB PC接続オプションを選択します。 この設定は、 USBケーブルをタ ブレッ トに接続している場合にのみ表示されます。... -
Page 48: Windows Media Playerとの同期
Windows Media Playerとの同期 Windows Media PlayerがPCにインス トールされていることを確認します。 1.USBケーブルを使用して、 Windows Media Playerがインス トールされて いるPCにタブレッ トを接続します。 2.メディアデバイス (MTP) オプションを選択します。 3.接続されると、 PCにポップアップ ウィン ドウが表示されます。 Windows Media Playerオプションを選択して音楽ファイルを同期します。 4.ポップアップウィン ドウで自分のタブレッ トの名前を編集または入力します (必 要な場合) 。 5.音楽ファイルを選択して同期リス トに ドラッグします。 6.同期を開始します。 • Windows Media Playerと同期するためには、 次の要件を満たす必要があ ります。 項目 要件 Microsoft Windows XP SP2、 Vistaま たはそれ以降 Window Media Playerの Windows Media Player 10以降 バージョン • Windows Media Playerのバージョンが10より古い場合、 10以降のバージ ョンをインス... -
Page 49: Mac Os Xユーザー向けのUsbケーブルを使用したPc接続
Mac OS Xユーザー向けのUSBケーブルを使用したPC接続 Android File Transferプログラムを設定することにより、 タブレッ トからMac OS X PCに、 またはその反対方向に、 メディアコンテンツを転送できます。 1.Macユーザー向けandroid.comのWebサイ ト (http://www.android. com/filetransfer/) からAndroid File Transferプログラムをダウンロー ド してインス トールします。 2.タブレッ トをコンピューターに接続し、 AFT (Android File Transferプログラ ム) アプリケーションをダブルクリ ックして起動します。 3.メディアコンテンツを確認でき、 メディアファイルをタブレッ ト (またはPC) に 対して双方向に ドラッグアン ド ドロップできます。... -
Page 50: 連絡先
連絡先 タブレッ トに連絡先を追加し、 連絡先が同期できるGoogleアカウン トその他の アカウン トと同期します。 連絡先の検索 をタップして連絡先リ 1.ホーム画面から、 アプリ > アプリタブ > 連絡先 ス トを開きます。 2.連絡先を検索ボックスをタップして連絡先の名前を入力します。 画面の左側 の文字をタップして、 その選択した文字で始まる名前にアクセスすることもで きます。 新しい連絡先の追加 をタップします。 1.ホーム画面から、 アプリ > アプリタブ > 連絡先 をタップします。 連絡先をタブレッ トだけに登録する 2.連絡先を新規登録 のか、 アカウン トに登録するのか選択します。 3.新しい連絡先に画像を追加する場合は、 をタップします。 写真を撮影を 選択してカメラで写真を撮影するか、 ギャラリーから選択を選択します。 次 に、 画像を参照して選択します。 4.姓、 そして名をタップして、 名前の情報を入力します。 5.電話番号など、... -
Page 51: グループの作成
連絡先をお気に入りに追加するには 1.ホーム画面から、 アプリ > アプリタブ > 連絡先 > 連絡先タブタップして連 絡先を開きます。 2.お気に入りに登録する連絡先をリス トから選択してタップします。 3.連絡先名の右側にある星 をタップします。 星の色がゴール ドに変わり、 該当の連絡先がお気に入りに追加されます。 お気に入りリストから連絡先を削除するには 1.ホーム画面から、 アプリ > アプリタブ > 連絡先 をタップして連絡先を 開きます。 2.お気に入りタブをタップして、 お気に入りの連絡先を表示します。 3.お気に入りから削除する連絡先をリス トから選択してタップします。 4.連絡先の名前の右にある星をタップします。 星の色がグレーに変わり、 該当 の連絡先がお気に入りから削除されます。 グループの作成 1.ホーム画面から、 アプリ > アプリタブ > 連絡先 をタップして連絡先を 開きます。 をタップします。 2.グループタブをタップしてから 3.作成するグループの名前を入力します。 • 作成したグループに連絡先を追加するには、 メンバーを追加をタップしま す。 • 作成したグループを保存するアカウン トを変更するには、 アカウントフィール ドをタップします。 4.保存をタップして、 作成したグループを保存します。 メモ... -
Page 52: Eメール
Eメール Eメールアプリを使用して、 Yahoo!、 MSN、 AOLなどのサービスから受信し たEメールを読むことができます。 Eメールアプリは、 アカウン トタイプとし て、 POP3、 IMAP、 およびExchangeをサポー トします。 必要なアカウン ト設定は、 サービスプロバイダまたはシステム管理者から入手 できます。 Eメールアカウントの管理 ホーム画面で、 Eメール をタップします。 Eメールアプリを初めて起動する と、 Eメールアカウン トの設定を支援する、 セッ トアップウィザー ドが開きます。 最初のセッ トアップの後、 受信ボックスの内容が表示されます。 複数のアカウン トを追加した場合、 アカウン トを切り替えることができます。 別のEメールアカウントを追加するには • Eメールアプリを開き、 メニューキー. > 設定 > アカウントを追加の順に タップします。... -
Page 53: アカウントフォルダーの操作
Eメールのアカウント設定を変更するには すべてのアカウン トに適用される設定を行うには、 Eメールアプリを起動し、 メニ > 設定 > Eメール設定の順にタップします。 特定のアカウン トに ューキー のみ適用される設定を行うには、 個々のアカウン トをタップします。 Eメールアカウントを削除するには • Eメールアプリを開き、 メニューキー > 設定 > メニューキー > アカ ウントを削除の順にタップし、 削除するアカウン トをタップして削除 > はいを 選択します。 アカウントフォルダーの操作 をタップしてフォルダーを選択します。 Eメールアプリを開き、 メニューキー 各アカウン トには、 受信 トレイ、 送信 トレイ、 送信済み、 および下書きフォルダーが あります。 アカウン トのサービスプロバイダがサポー トしている機能によっては、 その他のフォルダーがある場合もあります。 Eメールの作成と送信 をタップします。 1.Eメールアプリで、... -
Page 54: Eメールの受信
5.送信 をタップすると、 メッセージが送信されます。 機内モー ドで作業している場合のようにネッ トワークと接続していない場合、 送信したメッセージは、 ネッ トワークに再接続されるまで送信 トレイフォルダー に格納されます。 保留中のメッセージがある場合、 送信 トレイがアカウン ト画 面に表示されます。 Eメールの受信 受信 トレイで新しいEメールを受信すると、 音または振動で通知され (音と振動 の設定によります) 、 ステータスバーに通知アイコンが表示されます。... -
Page 55: エンターテインメント
エンターテインメント カメラ カメラアプリを開くには、 ホーム画面のカメラ をタップします。 ビューファインダの画面構成 ク リーンビュー – タップすると、 ビューファインダでのメニューの表示と非表 示が切り替わります。 カ メラの切り替え – 背面のカメラレンズと前面のカメラレンズを切り替えま す。 画面をスワイプしてカメラを切り替えることもできます。 モ ード – 撮影モー ドをオートまたはパノラマモー ドに設定できます。 . 設 定 – このアイコンをタップして、 設定メニューを開きます。 ギ ャラリー – 最後に撮影した写真を表示します。 この操作でギャラリーにア クセスして、 カメラモー ドで保存された写真を表示できます。 . ビ デオモード – タップすると、 ビデオの録画が開始します。 . 撮 影 – 写真を撮影します。 . 終 了 – タップすると、 カメラを終了します。... -
Page 56: 詳細設定の使用
メモ : .写真を撮影する前に、 カメラのレンズが汚れていないか確認してくだ さい。 詳細設定の使用 ビューファインダで をタップすると、 詳細オプションが表示されます。 写真の解像度を選択します。 高い解像度を選択すると、 ファイルサイズ が大きくなり、 メモリに保存できる写真が少なくなります。 音声コマン ドで写真を撮影します。 撮影ボタンを押した後の遅延時間を設定します。 写真にユーザー自身 が入る場合に便利です。 写真の位置調整に便利なグリ ッ ド線を画面に表示します。 ヘルプガイ ドが開き、 機能の操作法を参照できます。 ヒント : .カメラを終了すると、 タイマーなど、 一部の設定がデフォル トに戻りま す。 次の写真を撮影する前に、 これらの設定を確認してください。 写真の撮影 1.カメラアプリを起動します。 2.被写体にレンズを向けます。 をタップして写真を撮影します。 クリーンビューモー ドでは、 画面の任意 の箇所をタップして写真を撮影することもできます。... -
Page 57: ズームインまたはズームアウ トする
ズームインまたはズームアウ トするには 写真撮影やビデオ録画でズームインを行うには、 画面上の任意の場所に指を2 本置いて広げます。 ズームアウ トするには、 指を閉じます。 ジェスチャーショ ッ ト ジェスチャーショ ッ ト機能では、 前面カメラを使用して手のジェスチャーで写真を 撮影することができます。 写真を撮影するには、 前面カメラで検知され画面に表 示されるまで掌を開いて画面に向けます。 次に、 手を閉じて握り拳にすると、 そ のジェスチャーを認識してタイマーが開始されます。 撮影した写真の確認(ギャラリー) 1.撮影ボタンのそばの⑤ギャラリー(注:クリーンビューモー ドでは表示されてい ません)をタップします。 2.ギャラリーをタップし、 OKをタップします。 3.最後に撮影した写真が表示されます。 表示された写真をタップすると、 以下の メニューが表示されます。... - Page 58 写真を編集します。 続けて別の写真を撮影します。 他のデバイスと、 またはSNSなどを介して写真を共有します。 写真を削除します。 その他のオプションにアクセスします。 お気に入りに写真を追加します。 ヒント : ソーシャルネッ トワークのアカウン トを持ち、 タブレッ トにアカウン トが 設定されている場合、 SNSコミュニティで写真を共有できます。 をタップすると、 次のオプションが開きます。 メニューアイコン SmartShare – SmartShare機能を使用して写真を共有します。 画像を設定 – 写真をロック画面の背景、 壁紙または連絡先の写真として使用し ます。 移動 – 写真を他のアルバムに移動します。 コピー – 選択した写真をコピーして他のアルバムに保存します。 クリップボードにコピー – 写真をコピーしてクリ ップボー ドに保管します。 スライドショー – 現在のフォルダ内にある写真を自動的に次々と表示します。 左に回転する/右に回転する – タップすると、 写真が左または右に回転します。 トリミング – 写真の トリミングを実行します。 指を画面上で動かし、 トリミング する領域を選択します。 位置情報を追加 – 写真に位置情報を追加します。...
-
Page 59: 保存された写真の表示
リネーム – 選択した写真の名前を編集します。 印刷 – 写真を印刷できます。 ファイル情報 – 写真の詳細を表示します。 保存された写真の表示 カメラアプリから、 保存した写真にアクセスできます。 ⑤ギャラリー(注:クリーン ビューモー ドでは表示されていません)をタップすると、 保存した写真が表示で きます。 1.写真の表示や編集に使用するアプリを選択します。 ギャラリー またはフ をタップします。 ォ ト 2.OKをタップします。 • 他の写真を表示するには、 左右にスクロールします。 • 写真を拡大または縮小するには、 画面をダブルタップするか、 2本の指を置 き、 次にそれを広げます (縮小するには2本の指を互いに近づけます) 。 ビデオの録画 1.カメラアプリを起動します。 2.ビデオの被写体にレンズを向けます。 3.ビデオモー ドアイコン をタップして録画を開始します。 4.録画の長さを示すタイマーが表示されます。 5.録画を終了するには、 画面で をタップします。 ヒント : • をタップすると、 録画を一時停止します。 •... -
Page 60: 保存したビデオの視聴
保存したビデオの視聴 ビデオの録画後に保存したビデオにアクセスできます。 ⑤ギャラリーをタップす ると、 保存したビデオを視聴できます。 1.ビューファインダで、 撮影ボタンのそばの⑤ギャラリーをタップします。 2.ギャラリーが画面に表示され、 録画した最新のビデオが表示されます。 指を 左に滑らせると、 他のビデオにスクロールできます。 をタップすると、 ビデオが自動的に再生されます。 3.ビデオの再生アイコン メモ : .ビデオは、 ギャラリーやフォ トのアプリで再生できます。 メモ : .画面を強く押しすぎないようにしてください。 タッチスクリーンは十分 感度が高く、 軽く しっかりタップするだけで感知します。 ギャラリー マルチメディアファイルすべてにアクセスしやすいように、 内部メモリに格納でき ます。 このアプリを使用すると、 マルチメディアファイルを写真やビデオのよう に表示できます。 ホーム画面から、 アプリ > アプリタブ > ギャラリー. の順にタップし ます。 画像とビデオファイルをすべてギャラリーで管理し、 共有することができます。... -
Page 61: 画像の表示
メモ : . • タブレッ トにインス トールされているソフ トウェアによっては、 サポー トされ ていないファイル形式があります。 • エンコー ドの種類によっては、 適切に再生されないファイルがある場合があ ります。 • ファイルサイズが使用可能なメモリ量を超えている場合は、 ファイルを開く ときにエラーが発生することがあります。 画像の表示 ギャラリーアプリ を起動すると、 利用可能なフォルダが表示されます。 Eメールなど、 他のアプリが画像を保存するとき、 画像を格納するために Downloadフォルダが自動的に作成されます。 同様に、 スクリーンショ ッ トをキャ プチャすると、 Screenshotsフォルダが自動的に作成されます。 フォルダをタッ プして開きます。 画像は作成日順に表示されます。 フルスクリーンで表示するには、 画像を選択し ます。 次または前の画像を表示するには、 右または左にスクロールします。 ビデオの再生 を開き、... -
Page 62: 画像とビデオの削除
メモ : . • 動画アプリを使用してビデオを再生しているときに画面の明るさを調整す るには、 画面の左側を上下にスライ ドさせます。 音量を調整するには、 画面 の右側を上下にスライ ドさせます。 • 動画アプリを使用してビデオを再生しているときに巻き戻しまたは早送りを 行うには、 画面を左右にスライ ドします。 画像とビデオの削除 次のいずれかを実行します。 • フォルダ内で をタップして削除する写真やビデオを選択し、 削除をタップ してからはいをタップして確定します。 • 表示している写真またはビデオを削除するときは、 をタップしてからはい をタップして確定します。 壁紙として設定 表示している写真を壁紙に設定するときは、 メニューアイコン > 画像を設 定をタップし、 ロック画面の背景、 壁紙または連絡先の写真を選択します。 スライドショー アルバムごとか、 すべての写真を選択して、 写真をスライ ドショーとして表示させ ることができます。 ホーム画面でギャラリー をタップします。 • 表示する写真が含まれているアルバムをタップし、 メニューアイコン > ス... -
Page 63: ビデオ
ビデオ ギャラリーからお気に入りのビデオをすべて再生できます。 ビデオの再生 > アプリタブ > ギャラリー > 動画の順に 1.ホーム画面から、 アプリ タップして、 動画の一覧を表示します。 2.再生するビデオを選択すると、 以下のような動画再生画面になります(アプリ の選択画面が表示される場合は、 動画アプリを選択してください)。 Qスライ ドにアクセスして、 小さなウィン ドウにビデオを表示します。 SmartShare機能を介してビデオを共有します。 その他のオプションにアクセスします。 ビデオの音量を調節します。 タップし続けると、 3秒ずつ巻き戻されていきます。 一度タップする と、 10秒巻き戻されます。 ビデオ再生を一時停止します。... -
Page 64: メディアデバイス (Mtp) モードを使用した音楽の転送
タップし続けると、 3秒ずつ早送りされていきます。 一度タップする と、 10秒早送りされます。 ビデオ画面をロックまたはロック解除します。 ビデオの鑑賞中に音量を変更するには、 タブレッ トの右側にある音量キーを押 します。 ギャラリー > (タイ トルバーの左上) > 動画をタップし、 次にリス ト内のビデ オをタップし続けて、 共有、 削除、 トリム、 リネーム、 およびファイル情報のオプシ ョンにアクセスします。 ヒント : ビデオの再生中に画面の明るさを調整するには、 画面の左側で上ま たは下にスライ ドさせます。 音量を調整するには、 画面の右側で上または下 にスライ ドさせます。 音楽 お使いのタブレッ トには音楽プレーヤが付属しており、 お気に入りの トラックをす べて再生できます。 音楽プレーヤを使用するには、 ホーム画面から、 アプリ. > アプリタブ > 音楽... -
Page 65: 曲の再生
曲の再生 > アプリタブ > 音楽 の順にタップします。 1.ホーム画面から、 アプリ 2.曲タブをタップします。 3.再生する曲を選択します。 SmartShare機能で音楽を共有します。 現在の曲をお気に入りに設定します。 現在の再生プレイリス トを表示します。 その他のオプションにアクセスします。 シャフルモー ドを設定します。 繰り返しモー ドを設定します。... - Page 66 音楽の音量を制御します。 曲の初めに戻ります。 2度タップすると、 前の曲に戻ります。 タップ し続けると、 3秒ずつ巻き戻されます。 再生を一時停止します。 アルバムまたはプレイリス トの次の曲に移ります。 タップし続ける と、 3秒ずつ早送りされます。 オーディオ効果を設定します。 音楽の再生中に音量を変えるには、 タブレッ ト右側の音量キーを押します。 リス ト中の曲をタップし続けると、 次のオプションにアクセスできます。 再生、 プレイリストに追加、 削除、 共有、 詳細情報、 検索 メモ : . • タブレッ トのソフ トウェアによっては、 サポー トされていないファイル形式が あります。 • ファイルサイズが使用可能なメモリ量を超えている場合は、 ファイルを開く ときにエラーが発生することがあります。 • 音楽ファイルの著作権は、 国際条約と各国の著作権法によって保護されて いることがあります。...
-
Page 67: ツール
ツール Qメモ+ Qメモ+機能ではメモを作成し、 スクリーンショ ッ トをキャプチャできます。 Qメモ +を使用して画面をキャプチャし、 描画して、 家族や友人と共有しましょ う。 メモの作成 1.ホーム画面から、 Qメモ+ > の順にタップして新しいメモを作成し ます。 2.タイピングで直接テキス ト (文字) を入力するか、 使用するペンの種類とカラ ーを選択して手書きでテキス トを入力することができます。 3.メモを保存するとき、 または保存したメモを開いて をタップすると、 リマ インダを追加してイベン トのリマインダ通知を設定できます。 4.データネッ トワークが利用可能な場合は天気や位置情報を追加できます。 Qメモ+オプションの使用 画面最上部のQメモ+ツールバーでは、 次のオプションを使用できます。 Qスライ ドでメモを開きます。 前の操作を元に戻したり、 繰り返したりできます。 テキス ト (文字) を編集したり、 カラーや位置を調整できます。 手書きでテキス... - Page 68 その他のオプションにアクセスします。 イベン トのリマインダ通知を設定できます。 メモに天候情報を挿入できます。 GPSを使用して位置情報を追加できます。 Qメモ+でスクリーンショ ッ トをキャプチャするには 1.Qメモ+機能にアクセスするには、 ステータスバーを下にスライ ドして を タップします。 ま たは. 両方の音量キーを同時に1秒間押します。 2.ツールバーから目的のメニューオプションを選択し、 メモを作成します。 をタップするとメモが保存されます。 Qメモ+は、 戻るキー をタップ していつでも終了できます。 メモ : .Qメモ+使用中は、 指先を使用してください。 爪を使わないようにして ください。...
-
Page 69: Qリモート
Qリモート QuickRemoteを使用すると、 タブレッ トが、 自宅のTV、 ブルーレイ(Blu-ray)ま たはDVD用の万能リモコンに変ります。 メモ : .Qリモー トは、 一部のデバイスやエリアで使用できない場合がありま す。 Qリモートを起動および構成するには > アプリタブ > Qリモート の順にタップ 1.ホーム画面から、 アプリ. します。 Qリモー トの初期セッ トアップは、 通知パネルから開始することもできます。 ス テータスバーを下方向にスワイプし、 Qリモートアイコン をタップしてか らリモコンを追加をタップします。 をタップして部屋の種類を選択し、 をタップして機器を追 加します。 3.機器の種類とブラン ドを選択したら、 画面に表示される指示に従って機器を 設定します。... - Page 70 メモ : .Qリモー トの操作は、 従来からご使用の通常の赤外線 (IR) リモコンと同 様です。 Qリモー ト機能を使用する場合は、 タブレッ ト上部の赤外線センサー を覆ってしまわないよう注意してください。 モデル、 製造元、 またはサービス 会社によっては、 この機能がサポー トされない場合があります。 Qリモートの使用 を起動し、 リモコンを構成した部屋を選択します。 1.Qリモート 2.画面左側のQリモー トバー上で、 目的のリモコンの種類/名前をタップして選 択します。 3.表示されたリモコンのボタンをタップします。 メモ : .TVのリモコンを追加するとき、 Qリモー トでは適切なリモコンを構成す るために入力ボタンを使用できます。 入力ボタンを構成するとき、 TVの入力 ソースは変更できます。 TVの入力ソースをリセッ トするには、 Qリモー ト上の 入力ボタンを数回タップします...
- Page 71 時計 アラームの設定 1.ホーム画面から、 アプリ > アプリタブ > 時計. > の順にタップ します。 2.アラームを鳴らす時間を設定します。 3.繰り返し、 スヌーズ間隔、 バイブレート、 アラーム音、 アラーム音量、 アプリ自 動起動、 パズルロックおよびメモを設定します。 4.保存をタップします。 メモ : .アラームリス ト画面でアラーム設定を変更するには、 メニューアイコン をタップして設定を選択します。 電卓 電卓の使用 > アプリタブ > 電卓 の順にタップします。 1.ホーム画面から、 アプリ 2.数字キーをタップして数字を入力します。 3.単純な計算では、 実行する計算式(数字と 、 、 または ) をタップ してから をタップします。 メモ...
-
Page 72: カレンダー
カレンダー タブレッ トに追加してカレンダーに同期するように構成した各アカウン トのイベン トがカレンダーに表示されます。 カレンダーに予定を追加するには > アプリタブ > カレンダー の順にタップ 1.ホーム画面から、 アプリ します。 2.左上隅のメニューをタップすると、 カレンダービュー (日、 週、 月、 年、 予定リス ト) を変更できます。 3.イベン トを追加する日付をタップし、 をタップします。 4.イベント名フィール ドをタップして、 イベン ト名を入力します。 5.場所フィール ドをタップして、 場所を入力します。 日付を確認して、 イベン トの 開始時刻と終了時刻を入力します。 6.イベン トにメモを追加する場合は、 内容フィール ドをタップして、 詳細を記入 します。 7.アラームを繰り返す場合は、... -
Page 73: タスク
カレンダービューを変更するには 表示しているカレンダーアプリの日付にかかわらず、 カレンダービューは簡単に 切り替えることができます。 タイ トルバーの左上隅にある をタップするか画 面上で左から右にスワイプするだけで、 カレンダービューのメニューが表示され ます。 日、 週、 月、 年、 または予定リストをタップします。 タスク タスクアプリは、 MS Exchangeアカウン トと同期させることができます。 タ スクの作成や管理は、 タブレッ トから、 またはMS OutlookやMS Office Outlook Web Accessから行えます。 > タスク の順にタップします。 1.ホーム画面から、 アプリ をタップします。 2.(画面右上隅の) 新規タスク追加アイコン 3.必要に応じて件名、 開始日、 期日、 内容、 繰り返し、 通知を設定します。 4.保存をタップします。 ファイルマネージャー ファイルマネージャアプリを使用して、... -
Page 74: ボイスレコーダー
ファイルマネージャーアプリを開くには • ホーム画面から、 アプリ > アプリタブ > ファイルマネージャー の 順にタップします。 ファイルマネージャーのオプション ファイルマネージャーのアプリを起動し、 全ファイル > 内部ストレージの順に タップして (画面上の) 次のオプションにアクセスします。 Qスライ ドウィン ドウでファイルマネージャーを開くことができます。 ファイルまたは情報を検索できます。 新しいフォルダーを作成できます。 ファイルおよびフォルダーを他の場所に移動できます。 ファイルおよびフォルダーを他の場所にコピーできます。 ファイルおよびフォルダーを削除できます。 その他のオプションにアクセスできます。 ボイスレコーダー 音声のメモやその他のオーディオファイルを録音するには、 ボイスレコーダーを 使用します。... - Page 75 音または音声の録音 • ホーム画面から、 アプリ > アプリタブ > ボイスレコーダー の順に タップします。 タップすると、 録音の保存 場所を選択できます。 タップすると、 録音が開始 されます。 タップすると、 録音リス トが タップすると、 録音が停止 表示されます。 します。 メモ : .録音可能時間は、 実際に録音できる時間と異なる場合があります。 音声メモの管理 ボイスレコーダーリス トの画面 : • 共有アイコン をタップし、 使用可能な選択肢でボイスメモを共有します。 • 削除アイコン をタップし、 削除するボイスメモを選択します。 • リス ト中のボイスメモをタップし続けると、 次のオプションにアクセスできます。 共有、 削除、 リネーム、 トリム、 またはファイル情報を選択します。...
-
Page 76: Google
Google+ Google+アプリを使用すると、 GoogleのSNSを通じて人々とつながり続ける ことができます。 ホーム画面から、 アプリ > アプリタブ > Google > Google+ の順にタップします。 メモ : .地域やサービスプロバイダによっては、 このアプリを利用できない場合 があります。 LG.SmartWorld LG SmartWorldには、 フォン ト、 テーマ、 ゲーム、 各種のアプリなどの楽しいコン テンツが多数用意されています。 タブレッ トからLG SmartWorldにアクセスする方法 > アプリ > アプリタブをタップし、 アイコンをタップして LG SmartWorldにアクセスします。 2.ログインをタップし、 LG SmartWorldのID/パスワー ドを入力します。 まだ サインアップしていない場合は、 登録をタップし、 LG SmartWorldのメンバ ーシップを受け取ります。 3.希望するコンテンツをダウンロー ドします。 • LG SmartWorldは、 通信事業者または国により、 利用できない場合がありま... - Page 77 アイコンがない場合 メモ : . 1.モバイルWebブラウザを使用して、 LG SmartWorld (www.lgworld.com) にアクセスし、 国を選択します。 2.LG SmartWorldアプリをダウンロー ドします。 3.ダウンロー ド済みファイルを実行してインス トールします。 アイコンをタップして、 LG SmartWorldにアクセスします。 LG.SmartWorld以外では利用できない特典 1.LG SmartWorldに用意されているホームテーマ、 キーボー ドテーマ、 およ びフォン トでタブレッ トをカスタマイズすることによって、 自分だけのスタイ ルで飾り付けることができます (ただし、 このサービスは特定のデバイスで のみ利用できます。 利用可能かどうかは、 LG SmartWorldのWebサイ ト にてご確認ください) 。 2.常時ご提供しているプロモーションにご参加いただくと、 LG SmartWorld の特別なサービスをご利用いただけます。...
-
Page 78: Web
ブラウザ このアプリを使用すると、 インターネッ トを閲覧することができます。 ブラウザ を使用すると、 タブレッ トでゲーム、 音楽、 ニュース、 スポーツ、 エンターテインメ ン トなどの世界を、 どこで何を楽しむとしても、 スピーディにフルカラーで楽しむ ことができます。 ホーム画面から、 アプリ > アプリタブ > インターネッ ト の順にタッ プします。 Qスライ ドを実行します。 1ページ戻ります。 現在のページの後に接続したページに1ページ進みます。 これは、 戻 るキーをタップした場合とは逆です。 戻るキー では、 前のページ に戻ります。 現在のページを更新します。 ホームページに移動します。 ブックマークにアクセスします。 その他のオプションにアクセスします。... -
Page 79: ページを開く
ページを開く • 新しいページを開くには、 ブラウザの上部の をタップします。 • 他のWebページに移動するには、 画面最上部のタブをタップしてページを表 示します。 ブックマーク ブックマークしたWebページを開くには、 ブラウザツールバーの上の をタッ プしてページを選択します。 履歴 ブラウザツールバーの をタップして閲覧履歴タブを選択し、 最近訪問した Webページのリス トからWebページを開きます。 履歴を消去するには、 を タップしてすべての履歴を消去します。 Qスライ ドの使用 この機能を使用すると、 現在のアプリを閉じずにインターネッ トにアクセスでき ます。 ブラウザにコンテンツを表示した状態で をタップします。 すると、 タブレッ ト で他の情報を参照できます。 ブラウザをフルスクリーンで表示するには、 を タップします。 ファイルのダウンロード ダウンロー ドアプリを使用すると、 ダウンロー ドされたファイルを確認できます。 ホーム画面から、... -
Page 80: Chrome
Chrome Chromeを使用して情報を検索したりWebページを閲覧したりします。 ホーム画面から、 アプリ > アプリタブ > Chrome の順にタップしま す。 メモ : .地域やサービスプロバイダによっては、 このアプリを利用できない場合 があります。 Webページの表示 (画面上部の) ア ドレスフィール ドをタップし、 Webア ドレスまたは検索条件を入 力してから、 キーボー ドの をタップします。 ページを開く • 新しいページに移動するには、 ブラウザ上部の をタップします。 • 別のWebページに移動するには、 画面上部のタブをタップしてページを選択 します。 音声によるWebの検索 ア ドレスフィール ドをタップして をタップし、 キーワー ドを話してから、 表示さ れたキーワー ド候補の1つを選択します。 メモ... -
Page 81: 他のデバイスとの同期
他のデバイスとの同期 同じGoogleアカウン トでログインしているとき、 他のデバイス上のChromeで 使用するために、 開いているタブとブックマークを同期します。 他のデバイス上で開いているタブを表示するには、 メニューアイコン > 最 近使ったタブの順にタップします。 すべてのデバイスで、 同一のGoogleアカウ ン トにサインインしている必要があります。 Webページを選択します。 ブックマークの追加と参照 ブックマークを追加するには、 URLバーの をタップします。 ブックマークしたWebページを開くには、 メニューアイコン > ブックマーク の順にタップして目的のページを選択します。 Chromeのオプションメニュー をタップすると、 次のオプションにアクセスできます。 メニューアイコン • 新しいタブ – 新しいWebページタブが開きます。 • 新しいシークレッ トタブ – 新しいシークレッ トウィン ドウが開きます。 • ブックマーク – ブックマークしたWebページを表示します。 • 最近使ったタブ – 他のデバイスで開いているWebページを表示します。 • 履歴 – 閲覧データ (これまでにアクセスしたWebページ) を表示します。 • 印刷... – Webページを印刷します。 選択すると、 ネッ トワーク上のプリンタを 自動的に検出するか、... -
Page 82: 設定メニューの利用
設定 設定メニューの利用 > アプリタブ > 設定 の順にタップします。 1.ホーム画面から、 アプリ または ホ ーム画面で最近使用したアプリキー を長押ししてから、 システム設定 をタップします。 2.設定のカテゴリを選択し、 目的のオプションを設定します。 ワイヤレスネッ トワーク Wi-Fi Wi-Fi – 利用可能なWi-Fiネッ トワークに接続するためにWi-Fiをオンにします。 利用可能なWi-Fiネッ トワークのリス トが表示されます。 1つを選んでタップする と、 そのネッ トワークに接続できます。 メモ : .検索をタップし、 利用可能なWi-Fiネッ トワークのスキャンを開始します。 Wi-Fiメニューでメニューアイコン をタップすると、 次のオプションにアクセ スできます。 接続(WPSボタン) – セキュリティ保護されたWi-Fiネッ トワークにWPSボタン で接続できます。 接続(WPS.PIN).– セキュリティ保護されたWi-Fiネッ トワークにWPS PINで 接続できます。... - Page 83 ネッ トワークを追加 – 新しいWi-Fiネッ トワークを手動で入力できます。 Wi-Fi.Direct – アクセスポイン トがなくてもWi-Fiデバイスと直接接続できま す。 Wi-Fiの詳細設定 – 詳細なWi-Fi設定にアクセスします。 インタラクティブチュートリアル – Wi-Fi機能に関する便利なチュー トリアルを 表示します。 ヒント : .MACアドレスの取得方法 MACア ドレスフィルタリングが設定されている一部のワイヤレスネッ トワー クで接続を設定するには、 タブレッ トのMACア ドレスをルータに入力する必 要があります。 MACア ドレスは、 次のユーザーインターフェイスの中にあります。 ホーム画面 から、 アプリ > 設定 > Wi-Fi > メニューアイコン > Wi-Fiの 詳細設定の順にタップします。 Bluetooth Bluetoothを使用するには、 Bluetoothのワイヤレス機能のオン/オフを切り替 えます。 Bluetoothをオンにすると、 他のBluetoothデバイスとペアリングして 接続できます。 Bluetooothメニューのメニューアイコン をタップすると、 次のオプションに アクセスできます。...
- Page 84 アルを表示します。 データ使用 期間を指定してデータの使用量を表示します。 リス ト内のアプリをタップすると アプリのデータ使用量が表示されます。 その他 その他のワイヤレスおよびネッ トワーク設定を設定できます。 機内モード – 機内モー ドを設定できます。 機内モー ドを有効にすると、 ワイヤレ ス接続はすべて無効になります。 Miracast – タブレッ トの画面と音声をMiracastの ドングルやTVにミラーリ ングできます。 SmartShare.Beam – SmartShareビームを介してLGの携帯電話やタブ レッ トからマルチメディアコンテンツを受信できます。 LG.PC.Suite – Wi-Fi接続を許可してコンピュータとタブレッ ト間で音楽と画 像を転送できます。 メディアサーバー – DLNAを通じで近くのデバイスとマルチメディアコンテン ツを共有できます。 VPN – 以前構成したVPN (Virtual Private Networks) のリス トを表示しま す。 別の種類のVPNを追加できます。 メモ : .VPNを使用する前に、 ロック画面のPIN、 パスワー ドまたはパターンを 設定する必要があります。...
-
Page 85: デバイス
デバイス サウン ド サウンドプロフィール – サウンド、 バイブレートのみ、 またはサイレントのいず れかのサウン ドプロファイルを設定します。 ボリューム – 通知音、 タッチフィードバックとシステム、 音楽、 ビデオ、 ゲームと そのほかのメディア用の音量を管理します。 バイブレートの強さ – 通知、 タップ時のバイブレー トの強さを設定します。 通知音 – デフォル トの通知音を設定します。 タッチ操作音 – タップ操作に反応するボタン、 アイコンその他の画面上のアイ テムにタップしたとき音が出るようにタブレッ トを設定できます。 画面ロック時の音 – 画面をロック/ロック解除したとき、 音が出るようにタブレッ トを設定できます。 キー操作バイブレート – タブレッ ト画面にタップしたとき、 バイブレーションでフ ィー ドバックするように設定できます。 表示 ホームスクリーン テーマ – お使いのタブレッ トの画面のテーマを設定します。 壁紙 – ホーム画面で使用する壁紙を設定します。 スクリーン効果... - Page 86 設定のバックアップとリストア – アプリ、 ウィジェ ッ トの構成およびテーマを バックアップし、 復旧することができます。 ヘルプ – ホーム画面に関する情報を表示します。 画面のロック 画面ロックを選択 – タブレッ トのセキュリティを保護するための画面ロックの 種類を設定します。 壁紙 – ロック画面の壁紙を設定します。 ギャラリーまたは壁紙ギャラリーか ら選択します。 ウィジェッ ト – ロック画面でウィジェ ッ トを表示できます。 所有者情報 – タブレッ トを紛失した場合にロック画面に表示する連絡先情報 を入力できます。 ロックタイマー – 画面がタイムアウ トした後、 自動的にロックするまでの時間 を設定します。 電源ボタンですぐにロックする – チェ ックマークを付けると、 電源/ロックキ ーが押されたとき、...
- Page 87 をタップするとオン/ スクリーンセーバー – スクリーンセーバースイッチ オフが切り替わります。 オンにすると、 タブレッ トがクレー ドルに入っているか、 充 電しているか、 またはその両方の状態でスリープしているときに、 設定したスクリ ーンセーバーが表示されます。 時計またはGoogleフォ トから選択します。 メモ : .スクリーンセーバーがオンになっている場合、 充電が遅くなることがあ ります。 フォントタイプ – 表示フォン トの種類を変更します。 フォントサイズ – 表示フォン トのサイズを変更します。 スマートスクリーン – 画面を見ていることをタブレッ トが検知すると、 画面をオ ンのままにします。 ホームタッチボタン – バーに表示されるホームタッチボタンの種類と場所を設 定できます。 色と背景も選択できます。 センサー感度補正 – センサーの傾きおよび速度の精度を向上させます。 ス トレージ 内部ストレージ – タブレッ トのメモリの総容量と、 メモリを消費しているデータ の種類を表示します。 SDカード – microSDカー ドの総メモリ容量を表示します。 SDカードのマウント/マウント解除 – microSDカー ドをタブレッ トにマウン トまたはマウン...
- Page 88 バッテリー バッテリー情報 – タブレッ トの使用によるバッテリー電力の消費量を表示しま す。 バッテリーの残量はパーセン トで表示されます。 使用可能な推定残り時間 も表示されます。 ステータスバーに表示 – バッテリの残量をステータスバーにパーセン トで表示 します。 バッテリーセーブ – 省電力オプションの項目としてバッテリーを管理します。 ス イッチ をタップすると、 この機能が有効になります。 バッテリーセーブを タップすると、 以下のオプションが表示されます。 • バッテリーセーブをONにします : バッテリーセーブをオンにするバッテリ ー残量レベルを設定します。 • 自動同期 : 自動同期をオフにします。 • Wi-Fi : .使用していない場合は、 Wi-Fiをオフにします。 • Bluetooth : .使用していない場合は、 Bluetoothをオフにします。 • タップ時のバイブレート : .タップ時のバイブレーションによるフィー ドバック をオフにします。...
-
Page 89: パーソナル
アプリ 現在実行中やダウンロー ド済みなどのアプリのリス トを表示します。 左右にスワイプすると、 ダウンロード済み、 SDカード、 実行中、 すべてのアプリ の詳細を確認できます。 詳細を表示するにはアプリ名をタップし、 実行を停止するには強制終了 (または 停止)をタップしてからOKをタップします。 デュアルウィン ドウ 分割表示 – フルスクリーンでリンクをクリ ックするかEメールの添付文書 (画像 のみ) をタップしたときに、 タブレッ トが自動的にデュアルウィン ドウを開くように します。 ヘルプ – デュアルウィン ドウ機能の使用に関するヘルプ情報を表示します。 パーソナル アカウン トと同期 アプリが使用中であるかどうかに関係なく、 アプリによるバックグラウン ドでのデ ータ同期を許可します。 データ自動同期を無効化すると、 バッテリ消費を抑え、 データ使用量を削減できます (完全に使用しないようにすることはできません) 。 クラウ ド アカウントを追加をタップしてクラウ... - Page 90 ユーザー このメニューは、 現在作成されているユーザーを表示します。 ユーザーの追加 – タブレッ トに新しいアカウン トを追加し、 マルチユーザー機能 を使用できます。 位置情報 モード • 高精度(GPSとネッ トワーク) – GPSとWi-Fiネッ トワークを使用して位置 を推定します。 • バッテリーセーブ(ネッ トワークのみ) – Wi-Fiネッ トワークを使用して位置 を推定します。 • 本体センサーのみ(GPSのみ) – GPSを使用して現在の位置を正確に割 り出します。 最近の位置情報リクエスト – 最近、 位置情報を要求したアプリを表示します。 カメラ – タブレッ トで写真とビデオに位置情報をタグ付けできるようにします。 ちらつき抑制 – カメラのプレビュー画面のちらつきを防止するように、 周波数 を調整できます。 Google現在地送信機能 – Googleの位置情報設定を表示できます。 セキュリティ タブレッ トを暗号化 – セキュリティ保護のために、 タブレッ トのデータを暗号化 できます。 電源を投入するたびに、 タブレッ トを解読するためにPINまたはパス ワー...
- Page 91 パスワードを表示する – 入力に合わせて非表示パスワー ドの最後の文字を表 示します。 デバイス管理機能 – タブレッ トの管理機能を表示または無効にします。 提供元不明のアプリ – Playス トア以外のアプリからのアプリのインス トールを 許可します。 アプリを確認する – 有害なおそれのあるアプリのインス トールを許可しない か、 または警告します。 通知アクセス – システムおよびインス トールされたアプリによる通知へのアク セスを管理します。 ストレージタイプ – 認証情報のス トレージタイプを表示します。 確認済証明書 – 確認済CA証明書を表示します。 ストレージからインストール – 暗号化された証明書をインス トールすることを 選択します。 証明書の消去 – すべての証明書を削除します。 言語と入力 タブレッ トで表示/入力する言語および入力方法(オンスクリーンキーボー ド)を 選択し、 設定します。 バックアップとリセッ ト データのバックアップ – 設定とアプリのデータをGoogleサーバーにバックアッ プするように設定します。 バックアップアカウント – データのバックアップ先のアカウン トを設定します。 自動リストア – アプリがお使いのタブレッ トに再インス トールされたとき、 設定 とアプリのデータを復元するように設定します。...
-
Page 92: システム
LG.Backupサービス – タブレッ ト上の情報すべてをバックアップし、 データ 消失や部品交換の際に復元します。 詳細については、 94ページを参照してく ださい。 データの初期化 – 設定を工場出荷時のデフォル ト値にリセッ トし、 すべてのデー タを削除します。 この方法でタブレッ トをリセッ トした場合、 最初にAndroidを起 動したときと同じ情報を再入力するように促すプロンプ トが表示されます。 システム ショートカッ トキー ショー トカッ トキーのオンとオフを切り替えられます。 日付と時刻 日付の表示方法を設定します。 また、 これらの設定を使用して、 ネッ トワークか ら現在の時刻を取得する代わりに、 時刻とタイムゾーンを独自に設定すること もできます。 ユーザー補助 ユーザー補助設定を使用して、 タブレッ トにインス トールしたユーザー補助サー ビスを設定します。 メモ : .選択可能にするには、 サービスを追加する必要があります。... - Page 93 フォントサイズ – タブレッ トに表示される文字のサイズ(極小~極大)を選択し ます。 色の反転 – チェ ックマークを付けると、 画面とコンテンツの色を反転します。 色調調整 – 色のコン トラス トをはっきりさせて画面を表示するよう設定します。 スイッチ をタップしてオンにします。 その後、 画面例をタップし、 希望する 色調で表示されるまで任意の方向に ドラッグします。 タッチズーム – 画面を3回タップすることで拡大/縮小できるようになります。 画面表示を最も暗くする – 画面の明るさを最小に設定します。 ユーザー補助のショートカッ ト – この機能を有効にすると、 ユーザー補助機能 を2ステップで素早く起動できるようになります。 音声出力 – 音声出力をするエンジンと音声レー トを設定します。 また、 音声合 成の簡単なデモを再生します。 デフォル ト設定言語も表示されます。 音声形式 – オーディオタイプを設定します。 モノラルまたはステレオを選択し ます。 音声バランス – 左右から出力する音量のバランスを調整します。 スライ ドバー のスライダーを移動して設定します。 サウンドOFFモード – すべての音声をオフにします。 キャプション – 聴覚障害のあるユーザー向けに、 キャプション設定をカスタマ イズできます。 スイッチ をタップすると、...
- Page 94 ームキー 縦横表示の自動回転 – チェ ックマークを付けると、 タブレッ トの向きに応じて画 面が回転します (ポー トレー ト (縦) またはラン ドスケープ (横) ) 。 パスワードの読み上げ – チェ ックマークをオンにすると、 パスワー ドを入力する ときに音声で確認できます。 アクセシビリティ設定ショートカッ ト – ホームキーを トリプルタップすることで、 選択した機能に素早く簡単にアクセスできるようにします。 ワンタッチ入力 – LGキーボー ド使用時には、 TalkBackがオンでもワンタッチ で文字入力できるようにします。 Quick Cover このメニューを起動すると、 Quick Coverを使用したときに自動的に電源がオ ン/オフになります。 印刷 特定の画面 (Chromeで表示されたWebページなど) の内容を、 Androidデバイ スと同じWi-Fiネッ トワークに接続されているプリンタで印刷できます。...
- Page 95 このメニューでは、 ソフ トウェアのアップデー トを管理したり、 タブレッ トに関する さまざまな情報を表示できます。 タブレッ ト名 – お使いのタブレッ ト名を設定します。 更新センター – アプリやソフ トウェアのアップデー トを確認できます。 バッテリー – バッテリーの状態、 バッテリー残量、 バッテリー消費状況を表示し ます。 ハードウェア情報 – モデル番号、 IPア ドレス、 稼働時間、 CSN、 Wi-Fi MACア ド レス、 Bluetoothア ドレスを表示します。 ソフ トウェア情報 – Androidバージョン、 カーネルバージョン、 ビル ド番号、 ソフ ト ウェアバージョンを表示します。 使用条件 – LGソフ トウェアの利用条件、 オープンソースライセンス、 Google利 用規約について法律文書を表示できます。...
-
Page 96: Lg.backup
タブレッ トのデータのバックアップとリストアについて バックアップファイルを定期的に作成して保存することをお勧めします (特にソ フ トウェアアップデー トの前など) 。 最新のバックアップファイルを保存しておけ ば、 タブレッ トの予想外の問題による破損などが発生した場合にタブレッ トのデ ータを復元することができます。 LG Backupアプリは、 LG製のスマー トフォンやタブレッ トであれば、 OSやソフ ト のバージョンが異なっていてもサポー トされています。 その結果、 LG製の新し いスマー トフォンやタブレッ トを購入したときには、 お使いのタブレッ トのデータ を新しいデバイスに移すことができます。 スマー トフォンおよびタブレッ トにプリインス トールされたLG Backupアプリが ある場合、 ダウンロー ドおよびプリインス トールされたアプリ、 ブックマーク、 カレ... -
Page 97: タブレッ トデータのLg Backup
タブレッ トデータのLG.Backup > 設定 > バックアップとリセッ ト > 1.ホーム画面から、 アプリ LG Backupサービス > バックアップの順にタップします。 2.位置選択画面で、 内部ストレージまたはSDカードをタップしてから、 次へを タップします。 3.バックアップする項目のチェ ックボックスを選択し、 次へを選択します。 4.画面に表示された情報を読み、 開始をタップします。 5.選択したファイルがすべてバックアップされると、 バックアップ完了のメッセー ジが表示されます。 自動バックアップのスケジュール スケジュール設定に合わせて、 タブレッ トのデータの自動バックアップを計画す ることもできます。 この操作を行うには、 次の手順を実行します。 > 設定 > バックアップとリセッ ト > 1.ホーム画面から、 アプリ LG Backupサービス > スケジュールバックアップの順にタップします。 2.バックアップ項目をタップし、 バックアップ対象の項目の隣にあるチェ ックボッ クスを選択し、 完了をタップします。 3.バックアップの場所をタップし、 内部ストレージまたはSDカードを選択し、 完... -
Page 98: タブレッ トデータのリストア
表示された情報を読み、 開始をタップして、 タブレッ トにリス トアします。 メモ : .タブレッ トのデータが、 バックアップのコンテンツで上書きされますので 注意してください。 4.バックアップファイルが暗号化されている場合は、 暗号化時に作成したパスワ ー ドを入力します。 5.選択したファイルがすべて復元されると確認の表示になりますので、 表示内容 を確認して完了をタップしてタブレッ トを再起動します。 メモ : .バックアック作成時にバックアップファイルをロックしますオプション を設定すると、 バックアップファイルを暗号化して特別に保護することができ ます。 LG Backupのメイン画面で、 メニューキー > ロックパスワードの設定をタ ップし、 パスワー ドとパスワー ドを忘れた場合のヒン トを入力できます。 パスワー ドを設定して、 バックアップ時にバックアップファイルをロックしますオプション を設定したバックアップファイルをリス トアする際には、 パスワー ドを入力する必 要があります。... -
Page 99: タブレッ トのソフトウェア更新
タブレッ トのソフ トウェア更新 Over-the-Air ( OTA) を介したLGタブレッ トのソフ トウェ ア更新 この機能を利用すると、 USBデータケーブルを接続しないで、 OTA経由でタブ レッ トのファームウェアを最新バージョンに更新できます。 この機能は、 お使い のタブレッ トに対して、 LGが新バージョンのファームウェアを作成した場合に限り 使用可能になります。 最初に、 ご使用のタブレッ トのソフ トウェアバージョンをタ ブレッ ト上でチェ ックすることができます。 ホーム画面から、 アプリ > 設定. > タブレッ ト情報 > ソフ トウェア情 報の順にタップします。 タブレッ トのソフ トウェア更新を実行するには、 ホーム画面から、 アプリ... -
Page 100: 付属品
付属品 ACアダプタ USBケーブル クイックスタート ガイド メモ : .LGの正規付属品を必ずご使用ください。 その他の製品をご使用にな ると、 保証が無効になる場合があります。... -
Page 101: トラブルシューティング
いて説明します。 一部の問題では、 サービスプロバイダへの連絡が必要になり ますが、 ほとんどの場合はご自分で簡単に解決できます。 メッセージ 考えられる原因 対処法 バッテリーが充電され バッテリーを充電します。 ていません。 外部温度が高すぎる 常温の温度で充電している か、 低すぎます。 ことを確認してください。 充電器と接続状態、 および 接続に問題があり 充電器とタブレッ トの接続 ます。 を確認してください。 充電エラー 充電器を別のコンセン トに 電圧がありません。 差します。 充電器に不具合があ 充電器を交換します。 ります。 充電器のタイプが異な LG公認の充電器のみをご ります。 使用ください。 写真を送受信でき メモリがいっぱいで 画像の一部をタブレッ トか ません す。 ら削除してください。... - Page 102 メッセージ 考えられる原因 対処法 サポー トされているファ ファイルが開き サポー トされていない イル形式を確認してくだ ません ファイル形式です。 さい。 サウン ドメニューの設定で バイブレーションモー ドまた バイブレーションモー 音が聞こえません はサイレン トモー ドがオンに ドになっています。 なっていないことを確認し てください。...
-
Page 103: 安全と保証
安全と保証 安全上のご注意 (必ずお守りください) ご使用の前に、 この 「安全上のご注意」 をよくお読みの上、 正しくお使いください。 また、 お読みに • なった後は大切に保管してください。 ここに示した注意事項は、 お使いになる人や、 他の人への危害、 財産への損害を未然に防ぐため • の内容を記載していますので、 必ずお守りください。 次の表示の区分は、 表示内容を守らず、 誤った使用をした場合に生じる危害や損害の程度を説明 • しています。 この表示は、 取り扱いを誤った場合、 「 死亡または重傷を負う危険が切迫して生じるこ とが想定される」 内容です。 この表示は、 取り扱いを誤った場合、 「 死亡または重傷を負う可能性が想定される」 内 容です。 この表示は、 取り扱いを誤った場合、 「 軽傷を負う可能性が想定される場合、 および、 物 的損害の発生が想定される」... - Page 104 電源プラグをコンセン トから抜いていただくことを示す記号です。 本体、 充電用機器の取り扱いについて (共通) 高温になる場所 (火のそば、 暖房器具のそば、 こたつの中、 直射日光の当たる場所、 炎天下 の車内など) で使用、 保管、 放置しないでください。 火災、 やけど、 けがの原因となります。 電子レンジなどの加熱調理機器や高圧容器に入れないでください。 火災、 やけど、 けが、 感電の原因となります。 分解、 改造をしないでください。 火災、 やけど、 けが、 感電の原因となります。 水や飲料水、 ペッ トの尿などで濡らさないでください。 本製品が液体に濡れた場合は、 製 品内部のラベルの色が変わります。 この場合、 保証の対象外となり有償修理となりますの で、 ご注意ください 火災、 やけど、 けが、 感電の原因となります。 本製品に使用するアダプタなどの周辺機器は、...
- Page 105 使用中や充電中に、 布団などで覆ったり、 包んだりしないでください。 火災、 やけどの原因となります。 ガソリンスタン ドなど引火性ガスが発生する場所に立ち入る場合は必ず事前に本製品の電 源を切り、 充電をしている場合は中止してください。 ガスに引火する恐れがあります。 使用中、 充電中、 保管時に、 異臭、 発熱、 変色、 変形など、 いままでと異なるときは、 直ちに 次の作業を行ってください。 電源プラグをコンセン トやシガーライターソケッ トから抜く。 • 本製品の電源を切る。 • 火災、 やけど、 けが、 感電の原因となります。 ぐらついた台の上や傾いた場所など、 不安定な場所には置かないでください。 落下して、 けがの原因となります。 湿気やほこりの多い場所や高温になる場所には、 保管しないでください。 火災、 やけど、 感電の原因となります。 子供が使用する場合は、 保護者が取り扱いの方法を教えてください。 また、 使用中におい ても、...
- Page 106 本体の取り扱いについて 本製品の内蔵電池の種類は次のとおりです。 表示 電池の種類 Li-Polymer リチウムポリマー電池 火の中に投下しないでください。 内蔵電池の発火、 破裂、 発熱、 漏液の原因となります。 釘を刺したり、 ハンマーで叩いたり、 踏みつけたりしないでください。 内蔵電池の発火、 破裂、 発熱、 漏液の原因となります。 内蔵電池内部の液体などが目の中に入ったときは、 こすらず、 すぐにきれいな水で洗った 後、 直ちに医師の診療を受けてください。 失明の原因となります。 航空機内や病院など、 使用を禁止された区域では、 本製品の電源を切ってください。 電子機器や医用電気機器に悪影響を及ぼす原因となります。 医療機関内における使用については各医療機関の指示に従ってください。 航空機内での使用などの禁止行為をした場合、 法令により罰せられます。 ただし、 電波を出さない設定にすることなどで、 機内で本製品が使用できる場合には、 航空 会社の指示に従ってご使用ください。 心臓の弱い方は、 着信バイブレータ (振動) や着信音量の設定に注意してください。 心臓に悪影響を及ぼす原因となります。...
- Page 107 高精度な制御や微弱な信号を取り扱う電子機器の近くでは、 本製品の電源を切ってくだ さい。 電子機器が誤動作するなどの悪影響を及ぼす原因となります。 ※ご注意いただきたい電子機器の例 補聴器、 植込み型心臓ペースメーカーおよび植込み型除細動器、 その他の医用電気機器、 火 災報知器、 自動 ドア、 その他の自動制御機器など。 植込み型心臓ペースメーカーおよび植込 み型除細動器、 その他の医用電気機器をご使用される方は、 当該の各医用電気機器メーカー もしくは販売業者に電波による影響についてご確認ください。 万が一、 ディスプレイ部やカメラのレンズを破損した際には、 割れたガラスや露出した本製 品の内部にご注意ください。 ディスプレイ部やカメラのレンズの表面には、 プラスチックパネルを使用しガラスが飛散りに くい構造となっておりますが、 誤って割れた破損部や露出部に 触れますと、 けがの原因となります。 内蔵電池が漏液したり、 異臭がしたりするときは、 直ちに使用をやめて火気から遠ざけて ください。 漏液した液体に引火し、 発火、 破裂の原因となります。 本製品が破損したまま使用しないでください。 火災、 やけど、 けが、 感電の原因となります。 モーションセンサーのご使用にあたっては、...
- Page 108 誤ってディスプレイを破損し、 液晶が漏れた場合には、 顔や手などの皮膚につけないでく ださい。 失明や皮膚に傷害を起こす原因となります。 液晶が目や口に入った場合には、 すぐにきれいな水で洗い流し、 直ちに医師の診断を受け てください。 また、 皮膚や衣類に付着した場合は、 すぐにアルコールなどで拭き取り、 石鹸で水洗いして ください。 一般のゴミと一緒に捨てないでください。 発火、 環境破壊の原因となります。 お客様の体質や体調によっては、 かゆみ、 かぶれ、 湿疹などが生じることがあります。 異状 が生じた場合は、 直ちに使用をやめ、 医師の診療を受けてください。 本製品で使用している各部品の材質は次の通りです。 使用箇所 使用材質 表面処理 ディスプレイ ガラス AFコーティング フロン トケース PC樹脂 NCVM 外装ケース PC樹脂 + SFコーティング リアケース...
- Page 109 内蔵電池内部の液体などが漏れた場合は、 顔や手などの皮膚につけないでください。 失明や皮膚に傷害を起こす原因となります。 液体などが目や口に入った場合や、 皮膚や衣類に付着した場合は、 すぐにきれいな水で洗い 流してください。 また、 目や口に入った場合は、 洗浄後直ちに医師の診断を受けてください。 充電用機器の取り扱いについて アダプタのコードが傷んだら使用しないでください。 火災、 やけど、 感電の原因となります。 ACアダプタは、 風呂場などの湿気の多い場所では使用しないでください。 火災、 やけど、 感電の原因となります。 雷が鳴り出したら、 アダプタには触れないでください。 感電の原因となります。 コンセン トやシガーライターソケッ トにつないだ状態で充電端子をショートさせないでくだ さい。 また、 充電端子に手や指など、 身体の一部を触れさせないでください。 火災、 やけど、 感電の原因となります。 アダプタのコードの上に重いものをのせないでください。 火災、 やけど、 感電の原因となります。 コンセン...
- Page 110 指定の電源、 電圧で使用してください。 また、 海外で充電する場合は、 海外で使用可能なACアダプタで充電してください。 誤った電圧で使用すると火災、 やけど、 感電の原因となります。 ACアダプタ : AC100V~240V (家庭用交流コンセン トのみに接続すること) 電源プラグについたほこりは、 拭き取ってください。 火災、 やけど、 感電の原因となります。 ACアダプタをコンセン トに差し込むときは、 確実に差し込んでください。 火災、 やけど、 感電の原因となります。 電源プラグをコンセン トやシガーライターソケッ トから抜く場合は、 アダプタのコードを無 理に引っ張らず、 アダプタを持って抜いてください。 火災、 やけど、 感電の原因となります。 長時間使用しない場合は、 電源プラグをコンセン トやシガーライターソケッ トから抜いて ください。 火災、...
- Page 111 医用電気機器近くでの取り扱いについて 本記載の内容は 「医用電気機器への電波の影響を防止するための携帯電話端末等の 使用に関する指針」 (電波環境協議会) に準ずる。 医療機関の屋内では次のことを守って使用してください。 手術室、 集中治療室(ICU)、 冠状動脈疾患監視病室(CCU)には本製品を持ち込まない • でください。 病棟内では、 本製品の電源を切ってください。 • ロビーなどであっても付近に医用電気機器がある場合は、 本製品の電源を切ってくだ • さい。 医療機関が個々に使用禁止、 持ち込み禁止などの場所を定めている場合は、 その医療 • 機関の指示に従ってください。 自動的に電源が入る機能が設定されている場合は、 設定を解除してから、 電源を切って • ください。 身動きが自由に取れない状況など、 15cm以上の離隔距離が確保できないおそれがある 場合、 付近に植込み型心臓ペースメーカーおよび植込み型除細動器を装着している方が いる可能性がありますので、 事前に本製品の 「機内モード」 へ切り替える、 もしくは電源を 切ってください。...
- Page 112 取り扱い上のご注意 共通のお願い 改造された本製品は絶対に使用しないでください。 改造した機器を使用した場合は 電波法に抵触します。 本製品は電波法に基づく特定無線設備の技術基準適合証明などを受けており、 その証として 「技適 マーク が本製品の電子銘板に表示されております。 電子銘板は、 本製品で以下の操作を行うことでご確認いただけます。 [設定] > [タブレッ ト情報] > [規制と安全に関する情報] 本製品のネジを外して内部の改造を行った場合、 技術基準適合証明などが無効となります。 技術基準適合証明などが無効となった状態で使用すると、 電波法に抵触しますので、 絶対に使用され ないようにお願い致します。 本製品は64Kデータ通信には対応しておりません。 雷、 稲妻がひどいときは、 本製品の使用を自制して、 電源コードと充電器をコンセン ト から抜いてください。 落雷により、 深刻な障害や火災が発生する恐れがあります。 運転中は非常に危険ですので、 本製品を操作したり、 電話番号の検索など、 本製品を 使用しないでください。 やむを得ない場合はマイクまたはハンズフリーカーキッ トを 使用したり、...
- Page 113 お手入れは乾いた柔らかい布 (めがね拭きなど) で拭いてください。 乾いた布などで強く擦ると、 ディスプレイに傷がつく場合があります。 • ディスプレイに水滴や汚れなどが付着したまま放置すると、 シミになることがあります。 • アルコール、 シンナー、 ベンジン、 洗剤などで拭くと、 印刷が消えたり、 色があせたりすることがあ • ります。 端子は時々乾いた綿棒などで清掃してください。 端子が汚れていると接触が悪くなり、 電源が切れたり充電不十分の原因となったりしますので、 端子 を乾いた綿棒などで拭いてください。 また、 清掃する際には端子の破損に十分ご注意ください。 エアコンの吹き出し口の近くに置かないでください。 急激な温度の変化により結露し、 内部が腐食し故障の原因となります。 本体などに無理な力がかからないように使用してください。 . 多くのものが詰まった荷物の中に入れたり、 衣類のポケッ トに入れて座ったりするとディスプレイ、 内 部基板などの破損、 故障の原因となります。 また、 外部接続機器を microUSB接続ポー ト端子、 イヤ ホンジャ...
- Page 114 製品の故障修理やアップグレード時、 やむを得ず、 本製品に保存された主な内容が消 去される場合もありますので、 重要な電話番号などはあらかじめメモしておいてくだ さい。 データの損失による被害は、 責任を負いかねますので、 あらかじめご了承くだ さい。 キャラクター/写真/動画などが初期化される場合もあります。 タッチスクリーンの表面を強く押したり、 爪やボールペン、 ピンなど先の尖ったもの で操作したりしないでください。 . タッチスクリーンが破損する原因となります。 極端な高温、 低温は避けてください。 温度は 5℃ ~ 35℃、 湿度は 45% ~ 85% の範囲でご使用ください。 一般の電話機やテレビ ・ ラジオなどをお使いになっている近くで使用すると、 悪影響 を及ぼす原因となりますので、 なるべく離れた場所でご使用ください。 お客様ご自身で本製品に登録された情報内容は、 別にメモを取るなどして保管して くださるようお願いします。 万が一登録された情報内容が消失してしまうことがあっ ても、 当社としては責任を負いかねますのであらかじめご了承ください。 本製品を落としたり、...
- Page 115 磁気カードなどを本製品に近づけないでください。 キャ ッシュカー ド、 クレジッ トカー ド、 テレホンカー ド、 フロッピーディスクなどの磁気データが消えてし まうことがあります。 本製品に磁気を帯びたものを近づけないでください。 . 強い磁気を近づけると誤動作の原因となります。 内蔵電池は消耗品です。 使用状態などによって異なりますが、 十分に充電しても使用時間が極端に短くなったときは内蔵電池 の交換時期です。 内蔵電池の使用時間は、 使用環境や内蔵電池の劣化度により異なります。 充電用機器についてのお願い 充電は、 適正な周囲温度 (5℃.~.35℃) の場所で行ってください。 次のような場所では、 充電しないでください。 湿気、 ほこり、 振動の多い場所 • 一般の電話機やテレビ ・ ラジオなどが近くにある場所 • 充電中、 アダプタが温かくなることがありますが、 異常ではありません。 そのままご 使用ください。 強い衝撃を与えないでください。...
- Page 116 Bluetooth機能を使用する場合のお願い 本製品は、 Bluetooth機能を使用した通信時のセキュリティとして、 Bluetooth標 準規格に準拠したセキュリティ機能に対応しておりますが、 設定内容などによってセ キュリティが十分でない場合があります。 Bluetooth機能を使用した通信を行う際 にはご注意ください。 Bluetooth機能を使用した通信時にデータや情報の漏洩が発生しましても、 責任を 負いかねますので、 あらかじめご了承ください。 周波数帯について 本製品のBluetooth機能/無線LAN機能が使用する周波数帯は、 2.4GH z 帯の周波数を使用しま す。 2.4FH1/ DS4 / OF4 2.4 : 2400MHz帯を使用する無線設備を表します。 FH/DS/OF : 変調方式がFH-SS、 DS-SS、 OFDMであることを示します。 1 : 想定される与干渉距離が10m以下であることを示します。 4 : 想定される与干渉距離が40m以下であることを示します。 : 2400MHz ~ 2483.5MHzの全帯域を使用し、 かつ移動体識別装 置の帯域を回避可能であることを意味します。...
- Page 117 Bluetooth機器使用上の注意事項 本製品の使用周波数帯では、 電子レンジなどの家電製品や産業 ・ 科学 ・ 医療用機器のほか、 工場の製 造ラインなどで使用される免許を要する移動体識別用構内無線局、 免許を要しない特定小電力無線 局、 アマチュア無線局など (以下 「他の無線局」 と略します) が運用されています。 1. 本製品を使用する前に、 近くで 「他の無線局」 が運用されていないことを確認してください。 2. 万が一、 本製品と 「他の無線局」 との間に電波干渉が発生した場合には、 速やかに使用場所を変 えるか、 「電源を切る」 など電波干渉を避けてください。 3. その他、 ご不明な点につきましては、 表紙の 「お問い合わせ先」 までお問い合わせください。 無線LAN (WLAN) についてのお願い 無線LAN(WLAN)は、 電波を利用して情報のやり取りを行うため、 電波の届く範囲であれば自由 にLAN接続できる利点があります。...
- Page 118 2.4GHz.機器使用上の注意事項 WLAN搭載機器の使用周波数帯では、 電子レンジなどの家電製品や産業 ・ 科学 ・ 医療用機器のほか 工場の製造ラインなどで使用されている移動体識別用の構内無線局 (免許を要する無線局) および 特定小電力無線局 (免許を要しない無線局) ならびにアマチュア無線局 (免許を要する無線局) が運 用されています。 1. この機器を使用する前に、 近くで移動体識別用の構内無線局および特定小電力無線局ならびに アマチュア無線局が運用されていないことを確認してください。 2. 万が一、 この機器から移動体識別用の構内無線局に対して有害な電波干渉の事例が発生した場 合には、 速やかに使用周波数を変更するかご利用を中断していただいた上で、 表紙の 「お問い合 わせ先」 までお問い合わせいただき、 混信回避のための処置など (例えば、 パーティションの設置 など) についてご相談ください。 3. その他、 この機器から移動体識別用の特定小電力無線局あるいはアマチュア無線局に対して電 波干渉の事例が発生した場合など何かお困りのことが起きたときは、 表紙の 「お問い合わせ先」 までお問い合わせください。...
-
Page 119: User Guide
ENGLISH User Guide • Screen displays and illustrations may differ from those you see on actual device. • Some of the contents of this guide may not apply to your device, depending on the software and your service provider. All information in this document is subject to change without notice. • This device is not suitable for people who have a visual impairment due to the touch screen keyboard. • Copyright ©2014 LG Electronics, Inc. All rights reserved. LG and the LG logo are registered trademarks of LG Group and its related entities. All other trademarks are the property of their respective owners. • Google™, Google Maps™, Gmail™, YouTube™, Hangouts™ and Google Play™ are trademarks of Google, Inc. - Page 120 Table of contents About this user guide ......5 Rotate the screen ........21 Home screen .........21 About this user guide ......5 Customizing the Home screen ..23 Trademarks ..........6 Opening, switching, and stopping DivX HD ..........6 apps ............23 Important notice .........
- Page 121 Google account setup .......36 Contacts ..........46 Searching for a contact ......46 Connecting to Networks and Adding a new contact ......46 Devices ..........37 Favorite Contacts .........46 Wi-Fi ............. 37 Creating a group ........47 Connecting to Wi-Fi networks .....37 Email ..........48 Turning Wi-Fi on and connecting to a Wi-Fi network ........37 Managing an email account ....48...
- Page 122 Calendar ..........66 Restoring tablet data ......89 Tasks ............67 File Manager ........67 Tablet software update ..... 91 Voice Recorder ........68 LG tablet software update via Google+..........70 Over-the-Air (OTA) .......91 LG SmartWorld ........70 Accessories ........92 The Web ..........72 Troubleshooting .........93 Browser ..........72...
-
Page 123: About This User Guide
About this user guide About this user guide • Before using your device, please carefully read this manual. This will ensure that you use your device safely and correctly. • Some of the images and screenshots provided in this guide may appear differently on your tablet. • Your content may differ from the final product, or from software supplied by service providers or carriers, This content may be subject to change without prior notice. For the latest version of this manual, please visit the LG website at www.lg.com. • Your device's applications and their functions may vary by country, region, or hardware specifications. LG cannot be held liable for any performance issues resulting from the use of applications developed by providers other than LG. • LG cannot be held liable for performance or incompatibility issues resulting from edited registry settings being edited or operating system software being modified. Any attempt to customize your operating system may cause the device or its applications to not work as they should. • Software, audio, wallpaper, images, and other media supplied with your device are licensed for limited use. If you extract and use these materials for commercial or other purposes is, you may be infringing copyright laws. As a user, you are fully are entirely responsible for the illegal use of media. • Additional charges may be applied for data services, such as messaging, uploading and downloading, auto-syncing, or using location services. To avoid additional charges, select a data plan to is suitable for your needs. Contact your service provider to obtain additional details. -
Page 124: Trademarks
Trademarks • LG and the LG logo are registered trademarks of LG Electronics. • All other trademarks and copyrights are the property of their respective owners. DivX HD ABOUT DIVX VIDEO: DivX® is a digital video format created by DivX, LLC, a subsidiary of Rovi Corporation. This is an official DivX Certified® device that has passed rigorous testing to verify that it plays DivX video. Visit divx.com for more information and software tools to convert your files into DivX videos. ABOUT DIVX VIDEO-ON-DEMAND: This DivX Certified® device must be registered in order to play purchased DivX Video-on-Demand (VOD) movies. To obtain your registration code, locate the DivX VOD section in your device setup menu. Go to vod.divx.com for more information on how to complete your registration. DivX Certified® to play DivX® video up to HD 720p, including premium content. DivX®, DivX Certified® and associated logos are trademarks of Rovi Corporation or its subsidiaries and are used under license. -
Page 125: Important Notice
Important notice Please read this before you start using your tablet! Please check to see whether any problems you encountered with your tablet are described in this section before taking the tablet in for service or calling a service representative. 1. Tablet Memory You need to check your tablet memory and delete some data, such as applications, to make more memory available. To uninstall applications: Tap > > Apps tab > Settings > Apps. Once all of the applications appear, select the application you want to uninstall. Tap Uninstall and OK to confirm. 2. Before installing an open source application and operating system (OS) WARNING If you install and use an OS other than the one provided by the manufacturer it may cause your tablet to malfunction. In addition, your... - Page 126 WARNING To protect your tablet and personal data, only download applications from trusted sources, such as Play Store. If there are improperly installed applications on your tablet, the tablet may not work normally or a serious error may occur. You must uninstall those applications and all associated data and settings from the tablet. 3. Using a Screen Lock Set an screen lock to secure your tablet. Tap > > Apps tab > Settings > Display > Lock screen > Select screen lock and select a desired screen lock from Swipe, Face Unlock, Knock Code, Pattern, PIN and Password. You can create a Backup PIN as a safety measure in case you forget your screen lock. Caution: Create or sign into a Google account before setting a screen lock and remember the Backup PIN you created when creating your screen lock. WARNING Precautions to take when using a screen lock. It is very important to remember the screen lock you set. You will not be able to access your tablet if you use an incorrect screen lock 5 times. You have 5 opportunities to enter your unlock pattern, PIN or password. If you have used all 5 opportunities, you can try again after 30 seconds.
- Page 127 < If you have forgotten your PIN or Password > If you forget your PIN or Password, you will need to perform a hard reset. Caution: If you perform a hard reset, all user applications and user data will be deleted. NOTE: If you have not logged into your Google Account and have forgotten your Pattern, you will need to enter your Backup PIN. 4. Using the Hard Reset (Factory Reset) If your tablet does not restore to its original condition, use a Hard Reset (Factory Reset) to initialize it. Turn the tablet off. Press and hold the Volume Down Key first, then press and hold the Power/Lock Key on the right side of the tablet until the LG logo is displayed. Release all of the keys when the LG logo is displayed. Immediately press and hold the Power/Lock Key + Volume Up Key + Volume Down Key at the same time.
- Page 128 Key to continue. Press either of the Volume Keys to move the cursor to Yes once again, then press the Power/Lock Key to confirm. Your device will perform a hard reset. WARNING If you perform a Hard Reset, all user applications, user data and DRM licenses will be deleted. Please remember to backup any important data before performing a Hard Reset. 5. When the screen freezes If the screen freezes or the tablet does not respond when you try to operate it: Press and hold the Power/Lock Key for over 8 seconds until the LG logo is displayed to restart your tablet. If it still does not work, please contact the service center.
-
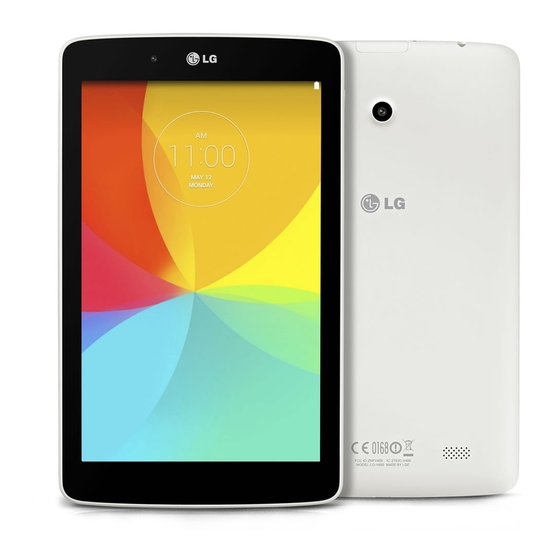
Page 129: Getting To Know Your Device
Getting to know your device Tablet Overview Front-facing camera Power/Lock key Volume keys Earphone jack IR LED microSD card slot Microphone Charger/USB port Rear-facing camera Speakers NOTE: Your tablet is designed to have two speaker openings on the back side for aesthetic reasons. However, the actual sound comes from only one speaker. Please note that it’s not a product defect. NOTE: Make sure that the microphone is not blocked when recording a video or audio clip. - Page 130 Use to take pictures and record videos of yourself. Front-facing You can also use this for video chatting. Keep it camera clean for optimal performance. Press to lock/unlock the screen. Press and hold to Power/Lock key turn the tablet on/off, restart it, activate/deactivate airplane mode, and change the sound settings. Allow you to adjust the media volumes. Press and Volume keys hold both keys at the same time to access the QuickMemo+ feature. Allows you to plug in an optional headset for Earphone jack convenient, hands-free conversations. You can also plug in headphones to listen to music. Infrared (IR) LED Used as a sensor for the QuickRemote app. Insert a microSD Card for storing files such as microSD card slot music, videos and photos. Records your voice and allows use for voice- Microphone activated functions. Allows you to connect the tablet and the USB cable Charger/USB port for use with the charger adapter, your PC, or other compatible accessories. Rear-facing Use to take photos and record videos. Keep it clean camera for optimal performance.
-
Page 131: Charging Your Tablet
WARNING Placing a heavy object on the tablet or sitting on it can damage the LCD and touch screen functions. TIP! • Tap the Menu icon whenever you open an application to check what options are available. • If the device is locked and does not work, press and hold the Power/ Lock Key for over 8 seconds until LG logo is displayed to restart your tablet. Charging your tablet A USB adapter, which is included with your tablet, is used to charge the battery. Before using your tablet for the first time, make sure the battery is fully charged. NOTE: Your device has an internal rechargeable battery. For your safety, do not remove the battery incorporated in the product. Warning! If the touch screen does not function while the tablet’s in the process of charging, this may be due to an unstable power supply. If this occurs, disconnect the USB cable from the device or unplug the USB adapter from the power outlet. -
Page 132: Optimizing Battery Life
Connect the USB adapter and USB cable. Plug the USB cable (as shown below) into the tablet’s Charger/USB port. Plug the charger into an electrical socket. NOTE: The battery must be fully charged initially to improve battery lifetime. Optimizing Battery Life You can extend your battery’s life between charges by turning off features that you don’t need to run constantly in the background. You can also monitor how applications and system resources consume battery power. To extend the life of your battery • Turn off radio communications that you aren’t using, such as Wi-Fi, Bluetooth, or GPS. • Lower screen brightness and set a shorter screen timeout. -
Page 133: To View The Battery Charge Level
• Turn off automatic syncing for Gmail™, Calendar, Contacts, and other applications. • Some applications you have downloaded may cause your battery power to be reduced. • While using downloaded applications, check the battery charged level. To view the battery charge level > About tablet > From the Home screen, tap Apps > Settings Battery. The battery status (charging or discharging) and level are displayed on the top menu of the screen. To monitor and control what uses the battery > About tablet > From the Home screen, tap Apps > Settings Battery > Battery use. The screen displays battery usage time and also lists applications or services using battery power from greatest amount to least. Inserting a microSD card Your device supports the use of microSD memory cards of up to 32 GB capacity. Multimedia contents can be saved in the microSD card. P lace your fingernail in the cutout and gently pull the memory card slot cover to remove it. -
Page 134: Removing The Microsd Card
I nsert the memory card into the slot with the contacts facing towards the screen. Carefully push the memory card slot cover into the tablet to close Removing the microSD card To safely remove the microSD card from your tablet, first you need to unmount it. From the Home screen, tap Apps > Settings > Storage > Unmount SD card. Open the microSD card tray and push the card in to release it. Gently pull the microSD card from the slot. -
Page 135: Formatting The Microsd Card
Warning! Do not remove the microSD card without unmounting it first. Otherwise, it may damage the microSD card as well as your tablet, and the data stored on the microSD card may be corrupted. Formatting the microSD card Warning! All files stored on your microSD card are deleted when you format the card. From the Home screen, tap Apps > Settings > Storage. Tap Erase SD card (twice). If you set an unlock pattern, enter it and tap Erase everything. The card will then be formatted and ready to use. NOTE: If there is content on your microSD card, the folder structure may be different after formatting since all the files will have been deleted. Locking and unlocking the screen If you do not use the tablet for a while, the screen will be automatically turned off and locked. This helps to prevent accidental touches and saves battery power. When you are not using the your tablet, press the Power/Lock Key to lock your tablet. If there are any programs running when you lock your screen, they may be still running in Lock mode. It is recommended that you exit all programs before entering Lock mode to avoid unnecessary charges (e.g. web access, data communications). -
Page 136: Turning The Screen On Using The Knockon Feature
To wake up your tablet, press the Power/Lock Key . The Lock screen will appear. Touch and slide the Lock screen in any direction to unlock your Home screen. The last screen you viewed will open. Turning the screen on using the KnockON feature The KnockON feature allows you to double-tap the screen to easily turn the screen on or off. • Quickly double-tap the center of the screen to turn the screen on. • Quickly double-tap the Status Bar, an empty area on the Home screen, or the Lock screen to turn the screen off. Unlocking your screen using the Knock Code feature The Knock Code feature allows you to create your own unlock code using a combination of knocks (or taps) on the screen. • While the screen is off, tap the same sequence you established anywhere on the screen. The Home screen will be accessed directly. - Page 137 To activate Knock Code feature From the Home screen, tap Apps > Settings > Display > Lock screen > Select screen lock > Knock Code. This opens a screen that will guide you through how to select the unlock sequence. You have to create a backup PIN as a safety measure in case you forget your unlock sequence.
-
Page 138: Your Home Screen
Your Home screen Touch screen tips Here are some tips on how to navigate on your tablet. NOTE: • To select an item, touch the center of the icon. • Do not press too hard; the touch screen is sensitive enough to pick up a light, yet firm touch. • Use the tip of your finger to touch the option you want. Be careful not to touch any other keys. Tap or touch A single finger tap selects items, links, shortcuts and letters on the on-screen keyboard. Touch and hold Touch and hold an item on the screen by touching it and not lifting your finger until an action occurs. For example, to open a contact's available options, touch and hold the contact in the Contacts list until the context menu opens. Drag Touch and hold an item for a moment and then, without lifting your finger, move your finger on the screen until you reach the target position. You can drag items on the Home screen to reposition them. -
Page 139: Swipe Or Slide
Swipe or slide To swipe or slide, quickly move your finger across the surface of the screen, without pausing when you first touch it (so you don’t drag an item instead). For example, you can slide the screen up or down to scroll through a list, or browse through the different Home screen canvases by swiping from left to right (and vice versa). Double-tap Double-tap to zoom on a webpage or a map. For example, quickly double- tap a section of a webpage to adjust that section to fit the width of the screen. You can also double-tap to zoom in and out when viewing a picture and when using Maps. Double-tap a word to highlight it. Double-tap can also activate the KnockON feature to turn the touchscreen on or off. Pinch-to-Zoom Use your index finger and thumb in a pinching or spreading motion to zoom in or out when using the browser, Maps, or when browsing pictures. Rotate the screen From many applications and menus, the orientation of the screen adjusts to the device's physical orientation. Home screen Simply swipe your finger to the left or right to view the panels. You can customize each panel with apps, downloads, widgets and wallpapers. The Quick Keys are available at the bottom part of the Home screen and provide easy, one-touch access to the functions you use the most. - Page 140 Status Bar – Shows device status information, including the time, Wi-Fi signal strength, battery status, and notification icons. Application icons – Tap an icon (application, widget, folder, etc.) to open and use it. Quick Keys – Provide easy, one-touch access to the functions used most often. Dual Window Key – Tap to change to dual window mode. It allows you to manage two different apps at the same time by splitting the screen in two. Recent Apps Key – Tap to display recently used applications. You can also touch and hold it to display the Menu options in applications. Home Key – Returns to the Home screen (or returns to your default Home screen canvas from any of the Home screen extension canvases). Touch and hold it to access Google Now. Back Key – Returns to the previous screen. Also closes pop-up items such as menus, dialog boxes, and the on-screen keyboard. Touch and hold it to access Dual window.
-
Page 141: Customizing The Home Screen
Customizing the Home screen You can customize your Home screen by adding apps, downloads, widgets or wallpapers. For more convenience using your tablet, add your favorite apps and widgets to the Home screen. To add items on your Home screen: Touch and hold the empty part of the Home screen. Tap the Apps or Widgets tab. Drag the desired item to the desired location and lift your finger. To remove an item from the Home screen: Touch and hold the icon you want to remove, drag it to , and lift your finger. TIP! To add an application icon to the Home screen from the Apps screen, touch and hold the application you want to add and drag it to the desired location. TIP! You can add several app icons in a folder. Drop one app icon over another one on a Home screen, and a folder will be created. Opening, switching, and stopping apps Tap to display recently used applications. You can keep multiple apps running at the same time, and switch between several open apps. You can... -
Page 142: Using Dual Window
Using Dual Window The Dual Window feature splits the screen to enable multi-tasking, drag and drop interaction, auto-linking and recently used apps. Touch to split the screen or touch and hold the until the app list is displayed. Touch or drag an app icon to the desired space. Tap to display the following options. You can also drag the tabs to change the size of the windows. Switch two screens. Change the apps list. Full screen view. Close the apps. To disable the Dual Window feature > Dual window. Tap > Apps > Settings Tap the Dual Window switch to toggle it to OFF. TIP! You can launch two Browser apps at the same time. -
Page 143: Customizing App Icons On The Home Screen
Customizing app icons on the Home screen You can customize each application icon with images from your Gallery. Touch and hold an application icon until it’s unlocked from its current position. Then drop it on the screen. The editing icon will appear in the upper right corner of the application. Tap the application icon again and select the desired icon design and tap OK. Or tap Add new and adjust the icon size and select an image from your Gallery. To view other Home screen panels • Swipe (or flick) your finger left or right across the Home screen. • Pinch in on the Home screen to display the mini panel view, then tap the Home screen panel you want to view. -
Page 144: Quick Access
Quick access To view the quick access items, touch anywhere in the front key area and drag up. The following options are available: Google Now, and QuickMemo+. Notifications Notifications alert you to the arrival of new messages, calendar events, and alarms, as well as to ongoing events, such as downloads. From the Notifications Panel, you can view your tablet’s current status and pending notifications. When a notification arrives, its icon appears at the top of the screen. Icons for pending notifications appear on the left, and system icons showing things like Wi-Fi or battery strength on the right. Pending notifications System notifications... -
Page 145: Accessing Notifications
Accessing notifications Swipe the Status Bar down to open the Notifications Panel and access notifications. To close the Notifications Panel, swipe the bar that is at the bottom of the screen upwards. Quick Settings Bar – Swipe to the right or left to scroll through the list. Tap an icon to activate/ deactivate the feature. QSlide Apps – Tap a QSlide app to open as a small window on your screen. Tap to remove, add, or rearrange QSlide apps. Slide to the left and right to adjust the screen brightness and volume. Clear Button – Tap here to clear your list of event- based notifications. Tap a notification to open it. Quick Settings on the Notifications Panel Use the Quick Settings to easily toggle function settings like Wi-Fi. The Quick Settings are located at the top of the Notifications Panel. NOTE: Touch and hold an icon in the Quick Settings Bar to view the function's settings menu. -
Page 146: To Rearrange Quick Setting Options On The Notification Panel
To rearrange Quick Setting options on the Notification Panel Open the Notifications Panel, swipe the Quick Settings to the left, and tap . To rearrange items, drag to the desired location. To add more icons, checkmark the desired functions. QSlide apps on the Notifications Panel QSlide apps are displayed in a bar on the Notifications Panel below the Quick Settings Bar. These icons provide a quick, convenient way to multi-task on the same screen (similar to picture-in-picture on a TV). QSlide displays a small application window on the screen that can be moved, resized, or made transparent. NOTE: You can remove the QSlide apps bar by tapping the QSlide icon in the Quick Settings bar. Using the QSlide apps Tap any of the QSlide apps in the bar to activate it. When activated, the QSlide feature opens the application in a window in the foreground, allowing you to access other applications in the background. You can open up to two QSlide windows at a time. Notification icons on the Status Bar The icons listed in the table below are some of the most common ones. - Page 147 Bluetooth is on System warning Vibrate mode is on Silent mode is on Battery fully charged Battery is charging Content sharing is on Downloading data Uploading data An alarm is set GPS is on Data is syncing New Gmail message New Hangouts message A song is currently playing Tablet is connected to PC via USB cable Battery saver mode is on...
-
Page 148: Multiple Users
Multiple Users Only one tablet owner ID can be created, but multiple user IDs can be added so that others can log in and use the tablet independently. Each user can configure their own tablet settings, use their own storage space, and have their own app update privileges. Tablet owner privileges • Only the tablet owner ID can add a new user log in ID and remove user IDs. Multiple tablet user limitations • All users share the same battery, internal memory, and data usage with all of the other users. • The language settings set by one user apply to all of the other users. • Each user can configure and use only their own content and data (e.g., Home screen settings, Sound settings, etc.). • Any user can accept updated app permissions on the behalf of all of the other users. • Messages and scheduled calendar events will be sent to notify the specified user ID only. • Once a user starts printing a document using Mobile Print, the print job will continue even if the user ID is changed. • Data transfer, download, multimedia play, and communication services will stop if the user ID is changed. However, the data transfer through Play Store can be continued even if the user ID is changed. -
Page 149: Qslide
To add a new user on your tablet > Users > Add user. From the Home screen, tap Apps > Settings Select the type of user you want to add. • User: Users have their own apps and content. • Restricted profile: You can restrict access to apps and content from your account. The setup wizard opens to help you add a new user. Touch Set up now. • After creating a new user, that person needs to go through the setup process upon their first login. To switch users Press the Power/Lock Key to lock the tablet's screen. Press the Power/Lock Key once more to wake the tablet's screen. Touch one of the colored icons at the bottom of the screen. Choose from the owner ID or any other user IDs you created. QSlide The QSlide function enables an overlay window on your tablet’s display for easy multi-tasking. QSlide windows can be opened from the QSlide apps bar on the Notifications panel, or directly from the applications that support the QSlide function. - Page 150 While using an application that supports QSlide, tap . The function will be displayed continuously as a small window on your screen. Using QSlide The QSlide function opens the associated app in a window in the foreground, allowing you to access other apps in the background. It’s displayed continuously on the screen until you close it. Tap to run QSlide. Tap to exit QSlide and return to full window. Tap to adjust the transparency. Tap to close QSlide. Tap to adjust the size.
-
Page 151: Capturing A Screenshot
NOTE: The QSlide function can support up to two windows at the same time. QSlide only supports the following applications: Video, Browser, Calendar, Email, File Manager, and Calculator. Capturing a Screenshot Press and hold the Volume Down Key and Power/Lock Key at the same time for 2 seconds to capture a screenshot of the current screen. To view the captured image, go to Apps > Gallery > Screenshots folder. Using QuickMemo+ to capture a screenshot On the screen you want to capture, drag the Status Bar downward and select QuickMemo+ Press and hold both Volume Keys at the same time. Using Capture plus to capture a screenshot of the browser This feature allows you to capture a portion of the screen in the default Internet browser. Open the Browser app and navigate to the page you want to capture a screen shot of. -
Page 152: Text Input Methods
Word suggestions Word suggestions Displays the word you've entered. Tap once to Tap to delete the capitalize the next previous character. letter you type. Double- tap for all caps. Tap to create a new line in the message Tap to switch to the field. numbers and symbols keyboard. Tap to enter a space. Tap to select the keyboard language. Tap to access the LG keyboard settings. Touch and hold to access the Clip Tray. Enter suggested word using gesture control Enter text on the keyboard and the related word suggestions appear. Tap or flick upward on the left side of the keyboard to select the left-side suggestion. Tap or flick upward on the right side of the keyboard to select the right-side suggestion. Split keyboard using gesture The split keyboard feature allows you to use both hands to type while in landscape view. Each half of the keyboard withdraws to the left and right of the screen. -
Page 153: Entering Special Characters
To change the keyboard height Adjust height of keyboard to show more of the screen and to control keyboard more easily. • Tap > Keyboard height and layout > Keyboard height > Tap and drag the icon to adjust the keyboard height. To change the bottom row keys > Keyboard height and layout > Bottom row keys > Tap and drag • Tap to add or delete keys or change the order. NOTE: Only QWERTY, QWERTZ, AZERTY keyboards can be customized. This function dose not support some languages. Entering special characters The on-screen keyboard allows you to enter special characters (e.g. "á"). For example, touch and hold the desired key (for example, the "a" key). After the desired character appears, slide your finger over it and lift it off to enter NOTE: A symbol at the top right corner of a key indicates that additional characters are available. -
Page 154: Google Account Setup
Google account setup When you first turn on your tablet, you have the opportunity to activate the network, to sign into your Google Account and select how you want to use certain Google services. To set up your Google account • Sign into a Google Account from the prompted setup screen. OR • From the Home screen, tap Apps > Apps tab > Settings > Accounts & sync > Add account > Google. If you have a Google account, touch Existing, enter your email address and password, then touch . Otherwise, touch New and enter the necessary information to create a new Google Account. Once you have set up your Google account on your tablet, your tablet automatically synchronizes with your Google account on the Web. Your contacts, Gmail messages, Calendar events and other information from these applications and services on the Web are synchronized with your tablet. (This will depend on your synchronization settings.) After signing in, you can use Gmail™ and take advantage of Google services on your tablet. -
Page 155: Connecting To Networks And Devices
Connecting to Networks and Devices Wi-Fi With Wi-Fi, you can use high-speed Internet access within the coverage of the wireless access point (AP). Enjoy wireless Internet using Wi-Fi, without extra charges. Connecting to Wi-Fi networks To use Wi-Fi on your tablet, you need to access a wireless access point or ‘hotspot’ . Some access points are open and you can simply connect to them. Others are hidden or use security features; you must configure your tablet to be able to connect to them. Turn off Wi-Fi when you're not using it to extend the life of your battery. Turning Wi-Fi on and connecting to a Wi-Fi network From the Home screen, tap Apps > Apps tab > Settings > Wi-Fi. Tap to turn Wi-Fi on and start scanning for available Wi-Fi networks. Tap Search to see a list of active and in-range Wi-Fi networks. • Secured networks are indicated by a lock icon. Touch a network to connect to it. • If the network is secured, you are prompted to enter a password or other credentials. (Ask your network administrator for details) The Status Bar displays icons that indicate your Wi-Fi status. -
Page 156: Bluetooth
Bluetooth You can use Bluetooth to send data by running a corresponding application, but not from the Bluetooth menu as on most other mobile phones and tablets. NOTE: • LG is not responsible for the loss, interception or misuse of data sent or received via the Bluetooth wireless feature. • Always ensure that you share and receive data with devices that are trusted and properly secured. If there are obstacles between the devices, the operating distance may be reduced. • Some devices, especially those that are not tested or approved by Bluetooth SIG, may be incompatible with your device. Turning on Bluetooth and pairing up your tablet with a Bluetooth device You must pair your device with another device before you connect to it. From the Home screen, tap Apps > Apps tab > Settings > Bluetooth. Tap the Bluetooth switch to turn it on. Tap the check box next to your tablet's name to make your tablet visible to other Bluetooth devices. NOTE: To select the length of time that your device will be visible, tap the Menu icon > Visibility timeout. A list of available devices will be displayed. Tap the device you want to pair with from the list. -
Page 157: Send Data Using The Bluetooth Feature
NOTE: Depending on the type of device, you may have to enter matching codes, confirm matching codes, or the devices may automatically pair. Once pairing is successful, your tablet will connect to the other device. NOTE: Your tablet doesn't support Handsfree Profile. Therefore, the use of call features with some of accessories, such as Bluetooth headsets or Bluetooth-enabled devices, may not be available for this device. Send data using the Bluetooth feature Open the item and tap OR Touch and hold the item and select Share. OR Open the item and tap the Menu icon > Share. Tap Bluetooth to share via Bluetooth. NOTE: The method for selecting an option may vary by data type. Search for and pair with a Bluetooth-enabled device. Receive data using the Bluetooth feature Refer to the Bluetooth device's user guide to send a file to your tablet. Both devices must be paired and Bluetooth must be on. Pair the devices and tap Accept when you receive a Bluetooth Authorization Request to accept the file(s). -
Page 158: Smartshare
SmartShare You can use the SmartShare feature easily in the Gallery, Music apps, and others. Enjoying the content via a variety of devices You can share your tablet's content with a variety devices. Tap or tap > SmartShare to share the content in the Gallery, Music, POLARIS Office 5 apps. Playing/Sending Play – You can play the content via a TV, a Bluetooth speaker or etc. Beam – You can send the content to the device of Bluetooth and SmartShare Beam supported. • SmartShare Beam – This allows to transfer the content feature fast via Wi-Fi Direct. < Play > < Beam > Enjoying the content from Nearby devices You can enjoy the content from nearby devices (i.e. PC, NAS, Mobile) in the Gallery and Music apps. Connecting devices Connect your device and other devices supported by DLNA in the same Wi-Fi network. -
Page 159: Searching Other Devices
Searching other devices Tap Nearby devices, then you can see the DLNA-supported devices. Connect to the device to view the content. Using the content from the Cloud You can use the content from the cloud (i.e., Dropbox) in the Gallery and Music apps. Using the Cloud NOTE: The supported features may vary depending on the cloud. Retrieving data may take some time depending on the cloud. Select Cloud in the Gallery and Music apps. Select the cloud what you want to use and log in. You can use the content of the cloud after logging in. Set the cloud settings to select the app to use the cloud. QPair By connecting your tablet and mobile phone via QPair, you can sync incoming calls, messages, and social networking notifications between your tablet and mobile phone. - Page 160 and tap Get started > Start on your tablet first and then Run QPair run the same steps on your phone. TIP! QPair may not be pre-installed on the phone. Go to the Google Play Store and search for QPair and install it. NOTE: • QPair works with phones running Android 4.1 or later. Some features may be limited depending on your phone model. • Since QPair uses the Bluetooth function, it may not work normally if you change the Bluetooth settings while QPair is in use. Bluetooth connection will be turned on automatically.
- Page 161 QPair features Call notifications – Sends the tablet a notification when the phone receives a call. The notification displays the caller's number and allows you to answer and decline the call. You can also change call settings, such as a ringtone, ringtone volume, ringtone with vibration, or send a decline message when you get a call. NOTE: You can only receive a call supported by Bluetooth technology. Dialing a call from the tablet using the QPair feature is not possible. Message notifications – Sends the tablet a notification when the phone receives a message. You can also change message settings, such as message pop-up, message preview, notification sound, and notification vibration. Social network notifications – Displays a social networking notification on your tablet's Status Bar when it arrives on your phone. NOTE: To enable this feature, turn the QPair social network notifications option on your phone (Settings > Accessibility > QPair social network notifications). This option allows you to be notified of social networking notifications on your tablet. QuickMemo+ transfer – Saves your current QuickMemo+ in the tablet's Gallery, and then syncs the tablet's Gallery with the Gallery on your phone. Internet via phone – Automatically connects your tablet to the Internet through your mobile phone (as a Wi-Fi hotspot). Using this feature may incur data charges. To save data usage on the phone, the phone automatically connects to any trusted Wi-Fi hotspots within range.
-
Page 162: Pc Connections With A Usb Cable
Recent app sticker – When the paired device's screen is unlocked, a sticker will display the last app used on the other device if the app is installed both on the tablet and the phone. PC connections with a USB cable You can connect your tablet to your PC to charge it, transfer items to the PC from the tablet and vice versa. Transferring music, photos and videos using the Media device (MTP) mode Connect your tablet to a PC using a USB cable. If you haven't installed the LG Android Platform Driver on your PC, you will need to manually change the settings. To change the settings, slide the Status Bar down and tap the current USB connection mode > Media device (MTP). You can now view the Media device content on your PC and transfer the files. NOTE: If you want to change the PC connection settings, slide the Status Bar down and select the USB connection mode option. This setting is visible on the Status Bar only when you connect a USB cable to your tablet. Synchronize with Windows Media Player Ensure that Windows Media Player is installed on your PC. -
Page 163: Pc Connections With A Usb Cable For Mac Os X Users
When connected, a pop-up window will appear on the PC. Select the Windows Media Player option to synchronize music files. Edit or enter your device’s name in the pop-up window (if necessary). Select and drag music files to the sync list. Start synchronization. • The following requirements must be satisfied to synchronize with Windows Media Player. Items Requirement Microsoft Windows XP SP2, Vista or higher Window Media Player version Windows Media Player 10 or higher • If the Windows Media Player version is older than 10, install version 10 or newer. PC connections with a USB cable for Mac OS X users You can transfer media contents to your Mac OS X PC from the tablet and vice versa by setting up the Android File Transfer program. Download and install the Android File Transfer program from android.com website for Mac Users (http://www.android.com/filetransfer/). Connect your tablet to your computer, and double click the AFT (Android File Transfer program) application to start it up. You can view the media contents, drag and drop the media file to and from the tablet (or PC). -
Page 164: Contacts
Contacts You can add contacts on your tablet and synchronize them with the contacts in your Google Account or other accounts that support syncing contacts. Searching for a contact From the Home screen, tap Contacts to open your contact list. Tap the Search contacts box and enter the contact's name. You can also tap a letter along the left side of the screen to access names starting with the chosen letter. Adding a new contact From the Home screen, tap Contacts Tap New contact . Select the desired account (if applicable). If you want to add a picture to the new contact, tap . Choose from Take photo to take a picture using the camera or Select from Gallery. Then browse for an image and select it. Tap to enter more specific name information. Enter the details about your contact. Tap Save. Favorite Contacts You can classify frequently called contacts as favorites. To add a contact to your favorites From the Home screen, tap Contacts to open your contacts. -
Page 165: Creating A Group
Tap the star to the right of the contact’s name. The star turns gold and the contact is added to your favorites. To remove a contact from your favorites list From the Home screen, tap Contacts to open your contacts. Tap the Favorites tab to view your favorite contacts. Tap a contact to view its details. Tap the gold star to the right of the contact’s name. The star turns grey and the contact is removed from your favorites. Creating a group From the Home screen, tap Contacts to open your contacts. Touch the Groups tab, then touch Enter a name for the new group. • Tap Add members to add contact entries to your new group. • Tap the ACCOUNT field to change the account(s) you want to save the new group to. Touch Save to save the group. NOTE: If you delete a group, the contacts assigned to that group will not be lost. They will remain in your contacts. -
Page 166: Email
Email You can use the Email application to read emails from services like Yahoo!, MSN, and AOL. The Email application supports the following account types: POP3, IMAP and Exchange. Your service provider or system administrator can provide you with the account settings you need. Managing an email account Tap the Email on the Home screen. The first time you open the Email application, a set-up wizard opens to help you to set up an email account. After the initial setup, the contents of your inbox are displayed. If you have added more than one account, you can switch among accounts. To add another email account: • Open the Email application and tap the Menu icon > Settings > Add account. To switch between accounts: If you've added more than one account, you can easily switch between them. From any email folder, tap the current account (at the top of the screen), then tap the account you want to access. To change an email account’s settings: > Settings > General Open the Email application and tap the Menu icon settings to configure settings that apply to all of your accounts. Tap an individual account to configure settings only for that particular account. -
Page 167: Working With Account Folders
Working with account folders Open the Email application and tap the Menu icon and select Folders. Each account has an Inbox, Outbox, Sent and Drafts folder. Depending on the features supported by your account’s service provider, you may have additional folders. Composing and sending email While in the Email application, tap Compose Enter an address for the message’s intended recipient. As you enter text, matching addresses will be proposed from your Contacts. Separate multiple addresses using semicolons. Tap Attach to attach files, if required. Enter the subject and your message. Tap Send to send the message. If you aren’t connected to a network, for example, if you’re working in airplane mode, the messages that you send will be stored in your Outbox folder until you connect to a network again. If it contains any pending messages, the Outbox will be displayed on the Accounts screen. Receiving emails When a new email arrives in your Inbox, you'll be notified by a sound or vibration (depending on your sound and vibration settings) and its notification icon appears on the Status Bar. -
Page 168: Entertainment
Entertainment Camera To open the Camera application, tap Camera on the Home screen. Getting to know the viewfinder C lean view – Touch to show or hide menus on the view finder. S wap camera – Switch between the back-facing camera lens and the front–facing camera lens. You can also switch the camera by swiping the screen. M ode – Allows to set the shot mode to Auto or Panorama mode. Settings – Touch this icon to open the settings menu. G allery – Touch to view the last photo you captured. This enables you to access your Gallery and view saved photos while in camera mode. Video mode – Tap to start recording a video. Capture – Takes a picture. Exit – Touch to exit the camera. -
Page 169: Using The Advanced Settings
NOTE: Please ensure the camera lens is clean before taking pictures. Using the advanced settings In the viewfinder, tap to open the advanced options. Selects photo resolution. If you choose a high resolution, the file size will increase, which means you will be able to store fewer photos in the memory. Take photos by voice command. Sets a delay after the capture button is pressed. This is ideal if you want to be in the photo. Displays grid lines on the screen to help you align your photos. Opens the help guide to know how a function operates. TIP! When you exit the camera, some settings return to their defaults, such as timer. Check these before you take your next photo. Taking a photo Open the Camera application. Point the lens towards the subject you want to photograph. Touch to capture the photo. You can also capture the photo by touching anywhere on the screen on Clean view mode. -
Page 170: To Zoom In Or Out
To zoom in or out When taking a picture or recording a video, place two fingers anywhere on the screen and spread them apart to zoom in. To zoom back out, pinch them together. Gesture shot The Gesture shot feature allows you to take a picture with a hand gesture using the front camera. To take photo, raise your hand, with an open palm, until the front camera detects it and a box appears on the screen. Then close your hand into a fist and a timer will start, allowing you time to get ready. Once you've taken a photo Tap the image preview by the capture button to view the last photo you captured. Tap Gallery or Photos, then tap OK. Touch to edit the photo. Touch to take another photo immediately. - Page 171 Touch to send your memo to others or share it via social networking services. Touch to delete the photo. Touch to access more options. Touch to add the picture to your favorites. TIP! If you have a social networking account and set it up on your tablet, you can share your photo with your social networking community. Touch the Menu icon to open the following options. SmartShare – Touch to share your photo using the SmartShare function. Set image as – Touch to use the photo as a Contact photo, Home screen wallpaper, Lock screen wallpaper or Wallpaper. Move – Touch to move the photo to another album. Copy – Touch to copy the selected photo and save it to another album. Copy to Clip Tray – Touch to copy the photo and store in the Clip Tray. Slideshow – Automatically shows you the images in the current folder one after the other. Rotate left/right – Touch to rotate the picture to the left or right. Crop – Crop your photo. Move your finger across the screen to select the area to be cropped. Add location – To add the location information. Rename – Touch to edit the name of the selected photo. Print – Allows you to print the picture. Details – Displays more information about the picture.
-
Page 172: Viewing Your Saved Photos
Viewing your saved photos You can access your saved photos when in camera mode. Just tap the image preview by the capture button and your Gallery will be displayed. Choose the app to use to view and/or edit your photos. Tap Gallery or Photos Tap OK. • To view more photos, scroll left or right. • To zoom in or out, double-tap the screen or place two fingers and spread them apart (move your fingers closer together to zoom out). Recording a video Open the Camera application. Point the lens towards the subject you wish to capture in your video. Touch the Video mode icon to start recording. A timer showing the length of the video will appear. Touch on the screen to stop recording. TIP! • Tap to pause the recording. • Tap to take a screen shot while recording a video. Watching your saved videos Access your saved videos from video camera mode by tapping the image preview by the capture button. In the viewfinder, tap the image preview by the capture button. Your Gallery will appear on the screen with your most recent recorded video displayed. Swipe to the left to scroll to your other videos. Tap the Play icon on a video to play it automatically. -
Page 173: Gallery
NOTE: You can view your videos in the Gallery and Photos apps. NOTE: Do not to press too hard; the touch screen is sensitive enough to pick up a light, but firm touch. Gallery You can store multimedia files in internal memory for easy access to all your multimedia files. Use this application to view multimedia files like pictures and videos. From the Home screen, tap Apps > Apps tab > Gallery You can manage and share all your image and video files with the Gallery. NOTE: • Some file formats are not supported, depending on the software installed on the device. • Some files may not play properly, depending on how they are encoded. • If the file size exceeds the available memory, an error can occur when you open files. Viewing pictures Launching the Gallery app displays your available folders. When another application, such as Email, saves a picture, the Downloads folder is automatically created to contain the picture. Likewise, capturing a screenshot automatically creates the Screenshots folder. Tap a folder to open it. Pictures are displayed in order by creation date. Select a picture to view it full screen. Scroll left or right to view the next or previous image. -
Page 174: Playing Videos
Playing videos Open the Gallery app and select an album. The Play icon is displayed on video files. Tap an image to select it. Select the app to play it (tap the Photos app or the Video app ), then tap OK and the video begins playback. NOTE: • When using the Videos app to play a video, slide the left side of the screen up and down to adjust the screen brightness. Slide the right side of the screen up and down to adjust the volume. • When using the Videos app to play a video, slide the screen left or right to rewind or fast-forward. Deleting images and videos Use one of the following methods: • In a folder, tap and select the photos and videos you want to delete, then tap Delete, the Yes to confirm. • When viewing a photo or video, tap , then tap Yes to confirm. Setting as wallpaper > Set image as and select When viewing a photo, touch the Menu icon Home screen wallpaper, Lock screen wallpaper or Wallpaper. Slideshow You can view your photos in a slideshow by album or by selecting all of your photos. From the Home screen, tap Gallery... -
Page 175: Videos
• Tap the album with the photos you want to view, then tap the Menu icon > Slideshow > choose the images you want to view > Next > verify the slideshow settings > Start. Tap the Back Key to stop playing the slideshow. Videos Your Gallery has an integrated video player that lets you play all of your favorite videos. Playing a video From the Home screen, tap Apps > Apps tab > Gallery > Video Select the video you want to play. Touch access QSlide and display the video in small window. Touch to share your video via the SmartShare function. Touch to access more options. Touch to manage the video volume. -
Page 176: Music
Touch and hold to rewind in 3 second increments. Tap once to rewind 10 seconds. Touch to pause video playback. Touch and hold to fast-forward in 3 second increments. Tap once to fast-forward 10 seconds. Touch to lock/unlock a video screen. To change the volume while watching a video, press the Volume Keys on the right side of the tablet. Tap Gallery > (in the upper left corner of the title bar) > Videos, then touch and hold a video in the list to access the following options: Share, Delete, Trim, Rename and Details. TIP! While watching a video, slide up and down along the left side of the screen to adjust the screen brightness. Slide up and down along the right side of the screen to adjust the volume. Music Your tablet has a music player that lets you play all your favorite tracks. To access the music player, from the Home screen, tap Apps > Apps tab > Music Transfer music using Media device (MTP) mode Connect the tablet to your PC using the USB cable. Select the Media device (MTP) option. Your tablet will appear as another hard drive on your computer. Click on the drive to view it. Copy the files from your PC to the drive folder. -
Page 177: Playing A Song
Playing a song From the Home screen, tap Apps > Apps tab > Music Touch the Songs tab. Select the song you want to play. Touch to share your music via the SmartShare function. Touch to set the current song as a favorite. Touch to see the Now playing playlist. Touch to access more options. Touch to set shuffle mode. Touch to set repeat mode. - Page 178 Touch to manage the music volume. Touch to go back to the beginning of the song. Touch twice to return to the previous song. Touch and hold to rewind 3 seconds. Touch to pause playback. Touch to skip to the next track on the album or in the playlist. Touch and hold to fast-forward 3 seconds. Touch to set the audio effect. To change the volume while listening to music, press the Volume Keys on the right side of the tablet. Touch and hold any song in the list to access the following options: Play, Add to playlist, Delete, Share, Details and Search. NOTE: • Some file formats are not supported, depending on the device software. • If the file size exceeds the available memory, an error can occur when you open files. • Music file copyrights may be protected by international treaties and national copyright laws. Therefore, it may be necessary to obtain permission or a licence to reproduce or copy music. In some countries, national laws prohibit private copying of copyrighted material. Before downloading or copying the file, check the national laws of the relevant country concerning the use of such material.
-
Page 179: Tools
Tools QuickMemo+ The QuickMemo+ feature allows you to create memos and capture screen shots. Capture screens, draw on them, and share them with family and friends with QuickMemo+. Creating a memo From the Home screen, tap QuickMemo+ , then tap to create a new memo. You can edit texts by typing words directly or select the pen type and color you want to use and enter text by handwriting. Add a reminder by touching to set the reminder notification for the event. Add weather and location information to your memo if a data network is available. Using the QuickMemo+ options The following options are available in the QuickMemo+ toolbar at the top of the screen. Touch to open the memo in QSlide. Allows you to undo and redo previous actions. Allows you to edit the text, its color and its alignment. Allows you to enter text by handwriting. You can select the type of pen to use and its thickness, transparency, and color. - Page 180 Erases edits you've made to the memo. Saves the memo in QuickMemo+. Touch to access more options. Allows you to set a reminder notification for an event. Allows you to insert weather information into the memo. Allows you to add location information using GPS. Capturing a screen shot for your QuickMemo To access the QuickMemo+ feature, slide the Status Bar downwards and touch O R Press both of the Volume Keys at the same time for one second. Select the desired menu option from the toolbar and create a memo. Tap to save the memo. To exit QuickMemo+ at any time, tap the Back Key...
-
Page 181: Quickremote
NOTE: Please use a fingertip while using the QuickMemo+. Do not use your fingernail. QuickRemote QuickRemote turns your tablet into a Universal Remote for your home TV, DVD or Blu-ray. NOTE: QuickRemote may not be available for some devices and areas. To open and configure QuickRemote From the Home screen, tap the Apps > Apps tab > QuickRemote . You can also perform the initial set up of your QuickRemote from the Notifications Panel. Swipe the Status Bar downward, tap the QuickRemote , then tap ADD REMOTE. icon Touch to select a room type and touch to add the device. Select the type and brand of device, then follow the on-screen instructions to configure the device(s). - Page 182 NOTE: The QuickRemote operates the same way as an ordinary infrared (IR) remote control in your region or country. Be careful not to cover the infrared sensor at the top of the tablet when you use the QuickRemote function. This function may not be supported depending on the model, the manufacturer or service company. Using QuickRemote Open QuickRemote and choose the room where you configured the remote. Select the remote you want by tapping its type/name on the QuickRemote bar along the left side of the screen. Tap the buttons on the displayed remote. NOTE: When adding the TV remote control, QuickRemote can use the INPUT button to configure appropriate remote control. When configuring the INPUT button, the TV input source can be changed. To reset the TV input source, tap the INPUT button on QuickRemote several times (depending on the number of devices connected to the TV). QuickRemote options To access the QuickRemote options menu, tap the Menu icon to select the desired option. NOTE: While playing music in the background, pressing any QuickRemote button will mute the sound for a second.
-
Page 183: Clock
Clock Setting your alarm From the Home screen, tap Apps > Apps tab > Clock > Set the desired alarm time. Set Repeat, Snooze duration, Vibration, Alarm sound, Alarm volume, Auto app starter, Puzzle lock and Memo. Touch Save. NOTE: To change alarm settings in the alarm list screen, touch the Menu icon and select Settings. Calculator Using your calculator From the Home screen, tap Apps > Apps tab > Calculator Tap the number keys to enter numbers. For simple calculations, tap the function you want to perform or ) followed by NOTE: • For more complex calculations, touch the Menu icon , select Scientific calculator, then choose the desired function. > Calculation history. • To view the calculation history, tap Menu icon... -
Page 184: Calendar
Calendar Events from each account you’ve added to your tablet and configured to synchronize calendars is displayed in your Calendar. Adding an event to your calendar From the Home screen, tap Apps > Apps tab > Calendar Tap the menu at the top left corner to change the calendar view (Day, Week, Month, Year, Agenda). Tap the date you wish to add an event to and tap Touch the Event name field and enter the event name. Touch the Location field and enter the location. Check the date and enter the time you wish your event to start and finish. If you wish to add a note to your event, touch the Description field and enter the details. If you wish to repeat the alarm, set REPEAT and set REMINDERS, if necessary. Touch Save to save the event in the calendar. NOTE: Touch and hold a spot on the calendar to quickly save a calendar event on that date. Simply enter the event name and time, then tap Save. You can tap Details and enter more information, or update the event with additional details later. -
Page 185: Tasks
To change your calendar view No matter where you’re in the Calendar app, you can easily switch calendar views. Simply tap in the upper left corner of the title bar, or on the left side of the screen swipe your finger from left to right to display a menu of calendar views. Tap Day, Week, Month, Year, or Agenda. Tasks The Tasks app can be synchronized with your MS Exchange account. You can create and manage your tasks using your tablet or from MS Outlook or MS Office Outlook Web Access. From the Home screen, tap Apps > Tasks Tap the Add task icon (in the upper-right corner of the screen). Enter the Subject, START DATE, DUE DATE, DESCRIPTION, REPEAT and REMINDER as necessary. Tap Save. File Manager The File Manager application allows you to manage files in your internal/ external storage. File Manager makes it easy to view and manage your files. Simply tap a file type (All files, Music files, Image files, Video files, Document files, or Cloud files), then tap on the necessary folders to find your files. To open the File Manager application > Apps tab > File Manager • From the Home screen, tap Apps... -
Page 186: Voice Recorder
File Manager Options Open the File Manager app > All files > Internal storage to access to the following options (at the top of the screen): Allows you to open File Manager in a QSlide window. Allows you to search for your files or information. Allows you to create a new folder. Allows you to move files and folders to another location. Allows you to copy files and folders to another location. Allows you to delete files and folders. Allows you to access more options. Voice Recorder Use the voice recorder to record voice memos or other audio files. Recording a sound or voice > Apps tab > Voice Recorder • From the Home screen, tap Apps... - Page 187 Touch to select where to save your recording. Touch to begin recording. Touch to view a list of your Touch to end the recordings. recording. NOTE: The available recording time may differ from actual recording time. Managing your Voice memos From the Voice Recorder list screen: • Tap the Share icon to share the voice memo using the available choices. • Tap the Delete icon to select the voice memo(s) you want to delete. • Touch and hold a voice memo to open a context memo to select Share, Delete, Rename, Trim, or Details.
-
Page 188: Google
Google+ Use the Google+ app to stay connected with people via Google’s social network service. From the Home screen, tap Apps > Apps tab > Google > Google+ NOTE: This application may not be available depending on the region or service provider. LG SmartWorld LG SmartWorld offers an assortment of exciting content – fonts, themes, games, applications. How to Get to LG SmartWorld from Your Tablet Tap > Apps > Apps tab > tap the icon to access LG SmartWorld. Tap Sign in and enter ID/PW for LG SmartWorld. If you have not signed up yet, tap Register to receive your LG SmartWorld membership. Download the content you want. • LG SmartWorld may not be available for all carriers or in all countries. - Page 189 NOTE: What if there is no icon? Using a mobile Web browser, access LG SmartWorld (www.lgworld.com) and select your country. Download the LG SmartWorld App. Run and install the downloaded file. Access LG SmartWorld by tapping the icon. Special benefit only in LG SmartWorld Decorate your own style on your tablet by personalizing it with Home themes, keyboard themes, and fonts provided on LG SmartWorld. (However, this service is available only to specific devices. Please check the LG SmartWorld website to check availability). Enjoy LG SmartWorld's special service by joining promotions that are consistently provided.
-
Page 190: The Web
The Web Browser Use this application to browse the Internet. Browser gives you a fast, full-color world of games, music, news, sports, entertainment and much more, right on your tablet wherever you are and whatever you enjoy. From the Home screen, tap Apps > Apps tab > Browser Tap to run QSlide. Tap to go back one page. Tap to go forward one page, to the page you connected to after the current one. This is the opposite of what happens when you touch the Back Key , which takes you to the previous page. Tap to refresh or stop the current page. Tap to go to the Home page. Tap to access your bookmarks. Touch to access more options. Opening a page • To open a new page, tap at the top of the browser. • To go to another web page, tap a tab at the top of the screen to view the page. -
Page 191: Bookmarks
Bookmarks To open a bookmarked web page, tap on the browser toolbar and select one. History Tap on the browser toolbar and select the History tab to open a web page from the list of recently-visited web pages. To clear the history, tap to clear all history. Using Reader mode Your tablet can display simplified web pages for easier reading. View news or blog posts and other article pages easily with no distractions – with Reader mode, you can read a clutter-free page. Tap on the URL web address bar to activate Reader mode. Using QSlide Use this feature to access the Internet without closing the current application. While viewing content on the browser, tap . You can then browse other information on your tablet. To view the browser in full screen, tap Download files Use the Downloads app to see what files have been downloaded. From the Home screen, tap Apps > Apps tab > Downloads Chrome Use Chrome to search for information and browse web pages. From the Home screen, tap Apps > Apps tab > Chrome... -
Page 192: Viewing Web Pages
NOTE: This application may not be available, depending on your region and service provider. Viewing web pages Tap the address field (at the top of the screen), enter a web address or search criteria, and tap on the keyboard. Opening a page • To go to a new page, tap at the top of the browser. • To go to another web page, tap a tab at the top of the screen to select the page. Searching the web by voice Tap the address field, tap , speak a keyword and select one of the suggested keywords that appear. NOTE: This feature may not be available depending on the region or service provider. Syncing with other devices Sync open tabs and bookmarks to use with Chrome on another device when you are logged in with the same Google account. > Other devices. To view open tabs on other devices, tap the Menu icon You must be signed in to the same Google account on all devices. Select a web page to open. -
Page 193: Adding And Viewing Bookmarks
Adding and viewing bookmarks To add bookmarks, tap in the URL bar. To open a bookmarked web page, tap the Menu icon > Bookmarks and select the desired page. Chrome Options menu Tap the Menu icon to access the following options. • New tab – Tap to open a new web page tab. • New incognito tab – Tap to open a new incognito tab. • Bookmarks – Displays your bookmarked web pages. • Other devices – Displays your open web pages on other devices. • History – Displays your browsing data (web pages you've visited). • Share... – Allows you to share the web page. • Print... – Tap to print the web page. Choose to automatically find a printer on your network, or manually enter one to use. • Find in page – Allows you to search for text on the current web page. • Add to homescreen – Allows you to add a shortcut to the current page on your Home screen. • Request desktop site – Checkmark to access the desktop site when you view web pages on your tablet. • Settings – Allows you to change the settings specific to the Chrome app. • Help &... -
Page 194: Settings
Settings Access the Settings menu From the Home screen, tap Apps > Apps tab > Settings OR F rom the Home screen, touch and hold the Recent Apps Key > System settings. Select a setting category and set the desired option. WIRELESS NETWORKS Wi-Fi Wi-Fi – Turns on Wi-Fi to connect to available Wi-Fi networks. A list of all available Wi-Fi networks will be displayed. Tap one to connect to NOTE: Tap Search to scan for available Wi-Fi networks. Tap the Menu icon in the Wi-Fi menu to access the following options. Connect by WPS button – Allows you to connect to a secured Wi-Fi network with a WPS button. Connect by WPS PIN – Allows you to connect to a secured Wi-Fi network with a WPS PIN. Add network – Allows you to manually enter a new Wi-Fi network. Wi-Fi Direct – Allows direct connection with Wi-Fi devices without any access point. -
Page 195: Data Usage
Advanced Wi-Fi – Accesses the advanced Wi-Fi settings. Interactive tutorial – Displays some useful tutorials for the Wi-Fi function. TIP! How to obtain the MAC address To set up a connection in some wireless networks with MAC filters, you may need to enter the MAC address of your tablet in the router. You can find the MAC address in the following user interface: From the Home screen, tap Apps > Settings > Wi-Fi > Menu icon > Advanced Wi-Fi > MAC address. Bluetooth Turn the Bluetooth wireless feature on or off to use Bluetooth. Turning Bluetooth on allows you to pair and connect to other Bluetooth devices. Tap the Menu icon in the Bluetooth menu to access the following options. Edit tablet name – Changes your tablet name for easy identification when pairing and connecting. Enter your new tablet name, then tap Save. Visibility timeout – Sets the amount of time other Bluetooth devices can see your tablet for pairing and connection. Choose from 2 min, 5 min, 1 h, and Never time out. Show received files – Displays a list of your Bluetooth received files. Interactive tutorial – Displays some useful tutorials about Bluetooth features. -
Page 196: Device
More... Allows you to set additional wireless and networks settings. Airplane mode – Allows you to set Airplane mode. Activating Airplane mode disables all wireless connections. Miracast – Allows you to wirelessly mirror your tablet screen and sound onto a Miracast dongle or TV. SmartShare Beam – Allows you to receive multimedia content via SmartShare Beam from LG phones or tablets. LG PC Suite – Allows Wi-Fi connection to transfer music and images between a computer and the tablet. Media server – Allows to share media contents with nearby devices via DLNA. VPN – Displays the list of Virtual Private Networks (VPNs) that you've previously configured. Allows you to add different types of VPNs. NOTE: You must set a lock screen PIN, Password or Pattern before you can use credential storage. DEVICE Sound Sound profile – Allows you to set the sound profile to Sound, Vibrate only or Silent. Volumes – Manage the volume for Notifications sound, Touch feedback & system, and Music, video, games & other media. Vibrate strength – Allows you to set the vibrate strength for calls, notifications, and touch feedback. - Page 197 Notification sound – Allows you to set your default notification ringtone. Touch sounds – Allows you to set your tablet to play a sound when you touch buttons, icons and other onscreen items that react to your touch. Screen lock sound – Allows you to set your tablet to play a sound when locking and unlocking the screen. Vibrate on touch – Allows you to set the vibration feedback when the tablet screen is touched. Display Home screen Theme – Sets the screen theme for your device. Wallpaper – Sets the wallpaper to use on your Home screen. Screen swipe effect – Sets the effect when you swipe to change screens. Allow Home screen looping – Checkmark to set the Home screens to scroll continuously, eliminating the need to scroll back in the opposite direction when you reach one end. Home backup & restore – Allows you to backup and restore app and widget configurations and themes. Help – Displays information about the Home screen. Lock screen Select screen lock – Set a screen lock type to secure your tablet. Screen swipe effect – Sets the screen swipe effect options. Wallpaper – Sets your Lock screen wallpaper. Select it from Gallery or Wallpaper gallery.
- Page 198 Lock timer – Sets the amount of time before the screen automatically locks after the screen has timed-out. Power button instantly locks – Checkmark to instantly lock the screen when the Power/Lock Key is pressed. This setting overrides the Security lock timer setting. Brightness – Adjust the screen brightness. Touch Night brightness to set the brightness to 0% automatically between the hours of 12:00 am - 6:00 am. Screen timeout – Set the time delay before the screen automatically turns off. Screen-off effect – Sets the screen-off effect used when the screen turns off. Auto-rotate screen – Set to switch orientation automatically when you rotate the tablet. Daydream – Tap the Daydream switch to toggle it On or Off. On allows the set screen saver to be displayed when the tablet is sleeping while docked and/or charging. Choose from Clock and Google Photos. NOTE: Charging might be slow while the screen saver is on. Font type – Change the type of display font. Font size – Change the size of the display font. Smart screen – Keeps the screen on when the device detects your eyes looking at the screen. Home touch buttons – Allows you to set which Home touch buttons are displayed and their position on the bar. You can also select the color and the background. Motion sensor calibration – Allows you to improve the accuracy of the tilt and speed of the sensor.
- Page 199 Storage INTERNAL STORAGE – Displays the total amount of space in the device’s memory and lists what type of data is using up space. SD CARD – Displays the total amount of memory space on the microSD card. Mount/Unmount SD card – Mounts and unmounts the microSD card from your tablet so that you can access the data stored in it, format the card, or safely remove it. This setting is dimmed if there’s no microSD card installed, if you’ve already unmounted it, or if you’ve mounted the microSD card on your computer. Erase SD card – Permanently erases everything on the microSD card and prepares it for use with your tablet. Battery BATTERY INFORMATION – See how much battery power is used for device activities. The battery level displays in a percentage. The remaining time of use is also displayed. Battery percentage on status bar – Displays the battery percentage on the Status Bar. Battery saver – Manage the battery for the power saving items. Tap the to turn this feature on. Tap Battery saver for the following switch options. • Turn Battery saver on: Set the battery level at which you want Battery saver to turn on.
-
Page 200: Personal
• Screen timeout: Adjusts the screen timeout. Help – Touch to access some tips for Power saver. Smart cleaning You can manage the unused apps, saved files or temporary internet files. Apps Display the list of applications such as currently running or downloaded. Swipe left and right to view one of the three tabs across the top of the screen to view detailed information for DOWNLOADED, ON SD CARD, RUNNING, and ALL applications. Tap an entry to view more information, tap Force stop (or Stop), then OK to stop it from running. Dual window Split view – Allows the device to automatically open Dual window when you tap a link on the full screen or tap an e-mail attachment (images only). Help – Displays help information about using the Dual window feature. PERSONAL Accounts & sync Permits applications to synchronize data in the background, whether or not you are actively working in them. Deactivating Auto-sync data can save battery power and lower (but not eliminate) data usage. Cloud Tap Add account to add a cloud account. You access your cloud accounts from this menu. Tap the Menu icon to upload files. - Page 201 Users This menu displays the current users you've created. Add user – Allows you to add new account for the tablet and use the Multi- user feature. Location Mode • High accuracy – Use GPS and Wi-Fi networks to estimate location. • Battery saving – Use Wi-Fi networks to estimate location. • Device sensors only – Use GPS to pinpoint your location. RECENT LOCATION REQUESTS – Displays apps that have recently requested your location information. Camera – Allows the device to tag photos and videos with their locations. Anti-flicker – Allows you to adjust the frequency to prevent the camera preview screen from flickering. Google Location Reporting – Allows you to view your Google location settings. Security Encrypt tablet – Allows you to encrypt data on the tablet for security. You will be required to enter a PIN or password to decrypt your tablet each time you power it on. Encrypt SD card storage – Allows you to encrypt data on the MicroSD for security. Password typing visible – Shows the last character of the hidden password as you type.
- Page 202 Notification access – Allows to get notifications to read all notifications posted by the system or and installed apps. Storage type – Displays the storage type for certificates. Trusted credentials – Displays trusted CA certificates. Install from storage – Choose to install encrypted certificates. Clear credentials – Remove all certificates. Language & input Use the Language & input settings to select the language for the text on your tablet and to configure the on-screen keyboard, including words you've added to its dictionary. Backup & reset Back up my data – Set to backup your settings and application data to the Google server. Backup account – Set the account to which you want to backup data to. Automatic restore – Set to restore your settings and application data when the applications are reinstalled on your device. LG Backup service – Backs up all information on the device and restores it in the event of data loss or replacement. Refer to page 88 for more information. Factory data reset – Reset your settings to the factory default values and delete all your data. If you reset the tablet this way, you are prompted to re-enter the same information as when you first started Android.
-
Page 203: System
SYSTEM Shortcut Key Allows you to turn the Shortcut keys on and off. Date & time Use Date & time settings to set how dates will be displayed. You can also use these settings to set your own time and time zone rather than obtaining the current time from the mobile network. Accessibility Use the Accessibility settings to configure accessibility plug-ins you have installed on your tablet. NOTE: Requires additional plug-ins to become selectable. TalkBack – Allows you to set up the TalkBack function which assists people with impaired vision by providing verbal feedback. Tap the TalkBack switch at the top right corner of the screen to turn it on. Tap Settings at the bottom of the screen to adjust the TalkBack settings. Font size – Checkmark to increase the size of the text. Invert colors – Checkmark to invert the colors of the screen and content. Color adjustment – Sets to view the screen with greater color contrast. Tap the switch to turn it on. Then tap the screen and drag across the screen in any direction until you see the color contrast you want to use. Touch zoom – Allows you to zoom in and out by triple-tapping the screen. Screen shades – Dims the screen's backlight. Accessibility shortcut – Activate this feature to allow you to quickly enable accessibility features in two steps. - Page 204 Text-to-speech output – Sets the text-to-speech preferred engine and speech rate setting. Also plays a short demonstration of speech synthesis. The default language status is also displayed. Audio type – Sets the audio type. Choose Mono or Stereo. Sound balance – Sets the audio route. Move the slider on the slide bar to set it. Turn off all sounds – Turns off all sounds. Captions – Allows to customize caption settings for those with hearing impairments. Tap the switch to turn this feature on. Set the language, text size, and caption style options as desired. Touch feedback time – Sets the touch and feedback time. Choose from Short, Medium, and Long. Universal touch – Touch the switch to toggle between on and off. On allows you to replace the hardware keys with a Universal touch board to access the Power, Home, Volume down, Tap the Universal touch icon Volume up, and More buttons. Draw a "W" on the board to automatically launch the browser application. Screen timeout – Sets the amount of time before the screen turns off. Touch control areas – Tap the switch to turn this feature on. Allows you to limit the touch control to selected areas of the screen. Press the Volume Down Key and Home Key at the same time to activate and deactivate the feature.
-
Page 205: About Tablet
One-touch input – Each finger touch enters a letter/character on the LG keyboard. Quick Cover Activate this menu to turn the screen on or off automatically when using the Quick Cover. Printing Allows you to print the content of certain screens (such as web pages displayed in Chrome) to a printer connected to the same Wi-Fi network as your Android device. About tablet This menu allows you to manage your software updates and view various information relating to your tablet. Tablet name – Allows you to set your tablet name. Update Center – Allows you to check for app and software updates. Battery – Allows you to view battery status, battery level, and battery use information. Hardware information – Allows you to view the model number, IP address, up time, CSN, Wi-Fi MAC address and Bluetooth address. Software information – Allows you to view Android version, kernel version, build number, and software version. Legal information – Allows you to view legal documents for LG software, open source licenses and Google legal information. -
Page 206: Lg Backup
LG Backup About backing up and restoring device data It is recommended that you regularly create and save a backup file on the internal storage, especially before updating any software. Maintaining a current backup file in storage memory may allow you to recover device data if your device is lost, stolen, or corrupted by an unforeseen issue. This LG Backup application is supported between LG smartphones and tablets, other software or operating system versions. As a result, when you buy the new LG smartphones and tablets, you can backup the current device data to your new device. If you have the LG Backup application preloaded on your smartphones and tablets, you can backup and restore most of your data, including downloaded and pre-installed applications, bookmarks, calendar entries, contacts, home screen settings, and system settings. You may also: • Perform a manual backup of your device. • Schedule automatic backups of your device. • Restore your device data. Warning! To protect against an unexpected power off during backup or restore operations, due to insufficient battery power, you should always keep your battery fully charged. -
Page 207: Backup Your Tablet Data
On the Backup Location screen, touch Internal storage or SD card, then tap Next. Select the check box for the items you want to backup and select Next. Read the information presented on the screen, then tap Start. When all selected files have been backed up, you will see the message Back up completed. Scheduling automatic backups You can also program automatic backups for the data on your tablet according to your schedule setting. To do this, complete the following steps: > Backup & reset > From the Home screen, tap Apps > Settings LG Backup Service > Scheduled backup. Tap Backup items and select the check box next to the item you want to backup. Tap Backup location, and select Internal storage or SD card. Set the backup time and scheduled backup files. Tap the switch to activate automatic backups. Restoring tablet data NOTE: All files that are stored on your tablet are deleted before the backup file is restored. Make sure to copy the backup file to another location. - Page 208 > Backup & reset > From the Home screen, tap Apps > Settings LG Backup Service > File restore & management. On the Restore screen, select a backup file that contains the data you wish to restore. Select the check box next to the item you wish to restore and select Next to restore it to your tablet. NOTE: Please note that your tablet data will be overwritten with the content of your backup. If the backup file is encrypted, type the password that you created to encrypt it. When all selected files have been restored, the tablet will automatically be restart. NOTE: You can set the Lock backup files option when creating a backup to encrypt your backup files for extra protection. > Set password On the LG Backup main screen, touch the Menu icon and enter a password and hint in case you forgot your password. Once you have set up a password, you need to enter it every time you want to do backup/restore.
-
Page 209: Tablet Software Update
Tablet software update LG tablet software update via Over-the-Air (OTA) This feature allows you to update the firmware of your tablet to the newer version conveniently via OTA without connecting the USB data cable. This feature is only available if and when LG makes the newer version of the firmware available for your device. First, you can check the software version on your tablet: > About tablet > From the Home screen, tap Apps > Settings Software information. To perform the tablet software update, from the Home screen, tap Apps >About tablet > Update Center > Software Update > Check > Settings now for update. NOTE: LG reserves the right to make firmware updates available only for selected models at its own discretion and does not guarantee the availability of the newer version of the firmware for all tablet models. NOTE: Your personal data—including information about your Google account and any other accounts, your system/application data and settings, any downloaded applications and your DRM licence —might be lost in the process of updating your device's software. Therefore, LG recommends that you back up your personal data before updating your tablet's software. LG does not take responsibility for any loss of personal data. -
Page 210: Accessories
Accessories AC adaptor USB cable Quick Start Guide NOTE: Always use genuine LG accessories. Failure to do this may void your warranty. -
Page 211: Troubleshooting
This chapter lists some problems you might encounter when using your tablet. Some problems require you to call your service provider, but most are easy to fix yourself. Message Possible causes Possible corrective measures Not supported by applications service provider or Contact your service provider. can be set registration required. Battery is not charged. Charge battery. Outside temperature is Make sure tablet is charging too hot or cold. at a normal temperature. Check the charger and its Contact problem connection to the tablet. Charging error Plug the charger into a No voltage different socket. Charger defective Replace the charger. Use only original LG Wrong charger accessories. Impossible Delete some images from to receive / Memory full your tablet. send photos... - Page 212 Message Possible causes Possible corrective measures Files do not Unsupported file Check the supported file open format formats. Check the settings status in the sound menu to make sure No sound Vibration mode you are not in vibration or silent mode.