Table of Contents
Advertisement
Charge the batteries for about
10 hours before initial use.
You must subscribe to Caller ID service to use this feature.
Caller ID
Please read these operating instructions before using the unit and save them for future
reference.
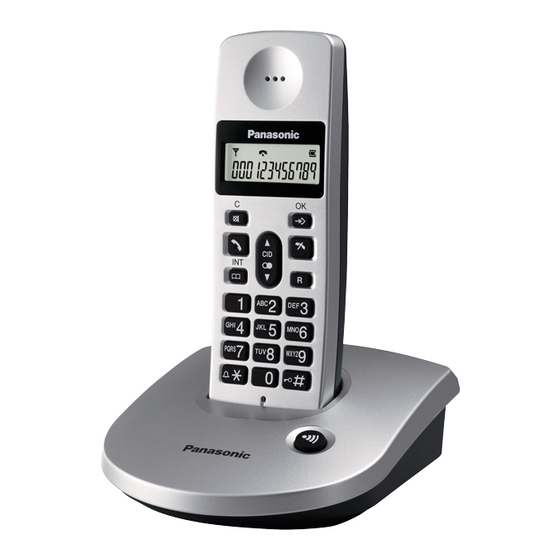
KX-TG1070
Table of Contents
Introduction ................................................. 2
Preparation .................................................. 4
Useful Telephone Settings ....................... 10
Making / Answering Calls ......................... 12
Phonebook ................................................. 14
Caller ID Service ........................................ 15
Answering System Feature...................... 16
Multi-unit Operation .................................. 19
Useful Information ..................................... 20
Operating Instructions
Digital Cordless Phone
Model No.
Digital Cordless Answering System
Model No.
KX-TG1070E
KX-TG1072E
KX-TG1073E
KX-TG1074E
KX-TG1090E
KX-TG1092E
KX-TG1093E
KX-TG1094E
1
Advertisement
Table of Contents

Related Manuals for Panasonic KX-TG1070E


Summary of Contents for Panasonic KX-TG1070E
-
Page 1: Table Of Contents
Useful Telephone Settings ... 10 Making / Answering Calls ... 12 Phonebook ... 14 Caller ID Service ... 15 Answering System Feature... 16 Multi-unit Operation ... 19 Useful Information ... 20 Digital Cordless Phone KX-TG1070E Model No. KX-TG1072E KX-TG1073E KX-TG1074E Model No. KX-TG1090E KX-TG1092E... -
Page 2: Introduction
In the event of problems, you should contact your equipment supplier in the first instance. Declaration of Conformity: Panasonic Communications Co., Ltd. declares that this equipment is in compliance with the essential requirements and other relevant provisions of Radio & Telecommunications Terminal Equipment (R&TTE) Directive 1999/5/EC. - Page 3 Included accessories Accessory items AC adaptor for base unit Part No. PQWATG1070E Telephone line cord Part No. PQJA87S or 460015600200 (for UK) Rechargeable batteries AAA (R03) size Part No. HHR-55AAAB or HHR-4EPT (Order No. P03P) Handset cover* Part No.8060094500 Charger Part No.
-
Page 4: Preparation
Preparation Important information General • Use only the AC adaptor included with this product, noted on page 3. • Do not connect the AC adaptor to any AC outlet other than a standard 220- 240 V AC outlet. • This product is unable to make calls when: - The portable handset battery(ies) need recharging or have failed. - Page 5 Information on Disposal for Users of Waste Electrical & Electronic Equipment (private households) This symbol on the products and/or accompanying documents means that used electrical and electronic products should not be mixed with general household waste. For proper treatment, recovery and recycling, please take these products to designated collection points, where they will be accepted on a free of charge basis.
-
Page 6: Battery Installation
Helpline Tel. No.: U.K. 08700 100 076 R.O.I. 01289 8333 (without AC adaptor) to the same telephone line using a T-adaptor. Your Panasonic sales shop can offer you more information about connection possibilities. Location For maximum distance and noise-free operation, place your base unit: •... -
Page 7: Battery Charge
Battery strength Battery icon Meaning The handset can be used. Needs to be charged. Panasonic Ni-MH battery performance When you charge the batteries for 10 hours from the battery empty status, the following performance is available. - Page 8 Preparation Handset KX-TG1090/KX-TG1092/KX-TG1093/ KX-TG1094 1. Receiver 2. Display 3. [ /C] Answering system / Clear / Mute 4. [ ] Talk 5. [ ] Speakerphone 6. [ ] Volume down / Redial list 7. Charge contacts 8. [ /INT] Phonebook / Intercom 9.
- Page 9 Meaning Icons Displayed when you press Displayed when you press Displayed when you press Displayed when you long press [0] If the current handset number is 2, “[2]” is displayed Displayed when you press and hold [INT]. For KX-TG1090/KX-TG1092/KX-TG1093/ KX-TG1094 only Icons Meaning Speakerphone is on...
-
Page 10: Useful Telephone Settings
Useful Telephone Settings Guide to telephone settings For your reference, a chart of all items which can be customized for the telephone is printed below. Items Date and time 12 and 24-hour display format Handset ringer tone Handset ringer volume Handset key tone Dial mode * Auto talk... - Page 11 Handset ringer volume /OK] > [5] 2 Press [ ] or [ ] to select handset ringer volume. • 5 levels are available. • The handset plays the selected tone at that volume while selecting. /OK] to save the setting. Handset key tone (On/Off) /OK] >...
-
Page 12: Making / Answering Calls
Making / Answering Calls Making calls 1 Predial the phone number > [ • If you make a mistake while predialling a phone number, press [C] to clear it. Press and hold [C] to clear all inputs. 2 When finished talking, press [ place the handset on the base unit or charger. - Page 13 Redialling The last 4 numbers dialled (each 20 digits max.) are stored in the redial list. ] > Press [ ] or [ desired number. 2 Press [ ] to start redialling. Note: • If the number is more than 12-digit long, only the last 11 digits will be displayed preceeded by a “_”.
-
Page 14: Phonebook
Phonebook Adding entries to the phonebook The phonebook allows you to make calls without having to dial manually. You can add 10 phone numbers to the phonebook. /OK] > [ 2 Press [ ] or [ ] to select a phonebook location (0-9). -
Page 15: Caller Id Service
Using Caller ID service Important: • This unit is Caller ID compatible. To use Caller ID features (such as displaying caller phone numbers), you must subscribe to Caller ID service. Consult your service provider/ telephone company for details. Caller ID features When new calls have been received, the display will show the number of new calls. -
Page 16: Answering System Feature
Answering System Feature Answering system The unit contains an answering system which can answer and record calls for you when you are unavailable to answer the phone. The total recording capacity (including your greeting message and caller messages) is about 8 minutes. Important: •... -
Page 17: Recording Incoming Messages
Answering System Feature Deleting the greeting message • " " flashes on the display. 2 [7 3 Press [#x] to delete user’s greeting message while listening to the greeting message. Prerecorded greeting message cannot be deleted. After you have erased your own greeting message, the unit will play a prerecorded greeting message. -
Page 18: Remote Access Code
Answering System Feature Turning call screening on / off (handset number 1 only) • " " flashes on the display. 2 [3 SCREEN] 3 Press [ ] or [ ] to select between “On” and “OFF”. /OK] to save the setting. >[ Screening calls (handset number 1 only) While a caller is leaving a message, you can listen to the call through the handset... -
Page 19: Multi-Unit Operation
Multi-unit Operation (KX-TG1072/KX-TG1073/KX-TG1074/KX-TG1092/KX-TG1093/KX-TG1094) Intercom between handsets Intercom calls can be made between handsets. Example: When handset 1 calls handset 2 1 Handset 1: Press and hold [INT] until “ on the display. Press [2] (desired handset number). 2 Handset 2: Press [ ] to answer. -
Page 20: Useful Information
Useful Information Troubleshooting If you still have difficulities after following the instructions in this section, disconnect the base unit's AC adaptor and remove the handset batteries. Then reconnect the AC adaptor and install the batteries. Problem disappears. flashes. I cannot make or receive calls. - Page 21 If you reset to default, the numbers in the phonebook and redial list are cleared. • If you have changed PIN but forgot it, please contact your nearest Panasonic Service Centre for help. • Caller information has been received (page 15).
- Page 22 Useful Information Answering system (KX-TG1090/KX-TG1092/KX-TG1093/KX-TG1094) Problem The unit does not record new messages. The other party complains that they cannot leave a message. I cannot operate the answering system with the handset. I cannot operate the answering system remotely. While recording a greeting message or listening to messages, the unit rings and recording stops.
-
Page 23: Handset Registration
Handset registration The included handset and base unit are preregistered. If is not shown on the handset display when the unit is turned on, the handset is not registered to the base unit. Register the handset. 1 Base unit: Press and hold page button [ about 10 seconds to go to registration mode. -
Page 24: Wall Mounting
Useful Information Wall mounting Base unit 70 mm Screws Helpline Tel. No.: U.K. 08700 100 076 R.O.I. 01289 8333... -
Page 25: Conditions Of Guarantee
8. The guarantee period applicable to this product shall be 12 months. Please keep these operating instructions with your receipt. Panasonic Business Systems U.K. Receipt No. Date of purchase Helpline Tel. No.: U.K. 08700 100 076 R.O.I. 01289 8333 Useful Information Model No. - Page 28 3 Ping Xi 8 Lu, Nanping Keji Gongye Yuan, Zhuhai, Guangdong, China 519060 Copyright: This material is copyrighted by Panasonic Communications Co., Ltd., and may be reproduced for internal use only. All other reproduction, in whole or in part, is prohibited without the written consent of Panasonic Communications Co., Ltd.