Table of Contents
Advertisement
Quick Links
Download this manual
See also:
Manual
Advertisement
Table of Contents

Related Manuals for Siemens C38H


Summary of Contents for Siemens C38H
- Page 1 Gigaset C38H Issued by Gigaset Communications GmbH Schlavenhorst 66, D-46395 Bocholt Gigaset Communications GmbH is a trademark licensee of Siemens AG © Gigaset Communications GmbH 2008 All rights reserved. Subject to availability. Rights of modifications reserved. Gigaset www.gigaset.com...
-
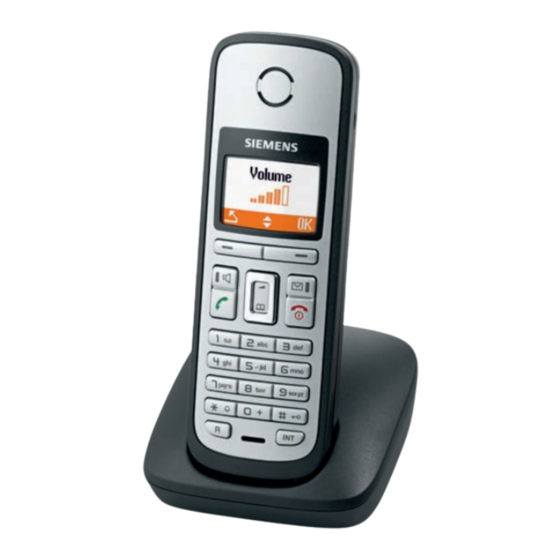
Page 2: The Handset At A Glance
The handset at a glance The handset at a glance 1 Display in idle status (example) ¢ 2 Charge status of the batteries ( page 9) ¢ 3 Display keys ( page 15) ¢ 4 Message key ( page 23) Access to calls and message lists;... -
Page 3: Table Of Contents
Contents Contents The handset at a glance ........1 Safety precautions . - Page 4 Contents Service (Customer Care) ....... . 27 Questions and answers ......... 27 Authorisation .
-
Page 5: Safety Precautions
Safety precautions Safety precautions Warning Read the safety precautions and the user guide before use. Explain their contents and the potential hazards associated with using the telephone to your children. Only use the mains adapter supplied, as indicated on the underside of the charger. -
Page 6: First Steps
First steps First steps Check the package contents one Gigaset C38H handset, one charging cradle, one mains adapter, two batteries, one battery cover, one belt clip, one user guide. Setting up the charging cradle The charging cradle is designed to be operated in enclosed, dry areas at tem- peratures ranging from +5 °C to +45 °C. -
Page 7: Connecting The Charging Cradle
First steps For instructions on how to mount the charging cradle to a wall, please see ¢ page 31. Please note: Never expose the telephone to the influence of heat sources, direct sunlight or other electrical devices. Protect your Gigaset from moisture, dust, corrosive liquids and vapours. Connecting the charging cradle ¤... -
Page 8: Setting Up The Handset For Use
The phone could also malfunction or be dam- aged as a result of using batteries that are not of the recommended type. * Gigaset Communications GmbH is a trademark licensee of Siemens AG. ¤ Insert the batteries the right way round. - Page 9 Before you can use the phone, you must first register the handset to the base station. The actual registration procedure will depend on the type of base sta- tion. Automatically register the C38H handset to the Gigaset C380/C385 base station ¤ Place the handset with the display facing up in the base station.
- Page 10 First steps Enter the system PIN of the base station (the default is 0000) and press §OK§ The registration screen is displayed. Handset is registering ë On the base station: Within 60 sec. press and hold the registration/paging key on the base station (approx.
- Page 11 First steps Initial charging and discharging of the batteries The correct charge level can only be displayed if the batteries are first fully charged and discharged. ¤ Place the handset in the base station or charging cradle for eleven hours. ¤...
- Page 12 First steps Setting the date and time Set the date and time so that the correct date and time can be assigned to incoming calls, and so that the alarm can be used. Þ Menu ¤ Press the key below on the §Menu§...
- Page 13 First steps ¤ The active line is marked [...]. Enter Date: Enter day, month and year as an [01.10.2008] 8-digit number via the handset, e.g. Q Q2QQN Ç for 01/10/2008. If you want to correct an entry, press the top or bottom of the control key to toggle between fields.
-
Page 14: Connecting The Headset
First steps Display in idle status Once the phone is registered and the time Ð set, the idle display is shown as in this exam- Þ 01.10.08 07:15 Your phone is now ready for use. Menu Please note The range icon is only displayed in idle status if Eco Mode+ is deactivated (depending on the base station, see your phone's user guide). -
Page 15: What Would You Like To Do Next
First steps What would you like to do next? Now you have successfully started your Gigaset you will probably want to adapt it to your personal requirements. Use the following guide to quickly locate the most important subjects. If you are unfamiliar with menu-driven devices such as other Gigaset tele- phones you should first read the section entitled "Using the phone"... -
Page 16: Using The Phone
Using the phone Using the phone Control key In the following description the side of the control key you need to press for each operation is indicated accordingly, e.g. t for "press the top of the control key". The control key has a number of different functions: When the handset is in idle status Open the directory. -
Page 17: Keys On The Keypad
Using the phone Keys on the keypad c / Q / * etc. Press the matching key on the handset. Enter digits or letters. Correcting incorrect entries You can correct incorrect characters in the text by navigating to the incorrect entry using the control key. -
Page 18: Activating/Deactivating The Handset
Using the phone Activating/deactivating the handset With the phone in idle status, press and hold the end call key (con- firmation tone) to switch off the handset. Press and hold the end call key again to switch the handset on. Activating/deactivating the keypad lock The keypad lock prevents any inadvertent use of the phone. -
Page 19: Illustration Of Operating Steps In The User Guide
Using the phone Illustration of operating steps in the user guide The operating steps are shown in abbreviated form. Example: The illustration: ‰ ¢ ¢ ¢ = on) Settings Handset Auto Answer §Menu§ means: Þ Menu ¤ Press the display key §Menu§... -
Page 20: Menu Tree
Menu tree Menu tree Instead of scrolling to locate a menu function, you can select a function more quickly by opening the menu and keying in a digit combination (or shortcut). M 2 2 for "Set ringer volume". Example: §Menu§ With the telephone in idle status, press (open main menu): §Menu§... -
Page 21: Making Calls
Making calls Making calls If the handset is in the charging cradle and the Auto Answer function is activated ¢ page 25), the handset automatically answers the call when you remove it from Making an external call the charging cradle. Please note that to display the caller's phone number or name External calls are calls using the public tel- (see next section), the display key... -
Page 22: Muting
Using the directory and lists Muting Length of the entries Number: max. 32 digits You can deactivate the microphone in Name: max. 16 characters your handset during an external call. Please note Press the display key to mute §Mute§ You can assign a number from the the handset. - Page 23 Using the directory and lists ¢ ¢ q (Select entry) Dialling a number from the directory §Menu§ ¢ ¢ ~ (press the key you ¢ Shortcut q (Select entry) want to assign the number to) Press the talk key. The number To dial, press and hold the required speed is dialled.
-
Page 24: Last Number Redial List
The last number redial list contains the ten numbers last dialled with the handset You are helping to protect the environ- (max. 32 numbers). If one of the numbers ment with your Gigaset C38H. is in the directory, the corresponding name will be displayed. Reduced energy consumption... -
Page 25: Setting The Alarm Clock
Setting the alarm clock Setting the alarm clock Changing date and time To change the time, open the input field Precondition: The date and time have ¢ with: already been set ( page 11). ¢ ¢ Settings Date/Time §Menu§ Activating/deactivating the alarm Enter Date: clock Enter the day, month and year in... -
Page 26: Activating/Deactivating Auto Answer
Handset settings The setting will automatically be saved Col. Scheme Four colour schemes are available. after approx. 3 seconds, if not then press When the backlight is turned off, the the display key §OK§ display is shown in black and white regardless of the selected setting. -
Page 27: Advisory Tones
Handset settings Setting the ringer melody – Menu end tone: when scrolling at the end of a menu. Set different ringer melodies for external Battery low tone: the battery requires calls, internal calls and the alarm clock. charging. ¢ ¢ Settings Audio Settings §Menu§... -
Page 28: Service (Customer Care)
Service (Customer Care) Service (Customer Care) Base " " flashes in the display. 1. The handset is outside the range of the base station. We offer you support that is fast and tai- ¥ Move the handset closer to the lored to your specific needs! base station. -
Page 29: Environment
Environment A copy of the 1999/5/EC Declaration of Environmental management system Conformity is available at this Internet Gigaset Communications address: GmbH is certified pursu- www.gigaset.com/docs. ant to the international standards EN 14001 and ISO 9001. ISO 14001 (Environment): certified since September 2007 by TüV SÜD Manage- Certificate No ment Service GmbH. -
Page 30: Appendix
Appendix Appendix We recommend the following battery types, because these are the only ones that guarantee the specified operating times, full functionality and long service Care life: GP 700 mAh Wipe the base station, charging cradle and Yuasa Phone 700 mAh handset with a damp cloth (do not use Yuasa Phone 800 mAh solvent) or an antistatic cloth. -
Page 31: Writing And Editing Text
Appendix Writing and editing text Cyrillic 1x 2x 3x 4x 5x 6x 7x 8x 9x 10x 11x 12x The following rules apply when writing 1 € $ text: Use t s to move the cursor to the left a б в г 2 a b c д... -
Page 32: Accessories
Accessories Accessories Ordering Gigaset products You can order Gigaset products from your specialist retailer. Only use original accessories. This will avoid possible health risks and damage to property, and also ensure that all the relevant regulations are complied with. Mounting the charging cradle to the wall 21 mm approx. -
Page 33: Index
Index Index Control key ....Correcting incorrect entries ..Customer Care ....Accepting a call . - Page 34 Index fast access ....handsfree key ....General troubleshooting .
- Page 35 Index Range ......Recall key ..... . Ringer changing .