Table of Contents
Advertisement
Start-Up, Operation and Maintenance
Screw liquid chillers are designed to provide safe and
reliable service when operated within design specifica-
tions. When operating this equipment, use good judgment
and safety precautions to avoid damage to equipment and
property or injury to personnel.
Be sure you understand and follow the procedures and
safety precautions contained in the chiller instructions, as
well as those listed in this guide.
DO NOT VENT refrigerant relief valves within a building. Outlet
from rupture disc or relief valve must be vented outdoors in accor-
dance with the latest edition of ANSI/ASHRAE 15 (American
National Standards Institute, American Society of Heating, Refrigera-
tion, and Air Conditioning Engineers), latest edition. The accumula-
tion of refrigerant in an enclosed space can displace oxygen and cause
asphyxiation.
PROVIDE adequate ventilation in accordance with ANSI/
ASHRAE 15, especially for enclosed and low overhead spaces. Inha-
lation of high concentrations of vapor is harmful and may cause heart
irregularities, unconsciousness, or death. Misuse can be fatal. Vapor is
heavier than air and reduces the amount of oxygen available for
breathing. Product causes eye and skin irritation. Decomposition
products are hazardous.
DO NOT USE OXYGEN to purge lines or to pressurize a chiller for
any purpose. Oxygen gas reacts violently with oil, grease, and other
common substances.
NEVER EXCEED specified test pressures. VERIFY the allowable
test pressure by checking the instruction literature and the design pres-
sures on the equipment nameplate.
DO NOT USE air for leak testing. Use only refrigerant or dry
nitrogen.
DO NOT VALVE OFF any safety device.
BE SURE that all pressure relief devices are properly installed and
functioning before operating any chiller.
DO NOT WELD OR FLAMECUT any refrigerant line or vessel until
all refrigerant (liquid and vapor) has been removed from chiller.
Traces of vapor should be displaced with dry air or nitrogen and the
work area should be well ventilated. Refrigerant in contact with an
open flame produces toxic gases.
DO NOT USE eyebolts or eyebolt holes to rig chiller sections or the
entire assembly.
DO NOT work on high-voltage equipment unless you are a qualified
electrician.
DO NOT WORK ON electrical components, including control cen-
ters, switches, starters, or oil heater (if applicable) until you are sure
ALL POWER IS OFF and no residual voltage can leak from capaci-
tors or solid-state components.
LOCK OPEN AND TAG electrical circuits during servicing. IF
WORK IS INTERRUPTED, confirm that all circuits are deenergized
before resuming work.
DO NOT syphon refrigerant.
AVOID SPILLING liquid refrigerant on skin or getting it into the
eyes. USE SAFETY GOGGLES. Wash any spills from the skin with
soap and water. If liquid refrigerant enters the eyes, IMMEDIATELY
FLUSH EYES with water and consult a physician.
Manufacturer reserves the right to discontinue, or change at any time, specifications or designs without notice and without incurring obligations.
Book 2
PC 211
Tab
5e
Hermetic Screw Liquid Chillers with HCFC-22
Instructions
SAFETY CONSIDERATIONS
Catalog No. 532-306
Printed in U.S.A.
and HFC-134a, 50/60 Hertz
NEVER APPLY an open flame or live steam to a refrigerant cylinder.
Dangerous over pressure can result. When it is necessary to heat
refrigerant, use only warm (110 F [43 C]) water.
DO NOT REUSE disposable (nonreturnable) cylinders or attempt to
refill them. It is DANGEROUS AND ILLEGAL. When cylinder is
emptied, evacuate remaining gas pressure, loosen the collar, and
unscrew and discard the valve stem. DO NOT INCINERATE.
CHECK THE REFRIGERANT TYPE before adding refrigerant to
the chiller. The introduction of the wrong refrigerant can cause dam-
age or malfunction to this chiller.
Operation of this equipment with refrigerants other than those cited
herein should comply with ANSI/ASHRAE 15 (latest edition). Con-
tact Carrier for further information on use of this chiller with other
refrigerants.
DO NOT ATTEMPT TO REMOVE fittings, covers, etc., while
chiller is under pressure or while chiller is running. Be sure pressure is
at 0 psig (0 kPa) before breaking any refrigerant connection.
CAREFULLY INSPECT all relief devices, rupture discs, and other
relief devices AT LEAST ONCE A YEAR. If chiller operates in a
corrosive atmosphere, inspect the devices at more frequent intervals.
DO NOT ATTEMPT TO REPAIR OR RECONDITION any relief
device when corrosion or build-up of foreign material (rust, dirt, scale,
etc.) is found within the valve body or mechanism. Replace the
device.
DO NOT install relief devices in series or backwards.
USE CARE when working near or in line with a compressed spring.
Sudden release of the spring can cause it and objects in its path to act
as projectiles.
DO NOT STEP on refrigerant lines. Broken lines can whip about and
release refrigerant, causing personal injury.
DO NOT climb over a chiller. Use platform, catwalk, or staging. Fol-
low safe practices when using ladders.
USE MECHANICAL EQUIPMENT (crane, hoist, etc.) to lift or
move inspection covers or other heavy components. Even if compo-
nents are light, use mechanical equipment when there is a risk of slip-
ping or losing your balance.
BE AWARE that certain automatic start arrangements CAN
ENGAGE THE STARTER, TOWER FAN, OR PUMPS. Open the
disconnect ahead of the starter, tower fan, or pumps. Shut off the
chiller or pump before servicing equipment.
USE only repair or replacement parts that meet the code requirements
of the original equipment.
DO NOT VENT OR DRAIN waterboxes containing industrial brines,
liquid, gases, or semisolids without the permission of your process
control group.
DO NOT LOOSEN waterbox cover bolts until the waterbox has been
completely drained.
DOUBLE-CHECK that coupling nut wrenches, dial indicators, or
other items have been removed before rotating any shafts.
DO NOT LOOSEN a packing gland nut before checking that the nut
has a positive thread engagement.
PERIODICALLY INSPECT all valves, fittings, and piping for corro-
sion, rust, leaks, or damage.
PROVIDE A DRAIN connection in the vent line near each pressure
relief device to prevent a build-up of condensate or rain water.
Form 23XL-3SS
Pg 1
23XL
PIC II Controls
7-99
Replaces: New
Advertisement
Table of Contents

Related Manuals for Carrier 23xl


Summary of Contents for Carrier 23xl
-
Page 1: Safety Considerations
ANSI/ASHRAE 15 (latest edition). Con- dance with the latest edition of ANSI/ASHRAE 15 (American tact Carrier for further information on use of this chiller with other National Standards Institute, American Society of Heating, Refrigera- refrigerants. -
Page 2: Table Of Contents
Spare Safety Alarm Contacts ....40 23XL CHILLER FAMILIARIZATION ....5-8 Refrigerant Leak Detector . - Page 3 CONTENTS (cont) Page Page Operating the Optional Pumpout Unit ... 69 Power Up the Controls and • TO READ REFRIGERANT PRESSURES Check the Oil Heater ......60 •...
-
Page 4: Introduction
INTRODUCTION Page Prior to initial start-up of the 23XL chiller, those involved in the start-up, operation, and maintenance should be thoroughly Checking Pressure Transducers....77 familiar with these instructions and other necessary job data. -
Page 5: Abbreviations And Explanations
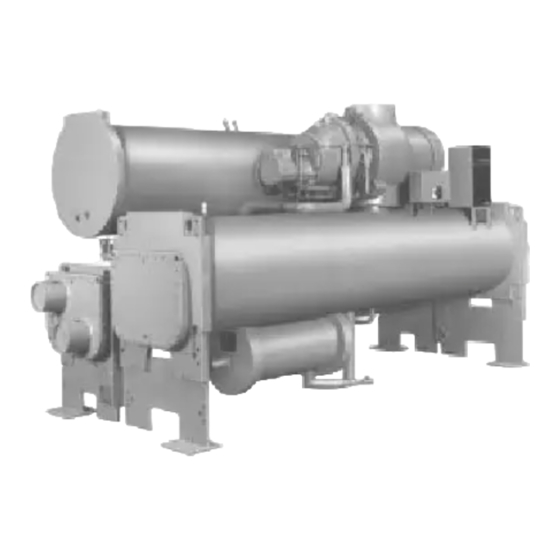
Fig. 1 — 23XL Identification Factory-installed additional components are referred to as options in this manual; factory-supplied but field-installed ad- ditional components are referred to as accessories. The chiller software part number of the 23XL unit is located on the back of the CVC. - Page 6 24 — Condenser Relief Valves (Hidden) 25 — Take-Apart Rabbet Fit Connector (Upper) 26 — Unit Mounted Starter (Option) 27 — Machine Identification Nameplate 23 22 21 20 Fig. 2A — Typical 23XL Installation (TC Frame 1 and 2 Chillers)
- Page 7 — Poppet Valve Assembly — Motor Cooling Isolation Valve — Condenser — Condenser Supply/Return End Waterbox Cover — Cooler Temperature Sensors — Cooler Water Pressure Sensors — Machine Identification Nameplate 8 26 Fig. 2B — Typical 23XL Installation (TD Frame 4 Chiller)
-
Page 8: Cooler
• lubricates the roller bearings which support the male cooling. and female rotors, and the ball bearings of the 23XL After taking heat from the water, the refrigerant vapor is compressor. -
Page 9: Tc Frame 1 And 2 Chillers
4 chillers. tion pressure. During initial start-up, the 23XL PIC II control Oil is driven from the oil separator through an oil filter to follows a ramped oil pressure requirement algorithm for the remove foreign particles. -
Page 12: Slide Valve Principle
1 and 2 chillers, oil heater, and portions of the starter STARTING EQUIPMENT controls. The 23XL requires a motor starter to operate the centrifugal An optional circuit breaker is available when required for a hermetic compressor motor and various auxiliary equipment. -
Page 13: Unit Mounted Solid-State Starter (Optional)
Unit-Mounted Solid-State Starter (Optional) — The 23XL chiller may be equipped with a solid-state, reduced- voltage starter (Fig. 8 and 9). This starter’s primary function is to provide on-off control of the compressor motor. This type of starter reduces the peak starting torque, reduces the motor inrush current, and decreases mechanical shock. -
Page 14: Controls
The PIC II can interface with the Carrier Comfort Network General Controls Overview — The 23XL hermetic (CCN) if desired. - Page 15 *Some 23XL chillers will have both an oil temperature sensor and an oil level safety switch (two separate components). Fig. 11 — 23XL Control and Sensor Locations (TC Frame 1 and 2 Chillers)
- Page 16 *Some 23XL chillers will have both an oil temperature sensor and an oil level safety switch (two separate components). Fig. 12 — 23XL Control and Sensor Locations (TD Frame 4 Chillers)
-
Page 17: Hot Gas Bypass Contactor Relay (3C)
CONTROL TRANSFORMERS (T1, T2) — These trans- INTEGRATED STARTER MODULE (ISM) — This mod- ule is located in the starter cabinet. This module initiates com- formers convert incoming control voltage to 24 vac power for mands from the CVC for starter functions such as starting and the 3 power panel contactor relays, CCM, and CVC. - Page 18 Fig. 15 — Control Panel Fig. 16 — Power Panel...
-
Page 19: Cvc Operation And Menus
CVC Operation and Menus (Fig. 17-23) PRIMARY STATUS COMPRESSOR DATE TIME MESSAGE ON TIME GENERAL SECONDARY • The CVC display automatically reverts to the default STATUS RUNNING TEMP CONTROL 01-01-95 11:48 MESSAGE LEAVING CHILLED WATER screen after 15 minutes if no softkey activity takes place 28.8 HOURS CHW IN CHW OUT... -
Page 20: To View Status
2. Press NEXT PREVIOUS to highlight the desired • Press to leave the selected decision or field with- QUIT status table. The list of tables is: out saving any changes. • MAINSTAT — Overall chiller status • STARTUP — Status required to perform start-up of chiller •... - Page 21 CONTROL TEST CONTROL ALGORITHM STATUS EQUIPMENT CONFIGURATION ISM (STARTER) CONFIG DATA EQUIPMENT SERVICE TIME AND DATE ATTACH TO NETWORK DEVICE LOG OUT OF DEVICE CVC CONFIGURATION NEXT PREVIOUS SELECT EXIT SEE FIGURE 21 Fig. 20 — 23XL CVC Menu Structure...
-
Page 22: Alarms And Alerts
Select a Table SELECT NEXT PREVIOUS EXIT Select a Parameter SELECT NEXT PREVIOUS EXIT Modify a Parameter INCREASE ENTER (ANALOG VALUES) DECREASE QUIT DISABLE QUIT ENTER (DISCRETE VALUES) ENABLE CONTINUED ON NEXT PAGE Fig. 21 — 23XL Service Menu Structure... - Page 23 — English (US IMP) or S.I. Metric Units CCN — Carrier Comfort Network indicate software version) — Password CVC — Chiller Visual Controller — Imperial — Integrated Starter Module PIC II — Product Integrated Control II Fig. 21 — 23XL Service Menu Structure (cont)
-
Page 24: Time Schedule Operation
3. Press to remove the override and return RELEASE the point to the PIC II’s automatic control. 23XL Override Indication — An override value is indicated by “SUPVSR,” “SERVC,” or “BEST” flashing next to the point value on the STATUS table. -
Page 25: To View And Change Set Points
2. There are 5 set points on this screen: BASE DEMAND b. Press to select days in the day-of-week ENABLE LIMIT, LCW SETPOINT (leaving chilled water set fields. Press to eliminate days from the DISABLE point), ECW SETPOINT (entering chilled water set period. -
Page 26: Alarms And Alerts
— Solid State reference CCN/BS documentation or use CCN/BS programs. For — Temperature more information, see the 23XL CCN literature. — Slide Valve — Variable Frequency Drive — Water System Manager EXAMPLE 1 —... - Page 27 Table 3 — CVC Display Data (cont) EXAMPLE 2 — MAINTSTAT DISPLAY SCREEN To access this display from the CVC default screen: 1. Press MENU 2. Press will be highlighted). STATUS MAINSTAT 3. Press SELECT DESCRIPTION STATUS UNITS POINT Control Mode NOTE 1 NOTE 1 CMODE...
- Page 28 Table 3 — CVC Display Data (cont) EXAMPLE 4 — COMPRESS DISPLAY SCREEN To access this display from the CVC default screen: 1. Press MENU 2. Press STATUS 3. Scroll down to highlight COMPRESS 4. Press SELECT DESCRIPTION STATUS UNITS POINT Slide Valve Load SV_LD...
- Page 29 Table 3 — CVC Display Data (cont) EXAMPLE 6 — POWER DISPLAY SCREEN To access this display from the CVC default screen: 1. Press MENU 2. Press STATUS 3. Scroll down to highlight POWER 4. Press SELECT DESCRIPTION STATUS UNITS POINT Average Line Current 0-999...
- Page 30 Table 3 — CVC Display Data (cont) EXAMPLE 8 — SETPOINT DISPLAY SCREEN To access this display from the CVC default screen: 1. Press MENU 2. Press (Base Demand Limit will be highlighted) . SETPOINT 3. Press SELECT DESCRIPTION STATUS UNITS POINT DEFAULT...
- Page 31 Table 3 — CVC Display Data (cont) EXAMPLE 10 — OVERRIDE DISPLAY SCREEN To access this display from the CVC default screen: 1. Press MENU 2. Press SERVICE 3. Scroll down to highlight CONTROL ALGORITHM STATUS 4. Press SELECT 5. Scroll down to highlight OVERRIDE DESCRIPTION STATUS...
- Page 32 Table 3 — CVC Display Data (cont) EXAMPLE 12 — ISM_HIST DISPLAY SCREEN To access this display from the CVC default screen: 1. Press MENU 2. Press SERVICE 3. Scroll down to highlight CONTROL ALGORITHM STATUS 4. Press SELECT 5. Scroll down to highlight ISM_HIST DESCRIPTION STATUS...
- Page 33 Table 3 — CVC Display Data (cont) EXAMPLE 14 — NET_OPT DISPLAY SCREEN To access this display from the CVC default screen: 1. Press MENU 2. Press SERVICE 3. Scroll down to highlight EQUIPMENT CONFIGURATION 4. Press SELECT 5. Scroll down to highlight NET_OPT DESCRIPTION STATUS...
- Page 34 Table 3 — CVC Display Data (cont) EXAMPLE 16 — OPTIONS DISPLAY SCREEN To access this display from the CVC default screen: 1. Press MENU 2. Press SERVICE 3. Scroll down to highlight EQUIPMENT SERVICE 4. Press SELECT 5. Scroll down to highlight OPTIONS DESCRIPTION STATUS...
- Page 35 Spare Temp #2 Limit –40-245 DEG F sp2_ lim 23XL Model TC Comp? NO/YES TC_23XL NOTE: No variables are available for CCN read or write operation; forcing shall not be supported on service screens. EXAMPLE 18 — SETUP2 DISPLAY SCREEN To access this display from the CVC default screen: 1.
- Page 36 Table 3 — CVD Display Data (cont) EXAMPLE 19 — LEAD/LAG DISPLAY SCREEN To access this display from the CVC default screen: 1. Press MENU 2. Press SERVICE 3. Scroll down to highlight EQUIPMENT SERVICE 4. Press SELECT 5. Scroll down to highlight LEAD/LAG DESCRIPTION STATUS...
-
Page 37: Pic Ii System Functions
PIC II System Functions NOTE: Increasing either of these settings causes the slide valve to respond more slowly than they would at a lower NOTE: Words not part of paragraph headings and printed in all setting. capital letters can be viewed on the CVC (e.g., LOCAL, CCN, The PROPORTIONAL ECW BAND can be adjusted on the RUNNING, ALARM, etc.) Words printed in both all capital CVC display for values of 1, 2, or 3;... -
Page 38: Safety Controls
Default Screen Freeze — CONFIGURATION table. See Table 3, Example 14. SCHED- When the chiller is in an ULE NUMBER can be changed to any value from 03 to 99. If alarm state, the default CVC display “freezes,” that is, it stops this number is changed on the NET_OPT screen, the operator updating. -
Page 39: Low Discharge Temperature Control
Oil Sump Temperature Control TC (Frame 1 1. The slide is prevented from closing further, and the status line on the CVC indicates the reason for the and 2) Chillers Only — The oil sump temperature con- override. trol is regulated by the PIC II using the oil heater relay when the chiller is shut down. -
Page 40: Remote Start/Stop Controls
Table 5 — Capacity Overrides Table Capacity Overrides SECOND STAGE OVERRIDE FIRST STAGE SET POINT SET POINT TERMINATION OVERRIDE CAPACITY CONTROL View/Modify Default Configurable Value Value on CVC Screen Value Range 150 to 260 psig >Override HIGH CONDENSER 230 psig <Override SETUP1 (1032 to... -
Page 41: Auto. Restart After Power Failure
vessels changes. This prevents low condenser water tempera- The CVC default screen indicates when the chilled water re- ture and maximizes chiller efficiency. The tower fan relay can set is active. TEMPERATURE RESET on the MAINSTAT only accomplish this if the relay has been added to the cooling screen indicates the amount of reset. -
Page 42: Head Pressure Output Reference
MENT SERVICE-OPTIONS table. When configuring this out- HGBP — Hot Gas Bypass put, ensure that minimum requirements for oil pressure and Fig. 24 — 23XL Hot Gas Bypass (English) proper condenser FLASC orifice performance are maintained. Lead/Lag Control — The lead/lag control system auto- matically starts and stops a lag or second chiller in a 2-chiller water system. -
Page 43: Chiller Communication Wiring
CHILLER COMMUNICATION WIRING — Refer to the designated as a standby chiller when its LEAD/LAG CONFIG- chiller’s Installation Instructions, Carrier Comfort Network URATION value on the LEADLAG screen is set to “3.” The Interface section for information on chiller communication standby chiller can operate as a replacement for the lag chiller wiring. -
Page 44: Faulted Chiller Operation
Lag Chiller Shutdown Requirements — The following con- the ACTIVE DEMAND LIMIT in the lag chiller to the lead ditions must be met in order for the lag chiller to be stopped. chiller’s compressor motor load value MOTOR PERCENT KILOWATTS or AVERAGE LINE CURRENT on the MAIN- 1. -
Page 45: Ice Build Initiation
ICE BUILD INITIATION — The ice build time schedule • 20 mA DEMAND LIMIT OPT (configured on (OCCPC02S) is the means for activating the ice build option. RAMP_DEM screen). The ice build option is enabled if: TERMINATION OF ICE BUILD — The ice build function terminates under the following conditions: •... -
Page 46: Attaching To Other Ccn Modules
LOCAL device. The CVC ATTACH softkey. for the 23XL will be uploaded and default screen will display. TO LOG OUT OF NETWORK DEVICE — To access this NOTE: The CVC will not automatically reattach to the local screen and log out of a network device, from the default CVC module on the chiller. -
Page 47: Start-Up/Shutdown/Recycle
CONTACTS INPUT and press the softkey. RELEASE 23XL Once local start-up begins, the PIC II performs a series of pre-start tests to verify that all pre-start alerts and safeties are within the limits shown in Table 4. The RUN STATUS parame- ter on the MAINSTAT screen line now reads PRESTART. -
Page 48: Shutdown Sequence
shutdown, advances the starts in the12 hours counter by one, If the water/brine temperature is high enough, the start-up sequence continues and checks the slide valve unload timer. If and displays the applicable shutdown status on the CVC the unload timer has expired, the PIC II then confirms the cor- display. -
Page 49: Chilled Water Recycle Mode
Once these conditions are met, the compressor initiates a 23XL chillers are shipped with a full refrigerant and oil charge. Units may be ordered with the refrigerant shipped sepa- start-up with a normal start-up sequence. -
Page 50: Leak Test Chiller
Carrier recommends the follow- to confirm. Total all leak rates for the entire chiller. ing leak test procedures. See Fig. 31 for an outline of the leak Leakage at rates greater than 1 lb/year (0.45 kg/year) - Page 52 Fig. 32 — Typical Optional Pumpout System Piping Schematic with Storage Tank (TC Frame 1 and 2 Chillers)
- Page 53 Fig. 33 — Typical Optional Pumpout System Piping Schematic With Storage Tank (TD Frame 4 Chillers)
- Page 54 Fig. 34 — Typical Optional Pumpout System Piping Schematic Without Storage Tank (TC Frame 1 and 2 Chillers)
- Page 55 Fig. 35 — Typical Optional Pumpout System Piping Schematic Without Storage Tank (TD Frame 4 Chillers)
- Page 56 Table 6A — HCFC-22 Pressure — Temperature (F) TEMPERATURE PRESSURE (psi) PRESSURE (psi) PRESSURE (psi) TEMPERATURE TEMPERATURE Absolute Gage Absolute Gage Absolute Gage –50 11.67 6.154* 69.59 54.90 241.04 226.35 –48 12.34 4.829* 72.17 57.47 247.50 232.80 –46 13.00 3.445* 74.82 60.12 254.08...
- Page 57 Table 6C — HFC-134a Pressure — Temperature (F) Table 6D — HFC-134a Pressure — Temperature (C) TEMPERATURE, F PRESSURE (psig) TEMPERATURE, C PRESSURE (kPa) 6.50 -18.0 44.8 7.52 -16.7 51.9 8.60 -15.6 59.3 9.66 -14.4 66.6 10.79 -13.3 74.4 11.96 -12.2 82.5 13.17...
-
Page 58: Chiller Dehydration
3. If the entire chiller is to be dehydrated, open all isola- The 23XL relief valves are set to relieve at the 300 psig tion valves (if present). (2069 kPa) chiller design pressure. -
Page 59: Carrier Comfort Network Interface
Clean and inspect the contactors if this has occurred. with devices of this type, remove the fluid cups from these magnetic overload relays. Add the dashpot oil to Carrier Comfort Network Interface — The Carrier the cups according to the instructions supplied with the Comfort Network (CCN) communication bus wiring is starter. -
Page 60: Benshaw, Inc. Redistart Micro Solid-State Starter
BENSHAW, INC. REDISTART MICRO SOLID-STATE As the 23XL unit is configured, all configuration settings STARTER should be written down. A log, such as the one shown on pages CL-1 to CL-12, provides a convenient list for configuration values. -
Page 61: Password
Line Frequency ISM_CONF — Enter YES for 60 Hz or CVC_PSWD menu on the STATUS screen is accessed by NO for 50 Hz. a Carrier representative. Line Frequency ISM_CONF — ENABLE if motor Faulting protection required for drop in line frequency. -
Page 62: If Necessary
SARY — The EQUIPMENT SERVICE table has screens to mate the refrigerant suction and condensing temperatures at select, view, or modify parameters. Carrier’s certified drawings this difference. Use the proper saturated pressure and tempera- have the configuration values required for the jobsite. Modify ture for the particular refrigerant used. -
Page 63: Perform A Control Test
Perform a Control Test — HEAT_EX screen). To calibrate oil pressure or water- Check the safety controls status by performing an automated control test. Access the side flow device, view the particular reading CONTROL TEST table and select a test to be performed func- (CHILLED WATER DELTA P and CONDENSER tion (Table 7). -
Page 64: Charge Refrigerant Into Chiller
The standard 23XL chiller is shipped with the refrigerant al- reattach the valve locking device. This prevents the valve ready charged in the vessels. However, the 23XL may be or- from opening or closing during service work or during dered with a nitrogen holding charge of 15 psig (103 kPa). -
Page 65: Initial Start-Up
The full refrigerant charge on the 23XL will vary with chill- er components and design conditions, as indicated on the job data specifications. An approximate charge may be determined Do not permit water or brine that is warmer than 110 F by adding the condenser charge to the cooler charge as listed in (43 C) to flow through the cooler or condenser. -
Page 66: Initial Start-Up
To Prevent Accidental Start-Up — CHECK OPERATOR KNOWLEDGE — Start, stop, and A chiller STOP shutdown procedures, safety and operating controls, refrigerant override setting may be entered to prevent accidental start-up and oil charging, and job safety. during service or whenever necessary. Access the MAINSTAT REVIEW THE START-UP OPERATION, AND MAINTE- screen and using the softkeys, high-... -
Page 67: To Stop The Chiller
It may be advisable to flush the water such as the Data Collection module and a Building Supervisor. circuits to remove any soft rust which may have formed. This Contact your Carrier representative for more information. -
Page 69: Procedures
*Bimetal thermal protector imbedded in motor winding. (backseated) during operation. Rotate the valve stem Fig. 38 — 23XL Pumpout Unit Wiring Schematic fully counterclockwise to open. Frontseating the valve closes the refrigerant line and opens the gage port to compressor pressure. -
Page 70: Chillers With Isolation Valves
Chillers with Isolation Valves e. Turn off the pumpout compressor. 2. Evacuate the refrigerant gas from the chiller condenser TRANSFER ALL REFRIGERANT TO CHILLER CON- vessel. DENSER VESSEL — For chillers with isolation valves, re- frigerant can be stored in one chiller vessel or the other without a. -
Page 71: Procedures
Chillers with Storage Tanks — If the chiller has a k. Close valves 1a, 1b, 2, 5, 6, and 10. separate storage tank, or the chiller does not have isolation VALVE 1a 1b 2 3 4 5 6 7 8 10 11 12 13 14 valves, refer to the following procedure. -
Page 72: General Maintenance
If the optional pumpout sys- 5. Close the charging valve on the chiller. Remove the tem is used, the 23XL refrigerant charge may be transferred to copper tube if no longer required. a storage vessel or within the condenser or cooler if isolation valves are present. -
Page 73: Weekly Maintenance
WEEKLY MAINTENANCE yearly oil analysis is performed, the time between oil changes may be extended. The 23XL TC frame 1 and 2 chillers use Check the Lubrication System — Mark the oil lev- approximately 4.2 gal (15.9 L) of oil. The 23XL TD frame 4 el on the sight glasses and observe the level each week while chillers use approximately 10 gal (38 L) of oil. -
Page 74: Oil Specification
Ensure that all openings • Carrier Part Number..... . . PP23BZ104 are free of obstructions. -
Page 75: Compressor Bearing Maintenance
During the tube cleaning process, use brushes especially de- signed to avoid scraping and scratching the tube wall. Contact your Carrier representative to obtain these brushes. Do not use LEGEND wire brushes. 1 — Refrigerant Inlet from FLASC Chamber 2 —... -
Page 76: Check Pressure Transducers
• Carrier Part Number ....PP23BZ-103 • The CVC default screen freezes when an alarm occurs. -
Page 77: Checking Pressure Transducers
Checking Display Messages — The first area to (oil pressure transducer — evap pressure transducer) is calcu- check when troubleshooting the 23XL chiller is the CVC dis- lated by the CCM. play. If the alarm light is flashing, check the primary and sec- All pressure transducers should be calibrated prior to initial ondary message lines on the CVC default screen (Fig. -
Page 78: Transducer Replacement
Pumpdown/Lockout after the pumpdown procedure is reversed and refrigerant is added. LEGEND TO TABLES 9A-9J — Chiller Control Module CCN — Carrier Comfort Network CVC — Chiller Visual Controller CHW — Chilled Water — Integrated Starter Module PIC II — Product Integrated Control II... -
Page 79: Troubleshooting Guide
Table 9 — CVC Primary and Secondary Messages and Custom Alarm/Alert Messages with Troubleshooting Guides A. MANUAL STOP PRIMARY MESSAGE SECONDARY MESSAGE PROBABLE CAUSE/REMEDY MANUALLY STOPPED — PRESS CCN OR LOCAL TO START PIC II in OFF mode, press CCN or LOCAL softkey to start unit. TERMINATE PUMPDOWN MODE TO SELECT CCN OR LOCAL Enter the CONTROL TEST table and select TERMINATE... - Page 80 Table 9 — CVC Primary and Secondary Messages and Custom Alarm/Alert Messages with Troubleshooting Guides (cont) D. PRE-START ALERTS: These alerts only delay start-up. When alert is corrected, the start-up will continue. No reset is necessary. PRIMARY SECONDARY ALARM MESSAGE STATE ADDITIONAL CAUSE/REMEDY MESSAGE...
- Page 81 Table 9 — CVC Primary and Secondary Messages and Custom Alarm/Alert Messages with Troubleshooting Guides (cont) F. NORMAL RUN PRIMARY MESSAGE SECONDARY MESSAGE CAUSE/REMEDY RUNNING — RESET ACTIVE 4-20 mA SIGNAL Auto chilled water reset active based on external input. RUNNING —...
-
Page 82: Chiller Protect Limit Faults
Table 9 — CVC Primary and Secondary Messages and Custom Alarm/Alert Messages with Troubleshooting Guides (cont) I. CHILLER PROTECT LIMIT FAULTS PRIMARY SECONDARY ALARM MESSAGE STATE ADDITIONAL CAUSE/REMEDY MESSAGE MESSAGE PRIMARY CAUSE PROTECTIVE 1M CONTACT 200->1M Aux Contact Fault; LIMIT FAULT Check 1M Contactor and PROTECTIVE... - Page 83 Table 9 — CVC Primary and Secondary Messages and Custom Alarm/Alert Messages with Troubleshooting Guides (cont) I. CHILLER PROTECT LIMIT FAULTS (cont) PRIMARY SECONDARY ALARM MESSAGE STATE ADDITIONAL CAUSE/REMEDY MESSAGE MESSAGE PRIMARY CAUSE PROTECTIVE OIL PRESS 227->Oil Delta P [VALUE] Check transducer wiring and accuracy.
- Page 84 Table 9 — CVC Primary and Secondary Messages and Custom Alarm/Alert Messages with Troubleshooting Guides (cont) I. CHILLER PROTECT LIMIT FAULTS (cont) PRIMARY SECONDARY ALARM MESSAGE STATE ADDITIONAL CAUSE/REMEDY MESSAGE MESSAGE PRIMARY CAUSE PROTECTIVE DIRTY OIL FILTER 246->Oil Filter DELTA P LIMIT [VALUE] exceeded limit of [LIMIT].
- Page 85 Table 9 — CVC Primary and Secondary Messages and Custom Alarm/Alert Messages with Troubleshooting Guides (cont) J. CHILLER ALERTS (cont) PRIMARY SECONDARY ALARM MESSAGE STATE ADDITIONAL CAUSE/REMEDY MESSAGE MESSAGE PRIMARY CAUSE CONDENSER PUMP RELAY 151->High Condenser Check sensor wiring and accuracy. PRESSURE ENERGIZED Pressure [VALUE]: Pump...
- Page 86 Table 10A — Thermistor Temperature (F) vs Resistance/VoltageDrop TEMPERATURE VOLTAGE RESISTANCE TEMPERATURE VOLTAGE RESISTANCE TEMPERATURE VOLTAGE RESISTANCE DROP (V) (Ohms) DROP (V) (Ohms) DROP (V) (Ohms) –25 4.821 98,010 3.409 7,665 1.211 1,141 –24 4.818 94,707 3.382 7,468 1.192 1,118 –23 4.814 91,522...
- Page 87 Table 10B — Thermistor Temperature (C) vs Resistance/Voltage Drop TEMPERATURE VOLTAGE RESISTANCE TEMPERATURE VOLTAGE RESISTANCE DROP (V) (Ohms) DROP (V) (Ohms) –40 4.896 168 230 1.898 2 184 –39 4.889 157 440 1.852 2 101 –38 4.882 147 410 1.807 2 021 –37 4.874...
-
Page 88: Control Modules
Control Modules — Notes on Module Operation Turn controller power off before servicing controls. This ensures safety and prevents damage to 1. The chiller operator monitors and modifies configura- the controller. tions in the microprocessor by using the 4 softkeys and The CVC, CCM, and ISM modules perform continuous di- the CVC. -
Page 89: Chiller Control Module (Ccm)
Benshaw, Inc., solid-state starter may be label on the rear of the CVC module. The chiller model and found in the following paragraphs and in the Carrier serial numbers are printed on the chiller nameplate located on REDISTART MICRO Instruction Manual supplied by the an exterior corner post. - Page 90 DISCRETE DISCRETE 24 VAC OUTPUTS OUTPUTS ANALOG OUT V/I INPUTS STAT COMM THERMISTORS PRESSURE DIFF PRESSURE Fig. 43 — Chiller Control Module (CCM) COM STAT I N T E G R A T E D S T A R T E R M O D U L E FUSE J3-1 J3-2...
-
Page 91: Scr Removal/Installation
5. Using quarter-turn increments, alternating between 5. Using an ohmmeter, perform the following resistance measurements and record the results: clamping bolts, apply the appropriate number of whole turns referencing the table in Fig. 45. SCR PAIRS MEASURE RECORDED BEING BETWEEN VALUE CHECKED T1 and T6... -
Page 92: Physical Data
For operator convenience during trou- specifications, physical data, electrical data, and wiring sche- matics may be found in Tables 11-18 and Fig. 46-52. bleshooting, additional details regarding compressor torque Table 11 — 23XL Heat Exchanger Weights ENGLISH Dry Wt (lb)* Machine Charge... - Page 93 Table 14A — 23XL Waterbox Cover Weights (Frame 1 and 2 Machines)* FRAME 1 FRAME 2 HEAT WATERBOX EXCHANGER DESCRIPTION (kPa) NIH, 1 Pass NIH, 2 Pass (Plain) (1034) COOLER OR NIH, 2 Pass (With Pipe Nozzles) CONDENSER NIH, 3 Pass...
- Page 94 230-3-60 57.5 19EA46-748 400/460-3-50/60 28.8 LEGEND LRA — Locked Rotor Amps RLA — Rated Load Amps Table 17A — 23XL Waterbox Cover Weights (TC Frame 1 and 2 Chillers)* FRAME 1 FRAME 2 HEAT WATERBOX EXCHANGER DESCRIPTION (kPa) NIH, 1 Pass...
- Page 95 Table 18 — 23XL Compressor Torque Specification Chart for Metric amd American Fasteners TORQUE CAP SCREW ITEM GRADE ASSEMBLY LOCATION SIZE AND TYPE Lb-Ft Lb-in. 1. FUSITE-MOTOR CASING M5 X 0.8 X 12 S.H. 4.1-5.4 36-48 2. SLIDE SEAL RETAINER-CYLINDER STOP 1.
- Page 98 NOTE: Power factor correction capacitors (when required) are connected ahead of all current transformers for proper calibra- tion and sensing by the ISM and IQDP4130. LEGEND — Auxiliary — Integrated Starter Module — Contactor — Main Supply Power — Circuit Breaker —...
- Page 103 LEGEND Factory Wiring Field Wiring Component Terminal Control Panel Terminal *Field supplied terminal strip must be located in the control center. Fig. 52 — Typical COMM1 CCN Communication Wiring for Multiple Chillers...
-
Page 104: Index
Optional Pumpout Compressor Water Piping (Check), 58 Before Initial Start-Up, 49 Optional Storage Tank and Pumpout System (Using), 49 Carrier Comfort Network Interface, 59 Optional Pumpout System Controls and Compressor (Check), 63 Capacity Override, 38 Optional Pumpout System Maintenance, 76... -
Page 105: Initial Start-Up Checklist For 23Xl Hermetic Screw
INITIAL START-UP CHECKLIST FOR 23XL HERMETIC SCREW LIQUID CHILLER (Remove and use for job file.) MACHINE INFORMATION: NAME JOB NO. ADDRESS MODEL CITY STATE DESIGN CONDITIONS FLOW TEMPERATURE TEMPERATURE PRESSURE SUCTION CONDENSER TONS BRINE PASS RATE DROP TEMPERATURE TEMPERATURE COOLER... - Page 106 E: After machine has been successfully run and set up, shut down and mark shutdown oil and refrigerant levels. F: Give operating instructions to owner’s operating personnel. Hours Given: Hours G: Call your Carrier factory representative to report chiller start-up. SIGNATURES: CARRIER CUSTOMER...
- Page 107 23XL PIC II SETPOINT TABLE CONFIGURATION SHEET DESCRIPTION RANGE UNITS DEFAULT VALUE 40 to 100 Base Demand Limit LCW Setpoint 10 to 120 DEG F 50.0 ECW Setpoint 15 to 120 DEG F 60.0 Ice Build Setpoint 15 to 60 DEG F 40.0...
- Page 108 Period 4: Period 5: Period 6: Period 7: Period 8: NOTE: Default setting is OCCUPIED 24 hours/day. ICE BUILD 23XL PIC II TIME SCHEDULE CONFIGURATION SHEET OCCPC02S Day Flag Occupied Unoccupied Time Time M T W T F S S H...
- Page 109 23XL PIC II ISM_CONF TABLE CONFIGURATION SHEET DESCRIPTION RANGE UNITS DEFAULT VALUE Starter Type 0 to 2 (0=Full, 1=Red, 2=SS/VFD) Motor Rated Line Voltage 200 to 13200 VOLTS Volt Transformer Ratio: 1 1 to 35 105 to 115 Overvoltage Threshold...
- Page 110 23XL PIC II OPTIONS TABLE CONFIGURATION SHEET DESCRIPTION RANGE UNITS DEFAULT VALUE Auto Restart Option DSABLE/ENABLE DSABLE Remote Contacts Option DSABLE/ENABLE DSABLE Soft Stop Amps Threshold 40 to 100 Stall/Hot Gas Bypass Stall Limit/HGBP Option Select: Stall=0, HGBP=1 Min. Load Point (T1/P1) Stall/HGBP Delta T1 0.5 to 20...
- Page 111 23XL PIC II SETUP1 TABLE CONFIGURATION SHEET DESCRIPTION RANGE UNITS DEFAULT VALUE Comp Motor Temp Override 150 to 200 DEG F Cond Press Override 150 to 260 Comp Discharge Alert 125 to 200 DEG F Chilled Medium WATER/BRINE WATER Chilled Water Deadband.
- Page 112 23XL PIC II SETUP2 TABLE CONFIGURATION SHEET DESCRIPTION STATUS UNITS DEFAULT VALUE Capacity Control 2 to 10 Proportional Inc Band Proportional Dec Band 2 to 10 Proportional ECW Gain 1 to 3 VFD/Slide Valve Control DSABLE/ENABLE DSABLE VFD Option VFD Gain 0.1 to 1.5...
- Page 113 23XL PIC II LEADLAG TABLE CONFIGURATION SHEET DESDRIPTION RANGE UNITS DEFAULT VALUE Lead Lag Control LEAD/LAG Configuration DSABLE=0, LEAD=1, 0 to 3 LAG=2, STANDBY=3 Load Balance Option DSABLE/ENABLE DSABLE Common Sensor Option DSABLE/ENABLE DSABLE LAG Percent Capacity 25 to 75...
- Page 114 23XL PIC II RAMP_DEM TABLE CONFIGURATION SHEET DESCRIPTION RANGE UNITS DEFAULT VALUE Pulldown Ramp Type: Select: Temp=0, Load=1 Demand Limit + kW Ramp Demand Limit Source Select: Amps=0, kW=1 Motor Load Ramp % Min 5 to 20 Demand Limit Prop Band...
- Page 115 23XL BROADCAST (BRODEF) CONFIGURATION SHEET DESCRIPTION RANGE UNITS DEFAULT VALUE Time Broadcast Enable DSABLE/ENABLE DSABLE Daylight Savings Start Month 1 to 12 Start Day of Week 1 to 7 Start Week 1 to 5 Start Time 00:00 to 24:00 HH:MM...
- Page 116 Copyright 1999 Carrier Corporation Manufacturer reserves the right to discontinue, or change at any time, specifications or designs without notice and without incurring obligations. PC 211 Catalog No. 532-306 Printed in U.S.A. Form 23XL-3SS Pg CL-12 7-99 Replaces: New Book...