Table of Contents
Advertisement
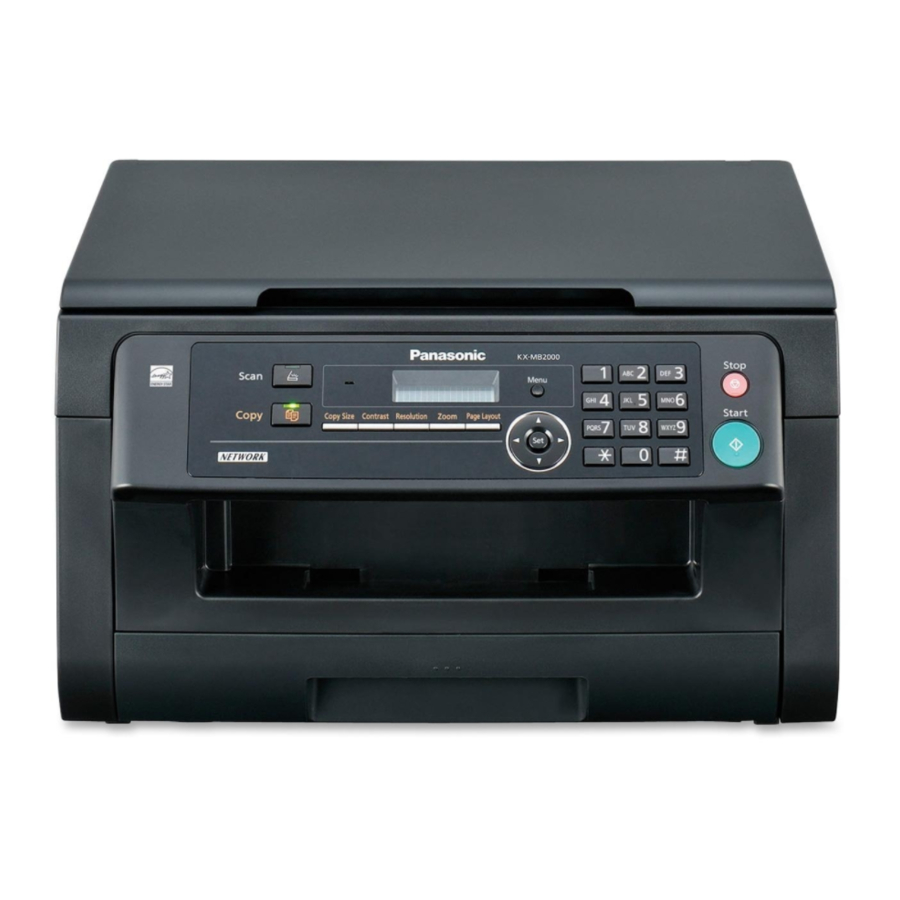
This pictured model is KX-MB2000.
Do NOT connect the unit to a computer with the USB cable until prompted to do so during the setup
of Multi-Function Station (CD-ROM).
1
KX-MB2025/KX-MB2030 only:
R This unit is compatible with Caller ID. You must subscribe to the appropriate service offered by
your service provider/telephone company.
KX-MB2025EX/KX-MB2030EX only:
R Designed to be used in Czech, Hungary and Slovakia according to the location setting feature. The
default setting is Czech. To change the location setting, see page 58 (feature #114).
Operating Instructions
KX-MB2000HX
Model No.
KX-MB2010HX
KX-MB2025EX
KX-MB2025FX
KX-MB2030EX
KX-MB2030FX
2
Multi-Function Printer
Advertisement
Table of Contents

Related Manuals for Panasonic KX-MB2000HX


Summary of Contents for Panasonic KX-MB2000HX
-
Page 1: Operating Instructions
R Designed to be used in Czech, Hungary and Slovakia according to the location setting feature. The default setting is Czech. To change the location setting, see page 58 (feature #114). Operating Instructions Multi-Function Printer KX-MB2000HX Model No. KX-MB2010HX KX-MB2025EX... - Page 2 R All other trademarks identified herein are the property of their respective owners. Copyright: R This material is copyrighted by Panasonic System Networks Co., Ltd., and may be reproduced for internal use only. All other reproduction, in whole or in part, is prohibited without the written consent of Panasonic System Networks Co., Ltd.
-
Page 3: Important Information
R For optimal performance, genuine Panasonic toner cartridges and drum cartridges are recommended. We cannot be responsible for problems that may be caused by a non-Panasonic toner cartridge or drum cartridge: – Damage to the unit – Poor print quality –... -
Page 4: Moving The Unit
Important Information printing. Leave the power turned ON for a minimum of 30 minutes after printing. Location R To avoid malfunction, do not position the unit near appliances such as TVs or speakers which generate an intense magnetic field. Static electricity R To prevent static electricity damage to the interface connectors or other electrical components inside the unit, touch a grounded metal surface before touching... -
Page 5: Table Of Contents
1. Introduction and Installation Accessories Supplied accessories ...7 Accessory information ...7 Finding the Controls Button descriptions ...8 Overview ...9 Installation Toner cartridge and drum cartridge ...10 Output tray ...13 Recording paper ...14 2. Preparation Connections and Setup Connections ...17 Turning the power switch ON ...18 Dialling mode (KX-MB2025/KX-MB2030 only) ...18 Selecting the operation mode (Scan/Copy) - Page 6 Table of Contents Telephone Handset unit (KX-MB2025/KX-MB2030 only) ...77 Making a phone call using one-touch dial feature or phonebook (KX-MB2025/ KX-MB2030 only) ...78 10. Help Reports and Displays 10.1 Report messages (KX-MB2025/KX-MB2030 only) ...80 10.2 Display messages ...81 Troubleshooting 10.3 When a function does not work ...84 11.
-
Page 7: Introduction And Installation
R After unpacking the product, take care of the packing materials and/or power plug cap appropriately. 1.2 Accessory information To ensure that the unit operates properly, we recommend the use of Panasonic toner and drum cartridges. n Replacement accessory – Toner cartridge R Model No. -
Page 8: Button Descriptions
1. Introduction and Installation 1.3 Button descriptions ABCDEFGHIJ K T U V * The pictured model is KX-MB2025/KX-MB2030. Station keys (KX-MB2025/KX-MB2030 only) R To use the one-touch dial feature (page 43, 44). MManual BroadN (KX-MB2025/KX-MB2030 only) R To send a document to multiple parties by using the dial keypad (page 45). -
Page 9: Overview
1.4 Overview 1.4.1 Front view * The pictured model is KX-MB2025. * The pictured model is KX-MB2000. Top cover ADF (Automatic Document Feeder) cover (KX-MB2010/KX-MB2025/KX-MB2030 only) Document guides (KX-MB2010/KX-MB2025/ KX-MB2030 only) Document cover Power switch Output tray Document entrance (KX-MB2010/KX-MB2025/ KX-MB2030 only) Paper input tray Recording paper exit... -
Page 10: Toner Cartridge And Drum Cartridge
R We cannot be responsible for any damage to the unit or degradation of print quality which may occur from the use of a non-Panasonic toner and drum cartridges. R Do not add toner to the toner cartridge. - Page 11 Open the top cover (H) by holding the indentations (I) on both sides of the unit. Note: R Do not touch the transfer roller (J). R If the lower glass (K) is dirty, clean it with a soft and dry cloth. Install the drum and toner cartridge (L) by holding the tabs.
- Page 12 R To ensure that the unit operates properly, we recommend the use of Panasonic toner and drum cartridges. See page 7 for accessory information. R To maintain print quality and machine life, we...
-
Page 13: Output Tray
1.6 Output tray Insert the output tray extender (A) until it clicks into place, and then press the centre part (B) of the extender to open it. Note: R Do not place the unit in an area where the output tray may be easily bumped into. -
Page 14: Recording Paper
1. Introduction and Installation 1.7 Recording paper The paper input tray unit can hold: – Up to 250 sheets of 60 g/m to 75 g/m – Up to 230 sheets of 80 g/m paper. – Up to 200 sheets of 90 g/m paper. - Page 15 match the paper size mark. Pinch the right side of the recording paper guide (E), then slide it to adjust the width to the size of the recording paper. R Make sure that the recording paper is under the paper limit mark (F), and the paper should not be loaded over the snubbers (G).
- Page 16 1. Introduction and Installation Insert the paper, print-side down (B) until the unit grasps the paper and a single beep is heard. Note: R To print from the manual input tray; – when printing with the computer, select #2 for the printer properties.
-
Page 17: Preparation
2.1 Connections Caution: R When you operate this product, the power outlet should be near the product and easily accessible. R Be sure to use the telephone line cord supplied with this unit (KX-MB2025/KX-MB2030 only). R Do not extend the telephone line cord (KX-MB2025/KX-MB2030 only). -
Page 18: Turning The Power Switch On
2. Preparation 2.2 Turning the power switch ON Turn the power switch to the ON position (A). 2.3 Dialling mode (KX-MB2025/ KX-MB2030 only) If you cannot dial (page 42), change this setting according to your telephone line service. MMenuN Press MBNM1NM2NM0N to display “DIALLING MODE”. Press M1N or M2N to select the desired setting. -
Page 19: Selecting The Operation Mode (Scan/Copy) (Fax: Kx-Mb2025/Kx-Mb2030 Only)
2.4 Selecting the operation mode (Scan/Copy) (Fax: KX-MB2025/ KX-MB2030 only) You can select the desired mode by pressing one of the following buttons. KX-MB2000 KX-MB2010 – MScanN: Select this mode when using the unit as a scanner (page 31). – MCopyN: Select this mode when using the unit as a copier (page 35). - Page 20 2. Preparation 2.5.2 Using the automatic document feeder (KX-MB2010/KX-MB2025/KX-MB2030 only) * The pictured model is KX-MB2010. Insert the document (up to 20 pages) FACE UP into the feeder until a single beep is heard. Adjust the width of the document guides (A) to fit the actual size of the document.
-
Page 21: Help Function (Kx-Mb2025/Kx-Mb2030 Only)
2.6 Help function (KX-MB2025/ KX-MB2030 only) The unit contains helpful information, which can be printed for reference. – “BASIC SETTINGS” – “FEATURE LIST” – “PHONEBOOK” – “FAX RECEIVING” – “COPIER” – “REPORTS” – “CALLER ID” MMenuN MSetN Press MMenuN repeatedly to display “HELP”. Press MFN or MEN repeatedly to display the desired item. -
Page 22: Date And Time
2. Preparation 2.8 Date and time We recommend you to set the date and time. The other party will receive your unit’s date and time as the header information. MMenuN MFaxN MSetN * The pictured model is KX-MB2025/KX-MB2030. MMenuN A MBNM1NM0NM1N A MSetN Enter the current date/month/year by selecting 2 digits for each. -
Page 23: Your Logo (Kx-Mb2025/Kx-Mb2030 Only)
2.9 Your logo (KX-MB2025/ KX-MB2030 only) You can program your logo (name, company name, etc.) so that it appears on the top of each page sent. MMenuN MSetN MMenuN A MBNM1NM0NM2N A MSetN Enter your logo, up to 30 characters (see page 75 for character entry). -
Page 24: Configuring The Unit To Access The Lan (Kx-Mb2000/Kx-Mb2010/Kx-Mb2030 Only)
2. Preparation 2.11 Configuring the unit to access the LAN (KX-MB2000/ KX-MB2010/KX-MB2030 only) You can print documents, scan documents, receive faxes or send faxes (KX-MB2030 only) using a computer connected to the LAN. To enable these features, you need to set the IP address, subnet mask, and default gateway in the unit. -
Page 25: Installing Multi-Function Station
2.12 Installing Multi-Function Station 2.12.1 Required computer environment Panasonic Multi-Function Station software enables the unit to carry out the following functions: – Printing on plain paper, thin paper and labels – Previewing documents and changing printer settings before printing (Easy Print Utility) –... - Page 26 To uninstall the software You must be logged in as an administrator in order to uninstall Multi-Function Station. [Start] A [All Programs] or [Programs] A [Panasonic] A the unit’s name A [Uninstall]. Then follow the on-screen instructions. ® Reader is required to view the operating...
-
Page 27: Starting Multi-Function Station
2.13 Starting Multi-Function Station [Start] A [All Programs] or [Programs] A [Panasonic] A the unit’s name A [Multi-Function Station] R Multi-Function Station will appear. * The pictured model is KX-MB2025/KX-MB2030. [Scan] (page 34) R To scan and display the scanned images. - Page 28 2. Preparation For Windows 2000: 1. [Start] A [Settings] A [Control Panel] A [Internet Options] A [Programs] A [E-mail] 2. Select the desired MAPI-compliant Email software such as [Outlook Express], etc. A [OK] For Windows XP: 1. [Start] A [Control Panel] A [Internet Options] A [Programs] A [E-mail] 2.
-
Page 29: Printer
3.1 Printing from Windows applications You can print a file created in a Windows application. For example, to print from WordPad, proceed as follows: Open the document you want to print. Select [Print...] from the [File] menu. R The [Print] dialogue box will appear. For details about the [Print] dialogue box, click [?], then click the desired item. -
Page 30: Easy Print Utility
– Labels that do not completely cover the backing sheet as follows: 3.2 Easy Print Utility By printing using the Panasonic Easy Print Utility instead of the printer driver, you can use useful printing features for your convenience. – Preventing unnecessary prints by checking the preview on PC screen –... -
Page 31: Scanner
4.1 Scanning from the unit (Push Scan) You can easily scan the document by using the operation panel on the unit. You can select one of the following scanning modes depending on how you intend to use the scanned image. –... - Page 32 4. Scanner Set the original (page 19). MScanN Press MCN or MDN repeatedly to select “EMAIL”. A MSetN For USB connection: Press MCN or MDN repeatedly to select “USB HOST”. A MSetN For LAN connection (KX-MB2000/KX-MB2010/ KX-MB2030 only): Press MCN or MDN repeatedly to select the computer to which you want to send the scanned image.
- Page 33 R You can easily send scanned image to the desired destinations using station keys (KX-MB2030 only). To use this feature, register email addresses to station keys beforehand (page 70). 1. Set the original (page 19). 2. MScanN 3. Using station 1–3: Press the desired station key.
-
Page 34: Scanning From A Computer (Pull Scan)
4. Scanner 4.2 Scanning from a computer (Pull Scan) Note: R When scanning a document, we recommend using the scanner glass rather than the automatic document feeder for better results (KX-MB2010/ KX-MB2025/KX-MB2030 only). R Do not open the document cover when scanning a document with the automatic document feeder (KX-MB2010/KX-MB2025/KX-MB2030 only). -
Page 35: Copier
5.1 Making a copy 5.1.1 Using the scanner glass MCopyN MCopy SizeN MStartN MContrastN MResolutionN MSetNMCNMDNMEN MFax Auto AnswerN * The pictured model is KX-MB2025. If the MCopyN light is OFF, turn it ON by pressing MCopyN. Set the original (page 19). If necessary, change the copy size (original document size and recording paper size), resolution and contrast according to the type of document. -
Page 36: More Copying Features
5. Copier 5.1.2 Using the automatic document feeder (KX-MB2010/KX-MB2025/KX-MB2030 only) MCopyN MStartN * The pictured model is KX-MB2010. If the MCopyN light is OFF, turn it ON by pressing MCopyN. Set the original (page 20). If necessary, change the copy size (original document size and recording paper size), resolution and contrast according to the type of document. - Page 37 Example: 150 % enlarged copy Using the scanner glass (A): Original document Using the automatic document feeder (KX-MB2010/ KX-MB2025/KX-MB2030 only): Original document Example: 70 % reduced copy Using the scanner glass (A): Original document Using the automatic document feeder (KX-MB2010/ KX-MB2025/KX-MB2030 only): Original document 5.2.2 Collate copy...
- Page 38 5. Copier Set the original (page 19). R To make a landscape copy, set the original in landscape direction. To make a portrait copy, set the original in portrait direction. R The scanning area changes according to the selected setting in step 4. See the following table for details.
- Page 39 Original document Page layout “8 in 1” 5.2.4 Poster feature (Scanner glass only) You can make copies divided into 2 (“1 X 2”), 4 (“2 X 2”) or 9 (“3 X 3”) sections to make enlarged copies of the individual sections. You can then glue them together to make a poster.
-
Page 40: Copy Reservation
5. Copier Original document Page layout “8 in 1” “PORTRAIT” “LANDSCAPE” Note: R You can save the previous page layout setting (feature #467 on page 67). Separate N in 1 feature (Scanner glass only) You can separate an N in 1 copied document back into its original, separate pages. - Page 41 Set the original (page 19). While “PC PRINTING” or “PRINTING” (KX-MB2025/KX-MB2030 only) is displayed, press MCopyN. Make necessary settings such as number of copies, resolution, zoom features and page layout features. A MStartN R “COPY RESERVED” will be displayed. The unit will start copying after the current printing job.
-
Page 42: Fax (Kx-Mb2025/Kx-Mb2030 Only)
6. Fax (KX-MB2025/KX-MB2030 only) 6.1 Sending a fax manually 6.1.1 Using the scanner glass By using the scanner glass, you can send a page from booklets or small size paper. MFaxN MSetN MStartN MRedialN MContrastN MQuick ScanN MResolutionN If the MFaxN light is OFF, turn it ON by pressing MFaxN. -
Page 43: Storing Items For The One-Touch Dial Feature And Phonebook
fax transmissions and receptions, make sure feature #402 is activated (page 62). For an explanation of the messages, see page 80. 6.1.2 Using the automatic document feeder MFaxN MMonitorN MStartN MQuick ScanN If the MFaxN light is OFF, turn it ON by pressing MFaxN. -
Page 44: Sending A Fax Using One-Touch Dial Feature And Phonebook
6. Fax (KX-MB2025/KX-MB2030 only) MMenuN Note: R A hyphen or a space entered in a telephone number counts as 2 digits. 6.2.3 Editing a stored item MPhonebookN Press MCN or MDN repeatedly to display the desired item. A MMenuN A MGN Edit the name if necessary. -
Page 45: Broadcast Transmission
MStartN 6. Fax (KX-MB2025/KX-MB2030 only) 6.4 Broadcast transmission You can send the same document to multiple parties (up to 20). To use this feature, store the fax numbers into broadcast memory as follows. Broadcast: Store items using one-touch dial or phonebook (page 43). - Page 46 6. Fax (KX-MB2025/KX-MB2030 only) 6.4.2 Adding a new item into the broadcast memory MPhonebookN Press MCN or MDN repeatedly to display the desired broadcast memory location (“<BROADCAST>” or “<MANUAL BROAD>”). A MMenuN A MGN Press MCN or MDN repeatedly to display the item you want to add.
-
Page 47: Sending An Electronic Document As A Fax Message From Your Computer
6.5 Sending an electronic document as a fax message from your computer You can access the fax function from a Windows application using Multi-Function Station. For example, to send a document created from WordPad, proceed as follows. Open the document you want to send. Select [Print...] from the [File] menu. -
Page 48: Receiving A Fax Automatically - Auto Answer On
6. Fax (KX-MB2025/KX-MB2030 only) Note: R Make sure feature #404 is set to “TEL” beforehand (page 62). How to receive phone calls and faxes You have to answer all calls manually. To receive a fax document, press MStartN and then M2N. 6.6.3 Use as a telephone and/or fax (TEL/FAX mode) Your situation... -
Page 49: Receiving A Fax Manually - Auto Answer Off
6.8 Receiving a fax manually – Auto answer OFF R A4 or letter size recording paper can be used. 6.8.1 Activating TEL mode Make sure feature #404 is set to “TEL” beforehand (page 62). Press MFax Auto AnswerN repeatedly to display “TEL MODE”. - Page 50 6. Fax (KX-MB2025/KX-MB2030 only) R To answer using the handset of the unit (if connected), lift the handset and talk to the other party. – See “1.1 Supplied accessories”, page 7 and “1.2 Accessory information”, page 7 if your unit includes a handset, or if an optional handset is available.
-
Page 51: Using The Unit With An Answering Machine
6.9 Using the unit with an answering machine 6.9.1 Setting up the unit and an answering machine Connect the answering machine (A). R Answering machine is not supplied. R Remove the stopper (B) if attached. * The pictured model is KX-MB2030. Set the number of rings on the answering machine to 4 rings or less. -
Page 52: Junk Fax Prohibitor (Preventing Fax Reception From Undesired Callers)
6. Fax (KX-MB2025/KX-MB2030 only) 6.11 Junk fax prohibitor (preventing fax reception from undesired callers) If you subscribe to Caller ID service (page 55), this feature prevents fax reception from calls that do not show caller information. Additionally, the unit will not accept faxes originating from numbers that match the ones on a programmable junk fax prohibitor list. -
Page 53: Receiving A Fax On Your Computer
6.12 Receiving a fax on your computer You can receive a fax document on your computer. The received fax document is saved as an image file (TIFF-G4 format). Important: R Make sure the PC fax setting is set to “ALWAYS” or “CONNECTED”... -
Page 54: Kx-Mb2030 Only
6. Fax (KX-MB2025/KX-MB2030 only) Select the [WEB FAX PREVIEW] tab. Enter the web fax preview access code (feature #450 on page 53). A [Submit] R A list of the received fax documents will be displayed. Click the desired icon to preview, print or save a fax document. -
Page 55: Caller Id (Kx-Mb2025/Kx-Mb2030 Only)
7.1 Caller ID service This unit is compatible with the Caller ID service offered by your local telephone company. To use this unit’s Caller ID features, you must subscribe to a Caller ID service. Important: R This unit is designed in accordance with the ETS (European Telecommunication Standard) and only supports the basic CLIP (Calling Line Identification Presentation) features. -
Page 56: Erasing Caller Information
7. Caller ID (KX-MB2025/KX-MB2030 only) To correct a mistake 1. Press MFN or MEN to move the cursor to the incorrect number. 2. Press MStopN to delete the number. 3. Enter the correct number. To delete a number Press MFN or MEN to move the cursor to the number you want to delete and press MStopN. -
Page 57: Programmable Features
8.1 Programming MMenuN MSetN MMenuN Press MBN and the 3-digit code (page 58 to page 73). Press the appropriate selection to display the desired setting. R This step will vary depending on the feature. MSetN Press MMenuN to exit. To select features through the web browser interface (KX-MB2000/KX-MB2010/KX-MB2030, LAN connection only) You can change features through the web browser... -
Page 58: Basic Features
Setting the date and time MBNM1NM0NM1N Setting your logo MBNM1NM0NM2N (KX-MB2025/KX-MB2030 only) Setting your fax number MBNM1NM0NM3N (KX-MB2025/KX-MB2030 only) Selecting the language MBNM1NM1NM0N (KX-MB2000HX/ KX-MB2010HX/ KX-MB2025EX/KX-MB2030EX only) Selecting the location where you use MBNM1NM1NM4N (KX-MB2025EX/ KX-MB2030EX only) Setting the dialling mode MBNM1NM2NM0N (KX-MB2025/KX-MB2030... - Page 59 Feature/Code Selecting the scale MBNM1NM4NM7N Changing the password for feature programming via remote operation MBNM1NM5NM5N Setting the toner maintenance time MBNM1NM5NM8N Resetting all features (and deleting all data in memory) MBNM1NM5NM9N Setting the ringer pattern MBNM1NM6NM1N (KX-MB2025/KX-MB2030 only) Setting the beep sounds and keytones MBNM1NM6NM5N Selection...
- Page 60 8. Programmable Features Feature/Code Changing the ring count in FAX ONLY mode MBNM2NM1NM0N (KX-MB2025/KX-MB2030 only) Setting the Caller ID list to print automatically MBNM2NM1NM6N (KX-MB2025/KX-MB2030 only) Setting the time adjustment MBNM2NM2NM6N (KX-MB2025/KX-MB2030 only) Setting the recording paper size in the paper input tray MBNM3NM8NM0N Setting the recording paper size in the manual input tray...
- Page 61 Feature/Code Setting the recording paper type for paper input tray MBNM3NM8NM3N Setting the recording paper type for manual input tray MBNM3NM8NM4N Setting the waiting time for the power save mode MBNM4NM0NM3N Holding the previous contrast setting MBNM4NM6NM2N Setting the default operation mode MBNM4NM6NM3N (KX-MB2025/KX-MB2030...
-
Page 62: Fax Features (Kx-Mb2025/Kx-Mb2030 Only)
8. Programmable Features 8.3 Fax features (KX-MB2025/KX-MB2030 only) Feature/Code Changing the TEL/FAX delayed ring count MBNM2NM1NM2N Erasing all items stored for the one-touch dial and phonebook MBNM2NM8NM9N Printing a sending report MBNM4NM0NM1N Setting the journal report to print automatically MBNM4NM0NM2N Changing the receiving mode in the manual answer setting MBNM4NM0NM4N... - Page 63 Feature/Code Sending documents overseas MBNM4NM1NM1N Sending a fax at a specific time MBNM4NM1NM2N Setting the Error Correction Mode (ECM) MBNM4NM1NM3N Selection If you cannot send a fax overseas even if the number is correct and the line is connected, activate this feature before sending the fax. This feature improves the reliability by reducing the transmission speed.
- Page 64 8. Programmable Features Feature/Code Setting the connecting tone MBNM4NM1NM6N Setting the maximum fax speed MBNM4NM1NM8N Setting auto reduction feature MBNM4NM3NM2N Changing the fax activation code MBNM4NM3NM4N Changing the silent fax recognition ring count MBNM4NM3NM6N Selection If you often have trouble when sending faxes, this feature allows you to hear connecting tones: fax tone, ring back tone and busy tone.
- Page 65 Feature/Code Setting the memory reception alert MBNM4NM3NM7N Setting friendly reception MBNM4NM3NM8N Receiving a fax into the computer MBNM4NM4NM2N Setting the computer for PC fax reception MBNM4NM4NM3N (KX-MB2030 only) Setting the fax preview mode MBNM4NM4NM8N (KX-MB2030 only) Setting the web fax preview access code MBNM4NM5NM0N (KX-MB2030 only)
- Page 66 8. Programmable Features Feature/Code Resetting fax features to their default settings MBNM4NM5NM9N Setting the PC information for notification of fax reception (KX-MB2030, LAN connection only) R This feature can be programmed only through the web browser interface. Selection M0N “NO” (default) M1N “YES”...
-
Page 67: Copy Features
8.4 Copy features Feature/Code Setting the input tray to use for copy MBNM4NM6NM0N Changing the default copy resolution MBNM4NM6NM1N Holding the previous page layout setting MBNM4NM6NM7N Holding the previous zoom setting MBNM4NM6NM8N Holding the previous collate setting MBNM4NM6NM9N Holding the previous edge setting MBNM4NM7NM3N Setting the frame margin... -
Page 68: Pc Print Features
8. Programmable Features 8.5 PC print features Feature/Code Changing the data timeout setting MBNM7NM7NM4N Setting mutual A4/letter print MBNM7NM7NM6N Selection The unit will automatically print the remaining data in memory when the computer does not send data to the unit during the set time. 1. -
Page 69: Scan Features
8.6 Scan features Feature/Code Setting the scan mode for Push Scan MBNM4NM9NM3N Holding the previous scanning parameter for Push Scan MBNM4NM9NM4N Setting the information for scan to email address (KX-MB2000/KX-MB2010/ KX-MB2030, LAN connection only) R This feature can be programmed only through the web browser interface. - Page 70 8. Programmable Features Feature/Code Registering the scan to email address destinations (KX-MB2000/KX-MB2010/ KX-MB2030, LAN connection only) R This feature can be programmed only through the web browser interface. Setting the information for scan to FTP (KX-MB2000/ KX-MB2010/KX-MB2030, LAN connection only) R This feature can be programmed only through the web browser interface.
-
Page 71: Lan Features (Kx-Mb2000/Kx-Mb2010/Kx-Mb2030 Only)
8.7 LAN features (KX-MB2000/KX-MB2010/KX-MB2030 only) Feature/Code LAN setting with a DHCP server MBNM5NM0NM0N Setting the IP address for the LAN connection MBNM5NM0NM1N Setting the Subnet mask for the LAN connection MBNM5NM0NM2N Setting the default gateway for the LAN connection MBNM5NM0NM3N Setting the primary DNS server for the LAN connection... - Page 72 8. Programmable Features Feature/Code IP filtering for the LAN connection MBNM5NM3NM2N Setting the IP address automatically for the LAN connection MBNM5NM3NM3N Setting HTTPD for the LAN connection MBNM5NM3NM4N IPv6 protocol MBNM5NM3NM5N Setting the primary WINS server for the LAN connection MBNM5NM3NM8N Setting the secondary WINS server for the LAN...
- Page 73 Feature/Code Erasing all email addresses, FTP destinations, and SMB folder destinations stored in the unit MBNM5NM7NM8N Selection M0N “NO” (default) M1N “YES” R Disconnect the telephone line cord (KX-MB2030 only), USB cable and LAN cable before activating this feature. To erase all email addresses: 1.
-
Page 74: Network Features (Kx-Mb2000/Kx-Mb2010/Kx-Mb2030, Lan Connection Only)
8. Programmable Features 8.8 Network features (KX-MB2000/KX-MB2010/KX-MB2030, LAN connection only) These features can be programmed through the web browser interface. Feature Setting the LAN features [LAN FEATURE] Setting the community [SNMP] name for SNMP Setting the location [SNMP] where you use this unit Displaying the link local [IPv6] address for IPv6... -
Page 75: Character Entry
9.1 Character entry The dial keypad is used to enter characters and numbers. – Press MFN or MEN to move the cursor. – Press the dial keys to enter characters and numbers. – Press MStopN to erase the character or number highlighted by the cursor. -
Page 76: Status Of The Unit
9. Useful Information 9.2 Status of the unit 9.2.1 Using Remote Control You can easily operate the following functions from your computer. – Programming the features (page 58) KX-MB2025/KX-MB2030 only: – Storing, editing or erasing items in directories (page 43) –... -
Page 77: Cancelling The Operations
9.3 Cancelling the operations You can cancel the current operation from the unit. You can also select the desired operation to cancel. MStopN R “USER STOPPED” is displayed. R If “USER STOPPED” is not displayed, go to step To cancel printing: Press MStopN repeatedly to display “STOP PRINTING?”. -
Page 78: Making A Phone Call Using One-Touch Dial Feature Or Phonebook (Kx-Mb2025/ Kx-Mb2030 Only)
9. Useful Information Insert the tab (C) and rib (D). Caution: R When moving the unit, be sure to hold by the grip. Do not hold by the handset unit. Correct Incorrect Note: R While talking to the other party, you can send a fax using the scanner glass by pressing MStartN, and then M1N (To receive a fax, press M2N). - Page 79 To search for a name by initial Example: “LISA” 1. MPhonebookN 2. Press MCN or MDN to initiate the phonebook. 3. Press M5N repeatedly to display any name with the initial “L” (see page 75 for character entry). R To search for symbols, press MGN. 4.
-
Page 80: Help
10. Help 10.1 Report messages (KX-MB2025/KX-MB2030 only) To indicate the unit’s fax transmission/reception status, one of the following messages will be printed on the sending and journal reports (page 42). Message COMMUNICATION ERROR DOCUMENT JAMMED ERROR-NOT YOUR UNIT JUNK FAX PROH. REJECT MEMORY FULL NO DOCUMENT / FAILED PICKUP OTHER FAX NOT RESPONDING... -
Page 81: Display Messages
10.2 Display messages To indicate the unit’s status, one or more of the following messages will appear on the display. Display “CALL SERVICE” “CHANGE DRUM” “CHECK DOCUMENT” “CHECK DRUM” “CHECK PAPER #1” “CHECK PAPER TRAY #1” “CHECK PICK UP INPUT TRAY #2”... - Page 82 10. Help Display “FAX IN MEMORY” “FILE SIZE OVER” “KEEP COPYING” “LOW TEMP.” “MEMORY FULL” “MODEM ERROR” “NO FAX REPLY” “OUT OF PAPER INPUT TRAY #2” “PAPER IN TRAY #2” “PAPER JAMMED” “OPEN TOP COVER” “PC FAIL OR BUSY” “PHONEBOOK FULL” “PLEASE WAIT”...
- Page 83 Display “REMOVE PAPER IN INPUT TRAY #2” “REPLACE DRUM CHANGE SUPPLIES” “RX MEMORY FULL” “SCANNER POSITION ERROR” “TONER EMPTY” “CHANGE SUPPLIES” “TONER LOW” “CHANGE SUPPLIES” “TOP COVER OPEN” “TRANSMIT ERROR” Cause & Solution R The recording paper is installed in the manual input tray when trying to receive faxes or print reports.
-
Page 84: When A Function Does Not Work
10. Help 10.3 When a function does not work 10.3.1 General Problem The unit does not work. The output tray becomes full quickly or the recording paper does not stack properly on the output tray. I cannot adjust the volume, display items stored in the one-touch dial and phonebook or display Caller... -
Page 85: Printing Problems
Problem I forgot the password for feature programming via remote operation. 10.3.2 Printing problems Problem The printing quality is poor (e.g. has smudges, blurred points or lines). I changed the recording paper, but the printing quality is still poor. A blank sheet is ejected. Coloured and grey objects are printed in black instead of greyscale when printing from... - Page 86 R The IP address of the unit may have changed. To detect the IP address, proceed as follows. [Start] A [All Programs] or [Programs] A [Panasonic] A the unit’s name A [IP Address Checker] R The IP address for the unit will be detected.
- Page 87 Problem The other party complains about the quality of their received documents. The other party complains that received documents are too dark and cannot be read. I cannot receive documents. I cannot receive documents automatically. The display shows “CONNECTING...”, but faxes are not received.
- Page 88 10. Help Problem When an extension telephone is connected, I cannot receive documents by pressing MGNMBNM9N. I cannot hear a dial tone. I cannot make calls. The unit does not ring. The other party complains they only hear a fax tone and cannot talk.
- Page 89 To detect the IP address, proceed as follows. [Start] A [All Programs] or [Programs] A [Panasonic] A the unit’s name A [IP Address Checker] R The IP address for the unit will be detected.
- Page 90 10. Help Problem The [Windows Security Alert] dialogue box appears and asks if I want to block [PCCMFLPD] and I cannot operate the following functions after installing the Microsoft Windows XP Service Pack 2 or later. – PC printing – Scanning –...
- Page 91 R The [Windows Firewall] dialogue box will appear. 3. Click the [Exceptions] tab. 4. Confirm that [Panasonic Trap Monitor Service] and [Panasonic LPD] are displayed and checked on the [Programs and Services] list. To confirm the security settings (For Windows Vista users) 1.
-
Page 92: Paper Jams
11. Paper Jams 11.1 Recording paper jam Caution: R Do not pull out the jammed paper forcibly before opening the top cover. R To prevent injuries, be careful not to put your hands under the top cover. 11.1.1 When the recording paper has jammed inside of the unit The display will show the following: –... - Page 93 R Open and close the top cover (D) to clear the message. Case 2: When the recording paper has jammed near the drum and toner cartridge: 1. Pull open the paper input tray (A). 2. Open the top cover (B) by holding the indentations (C) on both sides of the unit.
- Page 94 11. Paper Jams 3. Remove the jammed paper (F) carefully by pulling it upwards. Remove the jammed paper (G) carefully by pulling it toward you. 4. Close the paper input tray. 5. Close the top cover by holding the indentations on both sides of the unit, until locked.
- Page 95 Case 3: When the recording paper has jammed near the fuser unit: 1. Open the top cover (A) by holding the indentations (B) on both sides of the unit. Caution: R The fuser unit (C) gets hot. Do not touch it. Note: R Do not touch the transfer roller (D).
- Page 96 11. Paper Jams 5. Close the top cover by holding the indentations on both sides of the unit, until locked. 11.1.2 When the recording paper is not fed into the unit properly The display will show the following: – “CHECK PAPER #1 PRESS START” Pull the paper input tray until it clicks into place, then pull it completely out, lifting the front part of the tray.
-
Page 97: Document Jams (Automatic Document Feeder) (Kx-Mb2010/Kx-Mb2025/Kx-Mb2030 Only)
Note: R If the message is still displayed, check the recording paper specifications and re-install recording paper. See page 15 for details. 11.2 Document jams (Automatic document feeder) (KX-MB2010/ KX-MB2025/KX-MB2030 only) Note: R The pictured model is KX-MB2010. Caution: R Do not pull out the jammed document forcibly before lifting the ADF cover. - Page 98 11. Paper Jams Remove the jammed document (C) carefully. When the document has jammed near the document entrance: When the document has jammed near the document exit: Close the ADF cover.
-
Page 99: Cleaning
12.1 Cleaning the white plates and glass Clean the white plates and glass when a black line, a white line or a dirty pattern appears on: – your recording paper, – the original document, – the scanned data, or – the fax document received by the other party (KX-MB2025/KX-MB2030 only). - Page 100 12. Cleaning 12.1.2 Lower glass Turn the power switch OFF. Open the top cover (A) by holding the indentations (B) on both sides of the unit. Caution: The fuser unit (C) gets hot. Do not touch it. Note: R Do not touch the transfer roller (D). Remove the drum and toner cartridge (E) by holding the tabs.
- Page 101 Reinstall the drum and toner cartridge (G) by holding the tabs. R Make sure that the arrows (H) match, to install the drum and toner cartridge correctly. Close the top cover by holding the indentations on both sides of the unit, until locked. Caution: R To prevent injuries, be careful not to put your hands under the top cover.
-
Page 102: Cleaning The Document Feeder Rollers (Kx-Mb2010/Kx-Mb2025/Kx-Mb2030 Only)
12. Cleaning 12.2 Cleaning the document feeder rollers (KX-MB2010/ KX-MB2025/KX-MB2030 only) Clean the rollers when documents frequently misfeed. Note: R The pictured model is KX-MB2010. Caution: R Do not use paper products, such as paper towels or tissues for cleaning. Turn the power switch OFF. -
Page 103: General Information
13.1 Reference lists and reports You can print out the following lists and reports for your reference. – “SETUP LIST” – “TEL NO. LIST” – “JOURNAL REPORT” – “BROADCAST LIST” – “PRINTER TEST” – “CALLER ID LIST” – “ADDRESS LIST” –... - Page 104 13. General Information n Power consumption: Standby: Approx. 5.5 W Preheat: Approx. 65 W Copy: Approx. 500 W Maximum: Approx. 1,000 W (When the fuser lamp turns on) n Power supply: 220–240 V AC, 50/60 Hz n Memory capacity (for operation and storing memory): 32 MB n Fax memory capacity 3.5 MB in total...
- Page 105 1.6 Document tray 1.7 Output tray1.8 Recording paper2. Preparation 2.1 Connections 2.2 Turning the power switch ON Help Button2.3 Help function Volume Thank you for purchasing a Panasonic fax machine. Things you should keep a record of Attach your sales receipt here.
-
Page 106: Information Of Copyrights And Licences (Kx-Mb2000/Kx-Mb2010/Kx-Mb2030 Only)
13. General Information 13.3 Information of copyrights and licences (KX-MB2000/KX-MB2010/ KX-MB2030 only) R This product uses a part of NetBSD kernel. The use of a part of NetBSD kernel is based on the typical BSD style licence below. Copyright (c) The Regents of the University of California. - Page 107 13. General Information Copyright (c) 1982, 1986, 1990, 1991, 1993 The Regents of the University of California. All rights reserved. Copyright (c) 1982, 1986, 1990, 1993 The Regents of the University of California. All rights reserved. Copyright (c) 1982, 1986, 1990, 1993, 1994 The Regents of the University of California. All rights reserved.
- Page 108 13. General Information Copyright (c) 1996,1999 by Internet Software Consortium. Copyright (c) 1996-1999 by Internet Software Consortium. Copyright (c) 1997 Jonathan Stone and Jason R. Thorpe. All rights reserved. Copyright (c) 1997 Christos Zoulas. All rights reserved. Copyright (c) 1997 Manuel Bouyer. All rights reserved. Copyright (c) 1997, 1998 The NetBSD Foundation, Inc.
- Page 109 R This product contains Net-SNMP software and is using it based on the following licence conditions. ---- Part 1: CMU/UCD copyright notice: (BSD like) ----- Copyright 1989, 1991, 1992 by Carnegie Mellon University Derivative Work - 1996, 1998-2000 Copyright 1996, 1998-2000 The Regents of the University of California Permission to use, copy, modify and distribute this software and its documentation for any purpose and without fee is hereby granted, provided that the above copyright notice appears in all copies and that both that copyright notice and this permission notice appear in supporting documentation, and that the...
- Page 110 13. General Information ---- Part 3: Cambridge Broadband Ltd. copyright notice (BSD) ----- Portions of this code are copyright (c) 2001-2003, Cambridge Broadband Ltd. All rights reserved. Redistribution and use in source and binary forms, with or without modification, are permitted provided that the following conditions are met: * Redistributions of source code must retain the above copyright notice, this list of conditions and the following disclaimer.
- Page 111 FOR ANY DIRECT, INDIRECT, INCIDENTAL, SPECIAL, EXEMPLARY, OR CONSEQUENTIAL DAMAGES (INCLUDING, BUT NOT LIMITED TO, PROCUREMENT OF SUBSTITUTE GOODS OR SERVICES; LOSS OF USE, DATA, OR PROFITS; OR BUSINESS INTERRUPTION) HOWEVER CAUSED AND ON ANY THEORY OF LIABILITY, WHETHER IN CONTRACT, STRICT LIABILITY, OR TORT (INCLUDING NEGLIGENCE OR OTHERWISE) ARISING IN ANY WAY OUT OF THE USE OF THIS SOFTWARE, EVEN IF ADVISED OF THE POSSIBILITY OF SUCH DAMAGE.
- Page 112 13. General Information R This product contains NetBSD software and is using it based on the following licence conditions. * Copyright (c) 1989 The Regents of the University of California. * All rights reserved. * This code is derived from software contributed to Berkeley by Tom Truscott. * Redistribution and use in source and binary forms, with or without modification, are permitted provided * that the following conditions are met: * 1.
- Page 113 * LOSS OF USE, DATA, OR PROFITS; OR BUSINESS INTERRUPTION) HOWEVER CAUSED AND * ON ANY THEORY OF LIABILITY, WHETHER IN CONTRACT, STRICT LIABILITY, OR TORT * (INCLUDING NEGLIGENCE OR OTHERWISE) ARISING IN ANY WAY OUT OF THE USE OF THIS * SOFTWARE, EVEN IF ADVISED OF THE POSSIBILITY OF SUCH DAMAGE.
- Page 114 13. General Information R This product contains NetBSD software and is using it based on the following licence conditions. * Copyright (c) 1990 The Regents of the University of California. * All rights reserved. * This code is derived from software contributed to Berkeley by Chris Torek. * Redistribution and use in source and binary forms, with or without modification, are permitted provided * that the following conditions are met: * 1.
- Page 115 R This product contains NetBSD software and is using it based on the following licence conditions. * Copyright (c) 1989 The Regents of the University of California. * All rights reserved. * This code is derived from software contributed to Berkeley by Tom Truscott. * Redistribution and use in source and binary forms, with or without modification, are permitted provided * that the following conditions are met: * 1.
- Page 116 13. General Information * 1. Redistributions of source code must retain the above copyright notice, this list of conditions and the following disclaimer. * 2. Redistributions in binary form must reproduce the above copyright notice, this list of conditions and the following disclaimer in the documentation and/or other materials provided with the distribution.
- Page 117 * This library is free for commercial and non-commercial use as long as * the following conditions are aheared to. The following conditions * apply to all code found in this distribution, be it the RC4, RSA, * lhash, DES, etc., code; not just the SSL code. The SSL documentation * included with this distribution is covered by the same copyright terms * except that the holder is Tim Hudson (tjh@cryptsoft.com).
-
Page 118: Index
14. Index 14.1 Index #101 Date and time: 22 #102 Your logo: 23 #103 Your fax number: 23 #110 Language: 58 #114 Location: 58 #120 Dialling mode: 18 #121 Recall/Flash time: 58 #145 LCD display contrast: 58 #147 Scale selection: 59 #155 Change password: 59 #158 Maintenance time: 59 #159 Set all features to default: 59... - Page 119 Data timeout (Feature #774): 68 Date and time (Feature #101): 22 Default copy resolution (Feature #461): 67 Default gateway (Feature #503): 71 Default operation mode (Feature #463): 61 Delayed transmission (Feature #412): 63 DHCP mode (Feature #500): 71 Dialling mode (Feature #120): 18 Display contrast (Feature #145): 58 Display messages: 81 DNS server #1 (Feature #504): 71...
- Page 120 14. Index Power save (Feature #403): 61 Power switch: 18 Printer test: 103 Programming: 57 Pull scan: 34 Scan application: 34 Viewer: 34 Push scan: 31 Email: 31 Email address: 32 File: 31 FTP: 33 OCR: 32 SMB folder: 33 Viewer: 31 Quick scan: 43 Recall time (Feature #121): 58...
- Page 121 Notes...
- Page 122 Notes...
- Page 123 Notes...
- Page 124 PNQX2616ZA CM1209SY0...