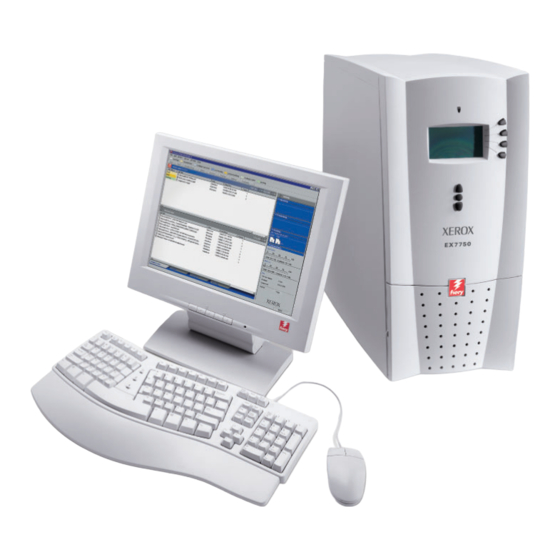
Xerox Phaser EX7750 Ser3Oftware )Nstallation'uide
Hide thumbs
Also See for Phaser EX7750:
- Configuration manual (220 pages) ,
- Job management manual (216 pages) ,
- Printing manual (132 pages)
Table of Contents
Advertisement
Quick Links
Advertisement
Table of Contents

Related Manuals for Xerox Phaser EX7750


Summary of Contents for Xerox Phaser EX7750
- Page 2 Job Management Guide explains the functions of the job management utilities, and how you can use them to monitor and control jobs on the Xerox EX7750. This manual is intended for a user with the necessary access privileges who monitors and manages job flow, and troubleshoots problems that may arise.
- Page 3 Copyright © 2004 Electronics for Imaging, Inc. All rights reserved. This product documentation is protected by copyright, and all rights are reserved. No part of it may be reproduced or transmitted in any form or by any means for any purpose without express prior written consent from Electronics for Imaging, Inc. (“EFI”), except as expressly permitted herein. Information in this document is subject to change without notice and does not represent a commitment on the part of EFI.
- Page 4 FCC Information WARNING: FCC Regulations state that any unauthorized changes or modifications to this equipment not expressly approved by the manufacturer could void the user’s authority to operate this equipment. Refer to the Class Compliance sticker affixed to the back of your Fiery (or, in the case of embedded systems, to the sticker affixed to the print engine) to identify the appropriate classification (A or B, below) for this product.
- Page 5 CE Marking (Declaration of Conformity) This product complies with the following EU directives: 89/336/EEC, 73/23/EEC, and 93/68/EEC directives. This declaration is valid for the area of the European Union. SOFTWARE LICENSE AGREEMENT PLEASE READ THIS SOFTWARE LICENSE AGREEMENT (“LICENSE AGREEMENT”) CAREFULLY. THIS LICENSE AGREEMENT IS A LEGAL AGREEMENT BETWEEN YOU AND ELECTRONICS FOR IMAGING, INC.
- Page 6 TO THE MAXIMUM EXTENT PERMITTED BY APPLICABLE LAW, EXCEPT FOR THE EXPRESS LIMITED WARRANTY SET FORTH ABOVE (“LIMITED WARRANTY”), EFI MAKES AND YOU RECEIVE NO REPRESENTATIONS OR WARRANTIES RELATING TO THE SOFTWARE, ANY PRODUCT AND/OR ANY SERVICES, WHETHER EXPRESS, IMPLIED, STATUTORY, OR IN ANY OTHER PROVISION OF THIS AGREEMENT OR ANY OTHER COMMUNICATION.
- Page 7 U.S. Government Restricted Rights Use, duplication, or disclosure of the Software by the United States Government is subject to restrictions as set forth in FAR 12.212 or DFARS 227.7202-3 - 227.7202-4 and, to the extent required under U.S. federal law, the minimum restricted rights as set out in FAR 52.227-14, Restricted Rights Notice (June 1987) Alternate III(g)(3) (June 1987) or FAR 52.227-19 (June 1987).
- Page 8 This page is intentionally blank.
-
Page 9: Table Of Contents
Contents About the Documentation Introduction About this manual Specifications User software xiii WebTools System requirements Chapter 1: Installing User Software on a Windows Computer Setting up PostScript or PCL printing with Windows 2000/XP Installing the PostScript or PCL printer driver for Windows 2000/XP Configuring installed options Completing the Windows 2000/XP printer connection Installing Fiery utilities... - Page 10 viii Contents Chapter 2: Installing User Software on a Mac OS Computer Setting up the EX7750 as a PostScript printer Setting up Mac OS 9 printer drivers and printer description files Setting up Mac OS X v10.2 printer drivers and printer description files Installing EX7750 software and fonts 2-11 Installing MRJ on your computer...
-
Page 11: About This Manual
About this manual This manual describes how to install user software for the Xerox EX7750, and how Introduction to set up printing from Microsoft Windows and Apple Mac OS computers. For information about setting up network servers and clients to use the Xerox EX7750, see the Configuration... -
Page 12: Specifications
xii Introduction Specifications • Celeron 2GHz CPU • 256MB RAM • 60GB hard disk drive • Internal DVD drive • Supports the Fiery Advanced Controller Interface (FACI), which includes a monitor, a keyboard, and mouse • Supports AppleTalk, TCP/IP, and IPX/SPX protocols simultaneously •... -
Page 13: User Software
xiii User software User software EX7750 user software is provided on the User Software CD. Adobe PostScript Enables you to print to the EX7750. Also supports Printer Driver EX7750 and PostScript 3 features. Windows 2000/XP users should use the Microsoft PostScript Printer Driver provided with those operating systems. - Page 14 xiv Introduction Command WorkStation LE Enables the operator to control EX7750 functions (Mac OS X Native from Mac OS X Native computers. To use Command Mode only) WorkStation LE, see the Job Management Guide. EFI Fiery Mail Port Enables you to send jobs to the EX7750 in the form of (Windows only) e-mail attachments by adding the Fiery Mail Port software as a printer port.
-
Page 15: Webtools
xv WebTools WebTools WebTools allow you to manage your EX7750 remotely from the Internet or from your company’s intranet. You access WebTools from the WebTools home page. WebTools Summary For more information Status Shows you the jobs currently processing See the Printing Guide. - Page 16 This page is intentionally blank.
-
Page 17: Chapter 1: Installing User Software On A Windows Computer
1-1 Setting up PostScript or PCL printing with Windows 2000/XP Chapter 1: This chapter describes the procedures for installing software and setting up printing from a computer using a supported version of Windows. For the Windows versions Installing supported, see the Quick Start Guide. -
Page 18: Installing The Postscript Or Pcl Printer Driver For Windows 2000/Xp
1-2 Installing User Software on a Windows Computer Installing the PostScript or PCL printer driver for Windows 2000/XP The following procedure describes installing the printer driver from the User Software CD or from the Installer WebTool. Subsequent procedures describe setting up the print connection. - Page 19 1-3 Setting up PostScript or PCL printing with Windows 2000/XP 5. Select LPT1: and click Next. 6. In the dialog box displaying lists of manufacturers and printers, click Have Disk. The Install From Disk dialog box prompts you for the disk. 7.
- Page 20 1-4 Installing User Software on a Windows Computer 9. Verify that the path is correct and click OK. 10. Select the Xerox EX7750 as your printer and click Next. 11. Type a name for the printer in the Printer name field, choose whether you want to use this printer as the default printer, and click Next.
-
Page 21: Configuring Installed Options
1-5 Setting up PostScript or PCL printing with Windows 2000/XP 12. Follow the instructions in the remaining dialog boxes. Choose whether to share this printer or not. When asked whether to print a Test Page, select No. 13. Click Finish. The necessary files are installed to your computer. - Page 22 1-6 Installing User Software on a Windows Computer 5. Click Add to move the option to the Installed Options list. —Not Installed, Installed Finisher —Not Installed, Installed Phaser 7750GX —Not Installed, Installed Phaser 7750DX F 6. Click OK to activate the current settings. EX7750 O CONFIGURE INSTALLABLE OPTIONS ON THE FROM THE...
- Page 23 1-7 Setting up PostScript or PCL printing with Windows 2000/XP Configuring installed options and updating print options settings automatically If you have a TCP/IP-enabled network, you can automatically update your printer driver to reflect the options currently installed on the EX7750. When the printer driver is first installed, the installable options have default settings that were set up in EX7750 Setup or ColorWise Pro Tools.
-
Page 24: Completing The Windows 2000/Xp Printer Connection
1-8 Installing User Software on a Windows Computer 8. To receive an e-mail notification after your job has been printed, select Enable E-mail Notification, and type in the e-mail address to which an e-mail notification is sent. You will also receive e-mail notification of any errors that occur during printing. Enable E-mail Notification is displayed only if Email Service is enabled at Setup. - Page 25 1-9 Setting up PostScript or PCL printing with Windows 2000/XP Before you continue, contact the system administrator for the IP address assigned to the EX7750, as well as the subnet mask and the gateway address, if they are used. You can also set up the LPR connection by installing Print Services for UNIX, which is supplied as an add-on Windows component with your Windows 2000/XP CD.
- Page 26 1-10 Installing User Software on a Windows Computer 3. Select Standard TCP/IP Port for Available port types and click New Port. 4. Click Next. The Add Standard TCP/IP Printer Port Wizard dialog box appears. 5. Type the IP address of the EX7750. 6.
- Page 27 1-11 Setting up PostScript or PCL printing with Windows 2000/XP 8. Click Finish to close the Add Standard TCP/IP Printer Port Wizard dialog box and click Close in the Printer Ports dialog box. 9. Click Configure Port in the Ports tab of the Properties dialog box. The Configure Standard TCP/IP Port Monitor dialog box appears.
- Page 28 1-12 Installing User Software on a Windows Computer The port number 9100 automatically appears under Raw Settings. This allows you to print to the printer connection that your administrator selected for Port 9100 printing in EX7750 Setup. You can also specify a port number as instructed in the following step.
- Page 29 1-13 Setting up PostScript or PCL printing with Windows 2000/XP Completing the Windows 2000/XP IPX (Novell) connection Complete the setup for the IPX (Novell) connection as follows: • Configure the Novell network and file server for handling EX7750 print jobs. The file server should be configured with a print server and print connection for the EX7750.
- Page 30 1-14 Installing User Software on a Windows Computer 3. Double-click the NetWare Tree or File Server on which the network administrator defined a print connection for the EX7750. You may have to log in to the file server to see the print connections. 4.
- Page 31 1-15 Setting up PostScript or PCL printing with Windows 2000/XP 9. Click the General tab and click Print Test Page. 10. In the printer Job Notes field, type user and job identification information and click OK. The Test Page remains listed in the queue window until it is printed. The EX7750 polls the NetWare server for print jobs in the print connection defined for the EX7750.
- Page 32 1-16 Installing User Software on a Windows Computer 2000/XP O SET UP PRINTING ON INDOWS 1. Open My Network Places. 2. Browse for the printer you want to print to. The printer name you are browsing for is the name entered in Network Setup > Service Setup >...
- Page 33 1-17 Setting up PostScript or PCL printing with Windows 2000/XP Setting up IPP printing with Windows 2000/XP With Internet Printing Protocol (IPP), print jobs are sent to the EX7750 over the Internet. IPP printing is supported directly for Windows 2000/XP computers. The IPP setup procedures are performed after installing the appropriate printer drivers (see “Installing the PostScript or PCL printer driver for Windows 2000/XP”...
- Page 34 1-18 Installing User Software on a Windows Computer 5. Select “Connect to a printer on the Internet or on your intranet.” Type an IP address or computer name in the URL field. The URL for the printer is the IP address or DNS name followed by “ipp/print”. Insert slashes between the different elements.
-
Page 35: Installing Fiery Utilities
1-19 Installing Fiery utilities Installing Fiery utilities From the User Software CD, you can install the following Fiery utilities and user software: • ColorWise Pro Tools • Fiery Job Monitor • Fiery Printer Delete Utility • Fiery Mail Port • Command WorkStation Includes DocBuilder Pro. - Page 36 1-20 Installing User Software on a Windows Computer To install the software, you must have Service Pack 4 on a Windows 2000 computer, and Service Pack 1 installed on your Windows XP computer. If not, a warning message alerts you to install the Service Pack. O INSTALL AVA ON YOUR COMPUTER 1.
-
Page 37: Adobe Acrobat
1-21 Installing Fiery utilities Adobe Acrobat In Command WorkStation, the DocBuilder Pro feature works with Adobe Acrobat and the PitStop software plug-in for Acrobat. DocBuilder Pro is installed with Command WorkStation. To use DocBuilder Pro, you must install Acrobat and the PitStop plug-in, and Command WorkStation. -
Page 38: Pitstop
1-22 Installing User Software on a Windows Computer PitStop PitStop is a plug-in for Acrobat for use with DocBuilder Pro. You must first install Acrobat as described in the previous section. PitStop software is included on the DocBuilder Pro CD. NSTALL 1. -
Page 39: Using Fiery Utilities For The First Time
1-23 Using Fiery utilities for the first time Using Fiery utilities for the first time Before you can use the newly installed software, you must configure the connection to the EX7750. Configuration of the Fiery utilities is similar. Fiery Printer Delete Utility is installed and used locally, so connection to the EX7750 is not required before using the software. -
Page 40: Configuring The Connection For Fiery Utilities
1-24 Installing User Software on a Windows Computer Configuring the connection for Fiery utilities The first time you start one of the Fiery utilities, you must configure the connection to the EX7750. Similar configuration is used for all Fiery utilities, so any change in one configuration affects all the other connections. - Page 41 1-25 Using Fiery utilities for the first time O CONFIGURE THE CONNECTION FOR IERY UTILITIES 1. Start the utility for which you want to configure a connection. 2. If the No Fiery Configured dialog box appears, click OK. If the Choose Printer Device dialog box appears, click Add. 3.
- Page 42 1-26 Installing User Software on a Windows Computer Type EX7750 exactly as shown because this term is case-sensitive. 4. When you have entered all the information, click Add. 5. With the device name (EX7750) selected in the Devices list, click OK. The EX7750 appears in the list of Available Servers.
-
Page 43: Configuring The Connection For Efi Fiery Mail Port
1-27 Using Fiery utilities for the first time Modifying the configuration Edit the configuration whenever there is any change to your EX7750 server or network, such as a server name or IP address. If you change EX7750 Setup information, do so before reconfiguring the connection. O MODIFY THE CONFIGURATION 1. - Page 44 1-28 Installing User Software on a Windows Computer 3. In the Ports tab, click Add Port. The Printer Ports dialog box appears, with the EFI Fiery Mail port listed as one of the available ports. 4. Select EFI Fiery Mail and click New Port. The Add Port dialog box appears.
- Page 45 1-29 Using Fiery utilities for the first time 6. Click Advanced. The E-Mail Port Configuration dialog box appears. 7. Type the following information. For Fiery Server: —The e-mail address of the EX7750. E-mail Address —The print connection on the EX7750 that you want. Queue For Outgoing Mail Server (SMTP): —The SMTP server to use.
-
Page 46: Configuring The Connection For Command Workstation
1-30 Installing User Software on a Windows Computer 8. Click OK. The name assigned to the EFI Fiery Mail Port appears in the Ports tab of the EX7750 printer driver. 9. Click Apply, and then click Close. The connection for the EFI Fiery Mail Port has now been configured. Configuring the connection for Command WorkStation The first time you start Command WorkStation, you are prompted to configure the connection to the EX7750. - Page 47 1-31 Using Fiery utilities for the first time 3. If no EX7750 servers were found, click the Manual tab to search by DNS name or IP address. Click Add to add the server to the Available Servers list. 4. Click Search. All available servers appear in the Available Servers list.
- Page 48 1-32 Installing User Software on a Windows Computer 5. Select the EX7750 server you want to use and click Add. The selected EX7750 appears in the Login Server dialog box. 6. Click the server name. The Login dialog box appears.
- Page 49 1-33 Using Fiery utilities for the first time 7. Select Administrator, Operator, or Guest and click Log In. Type the password when prompted. Your computer is connected to the EX7750. Modifying the configuration Edit the configuration whenever there is any change to your EX7750 server or network, such as a server name or IP address.
-
Page 50: Installing Color Files From The User Software Cd
1-34 Installing User Software on a Windows Computer Installing color files from the User Software CD You can copy additional color files from the User Software CD to your computer. Many of the files are PostScript files that you can download and print using Fiery Downloader. -
Page 51: Installing The Icc Profiles On A Windows Computer
1-35 Installing color files from the User Software CD Installing the ICC profiles on a Windows computer The ICC profiles included in the Icc folder on the User Software CD are for use with ColorWise Pro Tools. You can also use the ICC profiles with applications that support ICC standards, such as Photoshop. -
Page 52: Loading The Monitor Settings File
1-36 Installing User Software on a Windows Computer Loading the monitor settings file The Efirgb.icc monitor settings file can be used in Adobe Photoshop, or other applications that support ICC profiles, to define a source color space for printing to the EX7750. -
Page 53: Loading The Icc Printer Device Profile
1-37 Installing color files from the User Software CD Loading the ICC printer device profile This ICC profile defines the target color space for printing to the printer. These instructions assume you have installed the ICC profiles included on the User Software CD. - Page 54 1-38 Installing User Software on a Windows Computer Loading monitor settings files and ICC printer device profiles in Photoshop 6.x/7.x After you have installed the Efirgb.icc monitor settings file and the ICC profile for the EX7750, follow the procedure below to load them in Photoshop 6.x/7.x. O LOAD THE MONITOR SETTINGS FILE AND PRINTER DEVICE PROFILE IN...
-
Page 55: Installing The Printer Description Files For Windows
1-39 Installing color files from the User Software CD Installing the printer description files for Windows The User Software CD contains printer description files for popular Windows applications. Adobe Pagemaker 6.x and 7.x do not support automatic installation of printer description files from the Printers or Printers and Faxes Control Panel. To make the EX7750 available in the Print and Page Setup dialog boxes of this application, copy printer description files to the appropriate location. - Page 56 This page is intentionally blank.
-
Page 57: Chapter 2: Installing User Software On A Mac Os Computer
2-1 Setting up the EX7750 as a PostScript printer The general steps for installing the EX7750 user software and setting up printing on a Chapter 2: Mac OS computer are as follows: Installing • Install the PostScript printer driver and printer description file. User Software on a Mac OS •... -
Page 58: Setting Up The Ex7750 As A Postscript Printer
2-2 Installing User Software on a Mac OS Computer Setting up the EX7750 as a PostScript printer To set up the EX7750 as a PostScript printer, you must install the PostScript printer driver and the printer description file that corresponds to your Phaser 7750. The PostScript printer driver and printer description files are provided on the User Software CD. - Page 59 2-3 Setting up the EX7750 as a PostScript printer Setting up the EX7750 in the Chooser After you install the Adobe PostScript printer driver and printer description file (see “Setting up the EX7750 as a PostScript printer” on page 2-2), you must set up the EX7750 in the Chooser in order to take full advantage of its features.
- Page 60 2-4 Installing User Software on a Mac OS Computer 4. Select a EX7750 connection from the “Select a PostScript Printer” list and click Create. Select the correct printer description file for your printer. You must set up each print connection separately. Repeat this step for all enabled connections.
-
Page 61: Setting Up Mac Os X V10.2 Printer Drivers And Printer Description Files
2-5 Setting up the EX7750 as a PostScript printer Setting up Mac OS X v10.2 printer drivers and printer description files The following instructions are for Mac OS X v10.2 and v10.3 Native mode. The term “Mac OS X” is used in this chapter to refer to Mac OS X v. 10.2.5 through 10.3.1. The User Software CD contains the following software for Mac OS X inside the OSX folder: •... - Page 62 2-6 Installing User Software on a Mac OS Computer Setting up the EX7750 in the Print Center Mac OS X 10.2 screens are shown. Differences are noted wherever necessary. EX7750 O SET UP THE IN THE RINT ENTER ON AN NGLISH SYSTEM 1.
- Page 63 2-7 Setting up the EX7750 as a PostScript printer For IP Printing, enter the IP address or DNS name of the printer for Printer’s Address, clear Use default queue on server, and then enter the print connection for Queue Name. Enter the printer Queue Name for the print connection.
- Page 64 2-8 Installing User Software on a Mac OS Computer 2. Click Add in the Printer List dialog box. 3. Choose AppleTalk or IP printing in the pop-up menu. 4. For AppleTalk, choose the AppleTalk Zone, and then choose the name of the EX7750. If the zone is not listed as the Default Zone, or one of the Recent Zones, select AppleTalk Network, select the zone, and click Choose.
- Page 65 2-9 Setting up the EX7750 as a PostScript printer 5. For Printer Model, select Other. 6. In the Choose a File dialog box, select the appropriate language file from the left column, and the EX7750 name from the right column. The following table explains which file name corresponds to your language.
- Page 66 2-10 Installing User Software on a Mac OS Computer 7. Click Choose. 8. Click Add in the Printer List window. For more information about adding printers, see your Mac OS X documentation. O CONFIGURE INSTALLABLE OPTIONS 1. Double-click Print Center in Utilities under Startup disk/Application. The Print Center launches.
-
Page 67: Installing Ex7750 Software And Fonts
2-11 Installing EX7750 software and fonts Installing EX7750 software and fonts The Mac OS installers function essentially the same for each type of software. Before you begin each installation, determine where you want to install each item on your hard disk drive. Otherwise, the software is placed by default as follows: •... -
Page 68: Installing Mrj On Your Computer
2-12 Installing User Software on a Mac OS Computer Installing MRJ on your computer In order to use ColorWise Pro Tools or Fiery Downloader, you must have Mac OS Runtime for Java (MRJ) installed on your computer. If you do not have MRJ installed, the ColorWise Pro Tools or Fiery Downloader installer automatically initiates the MRJ installation process. -
Page 69: Configuring A Connection For Colorwise Pro Tools
2-13 Installing EX7750 software and fonts OS R O UNINSTALL UNTIME FOR 1. Locate the System Folder on your hard disk. 2. Inside the Extensions folder, locate MRJ Libraries and remove it or move it to another folder. If you find the “MRJ Enabler” file under Extensions, remove it or move it to another folder. - Page 70 2-14 Installing User Software on a Mac OS Computer O CONFIGURE A CONNECTION FOR OLOR OOLS 1. Start the utility by double-clicking its icon. The Choose Printer Device dialog box appears. 2. If you have previously configured a connection to the EX7750, you are ready to use ColorWise Pro Tools.
- Page 71 2-15 Installing EX7750 software and fonts —Type the name of the device the EX7750 is connected to: EX7750 New Device This device name appears in the Printer Setup section of the Configuration page. Type exactly as shown; this term is case-sensitive. EX7750 4.
-
Page 72: Configuring A Connection For Fiery Spooler
2-16 Installing User Software on a Mac OS Computer Configuring a connection for Fiery Spooler EFORE YOU BEGIN • Print the Configuration page from the Control Panel and note the IP address of the EX7750. • Print the Configuration page from the FACI and note the IP address of the EX7750. O CONFIGURE THE CONNECTION FOR IERY POOLER... - Page 73 2-17 Installing EX7750 software and fonts —Type the IP address (or DNS name) of the EX7750. Name —Type the name of the device that the EX7750 is connected to: EX7750. New Device This device name appears in the Printer Setup section of the Configuration page. Type EX7750 exactly as shown;...
-
Page 74: Configuring The Connection For Fiery Downloader And Command Workstation Le For Mac Os
2-18 Installing User Software on a Mac OS Computer Configuring the connection for Fiery Downloader and Command WorkStation LE for Mac OS X The first time you start Fiery Downloader or Command WorkStation LE, you are prompted to configure the connection to the EX7750. EFORE YOU BEGIN •... - Page 75 2-19 Installing EX7750 software and fonts 4. Click Connect. The Fiery Downloader dialog box appears. For information about using Fiery Downloader, see the Printing Guide. EFORE YOU BEGIN • Print the Configuration page from the Control Panel and note the IP address of the EX7750.
- Page 76 2-20 Installing User Software on a Mac OS Computer O CONFIGURE THE CONNECTION FOR OMMAND TATION 1. Start Command WorkStation LE. The Available Servers dialog box is displayed. All servers found in the local subnet are displayed. The device name for the EX7750 is EX7750 2.
-
Page 77: Fonts
2-21 Installing EX7750 software and fonts Fonts The Fonts installer on the User Software CD includes screen and printer fonts that correspond to the 136 built-in PostScript printer fonts on the EX7750. The Font installer copies both types of fonts to the System Folder:Fonts folder on your hard disk. -
Page 78: Installing Color Files From The User Software Cd
2-22 Installing User Software on a Mac OS Computer Installing color files from the User Software CD You can copy additional color files from the User Software CD to your hard disk. Many of the files are PostScript files you can download and print using Fiery Downloader. -
Page 79: Loading Icc Printer Profiles
2-23 Installing color files from the User Software CD Loading ICC printer profiles The ICC profiles are used with ColorWise Pro Tools and applications that support ICC standards. These instructions assume that you have already installed the ICC profiles included on the User Software CD inside the ColorSync folder. -
Page 80: Loading The Monitor Settings File
2-24 Installing User Software on a Mac OS Computer Loading the monitor settings file The EFIRGB ICC monitor settings file can be used in Photoshop or other applications that support ICC profiles to define a source color space for printing to the EX7750. O LOAD THE MONITOR SETTINGS FILE IN HOTOSHOP 1. -
Page 81: Loading The Icc Printer Device Profile
2-25 Installing color files from the User Software CD Loading the ICC printer device profile The ICC printer profile enables RGB-to-CMYK conversions that are specific to the kind of printer you are using. O LOAD THE PRINTER DEVICE PROFILE IN HOTOSHOP 1. - Page 82 2-26 Installing User Software on a Mac OS Computer O LOAD THE MONITOR SETTINGS FILE AND THE PRINTER DEVICE PROFILE IN HOTOSHOP 1. Start Photoshop. 2. Choose Color Settings from the Edit menu and then choose Advanced Mode. 3. Choose EFI RGB from the RGB menu. 4.
-
Page 83: Chapter 3: Downloading Installers With Webtools
3-1 Setting up WebTools WebTools allow you to manage your EX7750 remotely from the Internet or from your Chapter 3: company’s intranet. Downloading Installers with For more information about using WebTools, see the Printing Guide. WebTools Setting up WebTools To enable network users to access and use WebTools, you must set specific EX7750 options in Network Setup and Printer Setup. -
Page 84: Using The Webtools Installer
3-2 Downloading Installers with WebTools Using the WebTools Installer The Installer WebTool allows you to download installers for printer drivers directly from the EX7750 to your computer. O DOWNLOAD PRINTER DRIVERS WITH THE NSTALLER 1. Start your Internet or intranet browser and enter the DNS name or IP address of the EX7750. - Page 85 3-3 Using the WebTools Installer 5. Under the name of your operating system, click the name of the item you want to install. 6. For installation of user software, follow the on-screen instructions. 7. For installation of printer drivers, continue with the following instructions. A dialog box appears, prompting you to save the file to the location you choose.
- Page 86 This page is intentionally blank.
-
Page 87: Chapter 4: Troubleshooting
4-1 On a Windows computer This chapter provides troubleshooting tips. Chapter 4: Troubleshooting On a Windows computer Setting up printing on Windows 2000/XP computers If you have problems installing the EX7750 with Windows 2000/XP, try installing another PostScript printer (such as the Apple LaserWriter IIg), and then install the EX7750. -
Page 88: On A Mac Os Computer
If Auto-setup does not work and you are prompted to select the printer description file, select the appropriate EX7750 file on your hard disk SystemFolder:Extensions Printer Descriptions folder, “Xerox Phaser EX7750 PS”. Installing screen fonts If you experience problems installing the PostScript screen fonts from the User Software CD to the System Folder:Fonts folder, try the following: 1. -
Page 89: Index
Index Index Command WorkStation xi configuring the connection 1-30 Adobe Acrobat installing for Windows 1-19 for DocBuilder Pro 1-21 Command WorkStation LE installation 1-21 configuring the connection for Adobe PostScript 3 fonts xii Mac OS X 2-18 Adobe PostScript printer driver, see PostScript Configuration page 1-16, 1-24 printer driver connecting... - Page 90 I-2 Index EPS files xiii Installable Options installing for Mac OS 2-11 specifying, from Mac OS 9 printer installing for Windows 1-19 driver 2-4 overview xiii specifying, from Windows 2000/XP PDF files xiii printer driver 1-5 Fiery Job Monitor 1-19 Installer WebTool, see WebTools Fiery Printer Delete Utility 1-1, 1-23 installers...
- Page 91 I-3 Index installing software 2-11 PowerPoint, RGB color reference file 2-22 troubleshooting 4-2 uninstalling software 2-13 copying files for Windows monitor settings file, Mac OS 2-24 applications 1-39 overview xiii selecting the PPD in the Chooser 4-2 NetWare client setup selecting the PPD in the Print Windows 2000/XP 1-13 Center 4-2...
- Page 92 I-4 Index thinnet cable xii troubleshooting Mac OS computers 4-2 Windows computers 4-1 Uninstalled Fonts folder 4-2 uninstalling Mac OS software 2-13 unshielded twisted pair (UTP) cable xii User Software CD contents (Mac OS) 2-2 contents (Windows) 1-19 installing from, for Mac OS 2-2, 2-22 troubleshooting fonts 4-2 WebDownloader WebTool, see WebTools WebTools...