Advertisement
Quick Links
Download this manual
See also:
User Manual
calibrating the compass
OPERATING MODES
10.
: Sub-mode page indicator
11.
: Indicates bearing tracking system in switched
ON
COMPASS WATCH
12.
: Press ST / SP / + to increase values
MODEL: RA126
13.
: Keypad lock activated
14.
: Low battery
USER MANUAL
15. Smart indicator
16.
: Keypad tone is turned OFF
EN
17.
:Temperature icon
INTRODUCTION
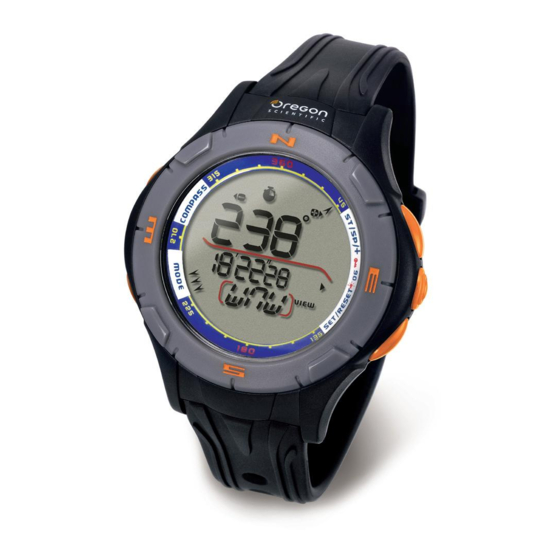
Thank you for selecting the Oregon Scientific™ Compass
Set
Watch (RA126). The RA126 is a very useful product for
GETTING STARTED
any outdoor activity as it can help you locate your position
TURN ON WATCH (FIRST-TIME USE ONLY)
and find your direction using the bearing tracking system.
Equipped with temperature function, it is the perfect
Press and hold any key for 2 seconds to activate the LCD
companion for any user who wishes to venture into the
display.
great outdoors. The RA126 bundles a digital compass,
northern calibration, true north calibration, adjustable
Press MODE to switch between:
declination angle, bearing tracking system stopwatch and
GETTING STARTED
temperature.
• Clock mode
The watch uses a 1 x CR2032 lithium battery, which has
• Compass mode
already been installed. See below for battery warnings.
IMPORTANT
• Temperature mode
• The measurement functions built into the RA126 are
• Set up mode
not meant to substitute professional measurement
LOW BATTERY
To scroll through sub-modes:
DESCRIPTION
or industrial precision devices. Values produced
ICON
Press SET to scroll through the mode options in each
by this watch should be considered as reasonable
mode. They are as follows:
representations only.
The watch battery is low.
• Oregon Scientific™ assumes no responsibility for any
Clock mode:
loss, or any claims by third parties that may arise
Appears when the battery
through the use of this watch.
is too low to operate the
sensor. "- -" is shown instead
of temperature and compass
COMPASS WATCH
values.
To replace battery:
Time
Compass mode:
1
3
4
2
5
6
1. Using a coin, remove battery compartment lid by twisting
counter-clockwise until it clicks out of place.
2. Remove the old batteries and insert the new matching
Compass with watch
the polarities.
3. Replace the lid by twisting it clockwise until firmly in
place.
Temperature mode:
1. COMPASS / -: Activate compass; lower setting values
2. MODE: Toggle main modes; quit setting modes quickly
NOTE
When battery is replaced it is important to re-
3. ST / SP / +: Start / stop stopwatch; increase setting
calibrate the magnetic sensor.
values
4.
/ : Turn on EL backlight; Activate keypad lock
USE IN THE WATER
5. SET / RESET / VIEW: Enter setting modes; toggle sub-
modes; Reset stopwatch
The RA126 is water-resistant up to 50 meters (164 feet).
6. Turning Bezel with cardinal points: North, South, East
and West
GETTING STARTED
Set up mode:
1
10
2
SHOWERING
SHALLOW
11
(WARM/
DIVING/
3
LIGHT
SNORKELING/
12
RAIN
COOL
SURFING/
DEEP
SWIMMING/
4
SPLASHES
WATER
SHALLOW
WATER
WATER
ETC
ONLY)
WATER
SPORTS
DIVING
5
13
50M /
14
164
OK
OK
OK
OK
NO
6
FEET
15
NOTE
Set the unit before exposing it to excessive water.
7
16
Pressing the keys while in the water or during heavy
rainstorms may cause water to enter the unit.
8
Declination
17
9
OPERATION
BACKLIGHT AND KEYPAD LOCK
1.
: Stopwatch is shown or running
Press
to turn backlight ON for 5 seconds.
2.
: Alarm is set; will flash when activated
NOTE
The backlight function will not operate while the low
3.
: Smart indicator to lower values
battery icon
is displayed and it will return to normal
CLOCK MODE
4.
"
": Directional arrows indicates your position
once batteries have been replaced.
TO SET THE TIME AND DATE
To toggle keypad lock ON / OFF:
5.
: Master digits: i.e. Time
1. Press MODE to navigate to Clock mode.
Press and hold
/
.
indicates keypad is locked.
6.
: Minor digits: i.e. Stopwatch
2. Press and hold SET to enter settings.
3. Press ST / SP / + to scroll upwards and COMPASS /
7.
: Smart indicator to return / quick confirm
- to scroll downwards through the setting options. The
8.
Cardinal direction
setting sequence is as follows: 12 / 24-hour time; hour;
minute; year; day-month / month-day; month; day;
9.
: Indicates which way to turn the watch when
RA126 USA IM R3.indd 1
temperature unit.
COMPASS AND CALIBRATION
4. Press SET to confirm.
Before the compass is first used, we recommend that you
calibrate the compass sensor.
NOTE
If no key is pressed for ten seconds, the display will
To calibrate the compass sensor:
return to Clock mode.
• Press MODE to navigate to the Set up mode.
• Press SET to navigate to Calibration mode option.
TO SET THE ALARM
• Press and hold SET to begin calibration of the
compass.
Time
Rotate the watch counter clockwise at the same speed
as the moving segments around the circumference of
the display. The rotation will be finished once you have
performed 1 ¼ turns and the display will appear as shown
below when nearing the end of its calibration.
Compass
Temperature
1. Press MODE to navigate to Clock mode.
2. Press SET to navigate to Alarm.
3. Press and hold SET to enter settings.
4. Press ST / SP / + to scroll upwards and COMPASS /
- to scroll downwards through the setting options. The
setting sequence is as follows: hour; minute.
5. Press SET to confirm.
To activate or deactivate the alarm:
NOTE
The compass should be calibrated:
•
Press MODE to navigate to Clock mode.
•
Press SET to navigate to Alarm and press ST / SP /
•
Before you use it for the first time.
+ to turn the alarm on or off.
will indicate that the
•
When the battery is replaced.
alarm has been activated.
•
Before you leave for an extended outdoor activity.
•
Press SET to confirm.
•
Whenever it is exposed to strong magnetic sources,
extreme cold, or you suspect that other environmental
NOTE
When the alarm clock is activated, it will sound at
conditions have affected the compass readings.
the set time every day. Press any button to stop the alarm
•
If you notice that the compass is not showing the
for that day. The alarm clock is still active and will set off
direction correctly.
Alarm
Beep ON / OFF
again the following day.
To silence the keys:
TO SET THE TRUE NORTH CALIBRATION
•
Press MODE to navigate to Clock mode.
When you do not know the declination angle, the true north
•
Press SET to navigate to Beep ON / OFF.
calibration function can be used to compensate for the
•
Press ST / SP / + to silence or to turn on key sounds.
difference between magnetic and true north. All you need
to know is the direction of true north (this can be found from
landmarks in your immediate vicinity). Setting the true north
COMPASS
calibration makes the compass reading more accurate.
ABOUT THE COMPASS
1. Press MODE to navigate to Set up mode.
The compass shows the bearing of your position in degrees
2. Press SET to navigate to True north mode option.
due North. The outer circumference of the display consists
3. Turn the compass to the direction of true north and
of 60 segments that graphically show your bearing. Three
press ST / SP / +.
Compass with temperature
lit segments represent South whereas one lit segment
represents North, as shown below.
To toggle True north calibration ON / OFF:
•
Press MODE to navigate to Set up mode.
•
Press SET to navigate to True north mode option.
1. South
1
•
Press ST / SP / + to toggle true north mode to ON /
2. Bearing
OFF.
2
3. Stopwatch
3
NOTE
If the declination angle is turned ON, the True north
function will automatically turn itself OFF and vice-
4. Cardinal point
5
versa.
4
5. North
DECLINATION ANGLE
NOTE
The compass display is active for 30 seconds at
ABOUT DECLINATION
a time. After this, the compass will go into power saving
Declination is the angle between where a compass needle
mode and "- - -" will appear on the display.
points (magnetic North Pole) and the true North Pole. The
To re-activate the compass, press COMPASS.
declination angle can vary from 0-30 degrees East (E)
or West (W) and can be found on most maps or on the
Internet.
STOPWATCH
For declinations in the United States:
http://www.ngdc.noaa.gov/seg/geomag/jsp/Declination.jsp
1. Enter your zip code in the area provided
Bearing Tracking
2. Click "Get Location"
3. Scroll down and click "Compute"
For declinations in Canada:
http://www.geolab.nrcan.gc.ca/geomag/apps/mdcal_e.php
When you set the declination angle on the compass you
compensate for the difference between true and magnetic
Calibration
north. This increases its accuracy.
To set the declination angle:
1. Press MODE to navigate to Set up mode.
2. Press SET to navigate to Declination mode option.
3. Press and hold SET to enter settings mode.
4. Press ST / SP / + or COMPASS / - to toggle settings.
True north
1.
Press MODE to navigate to Compass mode.
The setting options are as follows: WEST / EAST
2.
Press ST / SP / + to start and stop the stopwatch.
declination angle.
3.
Press and hold SET to reset.
5. Press SET to confirm.
NOTE
Unless you stop the stopwatch, "
" will blink in
all modes to remind you that the stopwatch is still timing.
BEARING TRACKING SYSTEM
To view Compass with temperature:
ABOUT THE BEARING TRACKING SYSTEM
• Press MODE to navigate to Compass mode.
• Press SET to navigate to Compass with temperature.
The bearing tracking system enables you to lock onto
a bearing, which you will be able to relocate using the
compass. By locking the bearing you can see when you
deviate from your course and how much you need to
or corrosive cleaning agents, as these may cause
MONTRE BOUSSOLE
correct it to get back on track.
damage. Use luke warm water and mild soap to clean
MODELE : RA126
the watch and chest belt thoroughly after each training
session. Never use the products in hot water or store
MANUEL DE L'UTILISATEUR
TO SET THE BEARING TRACKING SYSTEM
them when wet.
• Do not bend or stretch the transmitter part of the chest
1. Press MODE to navigate to Set up mode.
belt.
2. Press and hold SET to enter setting mode.
• The top figure shows your last bearing locked.
• Do not subject the product to excessive force, shock,
FR
• The bottom figure shows your current bearing.
dust, temperature changes, or humidity. Never expose
the product to direct sunlight for extended periods. Such
INTRODUCTION
treatment may result in malfunction.
Nous vous remercions d'avoir choisi la montre boussole
• Do not tamper with the internal components. Doing
(RA126) de Oregon Scientific™. La montre boussole RA126
so will terminate the product warranty and may cause
est un produit très utile pour les activités de plein air car il
damage. The main unit contains no user-serviceable
peut vous permettre de localiser votre emplacement et de
parts.
trouver votre direction à l'aide du système de guidage avec
• Do not scratch hard objects against the LCD display as
relevés. Equipé de la fonction « température », ce produit
this may cause damage.
est le parfait compagnon des utilisateurs qui souhaitent
• Take precautions when handling all battery types.
s'aventurer en plein air.
• Remove the batteries whenever you are planning to
comprend une boussole numérique, un calibrage compas
store the product for a long period of time.
(nord magnétique et nord géographique), un angle de
• When replacing batteries, use new batteries as specified
déclinaison ajustable, un système de guidage avec relevés,
in this user manual.
les fonctions « chronomètre » et « température ».
• The product is a precision instrument. Never attempt
to take this device apart. Contact the retailer or our
customer service department if the product requires
IMPORTANT
servicing.
• Les fonctions de mesure de l'appareil RA126 ne doivent
• Do not touch the exposed electronic circuitry, as there is
pas se substituer aux dispositifs de précision industriels
a danger of electric shock.
3. Point the compass in the desired direction and press
ni aux mesures effectuées par des professionnels.
• Check all major functions if the device has not been
SET.
Les relevés enregistrés par cette montre doivent être
used for a long time. Maintain regular internal testing
4. Press SET to fine tune the bearing. Press ST / SP / + to
considérés uniquement comme des représentations plus
and cleaning of your device. Have your watch serviced
increase and COMPASS / - to decrease the bearing.
ou moins précises.
by an approved service center annually.
5. Press SET to confirm.
• When disposing of this product, do so in accordance
• Oregon Scientific ™ ne peut être tenu responsable de la
6. In the Compass mode, the locked bearing will appear
with your local waste disposal regulations.
perte de l'appareil ni des réclamations de tierces parties
instead of the cardinal reading.
• Due to printing limitations, the displays shown in this
relatives à son utilisation.
manual may differ from the actual display.
Once the bearing tracking system has been set, the
• The contents of this manual may not be reproduced
compass segments on the display will show how far
without the permission of the manufacturer.
MONTRE BOUSSOLE
you deviate from your locked course. See the examples
below:
NOTE
The technical specifications for this product and the
A.
The locked bearing is 94 and the current bearing is
contents of the user manual are subject to change without
94.
notice.
B.
Your locked bearing is 94 and your current bearing is
120.
ABOUT OREGON SCIENTIFIC
Visit our website (www.oregonscientific.com) to learn more
1
1
A.
1. The locked bearing
about Oregon Scientific products.
is 94 and the current
2
bearing is 94.
If you're in the US and would like to contact our Customer
2. Current compass
Care department directly, please visit:
bearing.
www2.oregonscientific.com/service/support.asp
2
3
3. Locked compass
OR
bearing.
Call 1-800-853-8883.
For international inquiries, please visit:
www2.oregonscientific.com/about/international.asp.
B.
1. BOUSSOLE / - : Active la boussole ; diminue les valeurs
1
1. Your locked bearing
de réglage
2
is 94 and your
2. MODE : Alterne les modes principaux ; permet de quitter
current bearing is
rapidement les modes de réglage
120.
3
2. Current bearing.
3. ST/SP/ + : Démarre/ Arrête le chronomètre ; augmente
3. Locked bearing.
les niveaux de réglage
4.
/
: Allume le rétro éclairage EL ; Active le
The compass segments now show the angle between your
verrouillage des touches
locked bearing and your current bearing. Therefore, you
5. REGLER / REINITIALISER / AFFICHER : Permet
need to change the direction you are on to get back onto
d'accéder aux modes de réglage ; sélectionner les
your locked bearing course.
sous-modes ; réinitialiser le chronomètre
6. Permet de faire tourner la lunette sur laquelle figurent
To toggle the bearing tracking system to ON / OFF:
les points cardinaux : Nord, Sud, Est et Ouest
•
Press MODE to navigate to Set up mode.
•
Press SET to navigate to Bearing Tracking System.
•
Press ST / SP / + to toggle ON / OFF.
AU COMMENCEMENT
NOTE
The compass sensor should be calibrated before
initially using the bearing tracking system.
1
2
SPECIFICATIONS
3
12/24 hour with hour / minute/
Real time clock
4
second
00:00:00 to 59:59:59 (hrs:
Stopwatch
min: sec)
5
Thermometer
-5°C to 50°C
measuring range
(23°F to 122°F)
6
Resolution
0.1°C / 0.2°F
Power
Watch 1 x CR2032 3V battery
7
Operating
-5°C to 50°C
temperature
(23°F to 122°F)
8
Storage
-20°C to 60°C
temperature
(-4°F to 140°F)
9
Up to 50 meters (164 feet)
Water resistant
without pressing keys
PRECAUTIONS
1.
: Le chronomètre s'affiche ou est en marche
To ensure you use your product correctly and safely, read
2.
:
Le réveil est réglé ; le voyant clignote lorsqu'il est
these warnings and the entire user manual before using
activé
the product:
• Use a soft, slightly moistened cloth. Do not use abrasive
3.
: Indicateur - astuce : Diminue les valeurs
REMARQUE
Réglez l'appareil avant de l'exposer à un
4. "
": Les flèches directionnelles indiquent votre
volume d'eau trop important. Appuyer sur les touches
emplacement
lorsque vous êtes dans l'eau ou lorsque vous êtes exposé
à de fortes pluies peut provoquer des infiltrations d'eau à
5.
: Chiffres majeurs : c.à.d le temps
l'intérieur de l'appareil.
6.
Chiffres mineurs : c.à.d le chronomètre
FONCTIONNEMENT
7.
: Indicateur - astuce :
Retour en arrière /
confirmation rapide
RÉTRO ECLAIRAGE ET VERROUILLAGE DES TOUCHES
8. Direction cardinale
Appuyez sur
pendant 5 secondes pour activer le rétro
éclairage.
9.
: Indique vers quelle position la montre doit
REMARQUE
La
fonction
« rétro
éclairage »
être tournée lorsque l'on procède au calibrage de la
fonctionnera pas lorsque l'icône « piles faibles »
boussole
s'affiche. Cette fonction sera de nouveau opérationnelle
lorsque les piles auront été remplacées.
10.
: Indicateur sous-mode
Pour alterner entre le verrouillage ou le déverrouillage
La montre boussole RA126
des touches :
11.
: Indique que le système de guidage avec relevés
est e n position ON
Appuyez et maintenez enfoncé
/
.
indique que
12.
: Indicateur - astuce : Augmente les valeurs
les touches sont verrouillées.
13.
: Verrouillage des touches activé
MODES DE FONCTIONNEMENT
: Piles faibles
14.
15. Indicateur - astuce
16.
: Le son des touches est désactivé (position
OFF)
Heure
Icône température
17.
:
AU COMMENCEMENT
METTRE EN MARCHE LA MONTRE
Régler
Boussole
(UNIQUEMENT LORS DE LA PREMIÈRE UTILISATION)
Appuyez sur n'importe quelle touche pendant 2 secondes
pour activer l'écran à cristaux liquides.
Température
AU COMMENCEMENT
La montre fonctionne avec une pile lithium 1 x CR2032,
3
qui a déjà été installée.
Voir ci-dessous pour toute
Appuyez sur MODE pour alterner entre :
recommandation relative aux piles.
• Mode horloge
4
• Mode boussole
ICONE DE PILES
DESCRIPTION
FAIBLES
• Mode température
5
• Mode réglages
6
La pile de la montre est faible.
Pour faire défiler les sous-modes :
S'affiche lorsque la pile
Appuyez sur SET pour faire défiler les options dans chaque
est trop faible pour faire
mode. Les différents modes sont présentés ci-après :
fonctionner le capteur. "- -
Mode horloge :
" s'affiche à la place des
valeurs correspondant à la
température et à la boussole.
Pour remplacer la pile :
Heure
Réveil
Bip
ON / OFF
Mode boussole :
1. A l'aide d'une pièce de monnaie, tournez le couvercle
du compartiment des piles dans le sens inverse des
aiguilles d'une montre jusqu'à ce qu'il se détache.
2. Remplacez les piles usagées et insérez les nouvelles en
respectant les signes de polarité.
10
3. Repositionnez le couvercle en le tournant dans le sens
des aiguilles d'une montre jusqu'à ce qu'il soit bien en
Boussole avec chronomètre
Boussole avec température
place.
11
12
REMARQUE
Lorsque l'on remplace les piles, il est
Mode température :
important de calibrer à nouveau le capteur magnétique.
13
UTILISATION DANS L'EAU
14
La montre boussole RA126 est étanche, jusqu'à 50 mètres
15
de profondeur (164 pieds).
16
17
PLUIE
DOUCHE
NATATION/
PLONGEON
PLONGEE
EAU PEU
EN EAU PEU
AVEC
Température
ECLABOUS-
(EAU
PROFONDE
PROFONDE/
TUBA EAU
SURES
TIEDE ET
SURF /
PROFONDE
FROIDE)
SPORTS
ETC
NAUTIQUES
50 M /
OK
OK
OK
OK
NO
164
PIEDS
Mode réglages :
BOUSSOLE
A PROPOS DE LA BOUSSOLE
La boussole indique votre emplacement en degrés par
rapport au Nord. La circonférence extérieure consiste en 60
segments qui affichent graphiquement votre emplacement.
Trois segments allumés représentent le Sud alors qu'un
seul segment allumé représente le Nord, comme indiqué
Suivi
ci-après.
1. Sud
1
2. Relevés
ne
2
3. Chronomètre
3
4. Point cardinal
Déclinaison
Calibration
5
4
5. Nord
REMARQUE
L'affichage de la boussole est actif pendant
30 secondes à chaque fois. Par la suite, la boussole sera
initialisée en mode « économie d'énergie électrique » et "- -
Nord Géographique
-" apparaîtra sur l'écran.
MODE HORLOGE
Pour réactiver la boussole, appuyez sur COMPASS
(boussole).
POUR RÉGLER L'HEURE ET LA DATE
1. Appuyez sur MODE pour naviguer dans le Mode
horloge.
CHRONOMÈTRE
2. Appuyez et maintenez enfoncée la touche SET pour
avoir accès aux réglages.
3. Appuyez sur ST /SP / + pour faire défiler vers le haut
et appuyez sur COMPASS (boussole) pour faire défiler
vers le bas et passer en revue les options de réglage.
Les réglages se présentent dans l'ordre suivant : Heure :
format 12 ou 24 h ; heure ; minute ; année ; jour-mois /
mois-jour ; mois ; jour ; unité de température.
4. Appuyez sur SET pour valider.
REMARQUE
Si aucune touche n'est activée pendant 10
secondes, l'affichage revient au mode horloge.
POUR RÉGLER LE RÉVEIL
1. Appuyez sur MODE pour naviguer dans le Mode
boussole.
2. Appuyez sur ST/SP/ + pour démarrer et arrêter le
chronomètre.
3. Appuyez et maintenez enfoncée la touche SET pour le
remettre à zéro.
REMARQUE
A moins que vous n'arrêtiez le chronomètre,
l'icône "
" clignotera dans tous les modes, pour vous
rappeler que le chronomètre est encore en marche.
Pour voir la boussole avec la température :
1. Appuyez sur MODE pour naviguer dans le Mode
• Appuyez sur MODE pour naviguer dans le Mode
horloge.
boussole.
2. Appuyez sur SET pour avoir accès au réveil.
• Appuyez sur SET pour avoir accès à la boussole avec la
température.
3. Appuyez et maintenez enfoncée la touche SET pour
avoir accès aux réglages.
4. Appuyez sur ST /SP / + pour faire défiler vers le haut
BOUSSOLE ET CALIBRAGE
et appuyez sur COMPASS (boussole) pour faire défiler
vers le bas et passer en revue les options de réglage.
Avant la première utilisation de la boussole, nous vous
Les réglages se présentent dans l'ordre suivant : heure,
recommandons de procéder au calibrage du capteur de la
minute.
boussole.
5. Appuyez sur SET pour valider.
Pour calibrer le capteur de la boussole :
Pour activer ou désactiver le réveil :
• Appuyez sur MODE pour accéder au Mode réglages.
• Appuyez sur MODE pour avoir accès au Mode horloge.
• Appuyez sur SET pour accéder à l'option mode de
calibrage.
• Appuyez sur SET pour avoir accès au réveil et appuyez
• Appuyez et maintenez enfoncée la touche SET pour
sur ST / SP / + pour démarrer ou arrêter le réveil.
débuter le calibrage de la boussole.
indiquera que le réveil a été activé.
Tournez la montre dans le sens inverse des aiguilles d'une
• Appuyez sur SET pour valider.
montre à la même vitesse que les segments en mouvement
situés autour de la circonférence de l'écran. La rotation
REMARQUE
sera terminée une fois que vous aurez effectué 1 tour ¼ et
Lorsque le réveil est activé, il sonnera chaque
l'affichage apparaîtra comme indiqué ci-après lorsqu'il aura
jour à l'heure préprogrammée. Appuyez sur n'importe quelle
presque entièrement fini le calibrage .
touche pour arrêter le réveil. Le réveil est encore activé et se
déclenchera à nouveau le jour suivant.
Pour couper le son des touches :
• Appuyez sur MODE pour naviguer dans le Mode
horloge.
• Appuyez sur SET pour avoir accès aux options sonores.
• Appuyez sur ST / SP / + pour couper ou rétablir le son
des touches.
2007/8/17 3:39:22 PM
Advertisement

Related Manuals for Oregon Scientific RA126


Summary of Contents for Oregon Scientific RA126
- Page 1 :Temperature icon INTRODUCTION Compass Thank you for selecting the Oregon Scientific™ Compass Watch (RA126). The RA126 is a very useful product for GETTING STARTED any outdoor activity as it can help you locate your position TURN ON WATCH (FIRST-TIME USE ONLY) and find your direction using the bearing tracking system.
- Page 2 Pulse cualquier botón para detener la alarma USO EN EL AGUA por ese día. La alarma sigue activa y volverá a sonar a la El RA126 es resistente al agua a hasta 50 metros (164 misma hora el día siguiente. pies).