Table of Contents
Advertisement
Quick Links
Advertisement
Table of Contents

Related Manuals for LevelOne WUA-0315


Summary of Contents for LevelOne WUA-0315
- Page 1 LevelOne User Manual WUA-0315 11g Wireless USB Adapter Ver. 1.0.0-1117...
-
Page 2: Fcc Radiation Exposure Statement
This transmitter must not be co-located or operating in conjunction with any other antenna or transmitter. CE Marking Warning Digital Data Communications, declares that this product (Model-no. WUA-0315) is in compliance with the essential requirements and other relevant provisions of Directive 1999/5/EC. -
Page 3: Table Of Contents
Table of Content INTRODUCTION .......................... 4 1.1. User Manual Overview ....................... 4 UNPACKING AND SETUP ......................5 2.1. Features ............................5 2.2. Package Contents ........................5 2.3. Setup ............................5 HARDWARE INSTALLATION ....................7 3.1. Installation Procedure for USB Adapter ..................7 3.2. -
Page 4: Introduction
Congratulations on your purchase of LevelOne 11g Wireless USB Adapter. This manual helps to get familiar with the LevelOne 11g Wireless LAN Adapter. This manual con- tains detailed instructions in operation of this product. Please keep this manual for future reference. -
Page 5: Unpacking And Setup
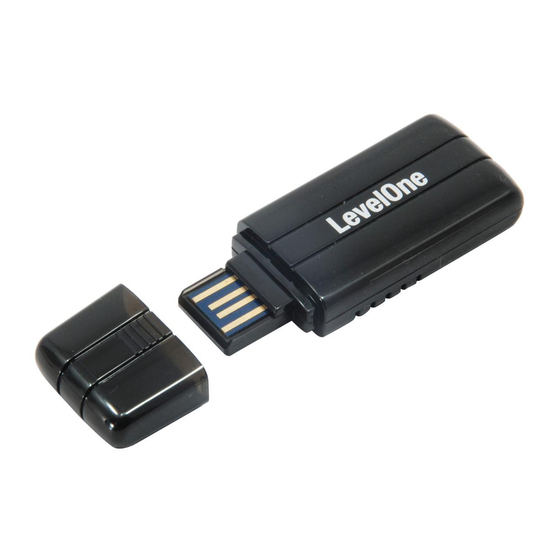
Package Contents Open the box of the 11g Wireless USB Adapter and carefully unpack it. The box should contain the following items: WUA-0315 11g Wireless USB Adapter Quick Installation Guide CD Manual/Driver/Utility If any item is found missing or damaged, please contact your local reseller for replacement. - Page 6 Make sure that there is a well environment that there is no much intrusion to have a better con- nection.
-
Page 7: Hardware Installation
3. Hardware Installation 3.1. Installation Procedure for USB Adapter You should install the supplied software BEFORE inserting the Wireless USB Adapter when using Windows 2000, XP or Vista. Note The following installation was operated under Windows XP and Vista. (Procedures are similar for Windows 2000.) If you have installed the Wireless Adapter driver &... -
Page 8: Software Installation
4. Software Installation This section will lead you to install the driver and utility of the 11g Wireless USB Adapter. 4.1. Windows XP Utility Installation 1. Insert the 11g Wireless USB Adapter Utility CD into the computer and then the Auto-run screen will appear. - Page 9 4. Select “Install driver and LevelOne 11g WLAN Utility” or “Install driver only” then click “Next” to continue the installation.
- Page 10 5. Select “LevelOne 11g Configuration Tool” then click “Next” to continue the installation. 6. Click “Install” to continue the installation.
- Page 11 7. Follow the on screen instruction and step through the installation procedures then click “Finish” to exit the wizard.
- Page 12 8. Insert the USB adapter into USB port when installation procedures are completed. 9. The Windows “Found New Hardware” wizard will prompt and then install the software auto- matically. 10. When the Windows wizard is complete, you will now have a new icon in your system tray. The installation program will help you to setup the Wireless LAN utility.
-
Page 13: Windows Vista Utility Installation
mance with the AP, and if the icon represents in low blue, then the signal strength has a worst formance with the wireless station. Excellent Wireless Signal Strength Adequate Wireless Signal Strength Low Wireless Signal Strength Wireless Card inactive 4.2. Windows Vista Utility Installation 1. - Page 14 3. Follow the Install Shield Wizard Instructions. Select “I accept the terms of the license agreement” then click “Next” to start the installation. 4. Select “Install driver and LevelOne 11g WLAN Utility” or “Install driver only” then click “Next” to continue the installation.
- Page 15 5. Click “Install” to continue the installation.
- Page 16 6. Follow the on screen instruction and step through the installation procedures. 7. Insert the USB adapter into USB port when installation procedures are completed. 8. The Windows “Driver Software Installation” wizard will prompt and then install the software au- tomatically.
- Page 17 When the icon in the toolbar represents in full blue color then the signal strength has an excellent performance with the AP, if it represents in half blue color then the signal strength has a fair perfor- mance with the AP, and if the icon represents in low blue, then the signal strength has a worst performance with the wireless station.
-
Page 18: Wireless Utility Configuration (For Windows Xp And Vista)
5. Wireless Utility Configuration (For Windows XP and Vista) 5.1. Profile The Profile List keeps a record of your favorite wireless settings at home, office, and other public hot-spots. You can save multiple profiles, and activate the correct one at your preference. The following Figure shows the basic profile section. - Page 19 If the desired wireless network is currently available, you can SSID select its SSID. Otherwise, type in the SSID of the desired wire- less network. Select either CAM (Constantly Awake Mode) or PSM (Power Power Save Mode Saving Mode). Select a value within the range of 0 to 2347 bytes RTS Threshold Fragment Threshold Select the value from 256 to 2346 bytes.
- Page 20 Auth./Encyp. You MUST select the option to match the Wireless LAN you wish Authentication to join. The available options are: Open - Broadcast signals are not encrypted. This method can be used only with no encryption or with WEP. Shared - Broadcast signals are encrypted using WEP. This me- thod can only be used with WEP.
- Page 21 Encryption The available options depend on the Authentication method se- lected above. The possible options are: None - No data encryption is used. WEP - If selected, you must enter the WEP data shown below. This WEP data must match the Access Point or other Wireless stations.
- Page 22 802.1x There are 5 methods in the drop-down list. EAP Method PEAP - Protect Extensible Authentication Protocol. PEAP trans- port securely authentication data by using tunneling between PEAP clients and an authentication server. PEAP can authenti- cate wireless LAN clients using only server-side certificates, thus simplifying the implementation and administration of a secure wireless LAN.
- Page 23 Select the desired option from the drop-down list. Tunnel Authentica- tion After reconnecting the signal which broke up, you can enable the Session Resump- session resumption to reduce the transferring packet to accelerate tion the speed. Enter the required data into the fields. Authentication ID / Password Tunnel ID / Pass-...
-
Page 24: Network
To enable a profile 1. In the list of available profiles, click the profile that you want to enable. 2. Click Activate. 5.2. Network The network setting page allows you to set and save different wireless settings. You can activate the suitable profile according to the environment where the wireless connection is used. - Page 25 It displays the Network type in use, Infrastructure Network Type for BSS, Ad-Hoc for IBSS network. The channel used by the Wireless network. Channel AP support wireless mode. It may support Wireless Mode 802.11a, 802.11b or 802.11g wireless mode Whether AP provides security-enabled wireless Security-Enable network.
- Page 26 Icons It indicates network type is infrastructure mode. It indicates network type is Ad-hoc mode. 802.11b wireless mode 802.11g wireless mode 802.11n wireless mode It indicates security-enabled wireless network. It shows the information of Link Status Section. It hides the information of Link Status Section. Link Status The Link Status section displays the detailed information of the current connection.
- Page 27 Link Screen Link Information Status It will indicate the current link status. Extra Info It shows the link status. It displays the current channel in use. Channel It will indicate the current authentication mode in use. Authentication It shows the wireless security that the wireless network is Encryption using.
- Page 28 5.3. Advanced Click Advanced tab of the utility, you can configure the detailed settings in this page. Windows Vista Screen:...
- Page 29 Windows XP Screen: Advanced Screen Advanced Select the desired wireless mode. Wireless Mode Tx Burst enables the adapter to deliver better throughput Enable Tx Burst during a period of time but the function only takes effect when connecting with the AP which also supports Tx Burst.
- Page 30 The TCP Window is the amount of data which a sender Enable TCP can send on a particular connection before it gets an Window Size acknowledgement back from the receiver that it has got- ten some of it. When the router or AP which the adapter is connecting to has set up the TCP Window, you can enable the parameter to meet the data size for the router or AP connection.
- Page 31 CCX (Cisco Compatible Extensions) is developed by Enable CCX (Cisco Cisco for the radio monitoring and fast roaming. Compatible eXtensions) Turn on CCKM: During normal operation, LEAP-enabled client devices mutually authenticate with a new access point by performing a complete LEAP authentication, including communication with the main RADIUS server.
-
Page 32: Statistics
5.4. Statistics Click Statistics tab of the utility, the page will display the transmitted and received results. Statistics Screen Transmit Frames successfully sent. Frames Transmitted Successfully Frames Retransmitted successfully Frames successfully sent with one or more reties. Frames failed to transmit after hitting retry limit. Frames Fail To Receive ACK After All Retries Successfully receive CTS (Clear To Send) after... -
Page 33: Wmm
Frames received with CRC error. Frames Receive With CRC Error Frames dropped due to resource problem. Frames Dropped Due To Out-of- Resource Frames received more than twice. Duplicate Frames Received Click the button to reset counters to zero. Reset Counter 5.5. -
Page 34: Wps
WMM Screen WMM is short for Wi-Fi Multimedia. It is a standard created to WMM Enable define quality of service (QoS) in Wi-Fi networks. It is a precursor to the upcoming IEEE802.11e WLAN QoS draft standard, which is meant to improve audio, video and voice applications transmit- ted over Wi-Fi. - Page 35 You will use the WPS screen when you try to connect the wireless network with the WPS function. WPS Screen WPS AP List It displays the information of surrounding APs with WPS IE from last scan result. List information includes SSID, BSSID, Channel, ID (Device Password ID) and Securi- ty-Enabled.
- Page 36 Enter the PIN code displayed in the following field to the PIN Code WPS screen of the access point. When STA is Enrollee, you can use "Renew" button to re-generate new PIN Code. Config Mode Our station role-playing as an Enrollee or an external Registrar.
-
Page 37: Radio On/Off
5.7. Radio On/Off You can turn the radio signal on/off by clicking this button. The radio signal is on. The radio signal is off. 5.8. About This page displays the information of version numbers, configuration utility, firmware and other information regarding this wireless USB adapter. Click the www.level1.com button to visit the Leve- lOne website for other information. -
Page 38: Network Planning
An ad hoc wireless LAN can be used for a small branch office or SOHO operation. Infrastructure Wireless LAN LevelOne WUA-0315 can also provide access to a wired LAN for wireless workstations. An inte- grated wired and wireless LAN is called an Infrastructure configuration. A Basic Service Set (BSS) consists of a group of wireless PC users, and an access point that is directly connected to the wired LAN. - Page 39 The infrastructure configuration not only extends the accessibility of wireless PCs to the wired LAN, but also increases the effective wireless transmission range for wireless PCs by passing their signal through one or more access points. A wireless infrastructure can be used for access to a central database, or for connection be- tween mobile workers, as shown in the following figure.
-
Page 40: Technical Specifications
7. Technical Specifications Technical Specifications Standards Network Security IEEE 802.11g, IEEE 802.11b - WEP-64/128 bit Host Interface - WPA USB Port Type: USB 2.0, 1.1, 1.0 - WPA-PSK Radio Operation - WPA2 Data Transfer Rate - WPA2-PSK 802.11g: 54, 48, 36, 24, 18, 12, 9 - Support WPS configuration and 6 Mbps Device Management...