LevelOne WUA-0605 User Manual
300mbps n_max wireless usb adapter
Hide thumbs
Also See for WUA-0605:
- Brochure & specs (3 pages) ,
- User manual (23 pages) ,
- Quick installation manual (19 pages)
Table of Contents
Advertisement
Quick Links
Advertisement
Table of Contents

Related Manuals for LevelOne WUA-0605


Summary of Contents for LevelOne WUA-0605
-
Page 1: User Manual
LevelOne User Manual WUA-0605 300Mbps N_Max Wireless USB Adapter V1.0... - Page 2 This transmitter must not be co-located or operating in conjunction with any other antenna or transmitter. CE Marking Warning Digital Data Communications, declares that this product (Model-no. WUA-0605) is in compliance with the essential requirements and other relevant provisions of Directive 1999/5/EC.
-
Page 3: Table Of Contents
Table of Contents Welcome ... 4 Package Contents ... 4 Wireless USB Adapter Overview ... 5 Wireless USB Adapter Installation ... 6 Making a Basic Wireless Network Connection ... 11 Introduction to the Wireless LAN Utility ... 15 Wi-Fi Protected Setup (WPS) ... 21 Troubleshooting ... -
Page 4: Welcome
Welcome Thank you for purchasing the LevelOne WUA-0605 N_Max Wireless USB Adapter. The WUA-0605 is a 802.11n compliant Wireless Adapter which is designed to be both affordable, and offer fast speeds of up to 300 Mbps. It is designed for the Home and SOHO user who needs enhanced range and performance, while the WPA2 wireless encryption ensures that the data transmitted is secured. -
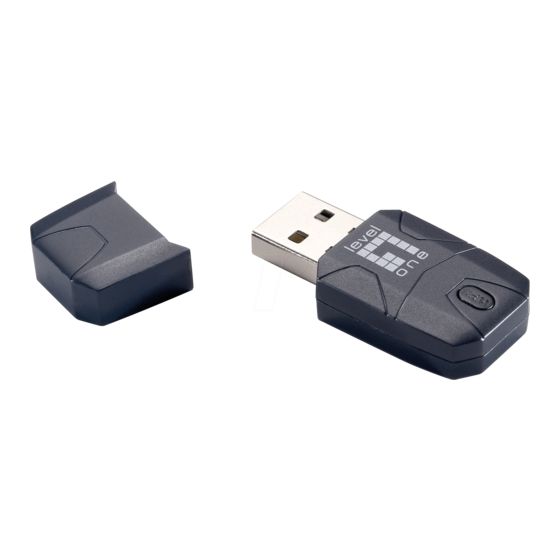
Page 5: Wireless Usb Adapter Overview
Wireless USB Adapter Overview Wireless USB Adapter has the USB interface, LED and WPS button below. Interface USB Interface: Connect the USB Interface to a USB port on your computer. LED Description The LED stays lighted to indicate WLAN link established and active. WPS Button WPS Button: Press this button to do WPS with AP. -
Page 6: Wireless Usb Adapter Installation
Wireless USB Adapter Installation The following instructions will guide you to through the process of installing the Wireless USB Adapter. Windows XP / Vista / 7 Setup Note: Screen captures shown in this guide are from Windows XP. Unless mentioned, there are no differences in Vista. - Page 7 4. Select your desired language, and then click “Next” to start the installation. 5. Click “Next” to continue.
- Page 8 6. Click “Install” 7. The WUA-0605 Driver and Utility is being installed. In Windows Vista, the follow message may appear. Please click “Install this driver software anyway.”...
- Page 9 8. Please click “Finish” and restart your computer. 9. After your computer has restarted, the WUA-0605 Utility icon will appear in your taskbar. Note: The red cross over the icon indicates the USB Adapter is not plugged in.
- Page 10 10. Now insert the Wireless USB Adapter into your computer’s USB port. The “Found New Hardware Wizard” will appear. 11. Follow the prompts until you see that the WUA-0605 has been successfully installed. 12. Device installation is now complete. You can now use the Utility to connect to your wireless network.
-
Page 11: Making A Basic Wireless Network Connection
Making a Basic Wireless Network Connection Step 1: Double click the LevelOne WUA-0605 Wireless LAN Utility on your Windows desktop. Step 2: Click the "Available Network" button to scan for available access points. - Page 12 Step 3: Double click on the SSID of Wireless access point or router that you are going to connect to. In the example, we want to connect to WBR-6800.
- Page 13 Enter the wireless security encryption method and key for the access point you are connecting to. For maximum security, LevelOne recommends WPA2-PSK (AES). Note: Use of WEP or WPA (TKIP) will force the wireless connection to connect at legacy 802.11g...
- Page 14 Step 5: Now you are ready to use the wireless network for Intranet and Internet connection.
-
Page 15: Introduction To The Wireless Lan Utility
Note: These instructions uses Windows XP as the presumed operation system. Some functions are not supported in Windows 98SE or Windows ME. Double click the LevelOne WUA-0605 Wireless LAN Utility on your Windows desktop to start the Utility When the utility is opened, you will see the following checkboxes at the bottom. - Page 16 General After starting the utility, the general page pops up This General tab provides the information of your current wireless network connection. Functions Status Check if the device associated to target network. Speed The current connection speed Type Infrastructure or Ad-Hoc mode. The encryption mode for connecting to current network profile.
- Page 17 Profile The Profile tab lists the preferred connections. You can click the buttons beside to do configure each connection. Functions To add a connection profile. Remove To remove a connection profile. Edit To modify the configurations for a profile. Duplicate To make a copy of a profile.
-
Page 18: Available Network
Available Network This Available Network tab lists the reachable wireless network. Functions Refresh To rescan available Wireless Networks. Add to Profile To add an available Wireless Network to your profile list. - Page 19 Status The Status tab shows the current connection status.
- Page 20 Statistics The Statistics tab shows the transmission activity record. Clicking the " Reset " button recounts the values from zero.
-
Page 21: Wi-Fi Protected Setup (Wps)
Wi-Fi Protected Setup (WPS) An easy and secure setup solution for Wi-Fi networks. - Page 22 Push Button Config (PBC) Method If both the Wireless Router / Access Point and the Wireless USB Adapter has a physical button or software button for Push Button Config (PBC), please follow steps below to complete the WPS. Step 1: First press the WPS button on your Wireless Router / Access Point.
- Page 23 Step 2: Click on "Push Button Config (PBC)" button. You can also push the physical button on the device.
- Page 24 Step 4: The Utility will now pair the Router/AP and USB Adapter. When paired successfully, wireless encryption security will be applied to the connection.
- Page 25 WPS PIN Code Method You will need to set the same PIN code on both the Wireless Router / Access Point and the USB Adapter. Step 1: Check the PIN code assigned by the Wireless LAN Utility...
- Page 26 Step 2: Enter your Router / Access Point’s Web Interface and set the WPS settings as Registrar and use the PIN code assigned in the Wireless LAN Utility. Screen Capture is from LevelOne Router Different models/brands will have varying configuration screens.
- Page 27 Step 3: Now press the “Pin Input Config (PIN)” Button. Step 4: Select “Yes” if you want to select your Router / Access Point.
- Page 28 Step 4: Select the desired Router / AP Name and then click on " Select " button. Step 6: The Wireless LAN Utility will start pairing process. When paired successfully, wireless encryption security will be applied to connection.
-
Page 29: Troubleshooting
Troubleshooting Session Overlap If there is more then one AP on the PBC mode, there will be [Session Overlap].Please using PIN method or wait for a while and push the button again. TimeOut If you see the message below while doing WPS!! Please retry again! Wireless LAN Utiliy appears twice The Wireless LAN Utility may appear twice when using Windows Vista.