Table of Contents
Advertisement
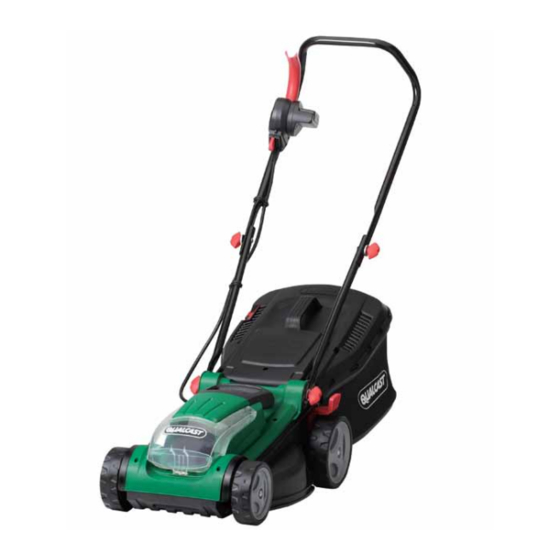
Qualcast
36V Lithium-Ion Cordless Rotary Mower
Instruction Manual
Important
- Please read these instructions fully before starting assembly
These instructions contain important information that will help you get the best from
your mower, ensuring it is assembled correctly and safely.
If you need help or have damaged or missing parts, call the Customer Helpline
on 08456 400 800.
After Sales Support
UK/Ireland
Web
www.argosspares.co.uk
(Model: CLMB3634M)
08456 400 800
Sep 2013
Advertisement
Table of Contents

Related Manuals for Qualcast CLMB3634M


Summary of Contents for Qualcast CLMB3634M
- Page 1 Qualcast 36V Lithium-Ion Cordless Rotary Mower (Model: CLMB3634M) Instruction Manual After Sales Support UK/Ireland 08456 400 800 www.argosspares.co.uk Important - Please read these instructions fully before starting assembly These instructions contain important information that will help you get the best from your mower, ensuring it is assembled correctly and safely.
-
Page 2: Table Of Contents
Contents Safety Information ............................3 Warning Symbols ............................3 General Safety ..............................4 Isolator Key Safety ............................5 Frequent Maintenance ..........................5 Battery Safety ...............................6 In the Box .................................7 Parts ................................7 Assembly ................................8 Step 1 - Handle Base Assembly .........................8 Step 2 - Top Handle Assembly and Adjustment for Operator Height ............9 Step 3 - Grass Collector Assembly......................10 Step 4 - Fitting, Removing and Emptying the Grass Collector ...............11 Fitting and Removing the Battery ......................12... -
Page 3: Safety Information
Safety Information Important - Please read these instructions fully before starting assembly Warning Symbols The following warning symbols appear throughout this assembly manual and indicate the appropriate safety measures you should take when assembly and operating the mower. Take extra care, beware of hazards. Read instruction manual. -
Page 4: General Safety
Safety Information Important - Please read these instructions fully before starting assembly Warnings Symbols (continued) IMPORTANT! When using equipment, the following safety precautions must be followed to avoid injuries and damage. • Read all operating instructions carefully and comply with them. It is important to understand these instructions and to acquaint yourself with the machine, its correct usage and all safety requirements. -
Page 5: Isolator Key Safety
Safety Information Important - Please read these instructions fully before starting assembly General Safety (continued) Exercise extreme caution when changing direction on slopes. Use extreme caution when stepping back or pulling the machine towards you. Never mow by pulling the mower towards you. •... -
Page 6: Battery Safety
Safety Information Important - Please read these instructions fully before starting assembly Battery Safety • Ensure the switch is in the ‘off’ position and the key removed before inserting the battery pack. Inserting the battery pack into a machine while the key is inserted could result in an accident. -
Page 7: In The Box
In the Box Parts Carrying handle Top handle Battery charge Support hook for status display grass collector Cable clip Handle fastene Battery charger Battery charge Cable Handle base section mains plug indicator button Isolator key Grass collector Grass collector steel Battery charge handle frame... -
Page 8: Assembly
Assembly Step 1 - Handle Base Assembly Do not connect the battery and/or the isolator key before the product is completely assembled. Some models have the handles partially fitted inside the box. In this case unfold the handles and tighten the 4 fasteners. If handles are no pre-assembled, proceed as follows: •... -
Page 9: Step 2 - Top Handle Assembly And Adjustment For Operator Height
Assembly Step 2 - Top Handle Assembly and Adjustment for Operator Height Attach the top handle with the bolts, washers and quick release levers to the base handle. Note that the fasteners can be fitted through holes at different heights to make the handle longer or shorter to suit the operator’s height. -
Page 10: Step 3 - Grass Collector Assembly
Assembly Step 3 - Grass Collector Assembly Customer Helpline 08456 400 800... -
Page 11: Step 4 - Fitting, Removing And Emptying The Grass Collector
Assembly Step 3 - Assemble the Grass Collector (continued) 5a. Insert the collector handle into the slots on the plastic top of the grass collector. 5b. Fully insert the grass collector steel frame into the grass box top. 5c. Use the screws and washers provided to lock the frame in place. -
Page 12: Fitting And Removing The Battery
Assembly Step 4 - Fitting, Removing and Emptying the Grass Collector (continued) Fitting the grass collector Lift the deflector guard and hold it up. Fit the grass collector onto the supporting hooks on the rear of the mower, then, release the deflector guard. Ensure the deflector fits snuggly on the grass collector Removing and emptying the grass collector Lift the deflector guard and hold it up, grip the grass collector handle and lift it off to empty it. -
Page 13: Operating Instructions & Tips
Operating Instructions & Tips Setting the Cutting Heights Stop the machine, release the switch lever and wait until the blade stops before adjusting the cutting height. Remember, the blade may continue to rotate after the machine is switched off. A rotating blade can cause injury. CAUTION! Do not touch rotating blades. -
Page 14: Starting And Stopping
Operating Instructions & Tips Starting and Stopping Always remember that the blade may continues to rotate for a few seconds after the machine is switched off. Allow the motor/blade to stop rotating before switching “on” again. Do not rapidly switch off and on. Starting: •... -
Page 15: Ipower Control Panel On Mower Handle
Operating Instructions & Tips Mowing Advice (continued) WARNING! A flashing LED on the cutting mode control panel indicates that the current is too high. A flashing LED on the battery indicates that the voltage is too low. In either case the motor will be shut down automatically . -
Page 16: After Mowing / Storage
Operating Instructions & Tips iPower Control Panel on Mower Handle (continued) Grass full indicator: • When the grass level indicator situated on the top of the grass collector remains open during operation, it means that the collector is not full. •... -
Page 17: Battery Charging
Operating Instructions & Tips Battery Charging • Do not use other battery chargers. The battery charger supplied is specifically designed for the Lithium-Ion battery used in this garden appliance. • Check the mains voltage! The voltage of the power supply must correspond with the data on the nameplate of the battery charger. -
Page 18: Battery Led Panel
Operating Instructions & Tips Charger LEDs (continued) The iPower intelligent charger measures the charge level of the battery and charges the battery accordingly with the required current and voltage based on battery temperature and voltage. This ensure maximum battery life charge it fully before storage. A flashing red LED light on the charger indicates that the battery temperature is not within the charging temperature range of -5 °C–... -
Page 19: Maintenance
Maintenance General Maintenance Always wear gardening gloves when handling or working near sharp blades. Switch off, remove the isolator key, battery and grass collector before adjusting or cleaning. NOTE! To ensure long and reliable product life, carry out the following maintenance regularly: •... -
Page 20: Blade Maintenance
Maintenance Blade Maintenance Turn the machine carefully onto its right side and inspect the blade. If blunt or damaged, replace it. Use the following procedure to remove and replace the blade: Wear thick gardening gloves. Hold the blade using a spanner (not provided) to loosen the blade bolt and remove the blade. -
Page 21: Troubleshooting
Troubleshooting General Troubleshooting The following table provides solutions to common problems encountered with the mower. Fault Possible Cause Solution Mower fails to operate Possible clogging Check underneath the mower and clear as necessary (always wear gardening gloves) Battery not fully charged Charge battery Battery not inserted (properly) Ensure battery is correctly... - Page 22 Troubleshooting General Troubleshooting (continued) The following table provides solutions to common problems encountered with the mower. Fault Possible Cause Solution Cutting blade not rotating while Cutting blade obstructed Switch off garden garden product switched on product Clear obstruction (always wear gardening gloves) Blade nut/bolt loose Tighten blade nut/bolt (17 Nm)
-
Page 23: Technical Data
Technical Data Technical Data Table Specification Value Blade width 34cm Height of cut 20/30/40/50/60/70mm Grass collector capacity 35 liters Speed 3800rpm Weight 15kg Charger input 220-240V~ 50HZ 145W Rated voltage of battery Capacity of battery 2.6Ah Charging period (battery fully discharged) 60mins Charging current of charger 3.7A... -
Page 24: Getting Help
Disposal Disposal and Recycling (continued) Li-Ion batteries: Please observe the instructions in section “Transport”. Do not dispose of with household waste. Dispose of safely according to local legal requirements. Due to a program of continuous product improvement features and instructions are liable to change without notice.