Table of Contents

Related Manuals for Sony Alpha A68


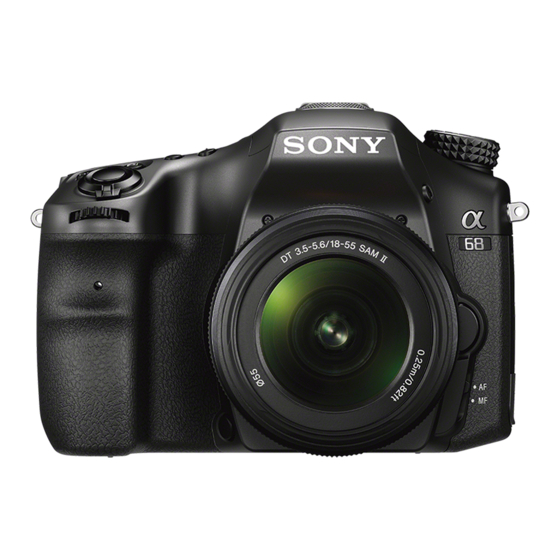
Summary of Contents for Sony Alpha A68
- Page 1 4-590-091-11(1) Interchangeable Lens Digital Camera A-mount Instruction Manual “Help Guide” (Web manual) Refer to “Help Guide” for in-depth instructions on the many functions of the camera. http://rd1.sony.net/help/ilc/1610/h_zz/ ILCA-68...
-
Page 2: Learning More About The Camera ("Help Guide")
Record the model and serial number (which are located on the product) in the space Learning more about the provided below. Refer to these numbers whenever you call your Sony dealer camera (“Help Guide”) regarding this product. Model No. ILCA- Serial No. - Page 3 • Be sure to charge the battery pack using a (USB, etc.) again. genuine Sony battery charger or a device that can charge the battery pack. This product has been tested and found • Keep the battery pack out of the reach of compliant with the limits set out in the small children.
-
Page 4: For Customers In The U.s.a
Declaration of Conformity rechargeable batteries Trade Name: SONY to the collection and Model No.: ILCA-68 recycling location Responsible Party: Sony Electronics Inc. nearest you. Address: 16535 Via Esprillo, San Diego, CA 92127 For more information regarding recycling U.S.A. -
Page 5: For Customers In Europe
Manufacturer: Sony Corporation, 1-7-1 These limits are designed to provide Konan Minato-ku Tokyo, 108-0075 Japan reasonable protection against harmful For EU product compliance: Sony interference in a residential installation. Belgium, bijkantoor van Sony Europe This equipment generates, uses, and can... - Page 6 In case of products that for safety, performance or data integrity reasons require a permanent connection with an incorporated battery, this battery should be replaced by qualified service staff only. To ensure that the battery and the electrical and electronic equipment will be treated properly, hand over these products at end- of-life to the applicable collection point for the recycling of electrical and electronic...
-
Page 7: Notes On Using Your Camera
No compensation for damaged warms up, the screen will function content or recording failure normally. Sony cannot compensate for failure to • The recorded image may be different record or loss or damage of recorded from the image you monitored before content due to a malfunction of the camera recording. - Page 8 PlayMemories Home shooting with the viewfinder. from the following website: The required length or frequency of the http://www.sony.net/pm/ break may differ depending on the individuals, so you are advised to decide Notes on the flash at your own discretion. In case you may •...
- Page 9 Notes on using your camera Notes when playing movies on other On the data specifications described devices in this manual • Movies recorded with this camera may The data on performance and specifications not be played back correctly on other are defined under the following conditions, devices.
-
Page 10: Checking The Supplied Items
Before use Checking the supplied items First check the model name of your camera (page 6). The accessories supplied differ depending on the model. The number in parentheses indicates the number of pieces. Supplied with all models: • Shoulder strap (1) •... -
Page 11: Identifying Parts
Identifying parts See the pages in parentheses for details on operation for the parts. Front side Shutter button (30) Mode dial lock release button (30, 35) Power switch (28) Mode dial (35) Control dial (17) (Flash pop-up) button Self-timer lamp Mounting index (26) Lens contacts* Lens release button (27) -
Page 12: Rear Side
Identifying parts Rear side Eyepiece cup Monitor Eye sensor MOVIE button (32) MENU button (19) For shooting: C1 (Custom 1) button Viewfinder* For viewing: (Enlarge) • When you look into the button viewfinder, the viewfinder For shooting: AEL (AE lock) mode is activated, and when you take your face away from button/SLOW SYNC button... - Page 13 Identifying parts For shooting: Fn (Function) button (18) For viewing: (Image rotation) button C2 (Custom 2) button For viewing: (Delete) button (34) (Playback) button (33) * Do not directly touch this part.
-
Page 14: Top Side
Top side Multi interface shoe* * For details on compatible accessories of the Multi interface shoe, visit the FINDER/MONITOR button Sony website in your area, or consult your Sony dealer or local authorized Display panel Sony service facility. (Drive mode) button... - Page 15 Identifying parts Sides/Bottom Hooks for shoulder strap Speaker • Attach both ends of the strap DC IN terminal onto the camera. • When connecting the AC- PW10AM AC Adaptor (sold separately) to the camera, turn the camera off, then plug the connector of the AC Adaptor to the DC IN terminal on the camera.
- Page 16 * For details on compatible accessories for the Multi/Micro USB Terminal, visit the Sony website, or consult your Sony dealer or local authorized Sony service facility. Focusing ring Zoom ring...
-
Page 17: Operating The Camera
Functions list Operating the camera How to use the control wheel • You can turn the control wheel or press up/down/left/right on the control wheel to move the selection frame. Press z in the center of the control wheel to set the selected item. In this manual, the action of pressing the up/down/left/right side of the control wheel is indicated by v/V/b/B. -
Page 18: Selecting A Function Using The Fn (Function) Button
Selecting a function using the Fn (Function) button This button is used for setting up or executing functions used frequently in shooting, except for functions from the Quick Navi screen. The displayed contents and their position shown below are just a guideline, and may differ from the actual display. -
Page 19: Functions That Can Be Selected Using The Menu Button
Functions that can be selected using the MENU button You can set up the basic settings for the camera as a whole, or execute functions such as shooting, playback, or other operations. Press MENU button to display the menu screen. Select the desired setting item using v/V/b/B on the control wheel or by turning the control wheel, and then... -
Page 20: Using The In-Camera Guide
Using the In-Camera Guide You can use [Custom Key Settings] to assign In-Camera Guide to the desired button. The In-Camera Guide displays explanations for the currently selected menu function or setting. MENU button t (Custom Settings) t [Custom Key Settings] t Select the desired button assigned to the function. -
Page 21: Charging The Battery Pack
Preparing the camera Charging the battery pack When using the camera for the first time, be sure to charge the NP-FM500H InfoLITHIUM™ battery pack (supplied). The InfoLITHIUM battery pack can be charged even when it has not been fully depleted. It can also be used when it has not been fully charged. -
Page 22: Connect The Battery Charger To The Wall Outlet (Wall Socket)
• The charging time differs depending on the remaining capacity of the battery pack or charging conditions. • Be sure to use only genuine Sony brand battery packs. • We recommend charging the battery pack in an ambient temperature of between 10°C to 30°C (50°F to 86°F). -
Page 23: Inserting The Battery Pack/Memory Card (Sold Separately)
Inserting the battery pack/memory card (sold separately) While sliding the battery cover open lever, open the cover. Firmly insert the battery pack all the way while pressing the lock lever with the tip of the battery. Lock lever Close the cover. Slide the memory card cover to open it. - Page 24 Inserting the battery pack/memory card (sold separately) Insert a memory card. • With the notched corner facing as illustrated, insert the memory card until it clicks into place. Ensure the notched corner faces correctly Close the cover. To remove the battery pack Turn off the camera and slide the lock lever in the direction of the arrow.
-
Page 25: Memory Cards That Can Be Used
PlayMemories Home. • Not all memory cards are guaranteed to operate correctly. For memory cards produced by manufacturers other than Sony, consult the manufacturers of the products. • When using Memory Stick Micro media or microSD memory cards with this... -
Page 26: Attaching A Lens
Attaching a lens Set the power switch of the camera to OFF before you attach or remove the lens. Remove the body cap from the Front lens cap camera and the packaging lid from the rear of the lens. • When changing the lens, change the lens quickly somewhere away from dusty locations to keep dust or debris from getting inside the camera. - Page 27 Attaching a lens Notes • When attaching a lens, do not press the lens release button. • Do not use force when attaching a lens. • E-mount lenses are not compatible with this camera. • When you use a lens for which a tripod socket is provided, attach the lens onto the tripod using the tripod socket provided to help balance the weight of the lens.
-
Page 28: Setting The Date And Time
Setting the date and time When you turn on the camera for the first time or after you initialize the functions, the screen to set the date and time appears. Set the power switch to ON to turn on the camera. The screen to set the date and time appears. -
Page 29: Checking Or Resetting The Date/Time And Area
Setting the date and time Checking or resetting the date/time and area The date and time setup screen appears automatically when the power is turned on for the first time or when the internal rechargeable backup battery has been discharged. To reset the date and time, use the menu. MENU button t (Setup) t [Date/Time Setup] or [Area Setting]... -
Page 30: Shooting Still Images
Shooting and viewing images Shooting still images In auto mode, the camera analyzes the subject and allows you to shoot with the appropriate settings. Set the power switch to ON to turn on the camera. Set the mode dial to (Auto Mode). - Page 31 Shooting still images To shoot in dark environments Use the flash to light up the subject while shooting and to prevent camera- shake. Press the (Flash pop-up) button to pop up the flash, then press the shutter button fully down. You can select an appropriate flash mode to suit your purposes.
-
Page 32: Recording Movies
Recording movies Set the mode dial to (Movie). • When the [MOVIE Button] is set to [Always], the movie recording can be started from any shooting mode. Press the MOVIE button to start MOVIE button recording. Press the MOVIE button again to stop recording. Notes •... -
Page 33: Playing Back Images
Playing back images Press the button. button Select an image by pressing the b/B on the control wheel. • To play back movies, press z on the control wheel. If you press V on the control wheel while playing back a movie, the control panel will be displayed. -
Page 34: Deleting Images
Deleting images Once you have deleted an image, you cannot restore it. Be sure that you want to delete the image before proceeding. While displaying the image you want to delete, press the (Delete) button. (Delete) button Select [Delete] with v/V on the control wheel, then press z. •... -
Page 35: Selecting A Shooting Mode
Selecting a shooting mode Selecting a shooting mode Turn the mode dial while pressing the mode dial lock release button on the center of the mode dial. The following shooting modes are available. (Auto Mode) Allows you to shoot still images with the settings adjusted automatically. -
Page 36: Using The Software
Use the following applications to optimize use of the images shot with your camera. • Image Data Converter • PlayMemories Home • Remote Camera Control For details on installation, see pages 37 to 40. System requirements You can find the system requirements for the software at the following URL: http://www.sony.net/pcenv/... -
Page 37: Using Image Data Converter
Click [Start] t [All Programs] t [Image Data Converter] t [Help] t [Image Data Converter Ver.4]. Image Data Converter support page (English only) http://www.sony.co.jp/ids-se/ Installing Image Data Converter Download the software from the following URL and install it on your computer. -
Page 38: Using Playmemories Home
• Refer to the following URL for Mac software: http://www.sony.co.jp/imsoft/Mac/ • If the software PMB (Picture Motion Browser), supplied with models released before 2011, has already been installed on your computer, it will be overwritten by PlayMemories Home during the installation. -
Page 39: Installing Playmemories Home
Blu-ray Disc. Installing PlayMemories Home Using the Internet browser on your computer, go to the following URL, then click [Install] t [Run]. http://www.sony.net/pm/ Follow the instructions on the screen to complete the installation. Using Remote Camera Control Connect the camera to your computer. With Remote Camera Control you can: •... -
Page 40: Installing Remote Camera Control
Using the software Installing Remote Camera Control Using the Internet browser on your computer, go to the following URL. Windows: http://www.sony.co.jp/imsoft/Win/ Mac: http://www.sony.co.jp/imsoft/Mac/ Follow the instructions on the screen to download and install Remote Camera Control. Notes • An Internet connection is required to install Remote Camera Control. -
Page 41: Checking The Number Of Images And Recordable Time Of Movies
The table below shows the approximate number of images that can be recorded on a memory card formatted with this camera. The values are defined using Sony standard memory cards for testing. The values may vary depending on the shooting conditions and the type of memory card used. -
Page 42: Battery Pack
– The battery pack is used at an ambient temperature of 25°C (77°F). – Using the lens DT 18-55mm F3.5-5.6 SAM II – Using Sony Memory Stick PRO Duo (Mark2) media (sold separately) – [Viewfinder Bright.] is set to [Manual] [±0]. -
Page 43: Available Recording Time For A Movie
Checking the number of images and recordable time of movies • The number of minutes for movie shooting is based on the CIPA standard, and are for shooting under the following conditions: – [ Record Setting] is set to [30p 50M]/[25p 50M]. –... -
Page 44: Notes On Continuous Movie Recording
Checking the number of images and recordable time of movies Notes • The recordable time of movies varies because the camera is equipped with VBR (Variable Bit-Rate), which automatically adjusts image quality depending on the shooting scene. When you record a fast-moving subject, the image is clearer but the recordable time is shorter because more memory is required for recording. - Page 45 Checking the number of images and recordable time of movies • If you observe the following points, the recording time will be longer. – Keep the camera out of direct sunlight. – Turn the camera off when it is not being used. •...
-
Page 46: Specifications
79 points (15 points cross type) Interchangeable Lens Digital Sensitivity Range: –2 EV to 18 EV Camera (at ISO 100 equivalent) Lens: Sony A-mount lens AF illuminator: Approx. 1 m to 5 m (3.3 ft. to 16.4 ft.) [Image sensor] [Electronic viewfinder] Image format: 23.5 mm ×... - Page 47 Specifications [Exposure control] [Built-In-Flash] Metering Cell: “Exmor” CMOS Flash G.No.: GN 12 (in meters at ISO sensor 100) Metering method: 1 200-zone Recycling time: Approx. 3 seconds evaluative metering Flash coverage: Covering 16 mm lens Metering Range: –2 EV to +17 EV on (focal length that the lens Multi segment, Center weighted, indicates)
- Page 48 Continuous shooting speed: File format: JPEG (DCF Ver. 2.0, [Tele-zoom Cont. AE]: Exif Ver. 2.3, MPF Baseline) Maximum 8 images per second/ compliant, RAW (Sony ARW 2.3 : Maximum 5 images per format) second/ : Maximum Movie (XAVC S format): MPEG-4 2.5 images per second...
- Page 49 Specifications Battery charger/Battery [Power consumption (while shooting)] Battery charger BC-VM10A When using a DT 18-55mm F3.5-5.6 SAM II* Input rating: AC 100 V – 240 V, When using the viewfinder: 50 Hz/60 Hz, 9 W Approx. 2.7 W Output rating: DC 8.4 V, 0.75 A When using the screen: Rechargeable battery pack Approx.
- Page 50 Specifications Lens DT 18-55mm F3.5-5.6 • The infinity position provides for some adjustment to compensate for SAM II (Supplied with ILCA- focus shift caused by change in 68K) temperature. To shoot a subject at Focal length: Equivalent 35 mm- infinite distance in MF mode, use the format focal length* viewfinder and set focus.
- Page 51 • Memory Stick and trademarks or registered trademarks of Sony Corporation. • XAVC S and are registered trademarks of Sony Corporation. • “AVCHD Progressive” and the “AVCHD Progressive” logotype are trademarks of Panasonic Corporation and Sony Corporation. • Dolby and the double-D symbol are trademarks of Dolby Laboratories.
- Page 52 Index Index Area Setting ........28 Help Guide........2 AUTO .........30 Auto Mode........30 Image Data Converter....37 In-Camera Guide ....... 20 Battery pack......21, 23 Language........7 CHARGE lamp......22 Lens..........26 Charging battery pack....21 Computer ........36 Memory card......23, 25 Control wheel ......17 MENU........
- Page 53 Index Set the clock....... 28 Shooting ........30 Shooting mode ......35 Shooting still images....30 Shoulder strap ......15 Software ........36 Specifications......46 Viewfinder ......... 12 Viewing image ......33...
- Page 54 Index...
- Page 55 Index...
- Page 56 Additional information on this product and answers to frequently asked questions can be found at our Customer Support Website. ©2016 Sony Corporation Printed in Thailand...