Table of Contents
Advertisement
Quick Links
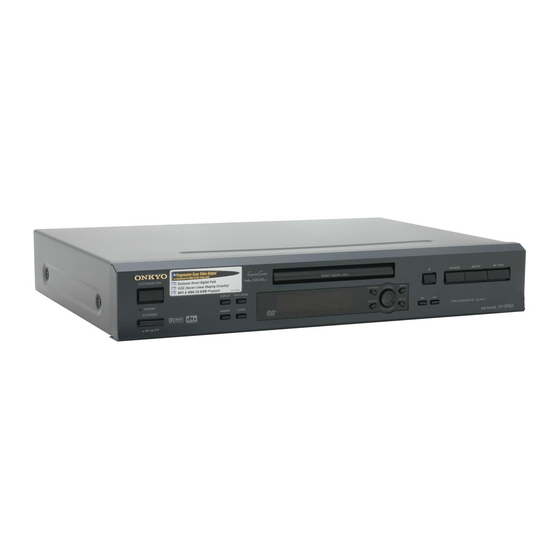
DVD Player
DV-SP501
Instruction Manual
Thank you for purchasing the Onkyo DV-SP501
DVD Player. Read this manual carefully before
using your new DVD Player. A good understand-
ing of its features and operation will allow you to
achieve optimum performance and enjoyment.
Keep this manual for future reference.
Contents
Important Safety Instructions ............2
Introduction .........................................7
Connecting the DV-SP501 ................18
Getting Started ..................................24
Playing discs .....................................29
Viewing JPEG discs ..........................40
Audio Settings menu ........................42
Video Adjust menu............................43
Initial Settings menu .........................44
Additional information ......................50
(North American model only)............... 54
Troubleshooting ................................57
E
n
Advertisement
Table of Contents

Related Manuals for Onkyo DV-SP501


Summary of Contents for Onkyo DV-SP501
-
Page 1: Table Of Contents
DVD Player DV-SP501 Instruction Manual Thank you for purchasing the Onkyo DV-SP501 DVD Player. Read this manual carefully before using your new DVD Player. A good understand- ing of its features and operation will allow you to achieve optimum performance and enjoyment. -
Page 2: Important Safety Instructions
WARNING: TO REDUCE THE RISK OF FIRE OR ELECTRIC SHOCK, DO NOT EXPOSE THIS APPARATUS TO RAIN OR MOISTURE. CAUTION: TO REDUCE THE RISK OF ELECTRIC SHOCK, DO NOT REMOVE COVER (OR BACK). NO USER-SERVICEABLE PARTS INSIDE. REFER SERVICING QUALIFIED PERSONNEL. -
Page 3: Precautions
Precautions This unit contains a semiconductor laser system and is classified as a “CLASS 1 LASER PRODUCT”. So, to use this model properly, read this Instruction Manual carefully. In case of any trouble, please contact the store where you purchased the unit. To prevent being exposed to the laser beam, do not try to open the enclosure. -
Page 4: For Canadian Model
We, ONKYO EUROPE ELECTRONICS GmbH LIEGNITZERSTRASSE 6, 82194 GROEBENZELL, GERMANY declare in own responsibility, that the ONKYO product described in this instruction manual is in compliance with the corresponding technical standards such as EN60065, EN55013, EN55020 and EN61000-3-2, -3-3. GROEBENZELL, GERMANY ONKYO EUROPE ELECTRONICS GmbH 1. - Page 5 Never handle this unit or its power cord while your hands are wet or damp. If water or any other liquid gets inside this unit, have it checked by your Onkyo dealer. 6. Installing this Unit • Install this unit in a well-ventilated location.
- Page 6 Important Safety Instructions...2 Precautions ...3 Introduction...7 Supplied Accessories ...7 DV-SP501 Features ...7 Disc Notes ...8 Before Using the DV-SP501...11 Installing the Batteries ...11 Using the Remote Controller ...11 Front & Rear Panels ...12 Front Panel ...12 Display...13 Rear Panel (Other than European model) ...14...
-
Page 7: Introduction
• Use the remote controller to control your TV (North American models only) The letter displayed at the end of the product name found in catalogs and on package represents the color of the DV-SP501 DVD player. Though the color varies, the specifications and operations are the same. -
Page 8: Disc Notes
DVD-Video rental discs with peeling labels, or discs with custom- made labels or stickers. Doing so may damage the DVD-Video, DV-SP501 and you may not be able to remove the disc VR format properly. Discs Made on Personal Computers Including PBC... - Page 9 Introduction—Continued MP3/WMA Compatibility • This unit will play CD-R, and CD-RW discs contain- ing files saved in the MPEG-1 Audio Layer 3 (MP3) or Windows Media Audio (WMA) format with a sam- pling rate of 32*, 44.1 or 48 kHz. Incompatible files will not play and the message “Can’t play this format”...
- Page 10 Introduction—Continued Handling Discs • Never touch the underside of a disc. Always hold discs by the edge, as shown. • Never attach adhesive tape or sticky labels to discs. Cleaning Discs • For best results, keep your discs clean. Fingerprints and dust can affect the sound and picture quality and should be removed as follows.
-
Page 11: Before Using The Dv-Sp501
• Flat batteries should be removed as soon as possible to prevent possible leakage and corrosion. Using the Remote Controller To use the remote controller, point it at the DV-SP501’s remote control sensor, as shown below. Remote control sensor STAN DBY/O... -
Page 12: Front & Rear Panels
(pages 18–22). STANDBY/ON button [23, 26] This button is used to set the DV-SP501 to On or Standby. For models with a POWER switch, this button has no effect unless the POWER switch is set to ON. -
Page 13: Display
Front & Rear Panels—Continued Display V C D TITLE PROGRESSIVE D indicator This indicator appears when playing Dolby Digital material. Disc type indicators These indicators show the type of disc loaded. TITLE indicator While stopped, the total number of titles on the cur- rent DVD-Video disc is displayed here. -
Page 14: Rear Panel (Other Than European Model)
Onkyo AV components for interactive control. For remote control operation, you must make an analog RCA/phono connection between your DV-SP501 and the other AV component, even if they are connected digitally. ANALOG AUDIO OUTPUT [19] These RCA/phono connectors can be connected to analog audio inputs on your TV, hi-fi... -
Page 15: Rear Panel (European Model)
These (Remote Interactive) connectors can be connected to the connectors on your other Onkyo AV components for interactive control. ANALOG AUDIO OUTPUT [19] These RCA/phono connectors can be connected to analog audio inputs on your TV, hi-fi amp, or AV receiver. -
Page 16: Remote Controller
STANDBY VOLUME RC - 524DV STANDBY button [23] This button is used to set the DV-SP501 to Standby. ON button [23] This button is used to turn on the DV-SP501. Don’t turn on the DV-SP501 until you’ve com- pleted, and double checked all connections (pages 18–22). - Page 17 Front & Rear Panels—Continued Stop button [27] This button is used to stop playback. Fast Reverse ) button [27, 30, This button is used for fast reverse, reverse slow motion, and reverse frame-by-frame playback. Fast Forward ) button [27, 30, This button is used for fast forward, slow motion, and frame-by-frame playback.
-
Page 18: Connecting The Dv-Sp501
• Don’t connect the power cord until you’ve completed all audio and video connections. Optical Digital Inputs The DV-SP501’s optical digital connectors have a shut- ter-type cover that opens when an optical plug is inserted, and closes when it’s removed. Push the plug in all the way. -
Page 19: Basic Setup
• If your TV only has a mono audio input, connect it to the DV-SP501’s MONO ANALOG AUDIO OUT- PUT. Other than European model • When connecting to your TV as shown above, do not set the “Component Out”... -
Page 20: Connecting Your Tv
Connecting the DV-SP501—Continued Connecting Your TV • Connect the DVD Player to the TV directly. If you connect the DVD Player to a VCR, TV/VCR combina- tion, or video selector, the playback picture may be distorted as DVD videos are copy protected. -
Page 21: Connecting To An Av Receiver
CDR recorder that’s connected to the AV receiver, and when your AV receiver has Zone2, you must connect the DV-SP501’s analog audio outputs to the AV receiver. You’ll probably also want to connect a video output to your AV receiver. You can use any of the video outputs available on this player (the illustration shows a standard (composite) connection). -
Page 22: Connecting -Compatible Components
OPTICAL COAXIAL REMOTE CONTROL AV receiver • The remote controller supplied with Onkyo AV receiver or amplifiers can be used to control the DV-SP501. • The function of the upper and lower the same. Connect to either one. • Connecting an cable only does not make the sys- tem operational. -
Page 23: Connecting The Power/Turning On The Dv-Sp501
Connecting the Power/Turning on the DV-SP501 Before connecting • The DV-SP501 is shipped with the POWER switch in the on position ( ON). When the power cord is plugged in for the first time, the DV-SP501 will auto- matically enter the standby state and the STANDBY indicator will light (same condition after step 2 below). -
Page 24: Getting Started
Getting Started Using the on-screen displays For ease of use, this player makes extensive use of graph- ical on-screen displays (OSDs). Make sure that you select the input on the TV (by using the TV remote) to view the on-screen displays. You should get used to the way these work as you’ll need to use them when setting up the player, using some of the playback features, such as program play, and when mak-... - Page 25 DTS compatible disc, you will have no sound outputting because the disc is not have a DTS soundtrack. DVD player, the disc would default to Dolby digital format. For DTS play- back you would need to select DTS in the table of contents of the movie.
-
Page 26: Playing Discs
AUDIO ANGLE SUBTITLE ZOOM TV CONTROL TV/VIDEO If the player isn’t already on, press DVD player’s STANDBY/ON or the STANDBY/ON remote controller’s ON to switch it If you’re playing a DVD or Video CD, ANDBY also turn on your TV and make sure that Remote it is set to the correct video input. -
Page 27: Basic Playback Controls
Getting Started—Continued Basic playback controls The table below shows the basic controls on the remote controller for playing discs. STANDBY OPEN/ CLOSE RANDOM REPEAT PLAY MODE DISPLAY Numbers DIMMER CLEAR TOP MENU MENU ENTER RETURN SETUP AUDIO ANGLE SUBTITLE ZOOM TV CONTROL TV/VIDEO CHANNEL... -
Page 28: Dvd-Video Disc Menus
Getting Started—Continued DVD-Video disc menus STANDBY REPEAT Numbers TOP MENU TOP MENU ENTER RETURN RETURN AUDIO ANGLE SUBTITLE ZOOM TV CONTROL TV/VIDEO Many DVD-Video discs contain menus from which you can select what you want to watch. They may give access to additional features, such as subtitle and audio lan- guage selection, or special features such as slideshows. -
Page 29: Playing Discs
Playing discs Introduction Most of the features described in this chapter make use of on-screen displays. For an explanation of how to nav- igate these, see “Using the on-screen displays” on page 24. Many of the functions covered in this chapter apply to DVD discs, Video CDs, CDs and WMA/MP3/JPEG discs, although the exact operation of some varies slightly with the kind of disc loaded. -
Page 30: Scanning Discs
Playing discs—Continued Scanning discs You can fast-scan discs forward or backward at various different speeds. STANDBY REPEAT TOP MENU ENTER RETURN AUDIO ANGLE SUBTITLE ZOOM TV CONTROL TV/VIDEO During playback, press to start scanning. Press repeatedly to increase the scanning speed. •... -
Page 31: Frame Advance/Frame Reverse
Playing discs—Continued Frame advance/frame reverse You can advance or back up a DVD disc frame-by- frame. With Video CDs and VR format DVD-RWs, you can only use frame advance. DIMMER CLEAR TOP MENU MENU ENTER RETURN SETUP AUDIO ANGLE SUBTITLE ZOOM TV CONTROL TV/VIDEO CHANNEL... -
Page 32: Using Repeat Play
Playing discs—Continued Press ENTER on “B (End Point)” to set the loop end point. Play Mode ENTER A-B Repeat A(Start Point) Repeat B(End Point) Random Program Search Mode After pressing ENTER, playback jumps back to the start point and plays the loop. •... -
Page 33: Using Random Play
Playing discs—Continued Using random play Use the random play function to play titles or chapters (DVD-Video) or tracks (CD, Video CD and WMA/MP3 discs) in a random order. You can set the random play option when a disc is play- ing or stopped. -
Page 34: Creating A Program List
Playing discs—Continued Creating a program list This feature lets you program the play order of titles/ chapters/folders/tracks on a disc. • You can’t use Program play with VR format DVD-RW discs, Video CDs playing in PBC mode, or while a DVD disc menu is being displayed. -
Page 35: Editing A Program List
Playing discs—Continued Repeat step 3 to build up a pro- gram list. A program list can contain up to 24 titles/ chapters/folders/tracks. To play the program list, press (play). Program play remains active until you turn off program play (see below), erase the program list (see below), eject the disc or switch off the player. -
Page 36: Other Functions Available From The Program Menu
Playing discs—Continued Other functions available from the program menu As well as creating and editing a program list, you can start program play, cancel program play, erase the pro- gram list, and memorize a program list from the Play Mode menu. STANDBY REPEAT CLEAR... -
Page 37: Switching Subtitles
Playing discs—Continued Notes: • The disc must be playing in order to use time search. • Search functions are not available with Video CDs in PBC mode, or unfinalized CD-R/RW discs. Switching subtitles Some DVD discs have subtitles in one or more lan- guages;... -
Page 38: Zooming The Screen
Playing discs—Continued Zooming the screen Using the zoom feature you can magnify a part of the screen by a factor of 2 or 4, while watching a DVD or Video CD. TOP MENU ENTER RETURN AUDIO ANGLE SUBTITLE ZOOM TV CONTROL TV/VIDEO CHANNEL During playback, use the ZOOM... -
Page 39: Displaying Disc Information
Playing discs—Continued Displaying disc information Various track, chapter and title information, as well as the video transmission rate for DVD discs, can be dis- played on-screen while a disc is playing. STANDBY OPEN/ CLOSE RANDOM REPEAT PLAY MODE DISPLAY DIMMER CLEAR TOP MENU MENU... -
Page 40: Viewing Jpeg Discs
Viewing JPEG discs Viewing JPEG discs After loading a CD/CD-R/RW containing JPEG pic- tures, press to start a slideshow from the first folder/ picture on the disc. The player displays the pictures in each folder in alphabetical order. Pictures are automatically adjusted so that they fill as much of the screen as possible (if the aspect ratio of the picture is different to your TV screen you may notice black bars at the sides, or at the top and bottom of the... -
Page 41: Using The Photo Browser
Viewing JPEG discs—Continued Using the Photo Browser The Photo Browser displays nine thumbnail images at a time from the current folder. STANDBY OPEN/ CLOSE RANDOM REPEAT PLAY MODE DISPLAY DIMMER CLEAR TOP MENU MENU ENTER RETURN SETUP AUDIO ANGLE SUBTITLE ZOOM TV CONTROL TV/VIDEO CHANNEL... -
Page 42: Audio Settings Menu
Audio Settings menu Audio DRC ■ Default setting: Off When watching Dolby Digital DVDs at low volume, it’s easy to lose the quieter sounds completely—including some of the dialog. Switching Audio DRC (Dynamic Range Control) to On can help by bringing up the quieter sounds, while con- trolling loud peaks. -
Page 43: Video Adjust Menu
Video Adjust menu Video Adjust ■ Default setting: Standard From the Video Adjust screen you can select the standard video presentation or define presets of your own. STANDBY OPEN/ CLOSE RANDOM REPEAT PLAY MODE DISPLAY DIMMER CLEAR TOP MENU MENU ENTER RETURN SETUP... -
Page 44: Initial Settings Menu
Initial Settings menu Using the Initial Settings menu The Initial Settings menu gives you complete control in setting up your DVD player, including audio, and video output settings, audience limitation settings, among oth- ers. If an option is grayed out it means that it cannot be changed at the current time. -
Page 45: Video Output Settings
Initial Settings menu—Continued MPEG Out You only need to make this setting if you connected this player to an AV receiver (or other component) using one of the digital outputs. ■ Default setting: MPEG > PCM Initial Settings Digital Audio Out Digital Out MPEG Video Output... -
Page 46: Language Settings
THE “STANDARD DEFINITION” OUTPUT. IF THERE ARE QUESTIONS REGARDING OUR TV SET COMPATIBILITY WITH THIS MODEL 525p DVD PLAYER, PLEASE CONTACT OUR CUS- TOMER SERVICE CENTER. AV Connector Out (European models only) You only need to make this setting if you connected this player to your TV using the AV SCART-type connector. -
Page 47: Subtitle Display
Initial Settings menu—Continued The available languages vary between models. • North American and European models: English, French, Spanish, German, Italian, Other Language. • Australian, Asian and South American models: English, French, Spanish, Chinese (traditional), Other Language. • Chinese model: English, Chinese (simplified), Other Lan- guage. -
Page 48: Options
This gives you some control about what your children watch on your DVD player. Some discs also support the Country code feature. The player does not play certain scenes on these discs, depending on the Country code you set. -
Page 49: Photoviewer
Initial Settings menu—Continued Setting/changing the Parental Lock level Select “Level Change”. Initial Settings Digital Audio Out Parental Lock Password Change Video Output PhotoViewer Level Change Language Country Code Display Options Use number buttons to enter your pass- word, then press ENTER. Initial Settings Parental Lock : Level Change Digital Audio Out... -
Page 50: Additional Information
Additional information Screen sizes and disc formats DVD-Video discs come in several different screen aspect ratios, ranging from TV programs, which are generally 4:3, to Cinema- Scope widescreen movies, with an aspect ratio of up to about 7:3. Televisions, too, come in different aspect ratios; “stan- dard”... -
Page 51: Titles, Chapters And Tracks
All DVD-Video discs carry a region mark on the case somewhere that indicates which region(s) of the world the disc is compatible with. Your DVD player also has a region mark, which you can find on the rear panel. Discs from incompatible regions will not play in this player. -
Page 52: Country Code List
Additional information—Continued Country code list Country Country code Argentina 0118 Australia 0121 Austria 0120 Belgium 0205 Brazil 0218 Canada 0301 Chile 0312 China 0314 Denmark 0411 Finland 0609 France 0618 Germany 0405 Hong Kong 0811 India 0914 Indonesia 0904 Italy 0920 Japan 1016... -
Page 53: Language Code List
Additional information—Continued Language code list Language Language Language code code letter Japanese 1001 English 0514 French 0618 German 0405 Italian 0920 Spanish 0519 Chinese 2608 Dutch 1412 Portuguese 1620 Swedish 1922 Russian 1821 Korean 1115 Greek 0512 Afar 0101 Abkhazian 0102 Afrikaans 0106... -
Page 54: Using The Rc-524Dv Remote Controller With Tvs From Other Manufacturers (North American Model Only)
STANDBY RC-524DV You can make RC-524DV remote controller to operate a TV from other brand than Onkyo by storing the pre-pro- gramming code of the brand in the RC-524DV. Find the 3-digit number for the brand name of the component that you want to operate in the table on page 55. - Page 55 Using the RC-524DV Remote controller with TVs from Other Manufacturers (North American model only)—Continued Pre-programming Code List Brand Code AIWA 100. 101 AKAI 102, 103, 104 AUDIO SONIC BELL&HOWELL BLAUPUNKT BRIONVEGA 108, 109 CENTURION COLTINA 111, 112, 113 CORONAD CROWN 115, 116 DAEWOO 117, 118, 119, 120, 121...
-
Page 56: Glossary
Glossary Analog audio An electrical signal that directly represents sound. Com- pare this to digital audio which can be an electrical sig- nal, but is an indirect representation of sound. See also “Digital audio”. Aspect ratio The width of a TV screen relative to its height. Conven- tional TVs are 4:3 (in other words, the screen is almost square);... -
Page 57: Troubleshooting
Troubleshooting If you have any trouble using your DV-SP501, check the following table for possible causes and remedies. If you still can’t resolve the issue yourself, please contact your Onkyo dealer. Symptoms The power cord is not connected. The [POWER] switch is set to OFF. - Page 58 DTS audio is only output by the digital outputs. To play DTS material you need to connect one of the DV-SP501’s digital outputs to a digital input on a hi-fi amp or AV receiver that has a DTS decoder built-in (page 21).
- Page 59 The DV-SP501 contains a microcomputer for signal processing and control functions. In very rare situations, severe interference, noise from an external source, or static electricity may cause it to lockup. In the unlikely even that this should happen, unplug the power cord from the wall outlet, wait at least five seconds, and then plug it back in again.
-
Page 60: Specifications
Units 2102-2107, Metroplaza Tower I, 223 Hing Fong Road, Kwai Chung, N.T., HONG KONG Tel: 852-2429-3118 Fax: 852-2428-9039 SN 29343485 (C) Copyright 2003 ONKYO CORPORATION Japan. All rights reserved. North American model: Standard NTSC, Other models: PAL/AUTO North American model: 1, European model: 2,...