Table of Contents
Advertisement
Quick Links
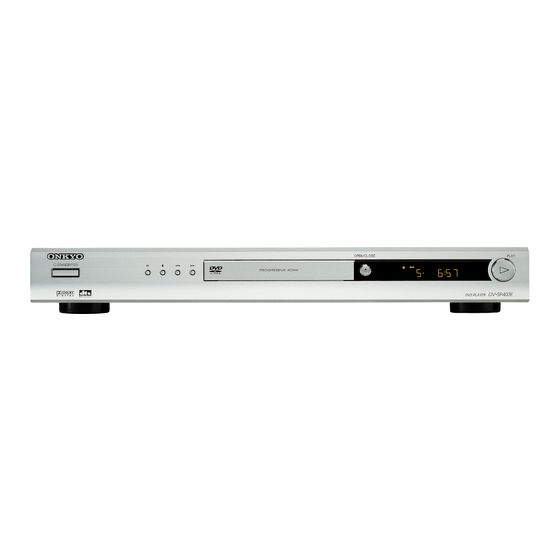
DVD Player
DV-SP403E
Instruction Manual
Thank you for purchasing the Onkyo DV-
SP403E DVD Player. Read this manual carefully
before using your new DVD Player. A good
understanding of its features and operation will
allow you to achieve optimum performance and
enjoyment.
Keep this manual for future reference.
Contents
Overview ..............................................2
Connections ......................................17
Getting Started and Setting up ........23
Basic Playback ..................................24
Playback Techniques ........................28
Detailed Settings ...............................38
Miscellaneous Information ...............46
E
n
Advertisement
Table of Contents

Related Manuals for Onkyo DV-SP403E


Summary of Contents for Onkyo DV-SP403E
-
Page 1: Table Of Contents
DVD Player DV-SP403E Instruction Manual Thank you for purchasing the Onkyo DV- SP403E DVD Player. Read this manual carefully before using your new DVD Player. A good understanding of its features and operation will allow you to achieve optimum performance and enjoyment. -
Page 2: Important Safety Instructions
WARNING: TO REDUCE THE RISK OF FIRE OR ELECTRIC SHOCK, DO NOT EXPOSE THIS APPARATUS TO RAIN OR MOISTURE. CAUTION: TO REDUCE THE RISK OF ELECTRIC SHOCK, DO NOT REMOVE COVER (OR BACK). NO USER-SERVICEABLE PARTS INSIDE. REFER SERVICING QUALIFIED PERSONNEL. -
Page 3: Precautions
Important Safety Instructions —Continued A. When the power-supply cord or plug is damaged, B. If liquid has been spilled, or objects have fallen into the appliance, C. If the appliance has been exposed to rain or water, D. If the appliance does not operate normally by following the operating instructions. -
Page 4: For Canadian Model
We, ONKYO EUROPE ELECTRONICS GmbH LIEGNITZERSTRASSE 6, 82194 GROEBENZELL, GERMANY declare in own responsibility, that the ONKYO product described in this instruction manual is in compliance with the corresponding technical standards such as EN60065, EN55013, EN55020 and EN61000-3-2, -3-3. GROEBENZELL, GERMANY ONKYO EUROPE ELECTRONICS GmbH 1. - Page 5 Never handle this unit or its power cord while your hands are wet or damp. If water or any other liquid gets inside this unit, have it checked by your Onkyo dealer. 6. Installing this Unit • Install this unit in a well-ventilated location.
-
Page 6: Overview
Introduction... 7 Supplied Accessories ... 7 DV-SP403E Features ... 7 Disc Notes ... 8 Before Using the DV-SP403E ... 11 Installing the Batteries ... 11 Using the Remote Controller ... 11 Front & Rear Panels ... 12 Front Panel ... 12 Display ... -
Page 7: Introduction
• Dynamic Range Control setting • Full-function remote controller The letter displayed at the end of the product name found in catalogs and on package represents the color of the DV-SP403E DVD player. Though the color varies, the specifications and operations are the same. -
Page 8: Disc Notes
See the manual supplied with your disc burner for more information. Condensation or dirt on the optical pickup lens can also affect playback. • The DV-SP403E supports 8 cm and 12 cm discs. • The DV-SP403E does not support disc types not listed. -
Page 9: About Wma
Introduction—Continued About WMA WMA is an acronym for Windows Media Audio and refers to an audio compression technology developed by Microsoft Corporation. WMA content can be encoded ® by using Windows Media Player version 7, 7.1, Win- ® ® dows Media Player for Windows XP, or Windows ®... - Page 10 Introduction—Continued Handling Discs • Never touch the underside of a disc. Always hold discs by the edge, as shown. • Never attach adhesive tape or sticky labels to discs. Cleaning Discs • For best results, keep your discs clean. Fingerprints and dust can affect the sound and picture quality and should be removed as follows.
-
Page 11: Before Using The Dv-Sp403E
• Flat batteries should be removed as soon as possible to prevent possible leakage and corrosion. Using the Remote Controller To use the remote controller, point it at the DV-SP403E’s remote control sensor, as shown below. Remote control sensor DV-SP403E... -
Page 12: Front & Rear Panels
For detailed information, refer to the pages in brackets. Front Panel STANDBY/ON STANDBY/ON button [22, 24] This button is used to set the DV-SP403E to On or Standby. (pause) button [25] This button is used to pause playback. (stop) button [25] This button is used to stop playback. -
Page 13: Display
Front & Rear Panels—Continued Display Pause indicator This indicator appears when playback is paused. Play indicator This indicator is shown during playback. CHP indicator This indicator appears while the number of the cur- rent chapter is being displayed. TITLE indicator While stopped, the total number of titles on the cur- rent DVD-Video disc is displayed here. -
Page 14: Rear Panel
Front & Rear Panels—Continued Rear Panel 1 2 3 COAXIAL DIGITAL AUDIO OUT [21] This coaxial digital audio output can be connected to a coaxial digital audio input on a hi-fi amp, AV receiver, or surround sound decoder (Dolby Digital, DTS). -
Page 15: Remote Controller
Front & Rear Panels—Continued Remote Controller STANDBY button [22] This button is used to set the DV-SP403E to Standby. ON button [22] This button is used to turn on the DV-SP403E. Don’t turn on the DV-SP403E until you’ve com- pleted, and double checked all connections (pages 17–21). - Page 16 Front & Rear Panels—Continued Fast Forward This button is used for fast forward, slow motion, and frame-by-frame playback. OPEN/CLOSE button [24] This button is used to open and close the disc tray. PLAY MODE button [32–35] This button is used to open and close the Play Mode menu.
-
Page 17: Connections
Connecting the DV-SP403E Before Making Any Connections • Read the manuals supplied with your AV components. • Don’t connect the power cord until you’ve completed all audio and video connections. RCA/phono AV Connection Color Coding RCA/phono AV connections are usually color coded: red, white, and yellow. -
Page 18: Basic Setup
Connecting the DV-SP403E—Continued Basic Setup The setup described here is a basic setup that allows you to play discs using just the cables supplied with the player. In this setup, stereo audio is played through the speakers in your TV. - Page 19 Connecting the DV-SP403E—Continued Switching the video output to interlace using the front panel controls Switch the player to standby then, using the front panel controls, press STANDBY/ON while pressing switch the player back to Interlace. STANDBY/ON STANDBY/ON Compatibility of this player with progressive-scan and high-definition TVs...
-
Page 20: Connecting Your Tv
Connecting the DV-SP403E—Continued Connecting Your TV • Connect the DVD Player to the TV directly. If you connect the DVD Player to a VCR, TV/VCR combina- tion, or video selector, the playback picture may be distorted as DVD videos are copy protected. -
Page 21: Connecting To An Av Receiver
CDR recorder that’s connected to the AV receiver, and when your AV receiver has Zone2, you must connect the DV-SP403E’s analog audio outputs to the AV receiver. You’ll probably also want to connect a video output to your AV receiver. You can use any of the video outputs available on this player (the illustration shows a standard (composite) connection). -
Page 22: Connecting The Power/Turning On The Dv-Sp403E
Press STANDBY/ON on the DV-SP403E or ON on the remote controller. STANDBY/ON The DVD Player turns on. • To put the DV-SP403E in the standby mode, press STANDBY/ON on the DV-SP403E, or STANDBY on the Remote controller remote controller. Be sure to set the... -
Page 23: Getting Started And Setting Up
Getting Started Using the on-screen displays For ease of use, this player makes extensive use of graph- ical on-screen displays (OSDs). All the screens are navigated in basically the same way, using the cursor buttons ( highlighted item and pressing ENTER to select it. STANDBY OPEN/ CLOSE... -
Page 24: Basic Playback
Getting Started—Continued Setting the language of this player’s on-screen displays This sets the language of this system’s on-screen dis- plays. STANDBY CLEAR TOP MENU ENTER RETURN AUDIO ANGLE SUBTITLE ZOOM Press SETUP and select “Initial Settings”. SETUP Select “OSD Language” from the “Display”... -
Page 25: Basic Playback Controls
Getting Started—Continued Load a disc. Load a disc with the label side facing up, using the disc tray guide to align the disc (if you’re loading a double-sided DVD disc, load it with the side you want to play face down). Press (play) to start playback. -
Page 26: Resume And Last Memory
Getting Started—Continued Resume and Last Memory When you stop playback of a disc, RESUME is shown in the display indicating that you can resume playback again from that point. If the disc tray is not opened, the next time you start play- back the display shows RESUME and playback resumes from the resume point. -
Page 27: Video Cd Pbc Menus
Getting Started—Continued Video CD PBC menus Some Video CD have menus from which you can choose what you want to watch. These are called PBC (Playback control) menus. You can play a PBC Video CD without having to navi- gate the PBC menu by starting playback using a number button to select a track, rather than the STANDBY OPEN/... -
Page 28: Playing Discs
Playing discs Notes: • Many of the functions covered in this chapter apply to DVD discs, Video CDs, CDs, DivX Video and MP3/ JPEG discs, although the exact operation of some var- ies slightly with the kind of disc loaded. •... -
Page 29: Frame Advance/Frame Reverse
Playing discs—Continued Frame advance/frame reverse You can advance or back up DVD discs frame-by-frame. With Video CD and DivX Video you can only use frame advance. STANDBY OPEN/ CLOSE PLAY MODE DISPLAY CLEAR TOP MENU MENU ENTER RETURN SETUP AUDIO ANGLE SUBTITLE ZOOM During playback, press Press... -
Page 30: Browsing Video Content With The Disc Navigator
Playing discs—Continued Browsing video content with the Disc Navigator Use the Disc Navigator to browse through the contents of a DVD or Video CD disc to find the part you want to play. Important: • You can’t use the Disc Navigator with Video CD in PBC mode. -
Page 31: Browsing Wma, Mp3, Divx Video And Jpeg Files With The Disc Navigator
Playing discs—Continued Browsing WMA, MP3, DivX Video and JPEG files with the Disc Navigator Use the Disc Navigator to find a particular file or folder by filename. STANDBY OPEN/ CLOSE PLAY MODE DISPLAY CLEAR TOP MENU MENU ENTER RETURN SETUP AUDIO ANGLE SUBTITLE ZOOM Press SETUP and select “Disc... -
Page 32: Looping A Section Of A Disc
Playing discs—Continued Looping a section of a disc The A-B Repeat function allows you to specify two points (A and B) within a track (CD, Video CD) or title (DVD) that form a loop which is played over and over. •... -
Page 33: Using Random Play
Playing discs—Continued Using random play Use the random play function to play titles or chapters (DVD-Video) or tracks (CD, Video CD) at random. (Note that the same track/title/chapter may play more than once.) You can set the random play option when a disc is play- ing or stopped. -
Page 34: Creating A Program List
Playing discs—Continued Creating a program list This feature lets you program the play order of titles/ chapters/tracks on a disc. Important: • You can’t use Program play with VR format DVD-RW discs, Video CD playing in PBC mode, WMA/MP3 discs, or while a DVD disc menu is being displayed. STANDBY OPEN/ CLOSE... -
Page 35: Other Functions Available From The Program Menu
Playing discs—Continued Other functions available from the program menu There are a number of other options in the program menu in addition to Create/Edit. • Playback Start – Starts playback of a saved program list • Playback Stop – Turns off program play, but does not erase the program list •... -
Page 36: Switching Subtitles
Playing discs—Continued Switching subtitles Some DVD or DivX Video discs have subtitles in one or more languages; the disc box will usually tell you which subtitle languages are available. You can switch subtitle language during playback. STANDBY CLEAR TOP MENU ENTER RETURN AUDIO... -
Page 37: Zooming The Screen
Playing discs—Continued Zooming the screen Using the zoom feature you can magnify a part of the screen by a factor of 2 or 4, while watching a DVD, DivX Video title or Video CD, or playing a JPEG disc. MODE DISPLAY CLEAR TOP MENU... -
Page 38: Audio Settings And Video Adjust Menus
Audio Settings and Video Adjust menus Audio Settings menu The Audio Settings menu offers features for adjusting the way discs sound. STANDBY CLEAR TOP MENU ENTER RETURN AUDIO ANGLE SUBTITLE ZOOM Press SETUP and select “Audio Settings” from the on-screen dis- SETUP play. -
Page 39: Video Adjust Menu
Audio Settings and Video Adjust menus—Continued Video Adjust menu From the Video Adjust screen you can adjust various set- tings that affect how the picture is presented. STANDBY OPEN/ CLOSE PLAY MODE DISPLAY CLEAR TOP MENU MENU ENTER RETURN SETUP AUDIO ANGLE SUBTITLE ZOOM RC-616DV... -
Page 40: Initial Settings Menu
Initial Settings menu Using the Initial Settings menu The Initial Settings menu provides audio and video out- put settings, parental lock settings, and display settings, among others. If an option is grayed out it means that it cannot be changed at the current time. This is usually because a disc is playing. -
Page 41: Digital Audio Out Settings
Initial Settings menu—Continued Digital Audio Out settings Setting Digital Out Dolby Digital Dolby Digital Out Dolby Digital > PCM DTS Out 96kHz > 48kHz 96 kHz PCM Out 96kHz MPEG > PCM MPEG Out MPEG Video Out settings Setting 4:3 (Letter Box) TV Screen (See also “Screen sizes and disc formats”... -
Page 42: Language Settings
Initial Settings menu—Continued Language settings Setting English Languages as displayed Audio Language Other Language English Languages as displayed Subtitle Language Other Language w/Subtitle Lang. Languages as displayed DVD Menu Language Other Language Subtitle Display *1 This setting is your preferred audio language for DVD discs. You can switch between the languages recorded on a DVD disc during playback using the AUDIO button. -
Page 43: Parental Lock
Country code: us (2119) To give you some control over what your children watch on your DVD player, some DVD-Video discs feature a Parental Lock level. If your player is set to a lower level than the disc, the disc won’t play. -
Page 44: Setting/Changing The Country Code
Initial Settings menu—Continued Setting/changing the Country code You can find the Country code list in the adjacent col- umn. Select “Country Code”. Use number buttons to enter your password, then press ENTER. Select a Country code and press ENTER. There are two ways you can do this: •... -
Page 45: About Divx ® Vod Content
Initial Settings menu—Continued ® About DivX VOD content In order to play DivX VOD (video on demand) content on this player, you first need to register the player with your DivX VOD content provider. You do this by gener- ating a DivX VOD registration code, which you submit to your provider. -
Page 46: Additional Information
Additional information Screen sizes and disc formats DVD-Video discs come in several different screen aspect ratios, ranging from TV programs, which are generally 4:3, to Cinema- Scope widescreen movies, with an aspect ratio of up to about 7:3. Televisions, too, come in different aspect ratios; “stan- dard”... -
Page 47: Setting The Tv System
All DVD-Video discs carry a region mark on the case somewhere that indicates which region(s) of the world the disc is compatible with. Your DVD player also has a region mark, which you can find on the rear panel. Discs from incompatible regions will not play in this player. -
Page 48: Selecting Languages Using The Language Code List
Additional information—Continued Selecting languages using the language code list Some of the language options (such as “DVD Language” in the Setup Navigator) allow you to set your prefered language from any of the 136 languages listed in the lan- guage code list on page 49. STANDBY CLEAR TOP MENU... -
Page 49: Language Code List
Additional information—Continued Language code list Language Language Language code code letter Japanese 1001 English 0514 French 0618 German 0405 Italian 0920 Spanish 0519 Chinese 2608 Dutch 1412 Portuguese 1620 Swedish 1922 Russian 1821 Korean 1115 Greek 0512 Afar 0101 Abkhazian 0102 Afrikaans 0106... -
Page 50: Glossary
Glossary Analog audio An electrical signal that directly represents sound. Com- pare this to digital audio which can be an electrical sig- nal, but is an indirect representation of sound. See also “Digital audio”. Aspect ratio The width of a TV screen relative to its height. Conven- tional TVs are 4:3 (in other words, the screen is almost square);... -
Page 51: Troubleshooting
Troubleshooting If you have any trouble using your DV-SP403E, check the following table for possible causes and remedies. If you still can’t resolve the issue yourself, please contact your Onkyo dealer. Symptoms The power cord is not connected. Can’t turn on the... - Page 52 DTS audio is only output by the digital outputs. To play DTS material you need to connect the DV-SP403E’s digital output to a digital input on a hi-fi amp or AV receiver that has a DTS decoder built-in (page 21).
- Page 53 The DV-SP403E contains a microcomputer for signal processing and control functions. In very rare situations, severe interference, noise from an external source, or static electricity may cause it to lockup. In the unlikely even that this should happen, unplug the power cord from the wall outlet, wait at least five seconds, and then plug it back in again.
-
Page 54: Specifications
Specifications Signal System Composite Video Output/Impedance S-Video Output/Impedance Component Video Output/Impedance AV Connector DVD Linear Sound Frequency response Audio CD S/N Ratio Audio Dynamic Range THD (Total Harmonic Distortion) Wow and Flutter Audio Output/Impedance (Digital Coaxial) Audio Output/Impedance (Analog) ■ General Power Supply Power Consumption Stand-by Power Consumption... - Page 56 ONKYO CHINA LIMITED Units 2102-2107, Metroplaza Tower I, 223 Hing Fong Road, Kwai Chung, N.T., HONG KONG Tel: 852-2429-3118 Fax: 852-2428-9039 http://www.ch.onkyo.com/ SN 29344032 (C) Copyright 2005 ONKYO CORPORATION Japan. All rights reserved. HOMEPAGE http://www.onkyo.com/ Printed in Japan I0504-1 J2G52801A SH 05/05...