Table of Contents
Advertisement
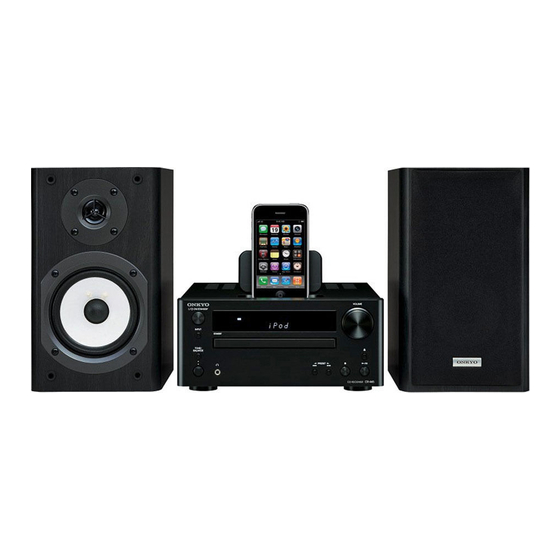
CD Receiver
CR-445
Instruction Manual
Thank you for purchasing an Onkyo CD receiver.
Please read this manual thoroughly before making
any connections and plugging it in.
Following the instructions in this manual will enable
you to obtain optimum performance and listening
enjoyment from your new CD receiver.
Please retain this manual for future reference.
Contents
Getting Started ................................... 2
Connections ..................................... 13
Basic Operations ............................ 18
Disc Playback ................................. 20
iPod / iPhone Playback .................... 27
Listening to the Radio .................... 30
Clock and Timer .............................. 36
Miscellaneous ................................. 40
Troubleshooting .............................. 40
Advertisement
Table of Contents

Related Manuals for Onkyo CR-445


Summary of Contents for Onkyo CR-445
-
Page 1: Table Of Contents
CD Receiver CR-445 Instruction Manual Thank you for purchasing an Onkyo CD receiver. Please read this manual thoroughly before making any connections and plugging it in. Following the instructions in this manual will enable you to obtain optimum performance and listening enjoyment from your new CD receiver. -
Page 2: Important Safety Instructions
WARNING: TO REDUCE THE RISK OF FIRE OR ELECTRIC SHOCK, DO NOT EXPOSE THIS APPARATUS TO RAIN OR MOISTURE. CAUTION: TO REDUCE THE RISK OF ELECTRIC SHOCK, DO NOT REMOVE COVER (OR BACK). NO USER-SERVICEABLE PARTS INSIDE. REFER SERVICING TO QUALIFIED SERVICE PERSONNEL. - Page 3 Hands—Never handle this unit or its power cord while your hands are wet or damp. If water or any other liquid gets inside this unit, have it checked by your Onkyo dealer. 6. Preventing Hearing Loss Caution Excessive sound pressure from earphones and headphones can cause hearing loss.
- Page 4 Precautions—Continued This unit contains a semiconductor laser system and is classified as a “CLASS 1 LASER PRODUCT”. So, to use this model properly, read this Instruction Manual carefully. In case of any trouble, please contact the store where you purchased the unit. To prevent being exposed to the laser beam, do not try to open the enclosure.
- Page 5 Features Amplifier • Digital Amplifier • 1 Audio Input • Subwoofer Pre Out CD Player • Plays CDs, MP3 / WMA , CD-Rs and CD-RWs • 25 Track Programming • 3 Repeat Modes (TRACK / FULL / 1 FOLDER) • 4 Play Modes (NORMAL / RANDOM /...
-
Page 6: Before Using The Cd Receiver
Before Using the CD Receiver Installing the Batteries Open the battery compartment, as shown. Insert two batteries (R6 / AA) into the battery compartment. Carefully follow the polarity diagram (positive (+) and negative (–) symbols) inside the battery compartment. After the batteries are installed and seated correctly, attach the compartment cover. -
Page 8: Getting To Know The Cd Receiver
Getting to Know the CD Receiver Front Panel 1 INPUT button 2 ON/STANDBY button 3 STANDBY indicator 4 Remote control sensor 5 Display 6 VOLUME control knob 7 TONE/BALANCE button / knob 8 PHONES jack Rear Panel 1 LINE IN 2 VIDEO OUT 3 AM ANTENNA 4 SPEAKERS... - Page 9 Getting to Know the CD Receiver—Continued Display 1 Input source indicator 2 File format indicators 3 S.BASS indicator 4 FOLD indicator 5 Playback mode indicators 1FOLD (REPEAT) (REPEAT 1) 6 Tuning indicators AUTO FM ST 7 iPod menu mode indicator 8 MUTING indicator 9 TITLE, ARTIST, and ALBUM indicators 10 Message area...
- Page 10 Getting to Know the CD Receiver—Continued Remote Controller 1 SLEEP button 2 ON/STANDBY button 3 Number buttons 4 Previous / Next [ ] / [ 5 INPUT [ ] / [ ] buttons 6 STOP button 7 CD Play/Pause [ ] button 8 Fast Reverse / Fast Forward [ buttons...
-
Page 11: Disc Notes
Disc Notes Precautions for Playback Compact discs (CDs) with the following logo on the label surface can be used. Do not use discs designed for purposes other than audio, such as CD-ROMs for PC use. Abnormal noise could damage the speakers or amplifier. * This CD receiver supports CD-R and CD-RW discs. - Page 12 Disc Notes—Continued Precautions for Rental Discs Do not use discs with residue from cellophane tape, rental discs with labels which are peeling off, or discs with decorative labels. This type of disc could get stuck in the CD receiver, or could damage the CD receiver.
-
Page 13: Connecting Antennas
Connecting Antennas This section explains how to connect the supplied indoor FM antenna and AM loop antenna, and how to connect commercially available outdoor FM antenna. The CD receiver won’t pick up any radio signals without an antenna connected, so you must connect the antenna to use the tuner. - Page 14 Connecting Antennas—Continued Connecting an Outdoor FM Antenna If you cannot achieve good reception with the supplied indoor FM antenna, try a commercially available outdoor FM antenna instead. Notes: • Outdoor FM antennas work best outside, but usable results can sometimes be obtained when installed in an attic or loft.
-
Page 15: Connecting Speakers
Connecting Speakers • Connect the right speaker to the CD receiver’s right (R) SPEAKERS terminals. Connect the left speaker to the left (L) SPEAKERS terminals. • Connect the positive (+) terminal on each speaker to the corresponding positive (+) terminal on the CD receiver. -
Page 16: Connections
Connecting Other Components About Connections • Before making any connections, read the manuals supplied with your other components. • Don’t connect the power cord until you’ve completed and double-checked all connections. Connecting a Subwoofer The CD receiver has a SUBWOOFER PRE OUT jack for connecting a powered subwoofer (i.e., a subwoofer with a built-in amplifier). - Page 17 Connecting Other Components —Continued Connecting a TV The CD receiver has a VIDEO OUT jack, which outputs video signal. When you see the contents of “videos” and “photos” in your iPod on TV, connect the cable as follows. Notes: • Before connecting the power cord, connect all of your speakers and AV components. •...
-
Page 18: Basic Operations
Basic Operations Turning On the CD Receiver To turn on the CD receiver, press the [ON/STANDBY] button on the CD receiver or remote controller. The STANDBY indicator goes off. Press the [ON/STANDBY] button again to set the CD receiver to Standby. The STANDBY indicator lights up. - Page 19 Basic Operations —Continued Adjusting the Bass, Treble and Balance Press the [TONE] button to select “Bass”. Use the [ ] / [ ] buttons to adjust the bass. Press [ENTER], and then use the ] / [ ] buttons to adjust the treble.
-
Page 20: Disc Playback
Disc Playback Using the CD Receiver Press the [ ] button to open the disc tray. Tip: Pressing the [ ] button while the CD receiver is on Standby will turn on the CD receiver and open the disc tray. Place the CD on the tray with the label-side facing up. - Page 21 Disc Playback—Continued Using the Remote Controller Press to select tracks • Press the Previous [ ] button to locate the beginning of the currently playing or paused track. Press it repeatedly to select earlier tracks. • Press the Next [ ] button repeatedly to select subsequent tracks.
- Page 22 Disc Playback—Continued Selecting / Playing MP3 / WMA Files On an MP3 / WMA Disc, MP3 / WMA files may be organized hierarchically, with folders containing files and subfolders, as shown below. On the CD receiver, all folders appear at the same level, making it easy to select folders regardless of the hierarchy.
- Page 23 Disc Playback—Continued 3 Use the number buttons to enter the file number. Playback starts. If a folder contains more than 99 MP3 / WMA files, double-digit file numbers must be preceded by zeros. To specify file #5, press [>10], [0], [0], and [5]. Displaying MP3 / WMA Information You can display various information about the MP3 / WMA file currently playing, including tags such as...
- Page 24 Disc Playback—Continued To start playback, press the [ENTER] or [ ] button. Playback will start with the first MP3 / WMA file in the specified folder and continue until all of the MP3 / WMA files in that folder have been played. Random Playback With random playback, all of the tracks on the disc are played in random order.
- Page 25 Disc Playback—Continued Use the [ ] / [ ] buttons to select the first track you want to add to the playlist, then press [ENTER]. Track to be added to Total time of the playlist playlist Repeat this step to add additional tracks to the playlist.
- Page 26 Disc Playback—Continued Preferences (*: default) MP3 / WMA Info? Select the MP3 / WMA file information to be displayed at the start of playback. The related information can be also switched with the [DISPLAY] button. File Name *: File name, Folder name, Sampling rate, and Bitrate Title: Title of the current file, Artist name, Album...
-
Page 27: Ipod / Iphone Playback
iPod / iPhone Playback When you select iPod as the input source, the headphones output no sound. If use headphones, connect it directly to iPod. Before using your iPod with the CD receiver, be sure to update your iPod with the latest software, available from the Apple Web site. - Page 28 iPod / iPhone Playback—Continued Using the iPod / iPhone menu (only remote control) Press the [MENU / CLEAR] button to display iPod menu on iPod. A dot indicator (iPod menu mode indicator) appears on the CD receiver’s display. To go to the upper iPod menu, press the [MENU / CLEAR] button.
- Page 29 iPod / iPhone Playback—Continued Setting for iPod / iPhone Remove the iPod. Press [MENU]. Select the desired setting item with the ] / [ ] buttons. Press [ENTER]. Select the desired selection with the ] / [ ] buttons. Press [ENTER]. Preferences (*: default) Charging? Select the method for charging iPod, which inserted...
-
Page 30: Listening To The Radio
Listening to the Radio Tuning into FM /AM Radio Stations When tuned into a station, the Tuned indicator appears. When tuned into a stereo FM station, the FM Stereo indicator appears as well. AUTO FM Stereo Band Frequency Tuning into Weak Stereo FM Stations If the signal from a stereo FM station is weak, it may be impossible to get good reception. - Page 31 Listening to the Radio—Continued Displaying FM/ AM Radio Information Press the remote controller’s [DISPLAY] button repeatedly to display more radio information. FM / AM Frequency Preset name * * If the selected preset has no name, “No Name” appears briefly and then the frequency is displayed.
- Page 32 Listening to the Radio—Continued Tune into the station that you want to store as a preset. Press the [MENU / CLEAR] button, and then use the [ buttons to select “Preset Write?”. Press [ENTER]. The preset number flashes. To cancel the Preset write function at this point, press the [MENU / CLEAR] button.
- Page 33 Listening to the Radio—Continued Naming Presets You can name presets for easy identification. The preset name may contain of up to twelve characters. Select the preset you want to name (see page 32). Press the [MENU / CLEAR] button, and then use the [ ] / [ buttons to select “Name In?”...
- Page 34 Listening to the Radio—Continued Copying Presets With the Preset Copy function, you can organize your presets in the order you want. When you copy a preset, its name is also copied. Select the preset you want to copy (see page 32). Press the [MENU / CLEAR] button, and then use the [ buttons to select “Preset Copy?”.
- Page 35 Listening to the Radio—Continued Adjusting the Display's Brightness Press the [MENU / CLEAR] button, and then use the [ ] / [ buttons to select “Dimmer?”. Press [ENTER]. Set the brightness with [ buttons. Off: Normal Dimmer Press [ENTER]. ] / [...
-
Page 36: Clock And Timer
Setting the Clock Use the following procedure to set the clock. Press the [TIMER] button repeatedly until “Clock” appears. Press [ENTER]. Use the [ ] / [ ] buttons to select the day of the week. You can select: SUN, MON, TUE, WED THU, FRI, or SAT. -
Page 37: Using The Timers
Using the Timers The CD receiver has four programmable timers for automated playback, and a sleep timer for turning the CD receiver off after a specified period. The timers can be used to start all the playback at a specified time. You could, for example, use a timer to turn on the CD receiver every morning, just like a radio alarm clock. - Page 38 Using the Timers—Continued If you selected FM or AM, use the ] / [ ] buttons to select the radio preset, and then press [ENTER]. Use the [ ] / [ ] buttons to select Once or Every, and then press [ENTER].
- Page 39 Using the Timers—Continued Turning Timers On and Off Once a timer has been programmed, you can turn it on or off as necessary. For example, while you’re on holiday, you may want to turn off the timer you use as an early-morning alarm. Press the [TIMER] button repeatedly to select timer 1, 2, 3, or 4.
-
Page 40: Miscellaneous
Troubleshooting If you have any trouble using the CD receiver, look for a solution in this section. „ How to reset to factory default? 1. Before unplug the power-supply cord, set the CD receiver in the STANDBY state. 2. While holding down the [ON/STANDBY] button on the main unit, plug the power-supply cord. - Page 41 Troubleshooting—Continued CD Playback Playback jumps. • The CD receiver is being subjected to vibration or the disc is scratched or dirty (see pages 11 to 12). Can’t add tracks to the playlist for memory playback. • Make sure there’s a disc in the CD receiver. Also, you can only add valid track numbers. For example, if the CD contains 11 tracks, you cannot add track #12.
- Page 42 If there is a power failure while the power is ON, disconnect the power cord. Onkyo is not responsible for damages (such as CD rental fees) due to unsuccessful recordings caused by the unit’s malfunction. Before you record important data, make sure that the material will be recorded correctly.
-
Page 43: Specifications
Specifications General Power Supply: Power Consumption: Stand-by Power Consumption: Dimensions (W × H × D): Weight: Audio Inputs Analog Inputs: Audio Outputs Subwoofer Pre Output: Speaker Outputs: Phones: Video Output: Amplifier Section Power Output: THD (Total Harmonic Distortion): Damping Factor: Frequency Response: Tone Control: Signal to Noise Ratio:... - Page 44 Tel: +44-(0)1628-473-350 Fax: +44-(0)1628-401-700 ONKYO CHINA LIMITED Unit 1 & 12, 9/F, Ever Gain Plaza Tower 1, 88, Container Port Road, Kwai Chung, N.T., Hong Kong. Tel: 852-2429-3118 Fax: 852-2428-9039 http://www.ch.onkyo.com/ SN 29400459 (C) Copyright 2010 ONKYO CORPORATION Japan. All rights reserved. W1004-1...