Samsung RS267TD series User Manual
Hide thumbs
Also See for RS267TD series:
- User manual (72 pages) ,
- Quick start manual (11 pages) ,
- User manual (36 pages)
Table of Contents
Advertisement
Available languages
Available languages
Advertisement
Table of Contents

Related Manuals for Samsung RS267TD series


Summary of Contents for Samsung RS267TD series
-
Page 1: User Manual
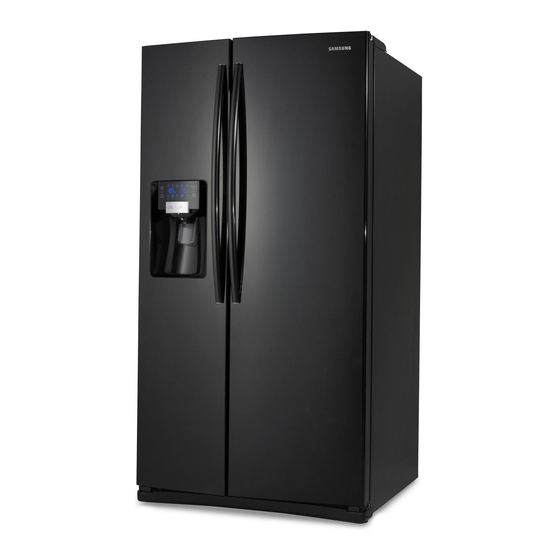
RS267TD** RS265TD** Refrigerator user manual E nglish Français imagine the possibilities Thank you for purchasing this Samsung product. To receive more complete service, please register your product at www.samsung.com/register Free Standing Appliance... - Page 2 KEY FEATURES OF YOUR NEW REFRIGERATOR Your Samsung Refrigerator comes equipped with various innovative storage and energy-efficient features. Twin Cooling Plus™ The Refrigerator and Freezer have separate evaporators. Due to this independent cooling system, the Freezer and Refrigerator cool more efficiently. Additionally, this separate air flow system prevents food odor of one compartment from seeping into other compartments.
- Page 3 SAFETY INFORMATION Before using your new Samsung Side-By-Side Refrigerator, please read this manual thoroughly to ensure that you know how to safely and efficiently operate the features and functions that your new appliance offers. This appliance is not intended for use by people (including children) with reduced physical, sensory or mental capabilities, or lack of experience and knowledge, unless they have been given supervision or instruction concerning use of the appliance by a person responsible for their safety.
- Page 4 safety information SEVERE WARNING SIGNS FOR INSTALLATION WARNING • Do not install the refrigerator in a damp place or place where it may come in contact with water. - Deteriorated insulation of electrical parts may cause an electric shock or fire. •...
- Page 5 • Never use gas pipes, telephone lines or other potential lightning attractors as an electrical ground. - Improper use of the grounding plug can result in a risk of electric shock. If it is necessary to use an extension cord, use only a 3-wire extension cord that has a 3-blade grounding plug and a 3-slot receptacle that will accept the plug on the appliance.
- Page 6 • If the products equipped with LED Lamp, do not disassemble Lamp Cover and LED Lamp by yourself. - Please contact your service agents. • If any dust or water is in refrigerator, pull out power plug and contact your Samsung Electronics service center. - Otherwise there is a risk of fire.
-
Page 7: Safety Information
This may result in electric shock or fire. > • Fill water tank, ice tray, water cubes only with potable water. • When the refrigerator gets wet by water, pull out the power plug and contact your Samsung Electronics service center. safety information _7... - Page 8 safety information CAUTION SIGNS FOR CLEANING CAUTION • Do not directly spray water inside or outside the refrig.erator. - There is a risk of fire or electric shock. • Remove any foreign matter or dust from the power plug pins. Do not use a wet or damp cloth when cleaning the plug, remove any foreign material or dust from the power plug pins.
-
Page 9: Table Of Contents
contents SETTING UP YOUR SIDE-BY-SIDE Getting ready to install the refrigerator REFRIGERATOR 12 Setting up the refrigerator 17 Leveling the refrigerator 18 Making minor adjustment to the doors 19 Checking the water dispenser line 20 Installing the water dispenser line OPERATING YOUR 22 Checking the control panel SIDE-BY-SIDE REFRIGERATOR... - Page 10 GETTING READY TO INSTALL THE REFRIGERATOR Congratulations on the purchase of your Samsung Side-By-Side Refrigerator. We hope you will enjoy the many Selecting the best location for the refrigerator • Select a location with easy access to the water supply.
- Page 11 doorways (both width and height), thresholds, ceilings, stairways, etc. The following chart details the exact height and depth. MOD E L R S 2 6 7 T D * * / R S 2 6 5 T D * * 908 (35 3/4) Only Cabinet 914.4 (36)
- Page 12 If you have any further questions, contact your Samsung Electronics service center. 1. Place the Refrigerator in an appropriate location with reasonable clearance between the wall and the Refrigerator.
- Page 13 (OPTIONAL) shorter part. Note: To best conceal the connection points: Assemble the handles with the mounting screws facing each other. setting up _13...
-
Page 14: Setting Up The Refrigerator
setting up your side-by-side refrigerator SETTING UP THE REFRIGERATOR(CONT’D) If your entrance won’t allow the refrigerator to pass easily through it, you can remove the doors. Tools you will need Philips Screwdriver Flat-blade Screwdriver 10mm Socket Wrench Removing the Front Leg Cover First, open both the freezer and refrigerator doors, and then take off the front leg cover by turning the three screws counter-clockwise. -
Page 15: Removing The Freezer Door
Removing the freezer door Make sure that you lift the door straight up so the hinges are not bent or broken. Be careful not to pinch the water tubing and wire harness on the door . Place doors on a protected surface to prevent scratching or damage. Is necesary two people for disassembling doors. - Page 16 setting up your side-by-side refrigerator SETTING UP THE REFRIGERATOR (CONT’D) Removing the fridge door 1. With the door closed, remove the upper hinge cover using a screwdriver 2. Remove hinge bolts with a 10mm Socket Wrench and ground screw counter-clockwise, the upper hinge in the direction of the arrow.
-
Page 17: Leveling The Refrigerator
LEVELING THE REFRIGERATOR Now that the doors are back on the refrigerator, you want to make sure the refrigerator is level so that you can make final adjustments. If the refrigerator is not level, it will not be possible to get the doors perfectly even. The front of the refrigerator is also adjustable. -
Page 18: Making Minor Adjustment To The Doors
setting up your side-by-side refrigerator MAKING MINOR ADJUSTMENTS TO THE DOORS Remember, a level refrigerator is necessary for getting the doors perfectly even. If you need help, review the previous section on levelling the refrigerator. When the door of the freezer is higher than the fridge Adjustment part Open the doors and adjust them, one at a time, as follows:... -
Page 19: Checking The Water Dispenser Line
C HECKING THE WATER DISPENSER LINE A water dispenser is one of the helpful features on your new Samsung Refrigerator. To help promote better emoves unwanted particles from your water. However, it does not sterilize or destroy microorganisms. You may need to purchase a water purifying system to do that. -
Page 20: Installing The Water Dispenser Line
setting up your side-by-side refrigerator INSTALLING THE WATER DISPENSER LINE Connecting the water line to the Refrigerator. There are several items that you need to purchase to complete this connection. dware store. • 1/4” compression nut • plastic tubing • copper tubing •... - Page 21 Removing residual matter inside the water supply line after installing filter 1. Turn ON the main water supply. 2. Press the Water button and push the dispenser pad. Refer to ‘Checking the control panel’ in the manual (page 22) Water 3.
-
Page 22: Operating Your
operating your side-by-side refrigerator HECKING THE CONTROL PANEL Lighting Press the Lighting button to turn on the dispenser LED lamp. Press the Freezer button to set the freezer temperature between cold and Freezer coldest. (Hold 3 sec for Press and hold the Freezer button for 3 seconds to activate Power Freezer Power Freeze) function which speeds up the freezing process in the freezer. -
Page 23: Using The Control Panel
USING THE CONTROL PANEL Freezer/Fridge (Temperature adjustment) Press the Freezer or Fridge button until the desired temperature is set. For lower temperature, press the Freezer or Fridge button until more LED lights (coldest). For higher temperature, press the Freezer or Fridge button until less LED lights (cold). Each time you press the Freezer or Fridge button, temperature indicator will change in below order. -
Page 24: Demo Mode
operating your side-by-side refrigerator USING THE CONTROL PANEL (CONT’D) Filter Indicator about every 6 months. Water This icon will light up when you activate the Water function. Cubed Ice , Crushed Ice Enjoy cubed or crushed ice by selecting your preference from the digital control panel. The ice type light indicates the type of ice that is currently chosen. -
Page 25: Using The Ice And Cold Water Dispenser
USING THE ICE AND COLD WATER DISPENSER No Ice Water Select this if you want to turn the ice maker off. Using the water dispenser Press the Water button on the control panel. Place your cup on the water outlet and push against the dispenser pad until hearing the “click” sounds. Make sure the glass is in line with the dispenser to prevent the water from splashing out. -
Page 26: Storing Food
STORING FOOD The Samsung Side-By-Side Refrigerator has been designed to provide you with maximum space saving features and functions. Here are some of the customized compartments we have created to keep your food fresher, longer. Remember, in order to prevent odor penetration to the ice, stored food should be wrapped securely and as airtight as possible. - Page 27 • Designed to store lots of ice easily. Do not put your fingers, hands or any other objects in the ice Ice Maker Bucket chute or the ice maker bucket. This may result in personal injury WARNING or material damage. Door Bins Can be used for small packages of frozen food.
-
Page 28: Removing The Freezer/Fridge Accessories
cleaning and maintaining your side-by- side refrigerator REMOVING THE FREEZER/FRIDGE ACCESSORIES 1. Door Bin/Dairy Bin Firmly grab the door bin with both hands and lift it up gently to remove the door bin. 2. Shelves (Freezer/Fridge) Remove the shelf by pulling the shelf out to the hole point as shown at the right figure. -
Page 29: Cleaning The Refrigerator
CLEANING THE REFRIGERATOR Caring for your Samsung Side-By-Side Refrigerator prolongs the life of your appliance and helps keep it odor and germ-free. Cleaning the Interior Clean the inside walls and accessories with a mild detergent and then wipe dry with a soft cloth. You can remove the drawers and shelves for a more thorough cleaning. -
Page 30: Changing The Water Filter
cleaning and maintaining your side-by- side refrigerator CHANGING THE WATER FILTER If the water filter indicator turns into red, filtering ability may decrease. Then you need to change the water filter. Water filter is located on the bottom right side of the refrigerator. 1. -
Page 31: Appendix 31 Troubleshooting
appendix TROUBLESHOOTING PROBLEM SOLUTION The refrigerator does not • Check that the power plug is properly connected. work at all or it does not • chill su ciently. Try setting it to a lower temperature. • Is the refrigerator in direct sunlight or located too near a heat source? •... -
Page 32: Warranty
Samsung authorized service center. Samsung will repair or replace any part found to be defective, at our option and at no charge as stipulated and products become the property of Samsung and must be returned to Samsung. Replacement parts and products assume the remaining original warranty, or ninety (90) days, whichever is longer. - Page 33 To obtain warranty service, please contact Samsung at: SAMSUNG CUSTOMER CARE CENTER Samsung Electronics America, Inc. 400 Valley Road Suite 201 Mt. Arlington, NJ 07956 1-800-SAMSUNG (1-800-726-7864) and www.samsung.com/ca warranty _33...
-
Page 34: Wiring Diagram
wiring diagram RS267TD* OPTIONAL OPTION 34_ wiring diagram... - Page 35 wiring diagram RS265TD* OPTIONAL OPTION wiring diagram_35...
- Page 36 Business users should contact their supplier and check the terms and conditions of the purchase contract. This product should not be mixed with other commercial wastes for disposal. Contact SAMSUNG WORLD WIDE If you have any questions or comments relating to Samsung products, please contact the SAMSUNG customer care center. WEB SITE CONTRY CUSTOM CARE CENTER www.samsung.com/us...
- Page 37 RS267TD77 RS265TD77 Réfrigérateur Guide d’utilisation Français imaginez les possibilités Merci d’avoir acheté un produit Samsung. Pour recevoir un service plus complet, enregistrez votre produit sur www.samsung.com/register Appareil amovible...
- Page 38 à compartiments juxtaposés CARACTERISTIQUES DE VOTRE NOUVEAU REFRIGERATEUR Votre réfrigérateur Samsung vous est livré équipé de divers rangements innovants et de caractéristiques permettant d’économiser de l’énergie. Twin Cooling Plus™ Le réfrigérateur et le congélateur ont des évaporateurs indépendants. Grâce à leur système de refroidissement indépendant, le congélateur et le réfrigérateur refroidissement de manière plus...
- Page 39 Les instructions suivantes couvrant divers modèles, les caractéristiques de votre réfrigérateur peuvent légèrement varier de celles décrites dans le présent manuel. Pour toute question, contactez-nous au 1-800-SAMSUNG ou trouvez de l’aide et des informations en ligne sur www.samsung.com. Symboles et précautions de sécurité importants: Des pratiques hasardeuses ou dangereuses peuvent entraîner de graves blessures...
- Page 40 consignes de sécurité SYMBOLES D’AVERTISSEMENT TRES IMPORTANTS POUR L’INSTALLATION WARNING • Ne pas installer le réfrigérateur dans un endroit humide ou dans un endroit où il pourrait être en contact avec l’eau. - Une isolation défectueuse des éléments électriques peut entraîner un choc électrique ou un incendie.
- Page 41 • Ne jamais utilisez de tuyaux à gaz, de lignes téléphoniques ou autres attracteurs de foudre potentiels comme mise à la terre électrique. - Une mauvaise utilisation de la prise de terre peut entraîner un risque de choc électrique. S’il y a besoin d’utiliser un prolongateur, utilisez un prolongateur trifilaire uniquement qui possède une prise de terre à...
- Page 42 - Tout changement ou toute modification effectué(e) par un tiers sur le produit fini n’est pas couvert par le service de garantie de Samsung. Aussi, Samsung ne peut être tenu responsable des problèmes de sécurité émanant des modifications apportées par un tiers.
- Page 43 • Remplir le réservoir d’eau, le tiroir à glace et le bac à glaçons uniquement avec de l’eau potable. • Lorsque le réfrigérateur est mouillé par l’eau, le débrancher et contacter le centre de services de Samsung Electronics. consignes de sécurité _7...
- Page 44 consignes de sécurité SYMBOLES D’ATTENTION POUR LE NETTOYAGE CAUTION • Ne pas vaporiser directement d’eau à l’intérieur ou à l’extérieur du réfrigérateur. - Il existe un risque d’incendie ou de choc électrique. • Retirer tout corps étranger ou poussière des broches des prises. Ne pas utiliser de chiffon mouillé...
- Page 45 sommaire INSTALLATION DE VOTRE Avant d’installer votre réfrigérateur REFRIGERATEUR A 12 Installation du réfrigérateur COMPARTIMENTS JUXTAPOSES 17 Calage du réfrigérateur 18 Derniers réglages des portes 19 Véri cation du distributeur d’eau 20 Installation du tuyau du distributeur d’eau FONTIONNEMENT DE VOTRE 22 Véri cation du panneau de commandes REFRIGERATEUR A 23 Utilisation du panneau de commandes...
- Page 46 érateur à comparti m ents j u xtaposés AVANT D’INSTALLER VOTRE REFRIGERATEUR Nous vous remercions d’avoir acheté le réfrigérateur à compartiments juxtaposés Samsung. Nous espérons que Choix du meilleur emplacement du réfrigérateur •...
- Page 47 Commençons par le début ! Assurez-vous de pouvoir facilement bouger votre réfrigérateur dans son emplacement Le tableau suivant indique précisément la hauteur et la profondeur. MODELO RS267TD**/ RS265TD** Caisse seule 908 (35 3/4) Largeur Avec cale avant 914.4 (36) Caisse seule 763.3 (30 1/16) Avec porte 875 (34 29/64)
-
Page 48: Installation Du Refrigerateur
i n stal l a ti o n de votre réfri g érateur à comparti m ents j u xtaposés INSTALLATION DU REFRIGERATEUR caractéristiques et fonctions. En suivant les consignes suivantes, votre réfrigérateur devrait parfaitement fonctionner. 1. Installez le bon emplacement du réfrigérateur avec samment d’espace entre le mur et le réfrigérateur. - Page 49 la vis (OPTION) la plus courte. Remarque: Pour mieux dissimuler les points de connexion: Assembler les manches avec les vis de montage gacing uns des autres. installation _13...
- Page 50 i n stal l a ti o n de votre réfri g érateur à comparti m ents j u xtaposés INSTALLATION DU REFRIGERATEUR (SUITE) Si votre réfrigérateur ne passe pas facilement la porte, vous pouvez retirer les portes. Outils requis Vis Philips Tournevis à...
- Page 51 Retrait de la porte du congélateur Prenons d’abord note de quelques éléments. Assur Veillez à ne pas pincer le tuyau d’eau ni le faisceau électrique dans la porte. Posez les portes sur une surface pr e ou tout dommage. Vous avez besoin de deux personnes pour démonter la porte Lorsque la porte du congélateur est fermée, retirez le cache-gond supérieur à...
- Page 52 i n stal l a ti o n de votre réfri g érateur à comparti m ents j u xtaposés INSTALLATION DU REFRIGERATEUR (SUITE) Retrait de la porte du réfrigérateur 1. Lorsque la porte est fermée, retirez le cache-gond supérieur à...
- Page 53 CALAGE DU REFRIGERATEUR Maintenant que les portes sont de nouveau sur votre réfrigérateur, assurez-vous que votre réfrigérateur est à niveau afin d’effectuer vos derniers réglages. Si le réfrigérateur n’est pas à niveau, les portes ne pourront pas être parfaitement droites. L’avant du réfrigérateur est également réglable.
- Page 54 i n stal l a ti o n de votre réfri g érateur à comparti m ents j u xtaposés DERNIERS REGLAGES DES PORTES Notez qu’un réfrigérateur à niveau est nécessaire pour que les portes soient parfaitement droites. Si vous avez besoin d’aide, relisez la section précédente sur le calage du réfrigérateur.
- Page 55 Un distributeur d’eau est une des caractéristiques les plus utiles de votre nouveau réfrigérateur Samsung. Pour une santé plus saine, le filtre à eau Samsung retire les particules indésirables de l’eau. Cependant, il ne stérilise pas et ne détruit pas les microorganismes. Pour cela, il vous faudra acheter un système de purification de l’eau.
- Page 56 i n stal l a ti o n de votre réfri g érateur à comparti m ents j u xtaposés INSTALLATION DU TUYAU DU DISTRIBUTEUR D’EAU Raccordement du tuyau d’eau au réfrigérateur Il vous faut acheter d’autres éléments pour terminer ce raccordement. Vous pouvez trouver ces articles vendus dans un kit dans votre magasin de bricolage le plus proche.
- Page 57 1. Allumez l’alimentation générale en eau. 2. Appuyez sur le bouton Water et appuyez sur le levier du distributeur. Référ Water 3. Tir e avant de l’utiliser. (soit environ 6 minutes.) Cela nettoiera le système d’alimentation en eau et éliminera l’air des tuyaux. 4.
- Page 58 fonctionnement de votre réfrigérateur à compartiments juxtaposés VERIFICATION DU PANNEAU DE COMMANDES Lighting Appuyez sur le bouton Lighting pour allumer la lampe LED du distributeur. Appuyez sur le bouton Freezer pour régler la température du congélateur entre froid et plus froid. Freezer (Hold 3 sec for Appuyez sur le bouton Freezer et maintenez-le enfoncé...
- Page 59 UTILISATION DU PANNEAU DE COMMANDES Congélateur / Réfrigérateur (Réglage de la température) Appuyez sur le bouton Freezer ou Fridge jusqu’à obtention de la température souhaitée. Pour baisser la température, appuyez sur le bouton Freezer ou Fridge jusqu’à ce que plus de voyants LED s’allument (plus froid).
- Page 60 fonctionnement de votre réfrigérateur à compartiments juxtaposés UTILISATION DU PANNEAU DE COMMANDES (SUITE) généralement tous les 6 mois. Cette icône s’allumera lorsque vous activez la fonction Eau. Glaçons , Glace pilée Optez pour des glaçons ou de la glace pilée en sélectionnant votre préférence sur le panneau de commandes digital, le voyant Ice Type indique le type de glaçons actuellement sélectionné.
- Page 61 UTILISATION DU DISTRIBUTEUR DE GLACONS ET D’EAU FROIDE Pas de glaçon Sélectionnez celasi vous souhaitez éteindre l’appareil à glaçons. Utilisation du distributeur d’eau Appuyez sur le bouton Water du panneau de commandes Placez un verre sous la sortie d’eau et appuyez de nouveau sur le levier du distributeur jusqu’au clic.
- Page 62 CONSERVATION DE LA NOURRITURE Le réfrigérateur à compartiments juxtaposés Samsung a été conçu pour vous offrir un maximum d’espace et de fonctions. Voici quelques compartiments personnalisés que nous avons inventés pour conserver votre nourriture plus fraîche et plus longtemps. N’oubliez pas que pour éviter toute odeur dans les glaçons, la nourriture doit être bien emballée dans des récipients aussi hermétiques...
- Page 63 • Conçu pour facilement conserver beaucoup de glaçons. Ne mettez pas vos doigts, vos mains ou tout autre objet sous la Bac de la machine à glaçons cascade des glaçons ou dans le bac de la machine à glaçons. WARNING Cela peut entraîner une blessure ou un endommagement du matériel.
- Page 64 le nettoyage et l’entretien de votre réfrigérateur à compartiments juxtaposés RETRAIT DES ACCESSOIRES DU CONGELATEUR/REFRIGERATEUR 1. Compartiment de la porte / Compartiment laitier Tenez fermement le compartiment de la porte avec vos deux mains et soulevez-le doucement pour retirer le compartiment de la porte.
-
Page 65: Nettoyage Du Refrigerateur
NETTOYAGE DU REFRIGERATEUR Cela permet de prolonger la vie de votre réfrigérateur à compartiments juxtaposés Samsung et à empêcher tout développement d’odeur et de germes. Nettoyage de l’intérieur Nettoyez les parois intérieures et les accessoires avec un détergent doux puis essuyez-les à l’aide d’un chiffon doux et humide. Vous pouvez retirer les étagères et les tiroirs pour laver plus en profondeur. - Page 66 le nettoyage et l’entretien de votre réfrigérateur à compartiments juxtaposés CHANGEMENT DU FILTRE A EAU Si l’indicateur du filtre à eau est rouge, le filtrage risque d’être moins efficace. Vous devez alors changer le filtre à eau. Le filtre à eau se trouve en bas à droite du réfrigérateur. 1.
- Page 67 annexe DEPANNAGE PROBLEME SOLUTION Le réfrigérateur ne • Vérifiez qu’il soit bien branché. fonctionne pas du • é p r u t a ’ l c i f f e - t e l l é p r u t tout ou n’est pas Essayez-de baisser la température.
- Page 68 Samsung, ou qui a endommagé ce produit ou qui se traduit par des réglages efectués par le client et le non-respect des présentes consignes d’utilisation, de nettoyage, d’entretien et de consignes liées à...
- Page 69 OU MATERIELS CAUSES PAR L’UTILISATION,LA MAUVAISE UTILISATION OU L’INCAPCITE A UTILISER CE PRODUIT, QUELQUE SOIT LA THEORIE LEGALE SUR LAQUELLE SE BASE LA PLAINTE, ET MEME SI SAMSUNG A ETE AVISE DES POSSIBILITES DE TELS DOMMAGES. AUCUN RECOUVREMENT DE QUEL QUE TYPE QUE CE SOIT CONTRE SAMSUNG NE REPRESENTERA UNE SOMME SUPERIEURE AU PRIX D’ACHAT DU PRODUIT VENDU PAR...
- Page 70 diagramme de circuit RS267TD* EN OPTION OPTION 34_ diagramme de circuit...
- Page 71 diagramme de circuit RS265TD* EN OPTION OPTION diagramme de circuit_35...
- Page 72 Les utilisateurs particuliers doivent contacter le détaillant auprès duquel ils l’ont acheté, ou les autorités locales, pour obtenir les informations sur où et comment recycler ce pr Les utilisateurs professionnels doivent contacter leur four Ce produit ne doit pas être jeté avec les autres déchets commerciaux. Contactez SAMSUNG WORLD WIDE PAYS SITE WEB CLIENT CENTER www.samsung.com/us...