Table of Contents
Advertisement
Quick Links
Download this manual
See also:
Quick Reference Manual
Advertisement
Table of Contents

Related Manuals for Symbol SPT 1800 Series


Summary of Contents for Symbol SPT 1800 Series
- Page 2 Symbol reserves the right to make changes to any product to improve reliability, function, or design. Symbol does not assume any product liability arising out of, or in connection with, the application or use of any product, circuit, or application described herein.
-
Page 3: Table Of Contents
R e f e r e n c e Introduction Congratulations on your purchase of Symbol Technologies’ SPT 1800 Series Terminal! The unique combination of capabilities offered by this product makes it superior for use in a wide range of applications: •... -
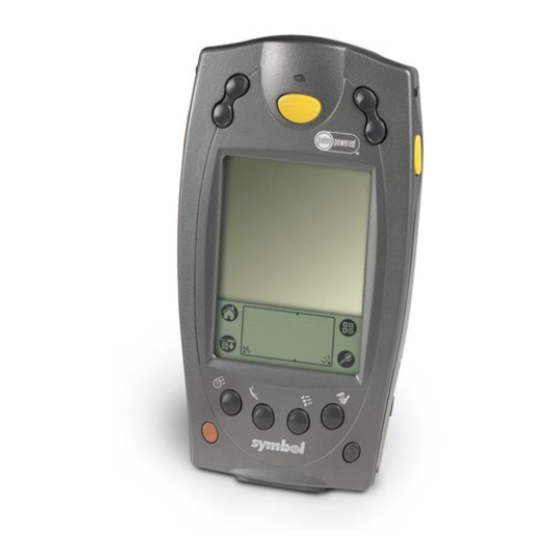
Page 4: Parts Of The Spt 1800
S P T 1 8 0 0 S e r i e s Parts of the SPT 1800 The following illustration indicates each part of the SPT 1800. Front View WAN Antenna Center Scan Button (SPT 1833/34 only) Laser Decode LED Scroll Button (Up and Down) Scroll Button... - Page 5 Q u i c k R e f e r e n c e Parts of the SPT 1800 (continued) Left View Left Scan Trigger Top View Bottom View Serial Port Scanner Exit Window...
- Page 6 S P T 1 8 0 0 S e r i e s Parts of the SPT 1800 (continued) Back View WAN Antenna WAN Antenna Headset Connector Stylus Stylus Silo Infrared Port Handstrap Connector Handstrap Connector Speaker Reset Button SIM Socket Battery Compartment Lithium-Ion Battery...
-
Page 7: Installing The Sim Card (Spt 1834 Only)
Q u i c k R e f e r e n c e Getting Started Before you can use your SPT 1800, perform the basic setup procedures: • Install the SIM card (SPT 1834 only) • Install and charge the battery •... -
Page 8: Installing The Battery
Charging the Battery Note: The SPT 1833 must use 1550 mAh Lithium-ion battery (p/n 21-52319-01). All other SPT 1800 Series terminals use Lithium-ion battery (p/n 20-36098-01). Before using your SPT 1800 for the first time, charge the battery using the cradle, the Synchronization/Charging Cable or the Universal Battery Charger (UBC). - Page 9 Q u i c k R e f e r e n c e Using the Cradle to Charge the Battery 1. Ensure the battery is installed in the terminal. 2. Plug the cradle into a wall outlet. 3. Insert the SPT 1800 into the cradle. The terminal’s battery is fully charged after approximately two hours.
-
Page 10: Starting The Spt 1800
S P T 1 8 0 0 S e r i e s 3. Plug the power cable into a wall outlet and plug the other end into the battery charging receptacle on the side of the Syn- chronization/Charging Cable. Battery Charging Power... -
Page 11: Using The Spt 1800
Q u i c k R e f e r e n c e 1. Press the power button on the front panel of your SPT 1800 to display the Welcome utility (This also displays following a hard reset). Power Button Note: If necessary, adjust the contrast control on the SPT... -
Page 12: Writing With The Stylus
S P T 1 8 0 0 S e r i e s Contrast Control The contrast control button is located on the lower right-hand side of the SPT 1800. Contrast Control 1. Press the contrast control button to display the contrast ad- justing bar on the screen. - Page 13 Q u i c k R e f e r e n c e 3. Tap the left target to open the Alpha keyboard, or tap the right target to open the Numeric keyboard. Tap here for numbers Tap here for letters keyboard keyboard Icon Descriptions...
-
Page 14: Resetting The Spt 1800
S P T 1 8 0 0 S e r i e s Resetting the SPT 1800 If your SPT 1800 stops responding to input, you may need to perform a reset. Performing a Soft Reset A soft reset restarts the SPT 1800 and saves all records and entries stored in your SPT 1800 terminal. -
Page 15: Attaching The Handstrap
Q u i c k R e f e r e n c e Note: With a hard reset, the current date and time are re- tained. Formats, preferences and other settings are re- stored to their factory default settings. Attaching the Handstrap The SPT 1800 has a handstrap which increases comfort when holding it for extended periods of time. -
Page 16: Scanning 1-D Bar Codes
2. Hold the trigger down and keep the scan line parallel to the rows of the symbol. 3. Manually raster the scan line by slowly moving the scanner up and down so it scans the entire bar code at a rate of one inch per second. -
Page 17: Initiating A Network Connection
Make sure you scan the top and bottom rows of the symbol. • Be patient - it may take a few swipes to decode the symbol. The bar code is completely decoded when you hear a tone, followed by a short, high tone beep. The green LED stays lit for three seconds or until the next trigger pull. -
Page 18: Maintaining The Spt 1800
S P T 1 8 0 0 S e r i e s connection. A cursor does not appear if you are not connected to the radio. Maintaining the SPT 1800 For trouble-free service, observe the following tips when using your SPT 1800: •... -
Page 19: Troubleshooting
Q u i c k R e f e r e n c e Troubleshooting Problem Cause Solution SPT 1800 terminal Contrast is set Adjust the contrast control. does not turn on. too light. Battery is not ful- Make sure the battery is fully charged ly charged. - Page 20 S P T 1 8 0 0 S e r i e s Problem Cause Solution SPT 1800 doesn’t You are not using For your SPT 1800 to recognize hand- recognize my hand- Graffiti character writing input with the stylus, you need ®...
- Page 21 See your Sys- tem Administrator. Bad bar code. Check to be sure the bar code symbol is not defaced. Too far away Be sure you are within proper scanning from bar code.
- Page 22 S e r i e s Regulatory Information All Symbol devices are designed to be compliant with rules and regulations in locations they are sold and will be labeled as required. Any changes or modifications to Symbol Technologies equipment, not expressly approved by Symbol Technologies, could void the user's authority to operate the equipment.
- Page 23 Q u i c k R e f e r e n c e In accordance with Clause 5, IEC 0825 and EN60825, the following information is provided to the user: ENGLISH HEBREW CLASS 1 CLASS 1 LASER PRODUCT CLASS 2 LASER LIGHT DO NOT STARE INTO BEAM CLASS 2 LASER PRODUCT...
- Page 24 S P T 1 8 0 0 S e r i e s GSM Regulatory Warnings Emergency Calls The Worldwide GSM standard provides a single uniform number, 112, to dial in cases of emergency. Provided that your phone has found an network you will be able to make an emergency call.
- Page 25 Q u i c k R e f e r e n c e Hearing Aids The device may interfere with some hearing aids. In the event of interference you may want to consult your hearing aid supplier to discuss solutions. Other Medical Devices The device transmits radio frequency energy and has the potential to interfere with inadequately protected medical devices.
- Page 26 • Italy requires a user license for outside usage. Statement of Compliance Symbol Technologies, Inc., hereby, declares that this device is in compliance with the essential requirements and other relevant provisions of Directives 1999/5/EC, 89/ 336/EEC and 73/23/EEC. Declaration of Conformities may be obtained from http:// www2.symbol.com/doc/.
- Page 27 This warranty is provided to the original owner only and is not transferable to any third party. It shall not apply to any product (i) which has been repaired or altered unless done or approved by Symbol, (ii) which has not been maintained in accordance with any operating or handling instructions...
- Page 28 Contact local distributor or call Distributor Operations +44 208 945 7360 Customer support is available 24 hours a day, 7 days a week. Visit http://www.symbol.com/manuals for all product manuals. 72-51336-01 Revision B — December 2001 Symbol Technologies, Inc. One Symbol Plaza Holtsville, NY 11742-1300...