Table of Contents
Advertisement
Quick Links
Advertisement
Table of Contents

Related Manuals for Xerox LF8040.8045


Summary of Contents for Xerox LF8040.8045
- Page 1 Office Fax LF8040.8045 User Manual...
- Page 2 © 2009 Xerox Corporation. All rights reserved. Xerox and the sphere of connectivity design are trademarks of Xerox Corporation in the US and/or other countries and is used under li- cense. Sagem Communications is an authorized Xerox licensee. Copyright protection claimed includes all forms and matters of copyrightable material and...
-
Page 3: Introduction
Introduction Dear Customer Introduction Brand Variable With the purchase of this device, you have chosen a quality Xerox product brand. Their device fulfils the most varied requirements for private use or in your office and business everyday. Starter Cartridge For printing purposes, your device utilises the most up-to-date laser technology. A starter car- tridge is provided with the device. -
Page 4: About This User Manual
About this User Manual With the installation guide on the following pages, you can start using your device quickly and easily. Detailed descriptions can be found in the following sections of this user manual. Read the entire user manual carefully. Follow all safety instructions in order to ensure proper operation of your device. -
Page 5: Table Of Contents
Table of Contents Introduction..............3 Dear Customer ......................... 3 About this User Manual ......................4 Safety Notes ..............9 Introduction ..........................9 Warning: Electrical Safety Information ..............10 Emergency Power Off ......................10 Laser Safety ..........................11 Operational Safety Information ................... 11 Maintenance .......................... - Page 6 Inserting Starter Cartridge ....................27 Connecting the Telephone Cable ................. 28 Connecting the Mains Cable ................... 29 Initial Installation ........................ 29 Telephone Functions ..........31 Placing a Call on the Device .................... 31 Getting Outside Line ......................32 Chain Dialling ......................... 32 Insert Dialling Pause ......................
- Page 7 SMS................. 49 SMS Requirements ....................... 49 Sending SMS .......................... 49 Receiving SMS Messages ....................51 Reading SMS Messages ..................... 51 Printing SMS Messages ...................... 52 Deleting SMS Messages ....................52 Modifying the Settings ...................... 52 Sending Text2Fax ........................ 54 Settings ................. 55 Energy Saving Mode ......................
- Page 8 Fixing a Paper Jam ......................71 Fixing a Document Jam ....................72 Cleaning ........................... 73 Power Cycling ......................... 73 11 Glossary ................ 77 12 Appendix ..............85 Technical Data ........................85 Guarantee ..........................87 Declaration of Conformity (DoC) ................. 89 Customer Information .......................
-
Page 9: Safety Notes
Safety Notes Introduction Read these safety notes carefully before using this product to make sure you operate the equipment safely. Read these safety notes carefully before using this product to make sure you operate the equipment safely. Your Sagem product and recommended supplies have been designed and tested to meet strict safety requirements. -
Page 10: Warning: Electrical Safety Information
Maintenance Any operator product maintenance procedures will be described in the customer documenta- tion supplied with the product. Do not carry out any maintenance procedures on this product which are not described in the customer documentation. Cleaning Your Product Cleaning Your Product Before cleaning this product, unplug the product from the electrical outlet. -
Page 11: Laser Safety
Laser Safety Caution: Use of controls, adjustments or performance of procedures other than those speci- fied herein may result in hazardous light exposure. With specific regard to laser safety, the equipment complies with performance standards for laser products set by government, na- tional and international agencies as a Class 1 laser product. -
Page 12: Maintenance
Maintenance Do not attempt any maintenance procedures that are not specifically described in the cus- tomer documentation supplied with your machine. • Do not use aerosol cleaners. The use of cleaners that are not approved may cause poor per- formance of the equipment, and could create a dangerous condition. •... -
Page 13: Radio Frequency Emissions
Radio Frequency Emissions Warning: In order to allow this equipment to operate in close proximity to Industrial Scien- tific and Medical (ISM) equipment, the external radiation from the ISM equipment may have to be limited or special mitigation measures taken. Changes or modifications to this equipment not specifically approved by Sagem may void the user’s authority to operate this equipment. -
Page 14: For Fax Function
For Fax Function Europe Certification to 1999/5/EC Radio Equipment & Telecommunications Terminal Equipment Di- rective This Sagem product has been self-certified by Sagem for pan-European single terminal con- nection to the analogue public switched telephone network (PSTN) in accordance with Direc- tive 1999/5/EC. -
Page 15: Overview
Overview Overview of the Menu Functions Introduction The following functions are available on your device. There are two ways in which you can call functions. Menu Navigation Navigating in the Menu: Press OK or one of the two arrow keys [, to open the function menu. -
Page 16: Lists And Reports
3 SMS Function is not supported in all countries and networks (Function is not supported in all countries and networks) 31 Sending SMS 31 Sending SMS ..........................page 49 32 Reading SMS 32 Reading SMS ..........................page 51 33 Deleting SMS 33 Deleting SMS .......................... -
Page 17: Printing Help Pages
Printing Help Pages Printing the Functions List Printing the Functions List You can also print the functions list by pressing ¨, 1 and OK. Printing the Telephone Book Printing the Telephone Book You can also print the telephone book by pressing ¨, 4 and OK. Printing the Fax Templates Printing the Fax Templates You can also print the fax templates by pressing ¨, 8 and OK. -
Page 18: Device Overview
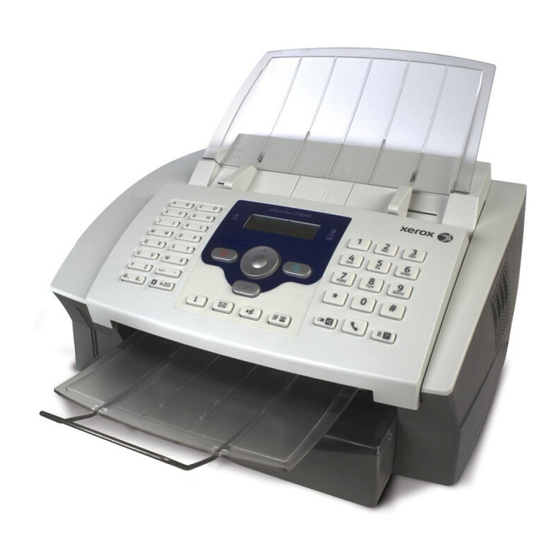
Device Overview 1 Cover ‚ Cover 2 Document Support ƒ Document support 3 Document Feed Slot „ Document feed slot 4 Document Guide … Document guide 5 Panel with Display † Panel with display 6 Document Outlet ‡ Document outlet 7 Printout and Fax outlet ˆ... -
Page 19: Connections On The Rear Side
1 Toner Cartridge ‚ Toner cartridge Außenansicht Tonerkartusche Connections on the Rear Side 1 Telephone Handset Socket ‚ ) socket—Connection socket for the telephone handset 2 External Devices ƒ EXT socket—Connection socket for additional devices 3 Telephone Cable „ LINE socket—Connection socket for telephone cable 4 Mains Cable Socket …... -
Page 20: Panel With Display
Panel with Display Letter Keypad Keys (A—Z)—Telephone book register: Calling up telephone book entries / entering letters. Entering capital letters by pressing and holding ú key. Entering a space using ½. Entering a full stop using .. Entering a break using Rø. Special Characters 1 ;ü—Entering special characters (punctuation marks and symbols). - Page 21 Symbols on the LCD Display SFine f—SFINE resolution configured Photo x—PHOTO resolution configured Fine h—FINE resolution configured CLIP ž—Incoming calls during absence (function is not supported in all countries and networks) _—Incoming SMS messages (function is not supported in all countries and networks) L3 Paneel Overview ·...
- Page 22 22 ¦ Overview · Panel with Display...
-
Page 23: Initial Operation
Initial Operation Packing Contents 1 Device ‚ Device 2 Telephone Handset (Type 3) ƒ Telephone handset (Office Fax LF8045) 3 Spiral Cable for Telephone Handset (Type 3) „ Spiral cable for telephone handset (Office Fax LF8045) 4 Document Support … Document support 5 Paper Tray †... -
Page 24: Attaching The Document Support
Attaching the Document Support Attaching the Document Support Insert the document support into the two openings in the cover. The document support should snap securely into place. Dokumentenhalter anbringen Loading Paper Requirements Before you can receive documents or make copies, you must load paper into the device. Please use only appropriate paper in standard format A4 ·... - Page 25 Notice Loading Pre-printed Material If you would like to print on an input sheet (for example, forms or stationery), place the input sheet face down in the paper tray, with the top of the page to- ward the rear. CAUTION! Forms from a Laser Printer! Forms that have been printed out by a laser printer are not suitable for further printing.
-
Page 26: Extending The Printout And Fax Outlet Tray
Extending the Printout and Fax Outlet Tray Extending the Printout and Fax Outlet Tray Pull the print-out and fax outlet tray out of the paper tray cover. Druckausgabe rausziehen Attaching the Document Outlet Tray Attaching the Document Outlet Tray Insert the document outlet tray into the two openings under the operation panel. Dokumentenausgabe anbringen Connecting the Telephone Handset Type 3 (mit Telefon) -
Page 27: Inserting Starter Cartridge
Inserting Starter Cartridge Plug’n’Print Card Before you can receive documents, make copies, or print, a toner cartridge must be inserted into the device. For this reason, a starter cartridge is supplied with the device. The toner level memory for this starter cartridge was set at the factory. The starter cartridge need not be up- dated with a Plug’n’Print card. -
Page 28: Connecting The Telephone Cable
Place the toner cartridge into your device. The cartridge should snap securely into posi- tion. Close the cover. Make sure that the cover snaps securely into position on both sides. Connecting the Telephone Cable Connecting the Telephone Cable Notice Analogue Fax Machine Your device is an analogue fax device (Group 3). -
Page 29: Connecting The Mains Cable
Connecting the Mains Cable Mains Voltage at the Site of Installation CAUTION! Mains Voltage at the Site of Installation! Check whether the mains voltage of your device (indicated on the type label) matches the mains voltage available at the setup location. Connecting the Mains Cable Insert the mains cable into the connection located on the rear side of the device. -
Page 30: Entering Number
Entering Number Page Header Your name and number are added together with date, time and page number at the top edge of each fax transmission (= header). Enter your number. Notice Enter Special Characters and Symbols To insert special characters and symbols, press ;ü. Select with [. Confirm with OK. -
Page 31: Telephone Functions
Telephone Functions Type 3 (mit Telefon) (Office Fax LF8045) Connecting Additional Telephones For information on how to connect additional telephones and which functions are available to you, please refer the chapter on Telephone Connections and Additional Devices, Page 63. Placing a Call on the Device Dial the desired number. -
Page 32: Getting Outside Line
Getting Outside Line PABX Systems Private branch exchanges (PABX) are typical in many offices and some households. You must dial an outside line access code in order to get a connection to the public telephone network (PSTN) from a PABX. Inserting Outside Line Access Code Enter the outside line access code with which you reach the public telephone network before you en- ter the desired number or select a stored entry. -
Page 33: Telephone Book
Telephone Book Help 4 · Telephone Book Notice Printing the Telephone Book Press ¨, 4 and OK to print a list of all saved entries and groups in the telephone book. Telephone Book Call the telephone book functions using am: You can store new entries, search for entries as well as set and edit groups. -
Page 34: Groups
Change the stored name, the number and the transmission speed. Confirm the changes by pressing OK. Deleting an Entry Press am. CANCEL Using [ select Confirm with OK. Enter the initial letters or select the entry you would like to delete with [. Confirm with OK. -
Page 35: Calling Line Identification (Clip)
You can delete or add entries. Use C to delete individual recipients. Press am to add a recipient from the telephone book. Confirm with OK. 10. If necessary, enter a new number for the group. 11. Confirm with OK. Deleting a Group Press am. - Page 36 36 ¦ Telephone Functions · Missed Calls...
-
Page 37: Fax
Help 3 · Fax Journal Notice Printing Fax Journal Press ¨, 3 and OK to print the fax journal of the last 30 transmissions. Unsuitable Documents! CAUTION! Unsuitable Documents! Do not insert any documents into the device that ..are wet, have been edited with correction fluid, are soiled or have a coated surface. …... - Page 38 Insert the documents face down into the document feeder. The lower most document will be fed in first. You can insert up to 20 documents (80¦g/m²) at a time. Push the document guide inwards, so that it lies level on the documents. Notice Cancel Transmission Press j to eject the documents without sending them.
-
Page 39: Sending Fax Manually
Telephone Book Telephone book register: with the keys (A—Z) you can access entries saved in the telephone book. Enter the initial letters or the name of the desired entry. Your device will show you the telephone book entries for the corresponding letters. Select an entry using [. Using the Telephone Book Notice Using the Telephone Book... -
Page 40: Eavesdropping While Connection Is Established
Eavesdropping while Connection is Established Eavesdropping while Connection is Established You can listen while a connection is established, for example if a fax transmission constantly fails. Enter the desired number using the numeric keypad or select a saved entry. Press μ. No Hands-free Operation Possible Notice No Hands-free Operation Possible... -
Page 41: Sending Fax Later (= Timer Function)
Notice Cancel Process You can interrupt the process at any time, by pressing j. Notice Transmission to Multiple Recipients If your device cannot reach a recipient, the fax message is sent to the other re- cipients. After the device has called all recipients, it once again dials the num- bers that previously could not be reached. -
Page 42: Using Fax Templates
Using Fax Templates Help 8 · Fax Templates Notice Printing the Fax Templates You can also print the fax templates by pressing ¨, 8 and OK. Fax Templates Five fax templates, which you can use, are stored in your device. With these templates you can quickly create, for example, a short fax note or an invitation. -
Page 43: Time Stamp
Time Stamp Time Stamp The device prints the date and the exact arrival time on every incoming fax received. This al- lows you to document the exact time at which you have received a fax transmission. A mem- ory buffer in the device ensures that the correct date and time of reception will be maintained even after a power loss. -
Page 44: Polling Faxes
Printing Out Fax Transmissions Press OK, 27 and OK. PRINT Using [ select Confirm with OK. Enter the four-digit PIN code. Confirm with OK. The stored fax transmissions are printed out and deleted from the memory. Polling Faxes Fax Polling With the fax polling function, you can retrieve faxes that lie ready in the dialled device. -
Page 45: Jobs
Using [, select the desired contrast. Confirm with OK. After a short warm up phase, the device will store the document in the fax memory. Deleting a Job L3 Notice Deleting a Job To cancel a scheduled fax transmission, simply delete the document from the jobs Jobs list (also see chapter , page 45). -
Page 46: Deleting A Job
Deleting a Job Press OK, 53 and OK. Using [ select the job that you would like to delete. Confirm with OK. Confirm the deletion with OK. Printing a Job Press OK, 54 and OK. Using [ select the job that you would like to print out. Confirm with OK. -
Page 47: Copier
Copier Inserting Documents Document Formats Use documents with size A4 · 210¦×¦297 millimetres with 60¦–¦90¦g/m . Do not use any docu- ments that are smaller than A4. You can insert up to 20 documents at a time. Insert the documents face down into the document feeder. The lower most document will be fed in first. -
Page 48: Making A Copy
Making a Copy Press COPY twice. The copy is created. Adjusting Copies Press COPY. Enter the number of times you would like to copy the document (maximum of 99 copies). Confirm with OK. Select the desired resolution using [. You have a higher resolution available to you for copying than you have for fax transmissions. -
Page 49: Sms
Function is not supported in all countries and networks (Function is not supported in all countries and networks) SMS Requirements CLIP for SMS Your device is preset for using the SMS (Short Messaging Service) services. Caller Line Identi- fication (CLIP) must be activated for the SMS to work. It is possible that you will not be able to send and receive SMS messages from a private branch exchange (depending on the coun- try and network). - Page 50 Notice Enter Letters Enter capital letters by pressing and holding ú key. You can enter space using ½. To insert special characters and symbols, press ;ü. Press ûü to insert lan- guage specific special characters. Select with [. Confirm with OK. You can move the cursor using [.
-
Page 51: Receiving Sms Messages
Direct Inward Dialling or Selecting Sub-address Press _. SEND SMS Using [ select Confirm with OK. Notice Access Function You can also call the function by pressing OK, 31 and OK. Enter the text as described under Sending SMS. Press _. Enter the desired number using the numeric keypad or select a saved entry. -
Page 52: Printing Sms Messages
Printing SMS Messages Press _. PRINT SMS Using [ select Confirm with OK. Notice Access Function You can also call the function by pressing OK, 34 and OK. Using [ select the SMS message you would like to print. SELECTED —Using [ select the message that you would like to print. -
Page 53: Changing Transmitting And Receiving Numbers
Changing Transmitting and Receiving Numbers Numbers of the SMS Center All numbers that you need to send and receive SMSs are stored in your device. In case you moved to another telephone service provider, you must change these numbers. You can also receive SMS messages through a second service provider. -
Page 54: Sending Text2Fax
Switching Automatic Printing On/Off Automatic Printing You can deactivate the automatic printing of SMS messages. Press OK, 35 and OK. AUTO PRINT Using [ select Confirm with OK. Use [ to select whether you would like to turn the function on or off. Confirm with OK. -
Page 55: Settings
Settings Help 5 · Settings Notice Prints the List of Settings Press ¨, 5 and OK to print a list of all settings of your device. Cursor Navigation 6 Notice Navigating in the Menu You can move the cursor using [. Press C to return to the previous menu level. Press j to close the menu and return to the starting mode. -
Page 56: Entering The Date And Time
Entering the Date and Time Press OK, 13 and OK. Enter the date (two digits for each field), for example 31¦05¦25 for May 31th, 2025. Enter the time, e.g. 14 00 for 2 pm. Confirm with OK. Entering Your Telephone Number and Name Page Header Your name and number are added together with date, time and page number at the top edge... -
Page 57: Locking The Device
Locking the Device Locking the Device With the locking function, you can prevent unauthorised persons from using your device. You can lock either the entire keyboard or the number pad of your device. Only after entering of the correct code will it be possible to access functions or enter numbers. The lock will turn it- self on again after each use of the device. -
Page 58: Set Resolution
Enter the four-digit PIN code. Confirm with OK. ONLY DIRECT. Using [ select Confirm with OK. Set Resolution Modifying the Basic Settings Notice Modifying the Basic Settings The changed settings are stored as new default settings. If you select a special func- tion for a one-time process, take care to restore the default settings or factory set- tings after that. -
Page 59: Switches Time Stamp On/Off
Switches Time Stamp On/Off Time Stamp The device prints the date and the exact arrival time on every incoming fax received (also see Time Stamp chapter , page 43). You have the option of turning this function off. Press OK, 26 and OK. Use [ to select whether you would like to turn the function on or off. -
Page 60: Setting The Ring Tones
Printing Multiple Copies Printing Multiple Copies You can apply settings to your device whereby multiple copies of fax transmissions are print- ed out upon reception. Press OK, 28 and OK. NBR OF COPIES Using [ select Confirm with OK. Enter a value from 1 to 99. Confirm with OK. -
Page 61: Manual Mode
Manual Mode Manual Mode The device will not receive faxes on its own. You can start fax reception manually, by pressing o. This setting is useful, when you want to receive faxes via a modem connected to a com- puter. Fax Mode Fax Mode In the fax mode, the device will ring for as many times as you have set with function 17 (also... -
Page 62: Printing Lists And Help Pages
Printing Lists and Help Pages Printing the Functions List Printing the Functions List Press OK, 41 and OK to print a list of all functions of your device. Help 1 · Function List Notice Printing the Functions List You can also print the functions list by pressing ¨, 1 and OK. Printing the Telephone Book Printing the Telephone Book Press OK, 43 and OK to print a list of all saved entries and groups in the telephone book. -
Page 63: Telephone Lines And Additional Devices
Telephone Lines and Additional Devices Configuring Telephone Lines and Services Private Branch Exchange / PABX PABX Systems Private branch exchanges (PABX) are typical in many offices and some households. You must dial an outside line access code in order to get a connection to the public telephone network (PSTN) from a PABX. -
Page 64: Connecting Additional Devices
Outside Line Access Code is Automatically Dialled Notice Outside Line Access Code is Automatically Dialled Once these settings are in place, you will no longer need to prefix the outside line access code every time you enter an external number. The device will automatically add the outside line access code in front of numbers that are the same length or longer than the configured direct dial numbers. -
Page 65: Using Additional Telephones (Easylink)
Connection to the Telephone Line Order of Connections In order for the fax switch to function, the device must be first in the series if multiple devices are connected to the same telephone socket. Follow the correct order. Connection to the First Telephone Socket Notice Connection to the First Telephone Socket If you have multiple telephone sockets for the same telephone line, the device must... - Page 66 66 ¦ Telephone Lines and Additional Devices · Using Additional Telephones (Easylink)
-
Page 67: Service
Service Changing the Toner Cartridge Use Original Consumable Materials! CAUTION! Use Original Consumable Materials! Use only original consumable materials. These are available from a specialised re- tailer or through our order service (see back side of this user manual). Other consum- able materials can cause damage to the device. - Page 68 Remove the old toner cartridge, by gripping it at the recess in the middle and pulling it upward. DANGER! Escaping Toner Dust! Carefully remove the toner cartridge from the device so that no toner dust spills out. Take care where you place the toner cartridge, escaping toner dust may soil the surface.
- Page 69 DANGER! Escaping Toner Dust! Once you have removed the protection strip, do not shake the toner cartridge any more. Otherwise, it is possible that toner dust will be released into the air. Place the toner cartridge into your device. The cartridge should snap securely into posi- tion.
-
Page 70: Restart The Recharging Process
12. Pull the Plug’n’Print card out of the device. Notice Cancel the Recharging Process You can interrupt the recharging process at any time, by pressing j. However, the toner level memory must be updated for each new toner cartridge. Restart the Recharging Process Press OK, 62 and OK. -
Page 71: Fixing A Paper Jam
Fixing a Paper Jam Introduction Your device is equipped with sensors that quickly recognise a paper or document jam. If trou- ble of this sort arises, the feeding of the printer paper or document is stopped immediately. Open the cover by taking hold of both document guides and tipping the cover backward. It is possible that you will have to remove the toner cartridge in order to reach the paper. -
Page 72: Fixing A Document Jam
DANGER! Escaping Toner Dust! In case of a paper jam, do not forcefully remove the paper, but rather pull it gently out of the device and throw it away carefully. It is possible that the toner may not be completely set on the print-out, and toner dust could be released into the air. -
Page 73: Cleaning
Cleaning Instructions for Cleaning! DANGER! Instructions for Cleaning! Unplug the device from the power socket before cleaning it. Use a soft, lint-free cloth. Never use liquid or easily flammable cleansers (sprays, abrasives, polishes, al- cohol, etc.). Do not allow any moisture to reach the interior of the device. Fax Cleaning Sheets Notice Fax Cleaning Sheets... - Page 74 Problems with Faxing No fax transmission Check the installation of the device. Check that the device is connected to the mains No dial tone when lifting the headset voltage. Connect the telephone cable to the socket marked LINE. Insert the telephone plug into your PTT line socket.
- Page 75 Problems with Printing No printing Paper or document jam, no paper or toner cartridge. Printing is interrupted. Follow the instructions on the display. Copy is blank or the recipient has received a Insert the documents face down into the blank sheet document feeder.
- Page 76 76 ¦ Service · Power Cycling...
-
Page 77: Glossary
Glossary Additional Devices You can connect additional devices to your device, such as answering machines, telephones, charge meters and computer modems; these can be connected either in series or in parallel. Parallel connection means that the devices are connected to another telephone socket of the same line. - Page 78 Chain Dialling see Combining Numbers Chain Dialling Before the dialling process begins, you can freely combine and edit telephone book entries, manually entered digits, numbers from the redial list or numbers from the caller list. For ex- ample, if you have saved the telephone number prefix of an inexpensive telephone service- provider (see Call-by-Call) as a telephone book entry, select this entry and manually enter the desired telephone number or select another number from the telephone book, the redial list or the caller list.
-
Page 79: Fax Polling
Error Correction Mode Encoding The data of your fax transmission are encoded and compressed for the transmission. The minimum standard is MH (Modified Huffmann). Better encoding methods are MR (Modified Read) or MMR (Modified Modified Read). Energy Saving Mode The device is normally in the energy save mode. Whenever you receive a fax or if you would like to print or make a copy, your device will automatically switch back into operating mode (see Warm-Up Phase). - Page 80 Handshake The handshake is the initial and final phase of a fax transmission. After establishing of the connection, fax machines check the group affiliation and features such as size compression or grey tones. After the fax transmission has been completed and before the connection is terminated, the receiving device confirms receipt of the transmission (see Fax Groups).
-
Page 81: Private Branch Exchange
Modem A modem converts digital computer signals into acoustic signals and vice versa. Analogue tel- ephone lines transfer only acoustic signals, not digital signals (see Hard Modem, see Soft Mo- dem). Modified Read (encoding process for faxes, see Encoding) Modified Read Code (encoding process for faxes, see Encoding) Outside Line Access Code The outside line access code is the number or letter that must be dialled before the actual telephone number on a telephone of a private branch exchange in order to establish a con-... - Page 82 Random Access Memory Resolution Number of dots per inch (dpi). For sending and receiving faxes, the resolution options availa- ble are Normal, Fine, SFine and Photo. For copying, the available resolutions are Fast, Quality and Photo. The higher the resolution, the longer it takes to complete the transmission. RJ-11 Registered Jack 11 (also called Western plug, standardised telephone plug) Scanning...
- Page 83 Tone Dialling (= Dual Tone Multi-Frequency) In many countries, tone dialling has replaced pulse dialling, in which each number was sent as a corresponding number of pulses. With tone dialling, a specific tone is assigned to each key (referred to as DTMF tones). Toner Level Memory Update the toner level memory of your device with the Plug’n’Print card that is included with each new toner cartridge.
- Page 84 84 ¦ Glossary · Warm-Up Phase...
-
Page 85: Appendix
Appendix Technical Data Dimensions Dimensions (L¦×¦H¦×¦W) ....................370¦×¦200¦×¦330¦mm Weight Weight................................7,25¦kg Mains Connection Mains Connection....................220¦–¦240¦V¦~ / 50¦–¦60¦Hz Power Consumption Power Consumption Stand-by Mode Stand-by Mode..........................<¦8,5¦W Transmission Transmission ............................<¦17¦W Reception Reception.............................. <¦20¦W Recommended Ambient Recommended Ambient ........................5¦–¦35¦ºC Relative Humidity Relative Humidity .....................15¦–¦85¦% (non-condensing) Connection Type Connection Type .......................... - Page 86 Printer Type Class 1 Laser Printer Type ............................Class 1 Laser Printer Warm-Up Time Warm-Up Time ........................approx. 15 seconds Width Width ................................200¦mm Resolution Resolution ..............................600¦dpi Speed Speed ..........................up to 16 pages/minute Memory Telephone Book Telephone Book........................up to 200 entries Fax Messages Fax Messages .................up to 400 pages (standard test letter) SMS Messages...
-
Page 87: Guarantee
Guarantee (Terms and Conditions for United Kingdom only) In order to supply the guarantee, you should contact your dealer or Sagem Communications Helpdesk. The proof of purchase will be required. Please make usage of your equipment for the purpose for which it was designed and under normal usage conditions. - Page 88 The repair and delivery costs will be invoiced to the customer. The foregoing shall apply unless otherwise agreed in writing with the customer and only for the United Kingdom. Helpdesk: 0871 - 711 18 82 Helpdesk of Sagem Communications, an authorized Xerox licensee. 88 ¦ Appendix · Guarantee...
-
Page 89: Declaration Of Conformity (Doc)
The CE symbol confirms conformity with the EU directives that apply to the device. Declaration of Conformity (DoC) Hereby, Sagem Communications Austria GmbH declares that this Office Fax LF8040, Of- fice Fax LF8045 is in compliance with the essential requirements and other relevant provi- sions of Directive 1999/5/EC. - Page 90 Sagem shall not be held liable for any damage resulting from electromagnetic interference that occurs from the use of any interface cables other than those designated as Sagem products. All rights reserved. No part of this publication may be reproduced, stored in a retrieval system or transmitted in any form or by any means, electronic, mechanical, photocopying, recording, or otherwise, without the prior written permission of Sagem.
- Page 91 Appendix · Declaration of Conformity (DoC) ¦ 91...
-
Page 92: Customer Information
To benefit of the extended warranty for 36 months it is necessary to register as our customer within 30 days after purchasing this device. You can find further information: www.xeroxfax.com We hope that you will have lots of joy using your new product. Office Fax LF8040.8045 UK · INT 253176126-B (V 1.1—05/2009)