Table of Contents
Advertisement
Quick Links
Advertisement
Table of Contents

Related Manuals for Oki MB 260


Summary of Contents for Oki MB 260
-
Page 2: Dear Customer
For your security and comfort, we urge you to carefully read the Safety booklet before attempting use. In buying this multifunction machine, you have opted for a quality OKI product. Your device satisfies all of the different needs of a modern office automation tool. -
Page 3: Table Of Contents
Contents Dear customer Consumables Preface Laser Safety Information For Europe/Asia For North America Positions of Safety labels on the machine Symbols for the main power switch Note to users in the United States of America Declaration of Conformity EME Compliance for Canada Declaration of confomity Notice to Users in EU Countries Environmental Information... - Page 4 MB260 Multifunction Terminal's Supervision Checking the connection between the PC and the multifunction machine Companion Director Graphical presentation Utilities and applications activation Companion Monitor Graphical presentation Device management Selecting the current device Status of the connection Device parameters Removing a device Display the consumable status Companion Suite Pro functionalities Document analysis...
-
Page 5: Preface
Preface Every effort has been made to ensure that the information in this document is complete, accurate, and up-to-date. Oki assumes no responsibility for the results of errors beyond its control. Oki also cannot guarantee that changes in software and equipment made by other manufacturers and referred to in this guide will not affect the applicability of the information in it. -
Page 6: For Europe/Asia
MB260 For Europe/Asia This machine complies with IEC 60825-1:1993+A1:1997+A2:2001 standard, is classified as laser class 1 product and is safe for office/EDP use. It contains one class 3B laser diode, 10.72 mW max, 770-795 nm and other class 1 LEDs (280 µW at 639 nm). Direct (or indirect reflected ) eye contact with the laser beam might cause serious eye damage. -
Page 7: Positions Of Safety Labels On The Machine
Positions of Safety labels on the machine The device has warning labels at the positions shown below. For your safety, you must never touch these surfaces when you remove a paper jam or when you replace the Toner cartridge. Symbols for the main power switch In accordance with IEC 60417, this machine uses the following symbols for the main power switch: means POWER ON. -
Page 8: Emc
MB260 Note to users in the United States of America This equipment has been tested and found to comply with the limits for a Class B digital device, pursuant to Part 15 of the FCC Rules. These limits are designed to provide reasonable protection against harmful interference in a residential installation. -
Page 9: Environmental Information
MB260 Environmental Information - 5 -... -
Page 10: Software Use License
MB260 Software use license CAREFULLY READ ALL THE TERMS AND CONDITIONS OF THE PRESENT LICENSE BEFORE OPENING THE SEALED ENVELOPE CONTAINING THE SOFTWARE. OPENING THIS ENVELOPE INDICATES THAT YOU In case you should not accept the terms of this license, the CD-ROM packaging should be returned to the retailer unopened, along with the other components of the product. -
Page 11: Applicable Law
Applicable law This license is under the French law. Any dispute following the interpretation or execution of this license will be submitted to the Paris Court. Given the continuous technology development, the manufacturer reserves the right to modify the technical specifications indicated for this product, at any time, without prior notice, and/or to stop manufacturing of the product. -
Page 12: Installation
MB260 Installation Location conditions By choosing an appropriate location, you preserve the longevity of the machine. Check that the selected location has the following characteristics: - Choose a well ventilated location. - Make sure not to obstruct the ventilation grids located on the left and right sides of the device. During the installation, make sure to place the machine thirty centimeters away from the surrounding objects so all the lids can be easily opened. -
Page 13: Safety Information
- If liquid or metallic item gets accidentally inside the machine, turn it off immediately, unplug the power cord and contact your retailer. Otherwise, you will face a fire hazard or an electric shock hazard. - In case of heat, smoke, unusual smell or abnormal noise emissions, turn the machine off, unplug the power cord immediately and contact your retailer. -
Page 14: Power Supply
MB260 - Be careful not to cut yourself on any sharp edges when you reach inside the product to remove misfed sheets of paper or masters. - For environmental reasons, do not dispose of the product or expended supply wastes at household waste collection point. -
Page 15: Rules For Use Symbols
Rules for use symbols WARNING Indicates important safety notes. Ignoring these notes could result in serious injury or death. Be sure to read these notes. Refer to the security notices presented in the Safety booklet. CAUTION Indicates important safety notes. Ignoring these notes could result in moderate or minor injury, or damage to the machine or to property. -
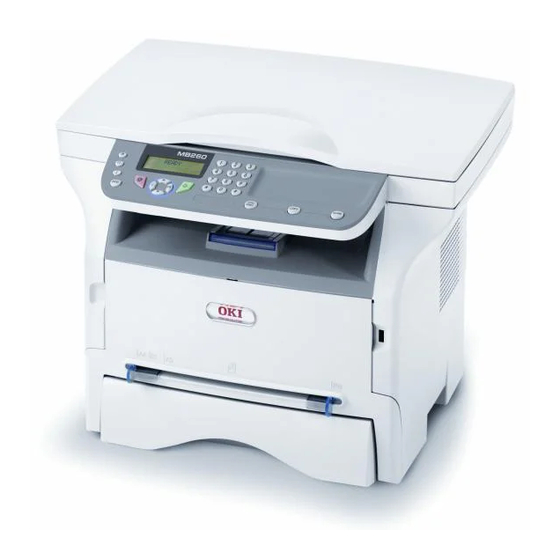
Page 16: Terminal Description
MB260 Terminal description 1. Control panel 2. Paper jam cover 3. Power supply cord connection 4. On/Off switch 5. Slave USB connection (for PC) 6. Master USB connection (USB key) 7. Manual paper feed setup guides Front and Back sides 8. -
Page 17: Command Panel
Command panel 1. Screen. 2. Digital keypad. 3. Key : document analysis to the PC or a media (USB key). 4. Key : local copy. 5. Key : stops the current PC print job. 6. Key : Validation. 7. Key OK: confirms the displayed selection. 8. -
Page 18: Packaging Contents
MB260 Packaging contents The packaging contains the items listed below: Multifunction device 1 toner cartridge 1 Installation guide 1 PC installation CD ROM and 1 OCR PC software CD ROM (depending on model) 2 booklets (safety and warranty) 1 power cord Device installation 1 Unpack the device. -
Page 19: Cartridge Installation
3 Setup the back side feed cassette stop by pushing the "PUSH" lever (A). Then adjust the lateral paper guides to the paper format by pushing lever (B) located on the left guide. Adjust the length paper guide to the paper format by pushing lever (C). -
Page 20: Starting Your Device
MB260 Starting your device Device connection Before plugging the power cord, it is imperative to refer to the Safety WARNING booklet. 1 Make sure that the On/Off switch is on Off (O position). 2 Connect the power cord to the device. Plug the power cord to outlet on the wall. - Page 21 appear on the reverse side. • Set envelope by pressing the folding line of four edges properly after releasing air inside. • Set envelope in a proper position after aligning in case it is bent or warped. • Paper conditioning is not allowed. And it should be used under normal office environment.
-
Page 22: Copy
MB260 Copy Your machine has the function to make one or more copies. You can also set up several parameters in order to make copies at your will. Simple copy In this case, the default parameters are applied. 1 Place the document to be copied face down on the glass, respecting the indications around the glass. -
Page 23: Special Setup For The Copying
2 Enter the desired number of copies and confirm with the OK button. 3 Choose the paper tray AUTOMATIC or MANUAL with the buttons , then confirm with the OK button. Copying in ID Card mode is only possible on A4 (original document size <... -
Page 24: Analysis Origin Setup
MB260 Analysis origin setup If you want, you can change the origin of the scanner. By entering new values for X and Y in mm (X < 209 and Y < 280), you move the analysed area as shown on the diagram below. -
Page 25: Top And Bottom Printing Margins Setup
Top and bottom printing margins setup If you want to, you can offset the lateral margins of the document towards the top or the bottom during printing. 856 - ADVANCED FCT/SCAN. & PRINT/TOP 1 Press , enter 856 using the keypad. 2 Setup the top / bottom margins offsets (by 0.5 mm steps) with the buttons 3 Confirm by pressing the OK button. -
Page 26: Parameters/Setup
MB260 Parameters/ Setup You can setup your machine as you like depending on the use. You will find in this chapter description of the functions. You can print the functions guide and the available setup of your multifunction machine. Language This setting enables you to choose the menu language of your choice. -
Page 27: Lock The Keyboard
2 Enter your lock code (4 digits) with the keyboard, confirm with OK. If a code is already registered, enter Important the old code before typing the new one. 3 Enter again your lock code (4 digits) with the keyboard, confirm with OK. 4 Quit this menu by pressing the Lock the keyboard Every time you use your machine, you will have to enter... -
Page 28: Games
MB260 Games Sudoku Sudoku is a Japanese puzzle. The game is in a grid format of three squares by three squares to be distributed in fields in zones of 3 × 3. Depending on the level of difficulty, more or fewer numbers are already entered at the start of the game. -
Page 29: Network Features
Network features You may connect your multifunction terminal to a wireless network. However, practical knowledge configuration is required to set up a network. You can connect your machine to a PC using a USB cable or make a wireless connection (via radio) with a PC or network. -
Page 30: Connect Your Wlan Adaptor
MB260 You can be sure of perfect communication if you use an approved adaptor in conjunction with your PC. Note All of the latest printer drivers for the approved adaptor may be found on our website together with further information: http://www.okiprintingsolutions.com. -
Page 31: Referring To Or Changing Your Network Parameters
8 IP CONF.: MANU or IP CONF.: AUTO appear on the screen. If you choose to set up the system manually, go to the next paragraph and enter the parameters IP ADDRESS, SUBNET MASK and GATEWAY. 9 At the end of this procedure, you return to the main menu of SETUP WIZARD. -
Page 32: An Example Of How An Ad-Hoc Network May Be Set Up
MB260 2827 - SETUP / WLAN / PARAMETERS / SECURITY This parameter allows you to make your network secure by setting the encryption method to use in your WLAN network. 1 Type in , select the menu SETUP using the keys and confirm with OK. -
Page 33: Setting Up The Pc
Setting up the PC For this section, refer to the instructions supplied by the manufacturer of the WLAN USB key to help you to find and join the "house" network. 1 You may need to install the software for the WLAN USB key on the PC, if this has not already been done. -
Page 34: Usb Memory Key
MB260 USB memory key You can connect a USB memory Key on the front side of your machine. The files stored in TXT, TIFF and JPEG formats will be analysed and you will be able to use the following actions: - print the stored files contained in your USB memory - delete the files contained in your USB memory key, - run an analysis on the contents of the inserted USB... -
Page 35: Delete Your Files Located In The Key
Save a document on a USB memory button. This function allows you to digitise and save a document directly in the folder OKI MB260\SCAN on a USB memory key. The folder OKI MB260\SCAN is created by the application. Important... - Page 36 MB260 With the IMAGE format, if you have selected: • BLACK&WHITE, the picture will be saved in TIFF format. • COLOUR, the picture will be saved in JPEG format. You can choose the image resolution that will be digitized to the USB memory key;...
-
Page 37: Pc Features
PC Features Introduction The Companion Suite Pro software allows the connection of a personal computer with a compatible multifunction machine. From the PC, you can: • manage the multifunction machine, allowing you to set it up according to your needs, •... -
Page 38: Installing Drivers Only
MB260 license agreement. 8 Click on the N button. 9 The final installation is ready to be executed. Click on the I button. NSTALL The following screen appears to indicate the progression of the installation. 10 Click on OK to finish the installation. Your Companion Suite Pro kit is successfully installed on your PC. -
Page 39: Installing The Drivers Manually
9 Click on the N button. 10 Select I in the list and click on the NSTALL DRIVERS button. 11 Select the destination folder for installation and click on the N button. 12 The final installation is ready to be executed. Click on the I button. -
Page 40: Connections
4 Open the CD-ROM drive, insert the installation CD- ROM and close the drive. The drivers are detected automatically. 5 Select OKI MB260 in the list and click on N 6 A screen informs you that the drivers have been installed. Click on the C... -
Page 41: Multifunction Terminal's Supervision
Multifunction Terminal's Supervision The software that you have installed contains two multifunction machine management applications, and C OMPANION IRECTOR OMPANION allow you to: • check whether the multifunction machine is connected to your PC, • monitor the multifunction machine activities, •... -
Page 42: Status Of The Connection
MB260 Status of the connection The status of the connection between the current device and the PC is indicated by a colour. The following table defines the possible states of the connection. Colour State Yellow Connection in progress. Green Connection established. The PC cannot connect to the device. -
Page 43: Companion Suite Pro Functionalities
You have the possibility to print your documents via the USB connection or the WLAN connection. During the installation of the Companion Suite Pro software, the OKI MB260 printer driver will be installed automatically onto your PC. Printing on the multifunction machine Printing a document on the multifunction machine from your PC is like printing a document in Windows. -
Page 44: Printing In Duplex Mode With The Multifunction Machine
1 Use the P command from the F RINT currently open application on the screen. 2 Select the OKI MB260 printer. 3 Check the Duplex box and choose among the two binding modes: Binding mode Printing... -
Page 45: Software Uninstallation
2 Delete the OKI MB260 icon. 3 In the P RINTERS and select R PROPERTIES 4 Select the D 5 Select the OKI MB260 driver and click on the button. EMOVE - 41 - MB260 TART >OKIDATA >C... - Page 46 ONTROL PANEL > D AND SOUND EVICE MANAGER operating system). 2 In the O sub-menu, select the OKI THER DEVICES MB260 item and click on the right button of the mouse. 3 Select U on the menu and left-click with NINSTALL the mouse.
-
Page 47: Maintenance
Maintenance Service General information For your safety, it is imperative to CAUTION refer to the security directives presented in the Safety booklet. To ensure that your machine is kept in the best conditions, it is recommended that you periodically clean the inner parts. -
Page 48: Issues With Smart Cards
MB260 A wait message appears. PLEASE WAIT The smart card is read. NEW TONER REMOVE CARD 9 Remove the smart card from the reader, your machine is ready to print again. Issues with smart cards If you use a smart card that has already been used, the machine will display: PLEASE WAIT... -
Page 49: Paper Jam
Paper jam When printing, a sheet of paper may get stuck in the printer or the paper tray and cause a paper jam. In case of a paper jam in the machine, the following message appears: PAPER JAM EXTERNAL TRAY 1 Open the paper jam cover located at the back of the machine. -
Page 50: Pc Printing Via Wlan Connection
MB260 PC printing via WLAN connection Issue encountered Print request handling Once the problem is resolved, Paper empty printing resumes from the first non-printed page. No paper feed Once the problem is resolved, printing resumes from the first Paper jam non-printed page. -
Page 51: Specifications
Specifications Physical specifications Dimensions: Weight: Electrical specifications Power supply (see rating plate): Electric consumption: Environmental specifications Operating temperature: Peripheral specifications Printer Type: Resolution: Speed: Preheating time: First page out time: a. Printing speed may vary depending on used operating systems, computer specifications, software applications, connection modes (USB or WLAN), paper formats as well as file types and sizes. -
Page 52: Consumable Specifications
MB260 Consumable specifications Reference paper Scanner : Printer : Specifications are subject to changes for improvement without notice. Inapa tecno SPEED A4 Ricoh T6200 A4 - 48 -... - Page 53 10 Constellation Drive Mairangi Bay, Auckland, New Zealand Tel:(64) 9 477 0500 Fax:(64) 9 477 0549 http://www.comworth.co.nz Oki Data(S) P Ltd. Malaysia Rep Office Suite 21.03, 21st Floor Menara IGB, Mid Valley City, Lingkaran Syed Pura 59200, Kuala Lumpur, Malaysia...
- Page 54 5th Floor Kiev 01025 Tel: +380 44 537-52-88 e-mail: info@oki.ua Website: www.oki.ua Oki Sistem ve Yazıcı Çözümleri Tic. Ltd. Ști. Harman Sokak, No:4, Kat:6, 34394, Levent, Istanbul Tel : +90 212 279 2393 Fax : +90 212 279 2366 http://www.oki.com.tr www.okiprintingsolutions.com.tr...
- Page 55 07099701 iss.2...